
Vinsælir flokkar
Ertu að leita að garni?


Athugasemdir / Spurningar (23)
![]() Leeanne skrifaði:
Leeanne skrifaði:
Addtnl. info for my last comments: I was confused by the first sentence in the short rows instructions stating to do 6 rows over all stitches. I thought that was part of the directions and the piece started with 6 rows before starting the short row repeat cycle but that is incorrect. This sentence is just telling you that there are 6 rows included in the short row instruction cycle that are not, in fact, short rows – 6 full rows and 2 short rows (not in that order) are listed in the row cycle.
06.09.2025 - 15:15
![]() Leeanne skrifaði:
Leeanne skrifaði:
(Cont. from previous two comments) next row starts with R3 and finishes with L3 and last row starts with L4 and finishes with R4. Then you start the cycle again with the first short row. So yes, the short row cycle is short row, full row, short row, full row, full row, full row, full row, full row as the pattern states (1 SR followed by 1 full row followed by 1 SR followed by 5 full rows). There are no edges in which you are not doing a picot edge instruction which allows for an even 8 row cycle
06.09.2025 - 15:08
![]() Leeanne skrifaði:
Leeanne skrifaði:
(continued from my previous comment) work the L2 row to the first marker and turn to work back to the “beginning” of the left side row, ending with L3, turn and start a new row with L4, working all the way across, ending with R4, (all the remaining rows in the cycle go all the way across – no more short rows) next row begins with R1 and goes all the way across to the last 4 stitches, ending in L1, turn and start with L2 and go all the way across to finish with R2, (cont. in next comment)
06.09.2025 - 15:03
![]() Leeanne skrifaði:
Leeanne skrifaði:
For anyone that needs it, here is the cycle of rows, combining picot edge with short rows instructions (it helps to draw this out on paper): start with right side 1 (R1) and work a short row (to first marker only, not all the way across), turn and work back to the beginning and knit the last four with R2, turn to start next row beginning with R3 and knit all the way across, ending this row with L1, then start the second short row with L2, (continued in next comment)
06.09.2025 - 14:58
![]() Leeanne skrifaði:
Leeanne skrifaði:
I figured it out! It is definitely not too complicated but they could have written this pattern differently so it wouldn’t take weeks or trial and error to figure out how to work the short rows in with the picot edge. Maybe we were just making it too complicated. I don’t have enough room to write the pattern in this comment so I’ll start a new one. It is easier to draw your lines and mark each end with the picot line number but I’ll try to write it here in my next comment.
06.09.2025 - 14:55
![]() Leeanne skrifaði:
Leeanne skrifaði:
I think I get it! I will test it in the morning and comment again trying to explain it for others if I have it right. My last two comments are wrong for sure. It helps to draw the rows as a picture on paper and mark the ends with the line number.
06.09.2025 - 05:10
![]() Leeanne skrifaði:
Leeanne skrifaði:
Revising my last comment: I now have it written as: short row, R1 &L1 on the same row, short row, R2 & L2, short row, R3 & L3, short row, R4 & L4. But this adds up to 8 rows on the sides and only 4 rows in the middle, not 6. Also not sure why the short rows directions refers to the middle stitches as being 70 (for the second size) when it’s only 30 (if excluding 25 on each end) or 72 (if excluding only the outermost 4 on each end).
06.09.2025 - 04:26
![]() Leanne skrifaði:
Leanne skrifaði:
The directions for the short rows are difficult to figure out. I’ve been working at this for a few weeks with my MIL, have restarted my project 7 times and we still don’t have it right. So we are alternating between right and left rows 1, 2, etc. when doing full rows? We are not doing any picot edge instructions when doing short rows, correct? To incoorporate the short rows, does it go: left row 1, right row 1, short row, left row 2, right row 2, short row, etc. through all four edge rows?
06.09.2025 - 02:40
![]() Leeanne skrifaði:
Leeanne skrifaði:
In addition to my last comment, I’m also confused because it says for garter stitch to knit two rows. The main directions says start with the right Picot edge, then knit the directions for garter stitch for the rest of the row, except for the last four and then knit the directions for the left edge on the last four. How do you knit two rows for the garter stitch directions in between doing the right and left edges?
14.07.2025 - 19:22DROPS Design svaraði:
Dear Leeanne, the garter stitch structure is 2 knit rows. So whenever most of the stitches in the row are knitted, both from the right side and the wrong side, the resulting texture will be garter stitch. In the picot edges we are already using garter stitch, since all other stitches except for the 4 stitches on each side for the picot are knitted from the right side and the wrong side. So you just need to work as indicated; the edges will have the picot texture while the remaining stitches are knitted. Happy knitting!
19.07.2025 - 17:47
![]() Leeanne skrifaði:
Leeanne skrifaði:
A video of the actual pattern, please! This is so confusing. I’ve now learned how to do picot edges and short rows, but I can’t understand how to do both at the same time. How do you know which row of the picot edge you’re on if you’ve turned around and gone the other direction halfway through a row? And then when you start the next row do you count as if half the row is row 5 and half is row 6 or just continue with the next direction for that edge in sequence, ignoring row numbers?
14.07.2025 - 19:18DROPS Design svaraði:
Dear Leeanne, please remember to mark your comments as questions so that we can see them and answer sooner. When you are combining the short rows and the picot edges, count only the rows where you reach the edges; those rows where you turn before reaching the edges are not taken into account for the picot edges on that side. Happy knitting!
19.07.2025 - 17:48
|
|
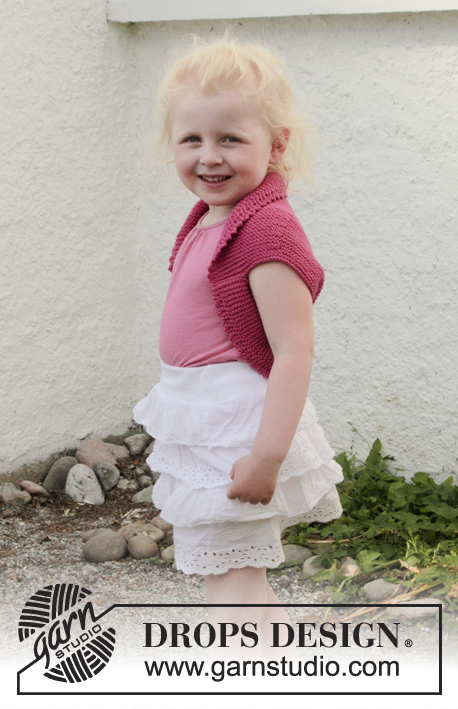
Berry Kiss#berrykissvest |
|
 |
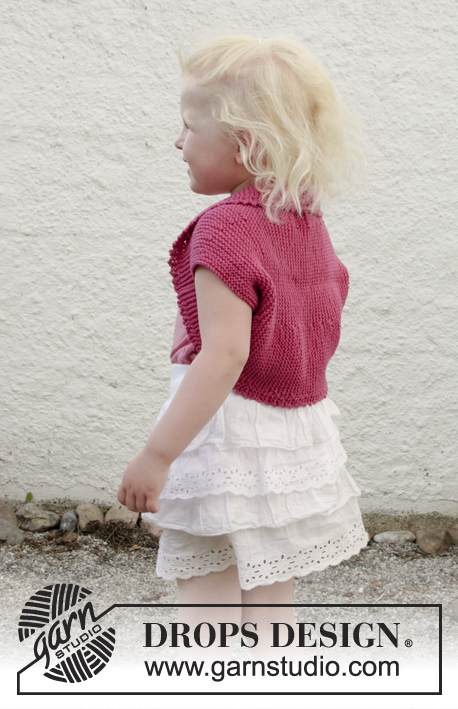 |
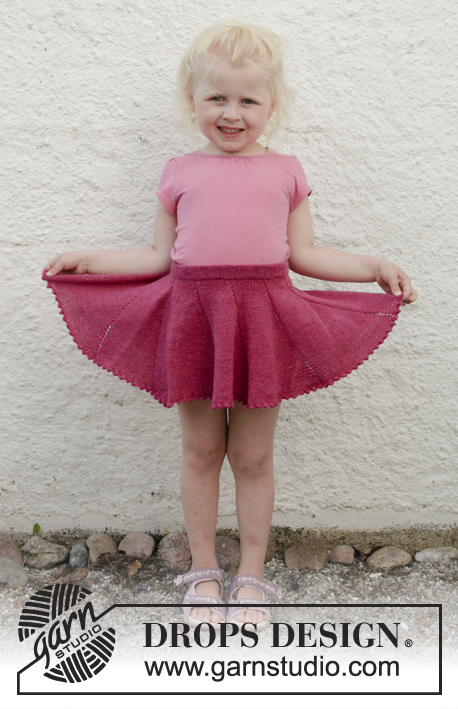
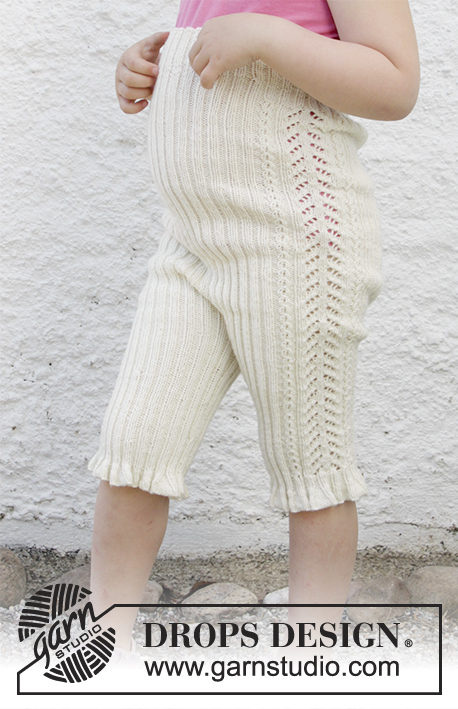
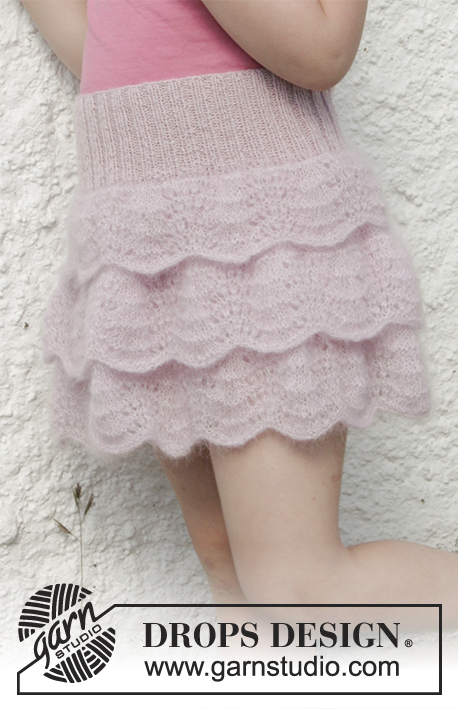
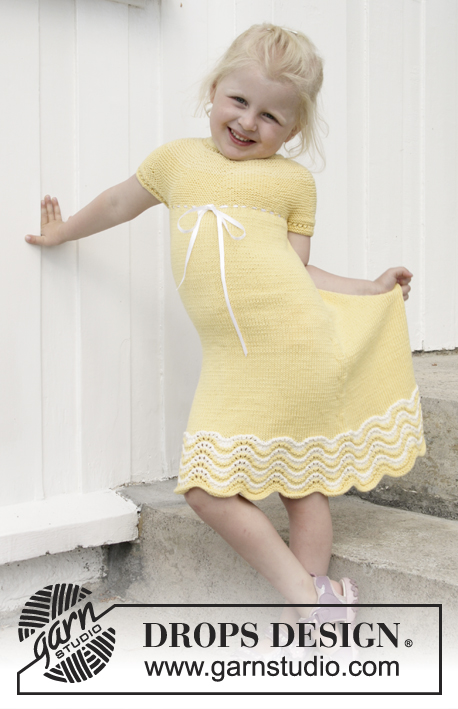
Prjónaður bolero fyrir börn með stuttum umferðum, picot kanti og garðaprjóni úr DROPS Cotton Merino. Stærð 3-12 ára.
DROPS Children 28-7 |
|
|
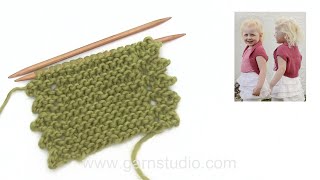
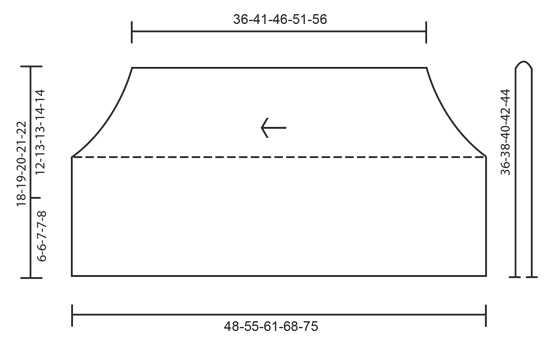
------------------------------------------------------- UPPLÝSINGAR FYRIR MYNSTUR: ------------------------------------------------------- GARÐAPRJÓN (prjónað fram og til baka): Lykkjurnar prjónast slétt í öllum umferðum. PICOT (prjónað fram og til baka): HÆGRI HLIÐ: UMFERÐ 1 (= rétta): Prjónið slétt. UMFERÐ 2 (= ranga): Prjónið sléttar lykkjur þar til 4 lykkjur eru eftir, þessar lykkjur eru prjónaðar þannig: 2 lykkjur slétt saman, sláið 1 sinni uppá prjóninn, í hvora af síðustu 2 lykkjum eru prjónaðar 2 lykkjur = 2 nýjar lykkjur í umferð. UMFERÐ 3 (= rétta): Takið 1. lykkju óprjónaða eins og prjóna eigi slétt, 1 lykkja slétt, steypið óprjónuðu lykkjunni yfir, 1 lykkja slétt og steypið nú öftustu lykkjunni yfir á hægri prjón yfir fremstu lykkju, fækkað hefur nú um 2 lykkjur – prjónið síðan sléttar lykkjur út umferðina. UMFERÐ 4 (= ranga): Prjónið slétt. Endurtakið umferð 1 til 4. VINSTRI HLIÐ: UMFERÐ 1 (= rétta): Prjónið sléttar lykkjur þar til 4 lykkjur eru eftir, prjónið þær þannig: 2 lykkjur slétt saman, sláið 1 sinni uppá prjóninn, í hvora af síðustu 2 lykkjum eru prjónaðar 2 lykkjur = 2 nýjar lykkjur í umferð. UMFERÐ 2 (= ranga): Takið 1. lykkjuna óprjónaða eins og prjóna eigi slétt, 1 lykkja slétt, steypið óprjónuðu lykkjunni yfir, 1 lykkja slétt og steypið öftustu lykkjunni yfir fremstu lykkjuna, fækkað hefur um 2 lykkjur – prjónið síðan sléttar lykkjur út umferðina. UMFERÐ 3 (= rétta): Prjónið slétt. UMFERÐ 4 (= ranga): Prjónið slétt. Endurtakið umferð 1 til 4. STUTTAR UMFERÐIR: Prjónið 6 umferðir yfir allar lykkjur, * prjónið 24-25-26-27-28 lykkjur (fram að fyrsta prjónamerki), snúið við, herðið á þræði og prjónið út umferðina. Prjónið 1 umferð yfir allar lykkjur, snúið við, prjónið 24-25-26-27-28 lykkjur (fram að öðru prjónamerki), snúið við, herðið á þræði og prjónið út umferðina. Prjónið 5 umferðir yfir allar lykkjur *, endurtakið frá *-*. Þ.e.a.s. prjónaðar eru 6 umferðir garðaprjón yfir miðju 66-70-72-80-86 lykkjur og 8 umferðir garðaprjón yfir lykkjur hvoru megin við hverja mynstureiningu. ------------------------------------------------------- BYRJIÐ Á STYKKI HÉR: ------------------------------------------------------- BOLERO - STUTT ÚTSKÝRING Á STYKKI: Stykkið er prjónað frá hlið fram og til baka á hringprjón frá handveg til handveg. Síðan er stykkið brotið saman tvöfalt og hliðarsaumar saumaðir. BOLERO: Fitjið upp 76-80-84-88-92 lykkjur með Cotton Merino á hringprjón 4. Setjið 1 prjónamerki í stykkið 24-25-26-27-28 lykkjur inn frá hvorri hlið (= 28-30-32-34-36 lykkjur á milli prjónamerkja). Prjónið frá réttu – þannig: PICOT HÆGRI HLIÐ, GARÐAPRJÓN – sjá útskýringu að ofan, yfir næstu 68-72-76-80-84 lykkjur, PICOT VINSTRI HLIÐ yfir síðustu 4 lykkjur. ATHUGIÐ PRJÓNFESTUNA! Haldið áfram í garðaprjóni og picot yfir síðustu 4 lykkjur í hvorri hlið JAFNFRAMT eru prjónaðar STUTTAR UMFERÐIR – sjá útskýringu að ofan! Þegar stykkið mælist ca 36-41-46-51-56 cm (mælt þar sem er styst) fellið laust af. FRÁGANGUR: Leggið boleron saman tvöfaldan – mynsturteikning sýnir hvernig brjóta á stykkið saman. Saumið saman neðstu 6-6-7-7-8 cm kant í kant í hvorri hlið (= 12-13-13-14-14 cm handvegur). |
|
 |
|
Ertu búin að klára þetta mynstur?Merktu myndirnar þínar með #dropspattern #berrykissvest eða sendu þær inn í #dropsfan gallery. Vantar þig aðstoð með þetta mynstur?Þú finnur 18 kennslumyndbönd, dálk með athugasemdum/spruningum og fleira með því að skoða mynstrið á garnstudio.com © 1982-2026 DROPS Design A/S. Við áskiljum okkur öll réttindi. Þetta skjal ásamt öllum undirhlutum þess, hefur höfundarétt. Lestu meira varðandi hvað þú mátt gera við mynstrin okkar neðst á hverju mynstri á síðunni okkar. |
|


Með yfir 40 ára prjón- og hekl hönnun, býður DROPS Design uppá eitt umfangsmesta vöruúrval af mynstrum án endurgjalds á netinu – þýdd á 17 tungumálum. Í dag þá erum við komin í 324 vörulista og 12290 mynstur - 7890 mynstur sem eru þýdd á [íslensku].
Við vinnum hörðum höndum við að færa þér það besta sem prjón og hekl hefur uppá að bjóða, innblástur, ráðgjöf og auðvitað frábært gæða garn á ótrúlegu verði! Langar þig að nota mynstrin okkar fyrir annað en til einkanota? Þú getur lesið hér ákvæði hvað leyfilegt er að gera í textanum Copyright sem er neðst á öllum mynstrunum okkar.
Skrifaðu athugasemd um DROPS Children 28-7
Við myndum gjarna vilja fá að heyra hvað þér finnst um þetta mynstur!
Ef þig langar að skifa inn spurningu, vertu þá viss um að velja réttan dálk að neðan, til þess að við getum svarað sem fyrst. Það verður að merkja við svæði merktri með *.