
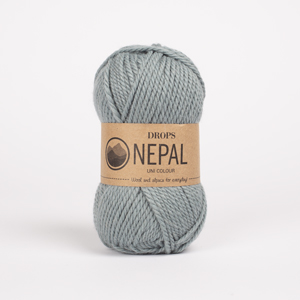
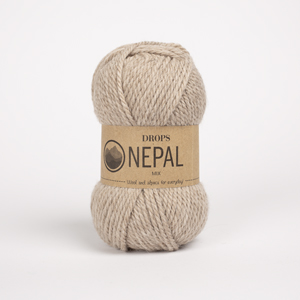
Ertu að leita að garni?




























Athugasemdir / Spurningar (171)
 Judith skrifaði:
I’m a bit confused regarding the instructions: “Now work in stocking stitch over sets I’m A.a, or start a bit earlier. (Am not certain what is meant by ‘start a bit earlier’ ie why/where?). Also, it continues.....”Continue A.1 and A.3 until “finished measurements”.........I can’t find which measurements are referred to. It says work A.a until piece measures 17-19-22 cm, so are the finished measurements in addition to this?
04.02.2020 - 12:51DROPS Design svaraði:
Dear Judith, you have to work A.a until piece measures 17-19-22 cm, and then work in stocking stitch over the stitches of A.a, but should you end A.a before the right measurement (= 17-19-22 cm), then work the stitches in stocking stitch (rather than start an new repeat in height that couldn't be finished). You continue working the cables on each side (= A.1 and A.3) to the end of the slipper, ie until all stitches will be decreased (= total length of slipper). Happy knitting!
04.02.2020 - 15:47
 Alisa Mai skrifaði:
Ich habe eine Frage bezüglich des Bündchens. Wieso soll ich nur 54 Maschen aufnehmen und dann 10 zunehmen, wenn ich in meinem Schaft doch insgesamt 68 habe. Dann macht es doch mehr Sinn, gleich daraus 64 aufzunehmen. Und wenn nicht, welche Maschen lasse ich dann aus? Das ist meine erste Strickanleitung und das verwirrt mich noch alles sehr. Danke schon im Voraus!
16.12.2019 - 22:29DROPS Design svaraði:
Liebe Frau Mai, wenn mann Maschen seitlich auffast, nimmt man ca 3 M auf 4 R, so daß Sie (bei der Maschenprobe) 54 M auffassen können, dann zur 64 M zunehmen. Viel Spaß beim stricken!
17.12.2019 - 09:41
 S Leishman skrifaði:
I have never made anything in the round before. I've made the socks and understand the directions up to this point: 'work the first 4 sts, round beg here = 41-41-43 sts. Now work piece in the round on double pointed needles... ' I have watched tutorial on how to cast onto the round but this isn't saying this. How do I get the stitches from the straight needles to the round needles and how many per needle?
17.11.2019 - 14:10DROPS Design svaraði:
Dear S, you simply divide the stitches between 4 double pointed needles, more or less evenly (that means that for the smaller sizes 3 needles will have 10 stitches eaach and the fourth will have 11), and use the 5th needle to knit in the round. I hope that helps. Happy Knitting!
17.11.2019 - 17:10
 Nathalie skrifaði:
Petite précision sur mon précédent commentaire : j'ai procédé ainsi pour le motif A2 seulement. pour A3 et A1, les cases vides correspondent à du jersey donc mailles endroit sur les rangs impairs et envers sur les rangs pairs.( mailles envers sur les cases avec point). J'ai également continué au point de riz après Aa et non en jersey car je trouve cela plus joli. Un grand merci au site pour ces tutos gratuits !
13.11.2019 - 21:43
Nathalie skrifaði:
Pour une lecture plus facile des diagrammes, un carré vide = 1 m endroit et un point=1 m envers.
11.11.2019 - 12:52
Judith skrifaði:
Where the pattern says "Work as follows from right side; p4, A3,, 13/13/15 moss st, A1, p4, then says cast o 4 new sts, work the 1st 4sts..........I'm not sure which way the 4 newly cast on stitches are worked. Is it P4, A3, 13/13/15moss (or seed ), A1, P4, then the new cast on 4 are either knit or purl?
16.10.2019 - 10:36DROPS Design svaraði:
Dear Judith, the 4 new stitches will be now the middle 4 stitches in A.2, after you have join in the round, purl the next 4 stitches (= the first 4 sts at the beg of previous row), then work A.3, moss st, A.1 as before, then over the next P4 + 4 new sts + next P4 = work A.2. Happy knitting!
17.10.2019 - 09:21
Judith Jeffery skrifaði:
I'm about to try this pattern for the first time; I've been knitting for more than 40 years , but have never tried knitting from a diagram like this, and have never come across a pattern written as a solid paragraph, so....absolutely no disrespect intended.....but far from being easy, it looks one of the most difficult patterns I've ever come across! This is going to be a real test, will let you know how I get on!
13.10.2019 - 11:22DROPS Design svaraði:
Dear Judith thank you for your note. In our experience diagrams are better, because you can see not only the actual stitch or row, but also how the stitches and rows above each otherrelate to each other, also they are universal, can be decipehered in almot any language. HERE is a DROPS lesson that might help you to use/ read diagrams more easily. Happy Knitting!
13.10.2019 - 13:49
 Ylva skrifaði:
Jeg holder på å strikke a. 2 diagrammet. Jeg ser at det ikke er noen forklaring til flettingen på linje 11,13,15 og 17. Det er bare forklaring på flettingen på a. 1, a. 3 og den nederste delen av a. 3. Hvordan strikker jeg den øverste delen?
30.09.2019 - 19:58DROPS Design svaraði:
Hej Ylva, Når du har strikket A.2 en gang, så fortsætter du med A.a over de midterste 12 masker. God fornøjelse!
02.10.2019 - 11:22
 Jean Sweezie skrifaði:
I have always had trouble reading the Drops patterns because they are all written in one paragraph. However, I tried picking up the wording of the pattern and dropping it into a word file, and was able to increase the line height and put paragraphs where I wanted them, and this worked perfectly. Such an interesting pattern.
13.09.2019 - 15:58
Dorothy Davis skrifaði:
Thank you for answering my question. I got another one for you, I am starting the A.2 & I am on the 3rd row. What does it mean when your doing the part with the cable needle P/K1. Do it mean p & k in the same stitch. Sorry if my country show something else before, I just noticed this. I am from Canada.
13.08.2019 - 23:30DROPS Design svaraði:
Dear Mrs Davis, when working the cables you will have to work the stitches on the side of the cable either P or K depending on the next row in diagram. The stitches on either side of the cable are purled and the stitches in the middle of the cables are worked in moss stitch, ie either K or P. Happy knitting!
14.08.2019 - 08:05
|
|||||||||||||||||||
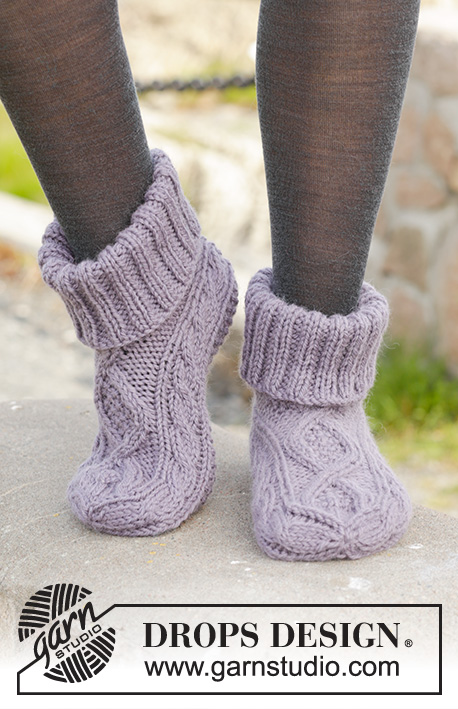
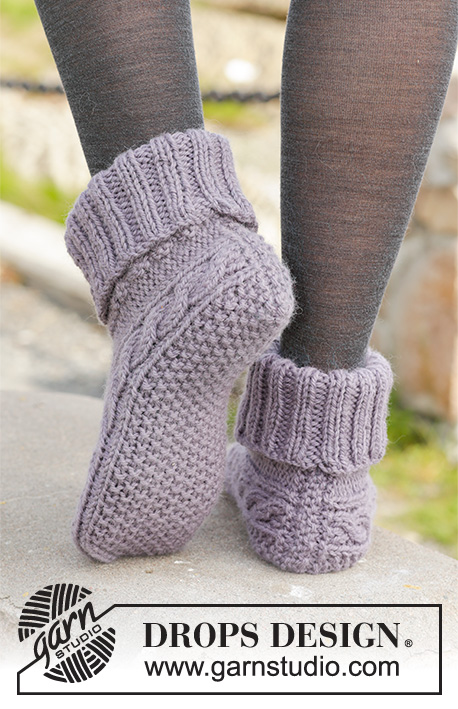
Celtic Dancer#celticdancerslippers |
|||||||||||||||||||
 |
 |
||||||||||||||||||
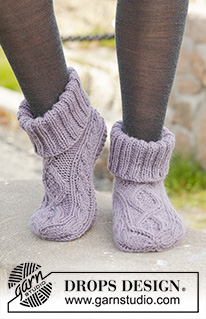
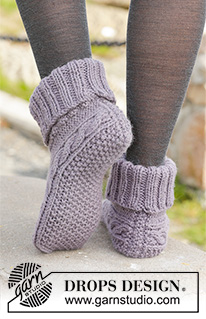
Prjónaðar tátiljur með köðlum úr DROPS Nepal. Stærð 35-43.
DROPS 156-55 |
|||||||||||||||||||
|
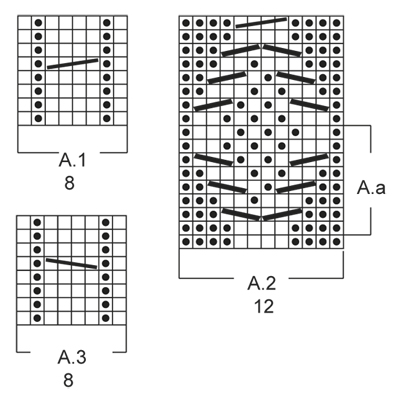
------------------------------------------------------- UPPLÝSINGAR FYRIR MYNSTUR: ------------------------------------------------------- MYNSTUR: Sjá mynsturteikningu A.1-A.3. Mynsturteikning sýnir mynstur séð frá réttu. LEIÐBEININGAR ÚRTAKA: Fækkið um 1 l á undan merki þannig: Prjónið 2 l slétt saman. Fækkið um 1 l á eftir merki þannig: Prjónið 2 l snúnar slétt saman. GARÐAPRJÓN (prjónað fram og til baka): Lykkjurnar prjónast slétt í öllum umf. PERLUPRJÓN: UMFERÐ 1: * 1 l sl, 1 l br *, endurtakið frá *-*. UMFERÐ 2: sl yfir sl og br yfir br. Endurtakið umf 2. LEIÐBEININGAR MÆLING: Mælt er fyrir miðju í kaðli A.1/A.3. ------------------------------------------------------- BYRJIÐ Á STYKKI HÉR: ------------------------------------------------------- TÁTILJUR - STUTT ÚTSKÝRING Á STYKKI: Stykkið er prjónað fram og til baka frá miðju að aftan. TÁTILJA: Fitjið upp 33-33-35 l á prjóna nr 5 með DROPS Nepal (látið endann vera ca 20 cm langan, hann er notaður við frágang). Prjónið 2 umf GARÐAPRJÓN – lesið útskýringu að ofan, JAFNFRAMT í síðustu umf er aukið út um 4 l jafnt yfir = 37-37-39 l. Prjónið nú frá réttu þannig: 4 l br, A.3 (= 8 l), 13-13-15 l PERLUPRJÓN – lesið útskýringu að ofan, A.1 (= 8 l), endið á 4 l br. Haldið svona áfram með mynstur, br er prjónað sl frá röngu. A.1 og A.3 er endurtekið til loka. ATHUGIÐ PRJÓNFESTUNA! Þegar stykkið mælist 10½-11½-13 cm – lesið LEIÐBEININGAR MÆLING að ofan, prjónið nú frá réttu þannig: 4 l br, A.3, 13-13-15 l perluprjón, A.1, 4 l br, fitjið upp 4 nýjar l, prjónið yfir 4 fyrstu l, umf byrjar hér = 41-41-43 l. Stykkið er nú prjónað áfram í hring á sokkaprjóna. Prjónið mynstur eins og áður, en nú er prjónað A.2 (= 12 l) yfir 4 l br í hvorri hlið á stykki og 4 nýjar l. Þegar A.2 hefur verið prjónað 1 sinni á hæðina er A.a prjónað þar til stykkið mælist 17-19-22 cm. Prjónið nú sléttprjón yfir l í A.a, jafnvel er hægt að prjónað sléttprjón aðeins fyrr. A.1 og A.3 heldur áfram til loka. Setjið nú 4 merki í stykkið þannig: Prjónið A.3, en setjið 1. merki á milli 1. og 2. l og 2. merki á milli 7. og 8. l í A.3, prjónið perluprjón eins og áður, prjónið A.1 en setjið 3. merki á milli 1. og 2. l og 4. merki á milli 7. og 8. l í A.1, prjónið sl yfir þær l sem eftir eru (= 14 l ofan á fæti, 15-15-17 l undir fæti og 6 l í hvorri hlið á stykki). Fækkið nú lykkjum fyrir tá í næstu umf þannig: Fækkið um 1 l á eftir 2. merki og 1 l á undan 3. merki undir fæti alls 0-0-1 sinnum – lesið LEIÐBEININGAR ÚRTAKA að ofan, prjónið yfir þær l sem efir eru = 14 l ofan á fæti og 15 l undir fæti (= 41 l alls). Í næstu umf er lykkjum fækkað þannig: Fækkið um 1 l á undan 1. og 3. merki og 1 l á eftir 2. og 4. merki (= alls 4 úrtökur). Endurtakið úrtöku í hverri umf alls 6 sinnum JAFNFRAMT í síðustu úrtöku er prjónuð kaðlalykkja í A.1 og A.3 þannig: Prjónið 2 l snúnar saman, 2 l slétt saman. Eftir alla úrtöku eru 13 l á prjóni. Stykkið mælist nú ca 20-22-25 cm. Klippið frá og þræðið þráðinn í gegnum þær l sem eftir eru, herðið að og festið vel. FRÁGANGUR: Brjótið uppfitjunarkant saman tvöfaldan (= miðja að aftan), notið enda brá byrjun til að sauma saman fallega við miðju að aftan. KANTUR: Kanturinn er prjónaður í hring á sokkaprjóna, í kringum op á tátiljunni. Prjónið upp 50-50-54 l á sokkaprjóna nr 4 með DROPS Nepal. Prjónið 1 umf br. Prjónið síðan 1 umf sl JAFNFRAMT er aukið út um 10 l jafnt yfir = 60-60-64 l. Prjónið stroff (= 2 l sl, 2 l br) þar til stykkið mælist 12-13-14 cm. Fellið laust af með sl yfir sl og br yfir br. Brjótið kantinn saman tvöfaldan. Prjónið aðra tátilju á sama hátt. |
|||||||||||||||||||
Skýringar á teikningu |
|||||||||||||||||||
|
|||||||||||||||||||
 |
|||||||||||||||||||
Ertu búin að klára þetta mynstur?Merktu myndirnar þínar með #dropspattern #celticdancerslippers eða sendu þær inn í #dropsfan gallery. Vantar þig aðstoð með þetta mynstur?Þú finnur 13 kennslumyndbönd, dálk með athugasemdum/spruningum og fleira með því að skoða mynstrið á garnstudio.com © 1982-2026 DROPS Design A/S. Við áskiljum okkur öll réttindi. Þetta skjal ásamt öllum undirhlutum þess, hefur höfundarétt. Lestu meira varðandi hvað þú mátt gera við mynstrin okkar neðst á hverju mynstri á síðunni okkar. |
|||||||||||||||||||


Með yfir 40 ára prjón- og hekl hönnun, býður DROPS Design uppá eitt umfangsmesta vöruúrval af mynstrum án endurgjalds á netinu – þýdd á 17 tungumálum. Í dag þá erum við komin í 333 vörulista og 12536 mynstur - 8139 mynstur sem eru þýdd á [íslensku].
Við vinnum hörðum höndum við að færa þér það besta sem prjón og hekl hefur uppá að bjóða, innblástur, ráðgjöf og auðvitað frábært gæða garn á ótrúlegu verði! Langar þig að nota mynstrin okkar fyrir annað en til einkanota? Þú getur lesið hér ákvæði hvað leyfilegt er að gera í textanum Copyright sem er neðst á öllum mynstrunum okkar.
Skrifaðu athugasemd um DROPS 156-55
Við myndum gjarna vilja fá að heyra hvað þér finnst um þetta mynstur!
Ef þig langar að skifa inn spurningu, vertu þá viss um að velja réttan dálk að neðan, til þess að við getum svarað sem fyrst. Það verður að merkja við svæði merktri með *.