
Populaire categorieën
Op zoek naar garen?


Opmerkingen / Vragen (113)
![]() Lisette schreef:
Lisette schreef:
Wat een leuk patroon! Het is al best oud, dus bedankt dat het nog beschikbaar is. Hier ga ik veel mensen blij mee maken en het is zo prettig om te breien. Super!
18.10.2025 - 01:26
![]() Anneli Kokkola schreef:
Anneli Kokkola schreef:
This is very nice, and there are my daughters and their friends hoping me to make this for them❣️
30.03.2025 - 12:30
![]() Silvia schreef:
Silvia schreef:
Seit Jahren stricke ich dieses Stirnband für mich und Freundinnen in allen möglichen Farben. Gut verständliche Anleitung und das Ergebnis sitzt perfek. Vielen Dank für dieses zeitlose und doch pfiffige Accessoire für kalte Tage.
24.02.2025 - 18:08
![]() Annika schreef:
Annika schreef:
Det fattas ju en del av mönstret på svenska! Inte konstigt att det blir fel är jag försöker sticka. Hade varit tacksam om ni rättade till det!
07.02.2025 - 17:14
![]() Janine Luisier schreef:
Janine Luisier schreef:
Bonjour votre site est excellent belles laines, beaux modèles, et le 86-10 super comme tant d'autres. Les explications à portée de tous. Mille MERCIS ż
05.12.2024 - 15:08
![]() Stéphanie P schreef:
Stéphanie P schreef:
Bonjour, Comment joindre les deux extrémités du tricot sans rabattre les mailles? Je ne trouve aucun tutos ... Merci d'avance Stéphanie
01.11.2024 - 00:33
![]() Lorraine schreef:
Lorraine schreef:
Bonjour, pourquoi ne pas rabattre les mailles avant de coudre le bandeau.
11.09.2024 - 17:20DROPS Design antwoorde:
Bonjour Lorraine, pour éviter que la couture ne soit trop épaisse, mais vous pouvez tout à fait rabattre avant si vous le préférez. Bon tricot!
12.09.2024 - 09:26
![]() June schreef:
June schreef:
Do I do the first two rows actually like they are written after doing the first increase row?
23.03.2024 - 00:43DROPS Design antwoorde:
Dear June, in this pattern you have a rib pattern, where you will repeat the rib explained in rows 1 and 2. However, as you increase, the rib will slightly change. For example, in the first increase at 3", you increase from P1 in the rib to P2 from the RS (by purling 2 stitches in 1 purl stitch). Then, on the WS knit over the new purl stitches (so the new rib will look like K2, P2 from the RS and P2, K2 from the WS). As you continue increasing you will add P stitches from the RS, which are knitted from the WS (so K2, P3 from the RS and P2, K3 from the WS; then K2, P4 from the RS and P2, K4 from the WS). Continue increasing like this. Happy knitting!
25.03.2024 - 00:00
![]() June schreef:
June schreef:
When the piece messages 3 ins what do I do now?
23.03.2024 - 00:30DROPS Design antwoorde:
Dear June, in the first increase at 3", you will work as follows from the RS: K 1 (edge st knit in garter st), * K 2, P 2 (that is, purl 2 stitches in the P1 to increase 1 purl stitch) * repeat a total of 5 times – finish row with K 2 and K 1 (edge st knit in garter st). Due to these increases, in the WS the rib also changes: from P2, K1 to P2, K2 (you don't increase in this row, just work over the increased stitches in the previous row). Happy knitting!
25.03.2024 - 00:00
![]() Carole Saidah schreef:
Carole Saidah schreef:
Bonjour, pour le bandeau, est ce que les diminutions se font sur l'endroit du travail comme pour les augmentations ? Merci pour votre réponse
27.12.2022 - 19:55DROPS Design antwoorde:
Bonjour Mme Saidah, tout à fait, on doit diminuer le nombre de mailles envers, vu sur l''endroit, on va tricoter ainsi 2 m ens à l'envers sur l'endroit. Bon tricot!
02.01.2023 - 10:33
|
|
Saturn Rings |
|
|
|
|
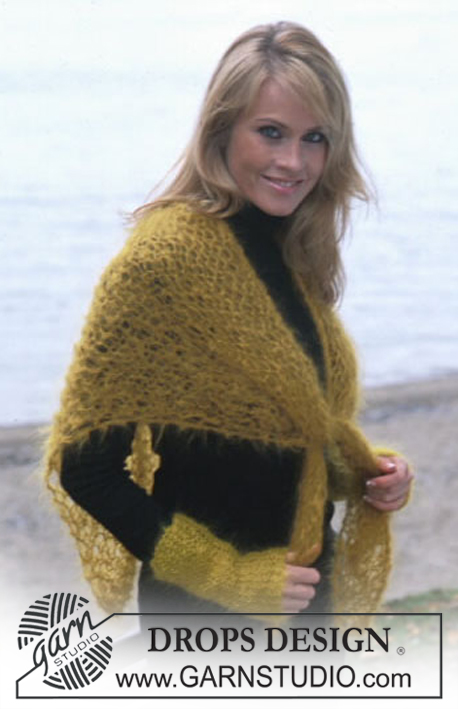
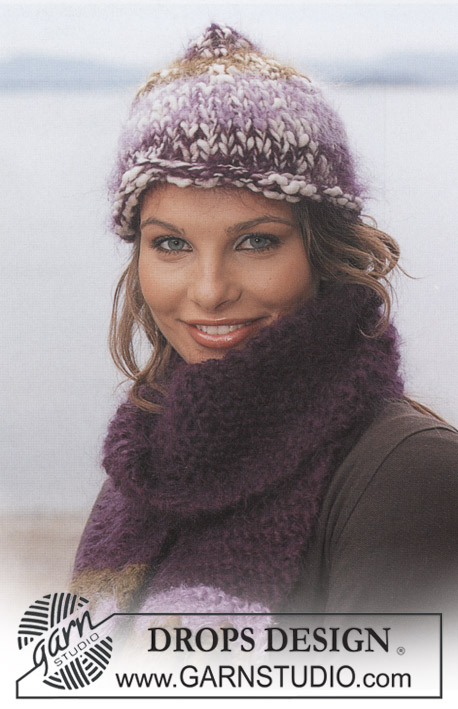
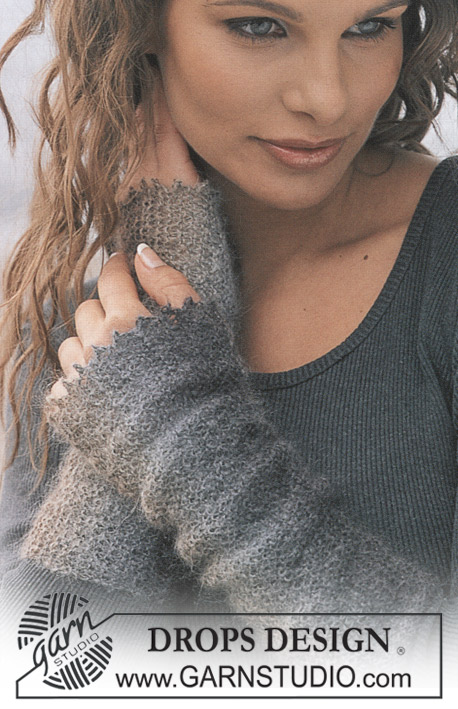
DROPS Hoofdband van “Alaska” en DROPS sjaal van “Vienna”
DROPS 86-10 |
|
|
HOOFDBAND: Steekverhouding: 18 st x 23 nld met breinld 4.5 mm in tricotst = 10 x 10 cm Ribbel: 1 ribbel = 2 nld. Ribbelst: Alle naalden recht breien. Hoofdband: begin op het middenachter en zet met breinld 4.5 mm en Alaska 19 st op. Brei de volgende nld als volgt: 1 ribbelst, *2 r, 1 av* herhaal steeds *-* in totaal 5 keer en eindig met 2 r en 1 ribbelst. Brei door als volgt: Meerder bij een hoogte van 8 cm alle 1 av naar 2 av = 24 st op de nld. Meerder bij een hoogte van 14 cm alle 2 av naar 3 av = 29 st op de nld. Meerder bij een hoogte van 18 cm alle 3 av naar 4 av = 34 st op de nld. Meerder bij een hoogte van 21 cm alle 4 av naar 5 av = 39 st op de nld. Plaats bij een hoogte van 24 cm 1 merkdraad = middenvoor. Brei vanaf hier verder in spiegelbeeld – d.w.z. minder st op dezelfde hoogte als waar voor de eerste helft werd gemeerderd, totdat er weer 19 st op de nld zijn. Kant de st af bij 48 cm, en sluit de naad aan de achterkant, met mooie kleine steken in elke st van de zijkanten, zodat de naad elastisch wordt. |
|
Heeft u dit patroon gemaakt?Tag dan uw afbeeldingen met #dropspattern of stuur ze naar de #dropsfan galerij. Heeft u hulp nodig voor dit patroon?U vind 16 instructievideo's, een commentaar/vragengedeelte en nog veel meer, als u naar het patroon gaat op garnstudio.com © 1982-2026 DROPS Design A/S. Alle rechten voorbehouden. Op dit document, inclusief alle subdocumenten, rust copyright. Lees meer over wat u kunt doen met onze patronen onderaan elk patroon op onze site |


Met meer dan 40 jaar ervaring in brei- en haakdesign biedt DROPS Design één van de meest uitgebreide collecties van gratis patronen aan op internet vertaald in 324 talen. Tot en met vandaag hebben wij 12290 boeken en 11997 patronen gepubliceerd.
Wij werken hard om u het beste van haken en breien te bieden; patronen, inspiratie, advies en natuurlijk garens van uitstekende kwaliteit voor de allerbeste prijzen! Wilt u onze patronen gebruiken voor meer dan privégebruik? U kunt lezen wat wel en niet is toegestaan is in de Copyright tekst, die u onderaan elk patroon kunt vinden. Veel handwerkplezier!
Laat een opmerking achter voor DROPS 86-10
Wij horen graag wat u vindt van dit patroon!
Wilt u een vraag stellen, kies dan de juiste categorie in het formulier hieronder om sneller een antwoord te krijgen. Verplichte velden zijn gemarkeerd met een *.