
Populaire categorieën
Op zoek naar garen?


Opmerkingen / Vragen (59)
![]() Camilla schreef:
Camilla schreef:
Jeg er ved at lave pandebåndet. I diagrammet står der man skal strikke ret over ret og vrang over vrang. Når jeg har slået de 12 masker op er 1. pind på vrang-siden, den næste pind på ret-siden. Dvs. snoninger bliver lavet fra vrang siden? Hvorfor skal jeg så strikke ret på hjælpepinden og de resterende masker?
02.11.2014 - 23:31DROPS Design antwoorde:
Hej Camilla. 1. pind er retsiden. Snoningerne laves paa retsiden.
06.11.2014 - 13:42
![]() Carla schreef:
Carla schreef:
Il modello è bellissimo, ma devo mettere il doppio dei punti. Come costruire lo schema? Devo farlo speculare? Grazie per la risposta
07.09.2014 - 10:29DROPS Design antwoorde:
Deve mettere il doppio dei punti perché utilizza un filato più sottile? Nel caso in cui dovesse fare così potrebbe lavorare la treccia più larga (con più maglie ogni fascia della treccia) per esempio. Se deve fare la fascia deve fare prima un campione per capire quanto rende con il filato che utilizzerà.
11.09.2014 - 16:31
![]() Klára S schreef:
Klára S schreef:
Dobrý den, v českém návodu neodpovídá popis vzorku originálu. Hezký den Klára S
01.02.2014 - 20:23DROPS Design antwoorde:
Dobrý den, děkuji za upozornění - opraveno!
08.02.2014 - 01:06
![]() Isabel schreef:
Isabel schreef:
Hallo, Maakt het nog uit wat voor maat kabelnaald ik gebruik voor de hoofdband? Bedankt
26.10.2013 - 14:06DROPS Design antwoorde:
Hoi Isabel. De kabelnld moet niet te dun zijn. Heb je niet een hele dikke kabelnld, dan kan je eventueel een sokkenbreinld gebruiken.
28.10.2013 - 19:13
![]() Jan schreef:
Jan schreef:
Got it - thank you - sorry to be so dense :)
30.01.2013 - 00:43
![]() Jan schreef:
Jan schreef:
Yes, I have checked your video which is great for a cable stitch in the middle of a row, not as the first stitch in the row. The difference is that the skein side of the wrapping yarn is on the cable needle not the right hand needle so i am not sure if that yarn should go behind the cable needle or infront of the cable needle prior to knitting the next/6th stitch.
29.01.2013 - 18:49DROPS Design antwoorde:
In front, because stitches you have to knit next are in front of slipped sts.
29.01.2013 - 21:49
![]() Jan schreef:
Jan schreef:
Another source of my confustion -the wrap over yarn is on the cable needle since it is the first 5 stiches being slipped, when a cable is worked in the middle of a piece, the wrap over yarn is on the right hand knitting needle. Thank you again.
29.01.2013 - 13:41DROPS Design antwoorde:
Have you checked out our Video tutorials for cable knitting?
29.01.2013 - 14:58
![]() Jan schreef:
Jan schreef:
Thank you for your response and clarification. One more question - does the wrapping yarn for the 11th row go behind the cable needle and slipped stiches or in front? Thank you
29.01.2013 - 13:35DROPS Design antwoorde:
The yarn should not run over stitches in front and should not be visible. When you slip first 5 sts to cable needle behind piece, keep yarn front to knit next st from left needle.
29.01.2013 - 14:48
![]() Jan schreef:
Jan schreef:
I am making the neckwarmer and have a question regarding the 11th row. If I read the pattern correctly, this row starts with the 5 stitches slipped off to the cable needle. I find this awkward since the first stitch has the wrapping yarn (for lack of a better term). Am I reading the pattern correctly? I hope I am explaining myself properly.
28.01.2013 - 23:43DROPS Design antwoorde:
Dear Jan, you are correct, on row 11 the first 5 sts are slipped on cable needle behind piece for the cable. Happy knitting!
29.01.2013 - 09:02
![]() Isabel Hicks schreef:
Isabel Hicks schreef:
Would be grateful for some help! Am doing this lovely headband but- cast on 12 stitches K1 then cabled 4 back knitted 4 . Three stitches left - please tell me how do I get the braiding as no stitches left to do the other half of the chart - where am I going wrong?.. Many thanks
20.01.2013 - 00:32DROPS Design antwoorde:
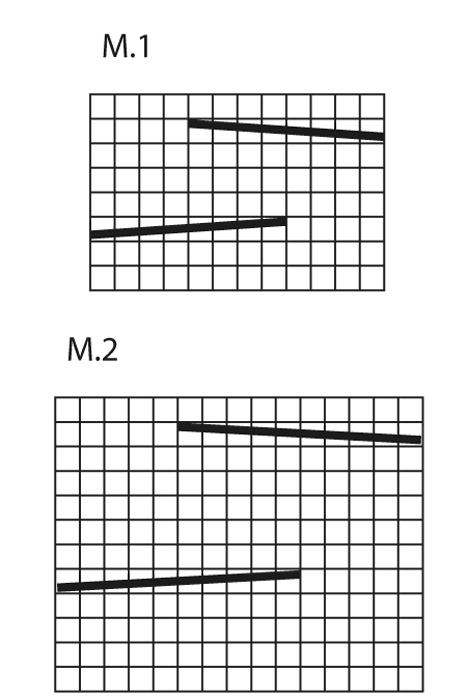
Dear Mrs Hicks, diagram is read from bottom right towards the left (RS) and left towards right side (WS), and M1 =12 sts, row 3 is : K4, cable on the next 8 sts. R7 : cable on the first 8 sts, K4. Happy knitting!
21.01.2013 - 18:21
|
||||||||||||||||
Braidy#braidyset |
||||||||||||||||
 |
 |
|||||||||||||||
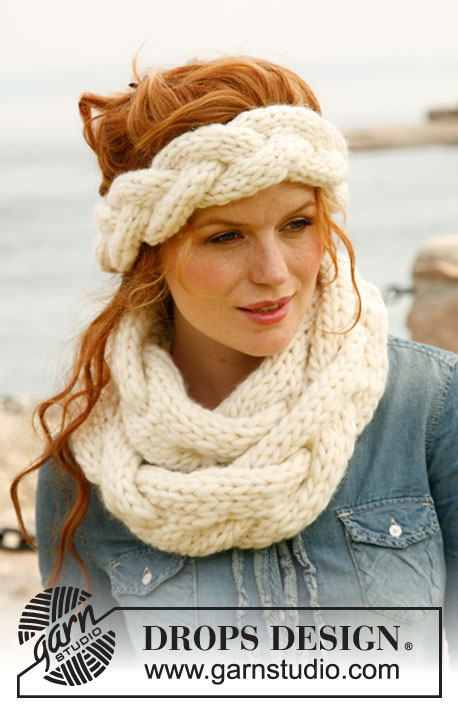
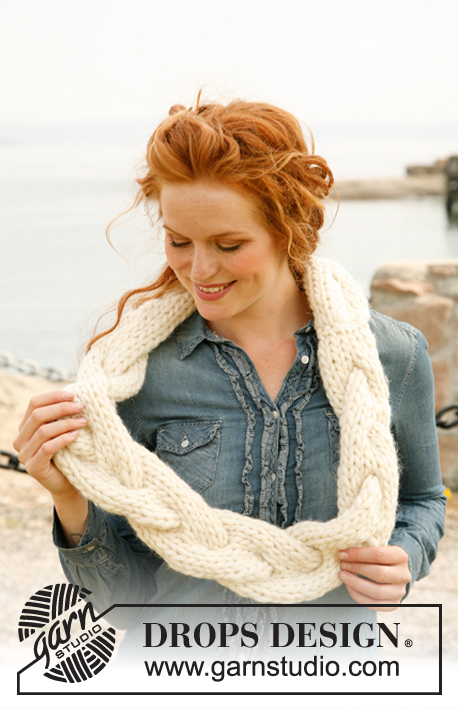
Gebreide DROPS hoofdband en halswarmer met grote kabel van ”Polaris”.
DROPS 134-7 |
||||||||||||||||
|
PATROON: Zie telpatroon M.1 voor de hoofdband en telpatroon M.2 voor de halswarmer. De telpatronen geven de goede kant van het werk weer. Zowel de heengaande als de teruggaande naalden zijn weergegeven. TIP VOOR HET WISSELEN VAN DRAAD: Als u met een nieuwe bol Polaris begint, verbind dan de nieuwe draad en de oude draad als volgt: Splijt het uiteinde van de laatste 15 cm draad, knip een deel weg (dun de draad als het ware uit). Doe hetzelfde met de eerste 15 cm van de nieuwe draad. Leg de twee draadeinden op elkaar zodat ze samen even dik zijn als een normale draad en ga zo verder met breien. Zo is de overgang naar een nieuwe bol onzichtbaar. -------------------------------------------------------- -------------------------------------------------------- HOOFDBAND: Wordt heen en weer gebreid tot een lange strook en later samengenaaid. Zet 12 st op met breinld 12 mm en Polaris. Brei telpatroon M.1 tot het werk ongeveer 50 cm meet - eindig na 1 hele patroonherhaling. Brei 1 nld in tricotst en kant dan losjes af. Naai de opzetkant en de afkantrand samen, naai met de zijkanten tegen elkaar om een dikke naad te voorkomen. -------------------------------------------------------- HALSWARMER: Wordt heen en weer gebreid op de nld tot een lange strook en later samengenaaid. Zet 15 st op met breinld 15 mm en Polaris. Brei telpatroon M.2 tot het werk ongeveer 120 cm meet - eindig na 1 hele patroonherhaling. Brei 4 nld in tricotst en kant dan losjes af. Naai de opzetkant en de afkantrand samen, naai met de zijkanten tegen elkaar om een dikke naad te voorkomen. Vouw de halswarmer dubbel (in een 8-lus) voordat u de halswarmer draagt. |
||||||||||||||||
Uitleg van het telpatroon |
||||||||||||||||
|
||||||||||||||||
 |
||||||||||||||||
Heeft u dit patroon gemaakt?Tag dan uw afbeeldingen met #dropspattern #braidyset of stuur ze naar de #dropsfan galerij. Heeft u hulp nodig voor dit patroon?U vind 5 instructievideo's, een commentaar/vragengedeelte en nog veel meer, als u naar het patroon gaat op garnstudio.com © 1982-2026 DROPS Design A/S. Alle rechten voorbehouden. Op dit document, inclusief alle subdocumenten, rust copyright. Lees meer over wat u kunt doen met onze patronen onderaan elk patroon op onze site |
||||||||||||||||


Met meer dan 40 jaar ervaring in brei- en haakdesign biedt DROPS Design één van de meest uitgebreide collecties van gratis patronen aan op internet vertaald in 324 talen. Tot en met vandaag hebben wij 12290 boeken en 11997 patronen gepubliceerd.
Wij werken hard om u het beste van haken en breien te bieden; patronen, inspiratie, advies en natuurlijk garens van uitstekende kwaliteit voor de allerbeste prijzen! Wilt u onze patronen gebruiken voor meer dan privégebruik? U kunt lezen wat wel en niet is toegestaan is in de Copyright tekst, die u onderaan elk patroon kunt vinden. Veel handwerkplezier!
Laat een opmerking achter voor DROPS 134-7
Wij horen graag wat u vindt van dit patroon!
Wilt u een vraag stellen, kies dan de juiste categorie in het formulier hieronder om sneller een antwoord te krijgen. Verplichte velden zijn gemarkeerd met een *.