
Populaire categorieën
Op zoek naar garen?


Opmerkingen / Vragen (66)
Sachu schreef:
Hi, I have a question You say that when you reach 149 st, you can start the Lace pattern. Could i start the lace pattern at any point like at 113 st which is what i have now. Can i do that or does it have to be at 149 st? Thanks :)
29.10.2014 - 18:27DROPS Design antwoorde:
Dear Sachu, we have started the lace pattern with 149 sts in this pattern, but you may start earlier if you rather like to. Happy knitting!
30.10.2014 - 09:46
![]() Tone schreef:
Tone schreef:
Dette skjerfet er kjempefint! Svigermor har strikket dette i lysegrått baby alpakka silk, og det passer til alle aldre. Stilig med kombinasjonen vanlig rettstrikk og hullmønster.
13.10.2014 - 21:23
![]() Therese schreef:
Therese schreef:
Jeg forstår ikke hvordan jeg skal gjøre overgangen til hullmønster riktig? Man får,så vidt jeg kan skjønne, 149 m på 5. pinnen i "sjalmønsteret", og er da i "økeenden" av arbeidet. Når man da skal gå over til hullmønsteret, skal man starte på pinne 1 hullmønster, som er en "minskepinne". Da vil jo hele fasongen på sjalet endres? Kan dere forklare dette for meg?
06.09.2014 - 21:17DROPS Design antwoorde:
Hej Therese, Når du har 149 m strikker du de 4 pinde i HULLMØNSTER, udtagningerne vil da være på 3.p i samme side som du har taget ud hele tiden. Du vil snart kunne se formen på sjalet.
10.09.2014 - 12:21
![]() Marleen schreef:
Marleen schreef:
Gebreid op normale naalden maar het kantpatroon is recht aan beiden zijden. Dus hoe krijg ik de zelfde punt als aan de beginkant?
16.08.2014 - 16:53DROPS Design antwoorde:
Die krijgt u niet, het patroon is schuin en het patroon is niet gelijk op beide punten.
01.09.2014 - 16:49
![]() Odile schreef:
Odile schreef:
Fantastisch mooi patroon, maar ik vind breien op een rondbreinaald niet fijn. Kan deze sjaal ook op rechte naalden worden gebreid?
08.06.2014 - 17:22DROPS Design antwoorde:
Hoi Odile. Je moet aan denken dat je alle st kwijt kan op de rechte naald. Ik denk dat het best lastig kan worden met dit model, maar ik weet het helaas niet zeker. Het is uitproberen.
10.06.2014 - 16:19
![]() Lena Mörk schreef:
Lena Mörk schreef:
Återigen en fråga om hålvarven. Här finns nu två olika svar på frågor om detta. Ska det vara 149 m alla varv eller ska det ökas vart 4 e varv enligt det senaste svaret????
04.04.2014 - 21:43DROPS Design antwoorde:
Hej Lena. Når du har 149 M på pinden strikker du hälmønstret som også står i mønstret. Her tages der også ud, så følger du mønstret kommer det at gå fint :-)
07.04.2014 - 21:04Dana schreef:
Det ökas vart 4e v!
03.04.2014 - 18:27
![]() Karin schreef:
Karin schreef:
Bonjour, Merci pour les précisions. Par contre, je pense qu'il y a une erreur dans l'explication du rang 3 pour le point fantaisie. Il est mentionné : 1 m end, *2 m ens à l'end, 1 jeté*, répéter de *-* jusqu'à ce qu'il reste 4 m, 2 m end, 1 jeté, 1 m end, 1 jeté et 1 m end. En regardant la vidéo, on voit bien qu'il faut répéter de *-* non pas jusqu'à 4m mais jusqu'à 2m puis faire 1 jeté, 1 m end, 1 jeté et 1 m end.
02.04.2014 - 15:15DROPS Design antwoorde:
Bonjour Karin, les explications sont correctes, la vidéo sera bientôt modifiée pour être conforme au modèle. Merci. Bon tricot!
25.04.2014 - 11:31
![]() Anna Malm schreef:
Anna Malm schreef:
När jag börjat på hålmönstrat och ska börja på min andra runda så stämmer inte maskantal - kanten blir inte rak i sidan- dragit upp fyra ggr. Stämmer inte - vad gör jag fel ???
02.04.2014 - 06:18DROPS Design antwoorde:
Hej Anna. Kan det vaere du overser 1 omslag eller 2 räta tills? Hvis du har f.eks. 17 m paa st og strikker haalmönstrat, saa strikker du förste v saadan: 2 m räta tills (= 15 m kvar paa st) * 1 omslag, 2 m räta tills, * (= 7 gange gentages) og du der återstår nu 1 m = 1 omslag och 1 rm. Dvs, her er maskeantallet det samme. I varv 3 ökar du med et ekstra omslag.
08.04.2014 - 16:00
![]() LAURO schreef:
LAURO schreef:
Doit-on avoir jusqu'à la fin 149m car il m'arrive d'en avoir 150-151. Je fais peut-être une erreur. Merci pour votre réponse.
04.03.2014 - 12:19DROPS Design antwoorde:
Bonjour Mme Lauro, quand vous avez 149 m, répétez les rangs 1 et 4 du point ajouré, le nombre de mailles augmente à chaque rang 3, continuez ainsi pour former le triangle jusqu'à la hauteur indiquée/voulue. Bon tricot!
05.03.2014 - 09:38
|
|
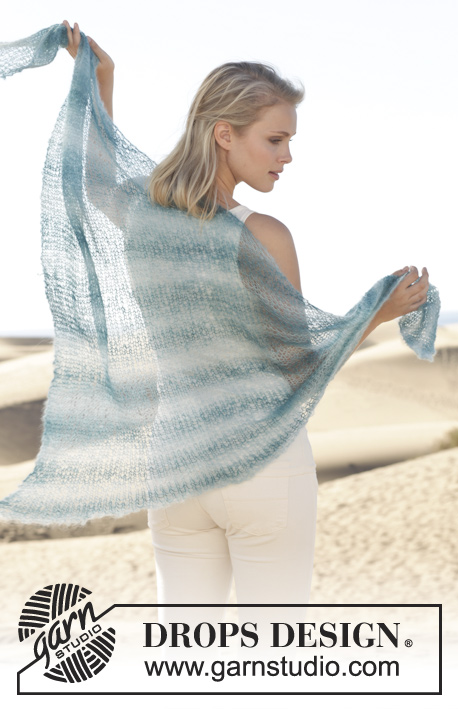
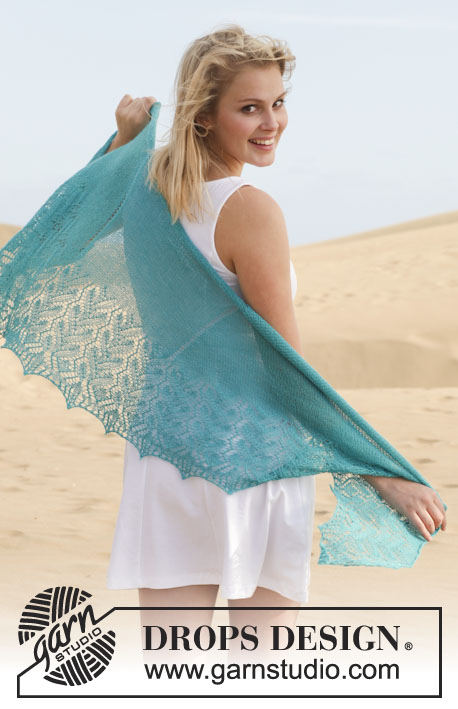
Soir d'Été#soirdeteshawl |
|
 |
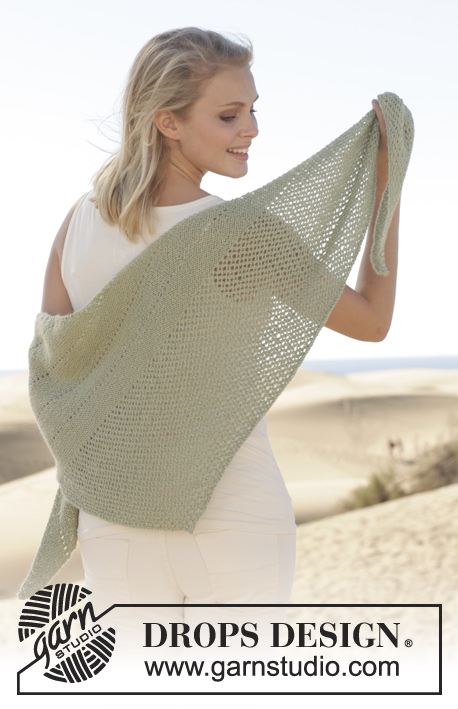 |
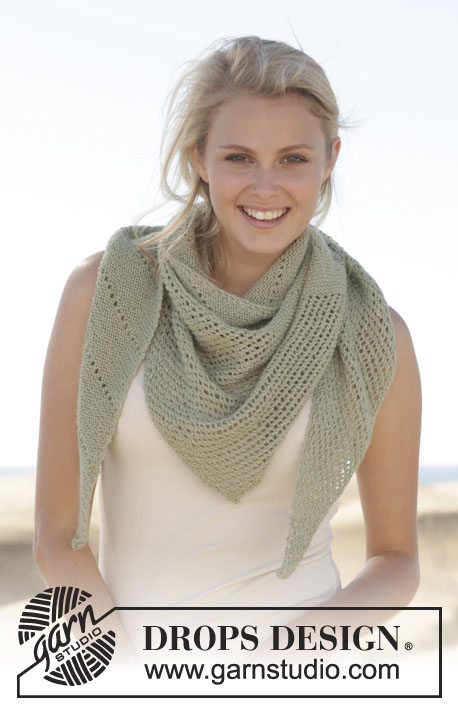
Gebreide DROPS omslagdoek in ribbelst met kantpatroon van ”BabyAlpaca Silk”.
DROPS 152-16 |
|
|
RIBBELST (heen en weer gebreid op de nld): brei alle nld recht. 1 ribbel = 2 nld r. GAATJESRAND: Brei een gaatjesrand elke 11e ribbel, brei de eerste gaatjesrand als er 17 st op de nld staan. De gaatjesrand wordt altijd op de 3e nld gebreid, dus de nld die begint met 2 st r samen. Brei de gaatjesrand als volgt: 2 st r samen, * 1 omsl, 2 st r samen *, herhaal van *-* tot er 1 st overblijft, 1 omsl en 1 st r. KANTPATROON: Nld 1: 2 st r samen, * 1 omsl, 2 st r samen *, herhaal van *-* tot er 1 st over is, 1 omsl en 1 st r. Nld 2: brei alle st en omsl recht. Nld 3: 1 st r, * 2 st r samen, 1 omsl *, herhaal van *-* tot er 4 st over zijn, 2 st r, 1 omsl, 1 st r, 1 omsl en 1 st r. Nld 4: brei alle st en omsl recht. Herhaal nld 1 tot en met 4. ---------------------------------------------------------- OMSLAGDOEK: Wordt heen en weer gebreid op de rondbreinld. Zet 3 st op met rondbreinld 3.5 mm en BabyAlpaca Silk en brei 1 nld recht. Brei dan in RIBBELST - zie uitleg boven, als volgt: NLD 1: 1 st r, 1 omsl, 1 st r, 1 omsl en 1 st r = 5 st. NLD 2: brei alle st recht. NLD 3: 2 st r samen (losjes), brei recht tot er 1 st over is, 1 omsl en 1 st r. Deze nld wordt elke 11e ribbel vervangen door de gaatjesrand. NLD 4: brei alle st recht. NLD 5: brei tot 2 st over zijn, 1 omsl, 1 st r, 1 omsl en 1 st r. Herhaal dan nld 2 tot en met 5 tot er 17 st op de nld staan. ** Ga verder als hiervoor, maar vervang bij de 11e ribbel de 3e nld door een GAATJESRAND - zie uitleg boven. Brei dan als hiervoor in ribbelst en meerderen/minderen als hiervoor zonder gaatjesrand tot er 12 nieuwe st zijn gemeerderd ** = 29 st op de nld. Herhaal van **-** tot er 11 gaatjesranden zijn gebreid (12 nieuwe st gemeerderd). Brei dus een gaatjesrand bij de volgende aantallen st op de nld: 17, 29, 41, 53, 65, 77, 89, 101, 113, 125 en 137 st. Ga verder in ribbelst met meerderen/minderen als hiervoor tot er 149 st op de nld staan en brei dan het KANTPATROON - zie uitleg boven. Herhaal nld 1 tot en met 4 van het kantpatroon tot het werk ongeveer 106 cm meet gemeten langs de nld/korte kant. Eindig na een 2e of 4e nld in het kantpatroon en kant losjes af met rechte st. Knip de draad af en zet vast. |
|
Heeft u dit patroon gemaakt?Tag dan uw afbeeldingen met #dropspattern #soirdeteshawl of stuur ze naar de #dropsfan galerij. Heeft u hulp nodig voor dit patroon?U vind 10 instructievideo's, een commentaar/vragengedeelte en nog veel meer, als u naar het patroon gaat op garnstudio.com © 1982-2026 DROPS Design A/S. Alle rechten voorbehouden. Op dit document, inclusief alle subdocumenten, rust copyright. Lees meer over wat u kunt doen met onze patronen onderaan elk patroon op onze site |
|


Met meer dan 40 jaar ervaring in brei- en haakdesign biedt DROPS Design één van de meest uitgebreide collecties van gratis patronen aan op internet vertaald in 324 talen. Tot en met vandaag hebben wij 12278 boeken en 11985 patronen gepubliceerd.
Wij werken hard om u het beste van haken en breien te bieden; patronen, inspiratie, advies en natuurlijk garens van uitstekende kwaliteit voor de allerbeste prijzen! Wilt u onze patronen gebruiken voor meer dan privégebruik? U kunt lezen wat wel en niet is toegestaan is in de Copyright tekst, die u onderaan elk patroon kunt vinden. Veel handwerkplezier!
Laat een opmerking achter voor DROPS 152-16
Wij horen graag wat u vindt van dit patroon!
Wilt u een vraag stellen, kies dan de juiste categorie in het formulier hieronder om sneller een antwoord te krijgen. Verplichte velden zijn gemarkeerd met een *.