
Popular categories
Looking for a yarn?


Comments / Questions (35)
![]() Aud wrote:
Aud wrote:
Hei, I beskrivelsen til FORHØYNING så stopper det etter 5. gangs vending. For å få det likt på begge sider så strikket jeg 84 masker vrangt tilbake og snudde og så strikket jeg 42 masker rett tilbake som er midt bak. Til info så strikker jeg str S.
06.11.2019 - 18:34DROPS Design answered:
Hei Aud. Takk for at du gjorde oss oppmerksom på dette. Vi vil legge til en rettelse. mvh DROPS design
11.11.2019 - 14:34
![]() Cecilie Almli wrote:
Cecilie Almli wrote:
Starter oppskriften med halsen?
10.10.2019 - 10:00DROPS Design answered:
Hej Cecilie, Du starter med oppskriften der hvor det står START ARBEIDET HER. God fornøjelse!
10.10.2019 - 14:16
![]() Detlev wrote:
Detlev wrote:
Hallo, ich hab aus versehen bei den Umschlägen bei der Rückreihe diese nicht verschränkt abgestrickt. Nun hab ich leider Löcher. Gibt es einen Trick, diese zu schließen?
27.09.2019 - 19:55DROPS Design answered:
Lieber Detlev, beim aufnehmen mit einem Umschlag kann ein kleines Loch entstehen, das meistens nach Spannen verschwindet; Sie können auch gerne eine andere Aufnahmetechnik benutzen. Viel Spaß beim stricken!
30.09.2019 - 08:09
![]() Eli wrote:
Eli wrote:
Er det riktig at det skal settes av først 49, så 50 masker på baksiden når det deles av på bolen? Får det ikke til å stemme med mønsteret. Ser ut som det blir rettere med 50+49 masker.
09.09.2019 - 10:52DROPS Design answered:
Hej Eli, det gør ikke noget, hovedsagen er at du får 99 masker på forstykket og 99 på bagstykket på de nye masker i siderne. God fornøjelse!
12.09.2019 - 13:48
![]() Karen wrote:
Karen wrote:
Stemmer målene til armene i oppskriften. Lengden på armen blir kortere etter størrelsen øker stemmer det?
26.08.2019 - 20:16DROPS Design answered:
Hei Karen. I de større størrelsene vil den totale overvidden fra ermtipp til ermtipp fortsatt være større enn i de mindre størrelsene, selvom selve ermet er litt kortere. De større størrelsene har høyere ermkuppel og i tillegg har de en bredere skuldervidde. På denne måten blir det god passform i alle størrelser.
27.08.2019 - 08:09
![]() Mariarosaria wrote:
Mariarosaria wrote:
Buongiorno ho notato che questo modello è un po corto se volessi farlo più lungo da che punto dovrei aumentare il numero dei ferri? Grazie
11.08.2019 - 13:15DROPS Design answered:
Buongiorno Mariarosaria. Quando arriva a queste indicazioni: Continuare a lavorare fino a quando il lavoro misura 22 cm dalla divisione per tutte le taglie (o fino alla lunghezza desiderata; mancano 3 cm alla fine del lavoro). Qui prosegue fino alla lunghezza necessaria. Riprende poi con le indicazioni successive. Buon lavoro!
11.08.2019 - 13:40
![]() Luba wrote:
Luba wrote:
Thank you for your answer. I have already finished the jumper and it is wonderful!
25.03.2019 - 11:37
![]() Luba wrote:
Luba wrote:
"...Increase like this every 8 cm a total of 3 times.." Impossible! 24 сm?
05.03.2019 - 12:07DROPS Design answered:
Dear Luba, increase the first time when piece measures 4 cm, then increase a 2nd time after 8 more cm (= 12 cm), then the last time after 8 more cm (= 20 cm), all increased are done when piece measures 22 cm. Happy knitting!
05.03.2019 - 14:51
![]() Roswitha wrote:
Roswitha wrote:
Ist die bei Drops- Produkten verwendete Merinowolle Mulesing- frei hergestellt?
15.02.2019 - 12:56DROPS Design answered:
Liebe Roswitha, ja genau, das lesen Sie in die Farbkarte sowie bei unserem FAQ. Viel Spaß beim stricken!
15.02.2019 - 15:50
![]() Malene wrote:
Malene wrote:
Hvis jeg nu vil lave den lidt længere kan jeg så bare købe garn efter str. XXL
24.01.2019 - 10:23DROPS Design answered:
Hej Malene, Ja du finder opskriftens mål i måleskitsen nederst på siden. Hvis du overholder strikkefastheden og følger opskriften, så får du de mål som står i måleskitsen. God fornøjelse!
24.01.2019 - 14:20
|
||||||||||
Dear to my Heart Sweater#deartomyheartsweater |
||||||||||
 |
 |
|||||||||
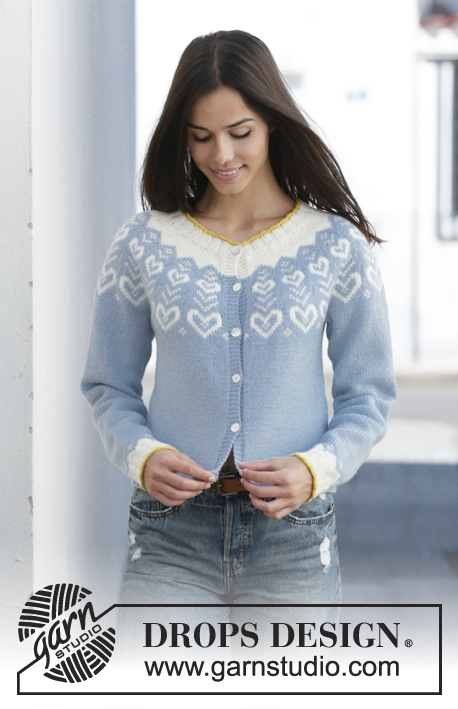
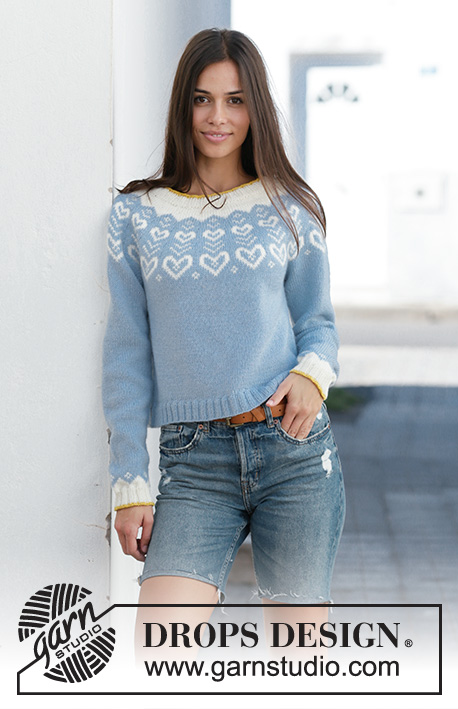
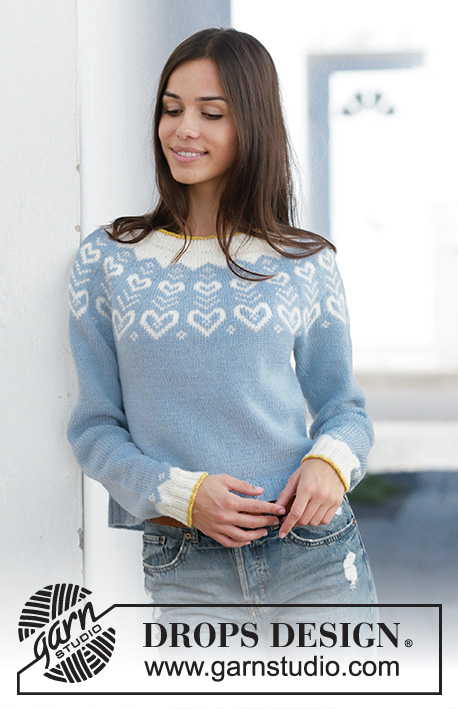
Knitted sweater in DROPS Merino Extra Fine. The piece is worked top down with round yoke and Nordic pattern. Sizes S - XXXL.
DROPS 199-7 |
||||||||||
|
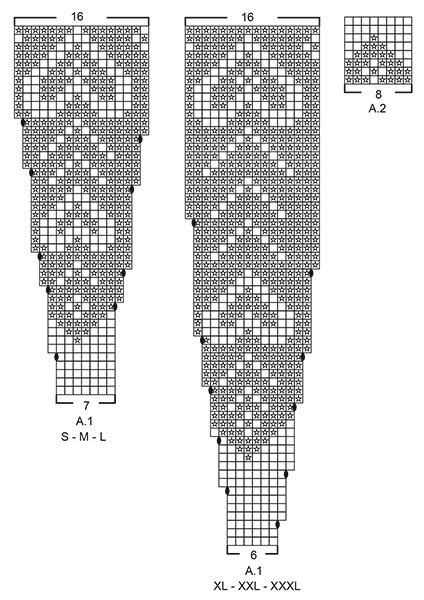
------------------------------------------------------- EXPLANATIONS FOR THE PATTERN: ------------------------------------------------------- ELEVATION (back of neck): To make the sweater slightly higher at the back of the neck when working the yoke, work an elevation as described below. Skip this section if you do not want an elevation. Insert 1 marker at the beginning of the round (= mid back). Start from the right side with off white and knit 14-15-16-16-17-18 stitches, turn, tighten strand and purl 28-30-32-32-34-36 stitches. Turn, tighten strand and knit 42-45-48-48-51-54 stitches, turn, tighten strand and purl 56-60-64-64-68-72 stitches. Turn, tighten strand and knit 70-75-80-80-85-90 stitches, turn, tighten strand and purl to mid back. Then work YOKE as described in text. PATTERN: See diagrams A.1 and A.2. Choose diagram for your size (applies to A.1). INCREASE TIP-1 (evenly spaced): To work out how to increase evenly, count the total number of stitches on the needle (e.g. 108 stitches) and divide by the number of increases to be made (e.g. 18) = 6. In this example, increase by making 1 yarn over after each 6th stitch. On the next round knit the yarn overs twisted to avoid holes. INCREASE TIP-2 (for sides of body): Start 3 stitches before the marker thread, make 1 yarn over, knit 6 (marker thread sits in the middle of these 6 stitches), make 1 yarn over (= 2 stitches increased). Increase the same way at the second marker thread. On the next round knit the yarn overs twisted to avoid holes. Then work the new stitches in stockinette stitch. DECREASE TIP (for mid under sleeves): Start 3 stitches before the marker thread, knit 2 together, knit 2 (marker thread sits between these 2 stitches), slip 1 stitch as if to knit, knit 1 and pass the slipped stitch over the knitted stitch (= 2 stitches decreased). KNITTING TIP: To avoid the knitting gauge becoming tighter when working pattern, it is important not to have tight strands at the back. You can increase the needle size when working pattern if this is a problem. BINDING-OFF TIP: To avoid the bind-off edge being tight, you can bind off with a larger needle size. Or make 1 yarn over after approx. each 8th stitch at the same time as you bind off (yarn overs bind off as normal stitches). ------------------------------------------------------- START THE PIECE HERE: ------------------------------------------------------- SWEATER - SHORT OVERVIEW OF THE PIECE: Neck and yoke are worked in the round with circular needle, top down. The yoke is divided for body and sleeves. The body is continued in the round with circular needle, top down. The sleeves are worked in the round with short circular needle/double pointed needles, top down. NECK: Cast on 108-112-116-120-124-128 stitches with short circular needle size 3 mm = US 2,5 and mustard. Knit 1 round. Change to off white and work rib in the round (= knit 2 / purl 2) for 3 cm = 1⅛". Change to short circular needle size 4 mm = US 6. Knit 1 round where you increase 18-21-31-18-26-28 stitches evenly spaced – read INCREASE TIP-1 = 126-133-147-138-150-156 stitches. Knit 1 round. Now you can work an ELEVATION in the back of the neck – read description above. If you do not want an elevation, go straight to YOKE. YOKE: Read KNITTING TIP and work A.1 in the round (= 18-19-21-23-25-26 repeats of 7-7-7-6-6-6 stitches). Continue this pattern and increase as shown in the diagram. REMEMBER THE KNITTING GAUGE! When A.1 has been completed there are 288-304-336-368-400-416 stitches on the needle. Continue with stockinette stitch and grey blue until the piece measures 19-21-23-25-27-29 cm = 7½"-8¼"-9"-9¾"-10⅝"-11⅜" from the cast-on edge mid front. The next round is worked as follows: Knit 42-45-49-54-60-63 stitches (= ½ back piece), place the next 59-61-69-75-79-81 stitches on 1 thread for sleeve, cast on 8-10-10-10-12-16 new stitches on the needle (= in side under sleeve), knit 85-91-99-109-121-127 stitches (= front piece), place the next 59-61-69-75-79-81 stitches on 1 thread for sleeve, cast on 8-10-10-10-12-16 new stitches on the needle (= in side under sleeve) and knit the remaining 43-46-50-55-61-64 stitches (= ½ back piece). Cut the strand. Body and sleeves are continued separately. THE PIECE IS NOW MEASURED FROM HERE! BODY: = 186-202-218-238-266-286 stitches. Insert 1 marker thread in each side of the body, in the middle of the 8-10-10-10-12-16 stitches under the sleeves. Allow the marker threads to follow your work onwards; they will be used when increasing in the sides. Start the round by one of the marker threads and work in the round with grey blue. When the piece measures 4 cm = 1½" from the division in all sizes, increase 1 stitch on each side of both marker threads – read INCREASE TIP-2 (= 4 stitches increased). Increase like this every 8 cm = 3⅛" a total of 3 times in each side = 198-214-230-250-278-298 stitches. Continue working until the piece measures 22 cm = 8¾" from the division in all sizes (or to desired length; there is 3 cm = 1⅛" left to finished length). Knit 1 round where you increase 38-38-46-46-54-58 stitches evenly spaced = 236-252-276-296-332-356 stitches. This is done to avoid the rib being tight. Change to circular needle size 3 mm = US 2,5 and work rib in the round (= knit 2 / purl 2) for 3 cm = 1⅛". Loosely bind off with knit over knit and purl over purl – read CASTING-OFF TIP! The sweater measures approx. 48-50-52-54-56-58 cm = 19"-19¾"-20½"-21¼"-22"-22¾" from the shoulder down. SLEEVE: Place the 59-61-69-75-79-81 stitches from the thread on the one side of the piece on circular needle/double pointed needles size 4 mm = US 6 and knit up 1 stitch in each of the 8-10-10-10-12-16 stitches cast on under the sleeve = 67-71-79-85-91-97 stitches. Insert 1 marker thread in the middle of the 8-10-10-10-12-16 stitches under the sleeve. Allow the marker thread to follow your work onwards; it will be used when decreasing mid under sleeve. Start the round by the marker thread and work stockinette stitch in the round with grey blue. When the piece measures 2 cm = ¾" from the division in all sizes, decrease 2 stitches mid under sleeve – read DECREASE TIP! Decrease like this every 4½-3½-2½-2½-2-1½ cm = 1¾"-1¼"-1"-1"-¾"-½" a total of 9-11-14-14-17-20 times = 49-49-51-57-57-57 stitches. Continue working until the piece measures 40-39-37-36-34-33 cm = 15¾"-15¼"-14½"-14¼"-13⅜"-13" from the division (or to desired length; there is 6 cm = 2⅜" left to finished length, decreases are finished mid under sleeve and there are shorter measurements in larger sizes due to wider neck and longer yoke). Knit 1 round with grey blue where you decrease 1-1-3-1-1-1 stitches evenly spaced = 48-48-48-56-56-56 stitches. Work A.2 in the round (= 6-6-6-7-7-7 repeats of 8 stitches). When A.2 is finished knit 1 round with off white where you decrease 0-0-0-4-4-0 stitches evenly spaced = 48-48-48-52-52-56 stitches. There is now 3 cm = 1⅛" left to finished length; if you want a longer sleeve continue with off white to desired length. Change to double pointed needles size 3 mm = US 2,5. Work rib in the round (= knit 2 / purl 2) for 3 cm = 1⅛". Change to mustard and work 1 round of rib. Then loosely bind off with mustard and knit over knit and purl over purl – read BINDING-OFF TIP! The sleeve measures approx. 46-45-43-42-40-39 cm = 18"-17¾"-17"-16½"-15¾"-15¼" from the division. Work the other sleeve in the same way. |
||||||||||
Diagram explanations |
||||||||||
|
||||||||||
 |
||||||||||
 |
||||||||||
Have you finished this pattern?Tag your pictures with #dropspattern #deartomyheartsweater or submit them to the #dropsfan gallery. Do you need help with this pattern?You'll find 28 tutorial videos, a Comments/Questions area and more by visiting the pattern on garnstudio.com. © 1982-2026 DROPS Design A/S. We reserve all rights. This document, including all its sub-sections, has copyrights. Read more about what you can do with our patterns at the bottom of each pattern on our site. |
||||||||||


With over 40 years in knitting and crochet design, DROPS Design offers one of the most extensive collections of free patterns on the internet - translated to 17 languages. As of today we count 324 catalogs and 12290 patterns - 12280 of which are translated into English (US/in).
We work hard to bring you the best knitting and crochet have to offer, inspiration and advice as well as great quality yarns at incredible prices! Would you like to use our patterns for other than personal use? You can read what you are allowed to do in the Copyright text at the bottom of all our patterns. Happy crafting!
Post a comment to pattern DROPS 199-7
We would love to hear what you have to say about this pattern!
If you want to leave a question, please make sure you select the correct category in the form below, to speed up the answering process. Required fields are marked *.