
Popular categories
Looking for a yarn?


























Comments / Questions (48)
 Sara wrote:
Buenas tardes, he terminado ya con la parte de la espalda y estoy haciendo el frontal derecho, mi pregunta es si el tejido debe de seguir creciendo ? Porque estoy siguiendo el patrón A2a y A2b y en las esquinas va creciendo con lo que no me queda un rectángulo si no que va quedando el lateral en diagonal.
29.10.2019 - 14:19
 Nelleke wrote:
Op 6 juni stelde Mieke de volgende vraag: de 2de rij is dan dubbel stokje 2losse, het dubbelstokjesgroepje, v, 6l, v enz.... als dit de manier is, dan meerdert de rij, dit kan niet de bedoeling zijn, hoe wordt dit opgelost? Ik loop ook tegen het probleem aan dat ik op deze wijze meerder. Hoe voorkom ik dit? Met vriendelijke groeten, Nelleke
23.09.2019 - 20:51DROPS Design answered:
Dag Nelleke,
Het heeft even geduurd, maar het patroon is nu aangepast met nieuwe telpatronen; er zat inderdaad een fout in.
15.11.2019 - 15:42
 Dagmar wrote:
Hallo, ich habe auch Probleme mit den Vorderteilen, die Häkelschruft ist etwas ungenau. Wird in der Hinreihe, also der mit den Stäbchengruppe, die erste Stäbchengruppe in eine 4er luftmaschenkette gehäkelt? Im Diagramm wird das ja in die 6er Luftmaschenkette gemacht. Das irritiert mich etwas. Ist es normal das dann die ersten 2 Stäbchengruppen dichter zusammen sitzen. Bitte erkläre. Lg Dagmar
17.09.2019 - 07:31DROPS Design answered:
Liebe Dagmar, ich bin etwas unsicher mit Ihrer Frage, entschuldigung. Wenn Sie die Vorderteile häkeln (separat), beginnen Sie mit A.2A (= 1 Stb, 2 Lm, 1 Stb), dann häkeln Sie wie zuvor bis nächster Ecke und mit A.2b (1 Stb, 2 Lm, 1 Stb) , zwischen A.2a und A.2b häkeln Sie wie zuvor, Diagramme zeigen die nächste Maschen, dh entweder 4 Lm oder 1Stb-gruppe um zu wissen, wie die Reihe beginnt/endet. Hoffentlich hilft es. Viel Spaß beim häkeln!
17.09.2019 - 10:22
Reni wrote:
Hallo. Wieso sehen eure Ecken des Musters, auf dem Fotos der Jacke ganz anders aus als im Diagramm angegeben? Ich hab mich schon gewundert wieso es mir so anders aussieht.
15.09.2019 - 16:17DROPS Design answered:
Liebe Reni, wenn Sie das Diagram häkeln, wie in der Anleitung und Diagram TExt erklärt, bekommen Sie dasselbe wie im Foto. hier lesen Sie mehr über Diagramme. Viel Spaß beim häkeln!
16.09.2019 - 13:01
 Deborah Novinger wrote:
Is there a way to get a written pattern for this? I'm having a lot of trouble reading the graph.
16.08.2019 - 16:39DROPS Design answered:
Dear Mrs Novinger, there are only diagrams bound together with the written pattern, you will find how to read a crochet diagram here. Happy crocheting!
19.08.2019 - 08:34
Cora wrote:
Ook ik loop vast op de voorpanden. Het patroon is 4 rijen. De voorpanden hebben in de beschrijving maar 2 rijen. Ik heb al gekeken bij de andere vragen die gesteld zijn maar daarin geen antwoord op de vraag over de 2 rijen in plaats van de 4 rijen.
26.06.2019 - 20:46DROPS Design answered:
Dag Cora,
Over de voorpanden haakje gewoon verder in patroon zoals op het achterpand (dus met de 4 rijen) en A.2a en A.2b laten alleen zien hoe je de hoeken haakt.
01.07.2019 - 12:06
Mieke wrote:
Kan je mee eens duidelijk zeggen waar het dubbelstokjes blok op de tweede rij van de voorkant moet komen. De eerste rij is duidelijk, ik start met een stokje, 2 losse, stokje , maak dan de 4 lossen bogen 2 maal en dan stokje, 6 losse, stokje enz. Dat lukt, MAAR de tweede rij, ik start met dubbel stokje, 2 losse, waar precies moet dat eerste dubbele stokjes groep komen, als ik dat in het eerste boogje doe, vermeerdert de rij, doe ik het in de 4lossenboog dan komt het op het einde niet uit.
05.06.2019 - 20:21DROPS Design answered:
Dag Mieke,
De dubbele stokjes groep moet je inderdaad in de lossenlus van de vorige toer haken. Bij de beschrijving van het rechter voorpand staat ook uitgelegd waar je de steken precies in haakt.
06.06.2019 - 21:14
 Julita wrote:
Wszystko robiłam jak w opisie stanęłam w miejscu "schemat A3 (6 oczek) " zrobiłam to i na nich zrobiłam wachlarze wyszło mi o jeden za dużo nie wiem dlaczego no i te łuki nad słupkami 3 oczka łańcuszka czy tak powinno być na zdjęciu wygląda jak by było tych oczek 6. Będę wdzięczna za wszelkie podpowiedzi
04.04.2019 - 18:58DROPS Design answered:
Witaj Julito! Przyjmę rozmiar S, mamy 84 sł2. Teraz przerabiamy 1-szy rząd schematy A.3 (=1 oł + 6 oł) = 1 łuk i powtarzamy schemat A.4 ponad pozostałymi oczkami w okrążeniu, tzn. 1 oś między 6-tym i 7-mym sł2, 6 oł, 1 oś między 12-tym i 13-tym sł2, 6 oł, 1 oś między 18-tym i 19-tym sł2, 6 oł, itd. (schemat A.4 jest powtórzony 13 razy) = 13 łuków, razem 14 łuków w okrążeniu. Następnie przerabiamy drugi rząd schematów A.3 i A.4 zgodnie ze schematem, czyli po 6 sł2 wokół każdego łuku, itd. Co do łuków w tych schematach: w 1-szym rzędzie są łuki z 6 oł, a w trzecim będzie 2 x więcej łuków, ale tylko z 3 oł. Powodzenia!
05.04.2019 - 18:22
Julita wrote:
Chciałabym się dowiedzieć jak zrobić ten rękaw bo nie bardzo mi pasuje opis i wzór do tego co widać na zdjęciu wg mnie powinno być 6 oczek łańcuszka a w następnym rzędzie wachlarze z 6sl podwójnych a w schemacie jest że są 3oczka
03.04.2019 - 19:52DROPS Design answered:
Witaj Julito! Napisz mi, w którym miejscu we wzorze się teraz znajdujesz, a postaram się pomóc. Pozdrawiam!
04.04.2019 - 16:23
 Jessica wrote:
Guten Abend Vielen Dank für die Antwort. Nur leider weiss ich nicht wie diese Vorterteile gehäkelt werden. Wie geht es nach Stäbchen-2LM-Stäbchen weiter???
25.03.2019 - 20:39DROPS Design answered:
Liebe Jessica, nach A.2b (1 Stb, 2 Lm, 1 Stb) in der Ecke, häkeln Sie weiter wie zuvor = 4 Lm, 1 feste M um den Lufmaschenbogen, 4 Lm, usw und mit A.2a (= 1 Stb, 2 LM, 1 Stb) in der Ecke enden. So weiter häkeln, dh zwischen A.2a und A.2b häkeln Sie wie zuvor zwischen die Ecken in A.1 aber es gibt jetzt durch A.2 keine Zunahmen mehr. Viel Spaß beim häkeln!
26.03.2019 - 09:07
|
||||||||||||||||||||||||||||||||||||||||||||||||||||||||||
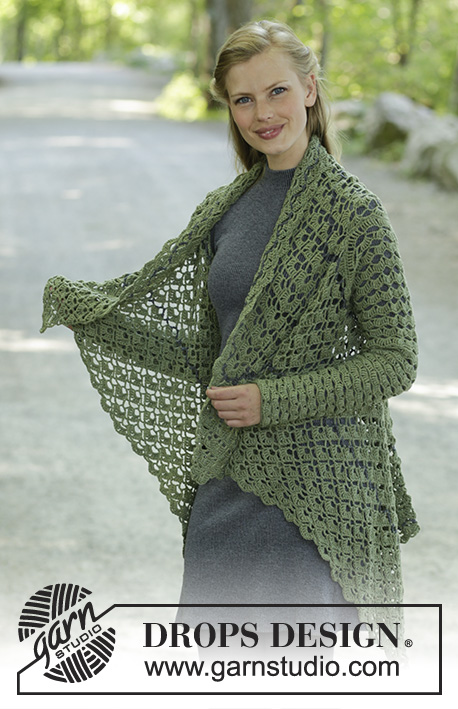
Green Envy#greenenvyjacket |
||||||||||||||||||||||||||||||||||||||||||||||||||||||||||
 |
 |
|||||||||||||||||||||||||||||||||||||||||||||||||||||||||
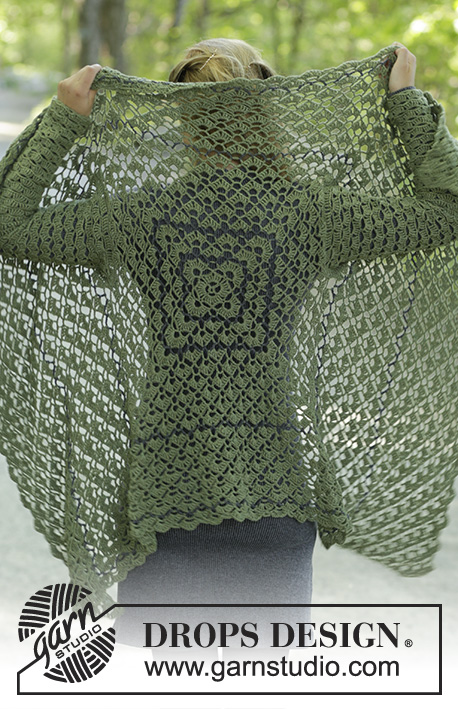
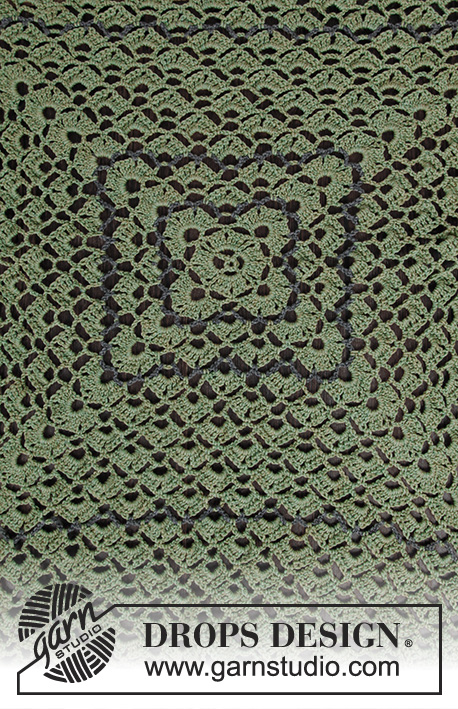
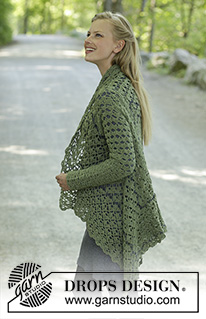
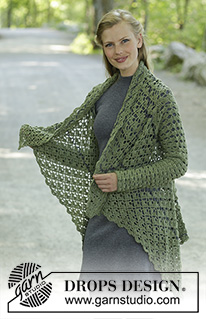
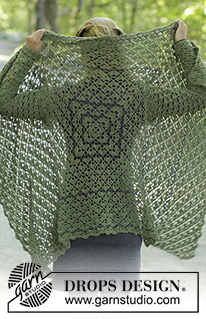
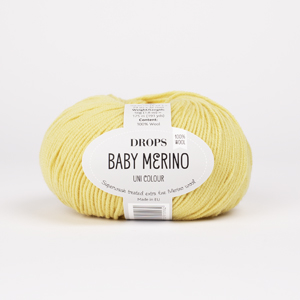
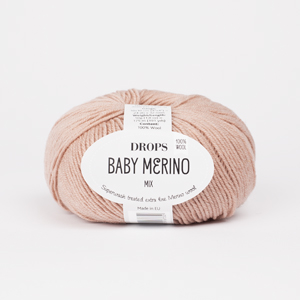
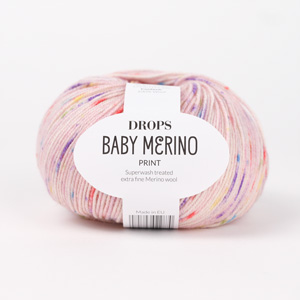
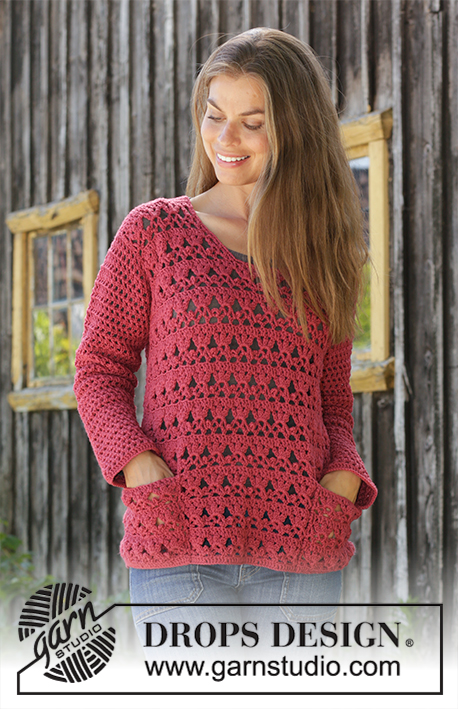
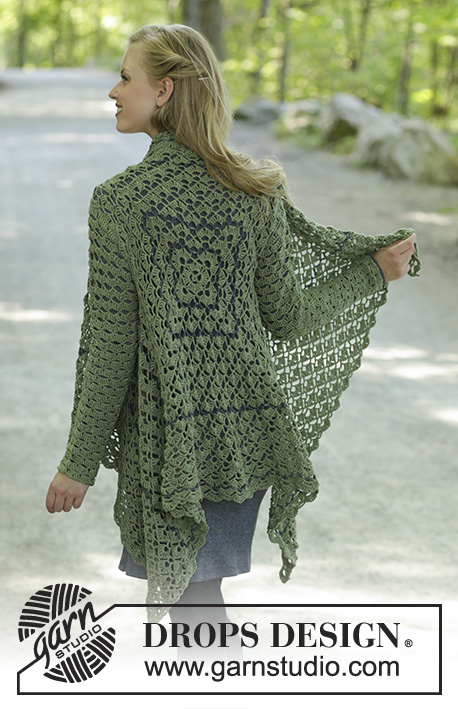
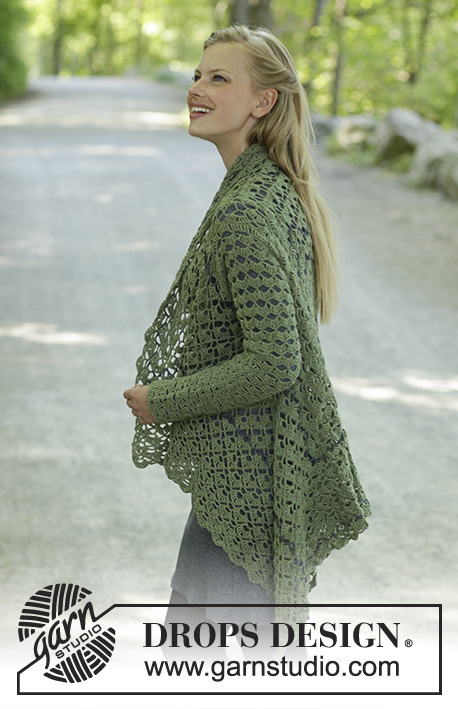
Crocheted jacket in DROPS BabyMerino. The piece is worked in a square with fans, lace pattern and stripes. Sizes S - XXXL.
DROPS 196-28 |
||||||||||||||||||||||||||||||||||||||||||||||||||||||||||
|
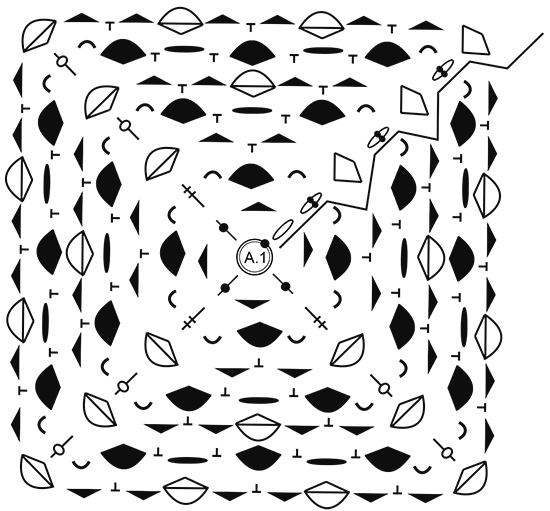
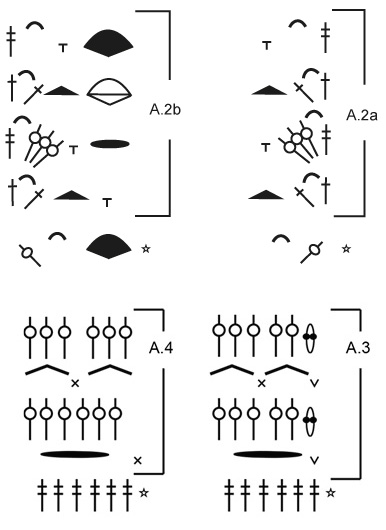
------------------------------------------------------- EXPLANATIONS FOR THE PATTERN: ------------------------------------------------------- PATTERN: See diagrams A.1 to A.4. CROCHET INFORMATION: On each round which begins with 1 double crochet, start with 3 chain stitches (which replace the first double crochet) and finish with 1 slip stitch in the 3rd chain stitch at the beginning of the round. On each round which begins with 1 treble crochet, start with 4 chain stitches (which replace the first treble crochet) and finish with 1 slip stitch in the 4th chain stitch at the beginning of the round. On each round which begins with 1 single crochet, start with 1 chain stitch (which replaces the first single crochet) and finish with 1 slip stitch in the first chain stitch at the beginning of the round. STRIPES: When the piece measures 5, 10, 20 and 36 cm from the middle (adjust so that the next round is a round without double crochet groups) work the next round with dark gray. Cut and fasten the dark gray strand when the round is finished. Do not cut the olive strand, this is carried forwards on the wrong side, but make sure it is not tight. ------------------------------------------------------- START THE PIECE HERE: ------------------------------------------------------- JACKET - SHORT OVERVIEW OF THE PIECE: The back piece is worked first in the round from the middle outwards, in a square, then worked back and forth over each front piece. The sleeves are worked in the round top down and sewn onto the square. BACK PIECE: The piece is worked in STRIPES – read description above. Work A.1 with hook size 4 mm / G/6 and olive. REMEMBER THE CROCHET GAUGE! When A.1 has been worked 1 time, repeat the last 2 rounds onwards with increases as before. Continue until the square measures 36-38-40-42-44-46 cm / 14¼"-15"-15¾"-16½"-17¼"-18" (i.e. 18-19-20-21-22-23 cm / 7"-7½"-8"-8¼"-8 ¾"-9" from the middle), adjust so that next round is a round as last round in diagram A.1 (i.e. a round with 1 single crochet in the middle of each side, so it is easier to divide for armhole). Now work the armholes as follows: Work over the first side as before (up to and including the first corner), work 48-52-55-59-62-62 chain stitches, skip the first half of the next side for sleeve, work the second half to the corner, the next side as before as far as the corner, work the first half of the last side as before, work 48-52-55-59-62-62 chain stitches, skip the last half of the last side for sleeve and work the last corner as before. On the next round continue the pattern as before; around the chain stitches for the sleeves work pattern as before (i.e. you work the same number of repeats as you skipped, including the increase in the corner). Continue in the round until the piece measures a total of 78-80-82-84-86-88 cm / 30¾"-31½"-32¼"-33"-33⅞"-34⅝" / 30¾"-31½"-32¼"-33"-33⅞"-34⅝", adjust so that you finish with 1 round of treble crochet groups (i.e. 39-40-41-42-43-44 cm / 15¼"-15¾"-16⅛"-16½"-17"-17¼" from middle of square). Cut the strand. RIGHT FRONT PIECE: Start in the middle of the first corner. The first row is worked from the wrong side as follows: Work A.2b (i.e. 1 double crochet + 2 chain stitches + 1 double crochet are worked in the 4 chain stitches which replaced the first treble crochet at the beginning of the previous round,, 4 chain stitches, skip over first chain space, 1 single crochet around next chain space) – read CROCHET INFORMATION, then work pattern as before until there are 2 chain stitches left before the next corner, work A.2a over the corner (i.e. 4 chain stitches, 1 double crochet + 2 chain stitches + 1 double crochet are worked in the treble crochet in the corner). Continue this pattern back and forth (i.e. repeat the last 2 rows in A.2). Work until the piece measures 61-63-65-67-69-71 cm / 24"-24¾"-25½"-26⅜"-27⅛"-28" from the middle of the square; adjust so that you finish with 1 row of treble crochet groups. Cut and fasten the strand. LEFT FRONT PIECE: Work as for right front piece. SLEEVE: Work 97-104-111-118-125-125 chain stitches with hook size 4 mm / G/6 and olive and form them into a ring with 1 slip stitch in the first chain stitch. Work 4 chain stitches (= 1 treble crochet), skip 1 chain stitch, 1 treble crochet in each of the next 5 chain stitches, * skip 1 chain stitch, work 1 treble crochet in each of the next 6 chain stitches *, work from *-* and finish with 1 slip stitch in the 4th chain stitch at the beginning of the round = 84-90-96-102-108-108 treble crochets. Then work pattern in the round as follows: Work A.3 (= 6 stitches) and repeat A.4 over the remaining stitches (= 13-14-15-16-17-17 times in width). Continue this pattern. When the sleeve measures 4 cm / 1½", adjust so that the next round is round 3 in A.3, decrease as follows: Work 1 chain stitch, skip the first 4 chain stitches (= replaced the first treble crochet on the previous round) and 2 treble crochets on the previous round, continue the pattern as before until there are 3 chain stitches and 1 slip stitch left, skip 3 treble crochets on the previous round and finish with 1 slip stitch in the first chain stitch (= 3 double crochets decreased in each side = a total of 6 double crochets decreased). The next round is worked in the same way as round 2 (so that the chain-spaces continue and are displaced). Continue rounds 1 to 4 as before. Decrease like this every 10-8-8-7-7-7 cm / 3⅞"-3⅛"-3⅛"-2 ¾"-2 ¾"-2 ¾" a total of 5-6-6-7-7-7 times = 54-54-60-60-66-66 stitches (on 1 round of treble crochets). When the sleeve measures approx. 53 cm (adjust so that you finish with 1 round of chain stitches and single crochets) cut and fasten the strand. Work 1 more sleeve in the same way. ASSEMBLY: Sew the sleeves to the square with olive, in the outermost loop of the outermost stitch. |
||||||||||||||||||||||||||||||||||||||||||||||||||||||||||
Diagram explanations |
||||||||||||||||||||||||||||||||||||||||||||||||||||||||||
|
||||||||||||||||||||||||||||||||||||||||||||||||||||||||||
 |
||||||||||||||||||||||||||||||||||||||||||||||||||||||||||
 |
||||||||||||||||||||||||||||||||||||||||||||||||||||||||||
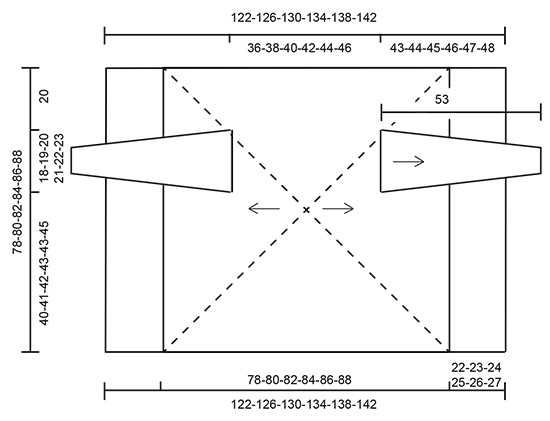 |
||||||||||||||||||||||||||||||||||||||||||||||||||||||||||
Have you finished this pattern?Tag your pictures with #dropspattern #greenenvyjacket or submit them to the #dropsfan gallery. Do you need help with this pattern?You'll find 11 tutorial videos, a Comments/Questions area and more by visiting the pattern on garnstudio.com. © 1982-2026 DROPS Design A/S. We reserve all rights. This document, including all its sub-sections, has copyrights. Read more about what you can do with our patterns at the bottom of each pattern on our site. |
||||||||||||||||||||||||||||||||||||||||||||||||||||||||||






With over 40 years in knitting and crochet design, DROPS Design offers one of the most extensive collections of free patterns on the internet - translated to 17 languages. As of today we count 333 catalogs and 12525 patterns - 12515 of which are translated into English (US/in).
We work hard to bring you the best knitting and crochet have to offer, inspiration and advice as well as great quality yarns at incredible prices! Would you like to use our patterns for other than personal use? You can read what you are allowed to do in the Copyright text at the bottom of all our patterns. Happy crafting!
Post a comment to pattern DROPS 196-28
We would love to hear what you have to say about this pattern!
If you want to leave a question, please make sure you select the correct category in the form below, to speed up the answering process. Required fields are marked *.