
Popular categories
Looking for a yarn?


Megjegyzések / Kérdések (13)
![]() FRANCOISE WEIS írta:
FRANCOISE WEIS írta:
BONJOUR, POUR la bordure, comment fait on les rangs suivants après le 4 ème rang afin de pouvoir avoir 3 cm ?pour moi la vidéo est incompréhensible car la technique de tricot est totalement différente de la mienne et cela va trop vite
14.10.2024 - 04:06A DROPS Design válasza:
Bonjour Mme Weis, vous allez tricoter les rangs 3 et 4 encore 3 fois (vous augmentez encore 3 fois les mailles envers, vu sur l'endroit), ou si vous préférez, augmentez le nombre de mailles envers, vu sur l'endroit jusqu'à ce qu'il y ait 11 mailles envers; puis tricotez les mailles comme elles se présentent. Notez que vous pouvez ajuster la vitesse de la vidéo en cliquant sur la route crantée dans la barre de lecture. Bon tricot!
14.10.2024 - 09:40
![]() Maria Kassalia írta:
Maria Kassalia írta:
Hallo liebes tiem können sie mir erkläre was sie genau meinen mit....und mit 2 maschen in rück reihe abnehmen? und 2 Maschen in Rück-Reihen abnehmen.
01.10.2024 - 19:22A DROPS Design válasza:
Liebe Frau Kassalia, man muss wie zuvor zunehmen (und nicht abnehmen, eine Korrektur erfolgt, danke für den Hinweis). Viel spaß beim Stricken!
02.10.2024 - 08:19
![]() Jean Brown írta:
Jean Brown írta:
Tension is 32 rows in height. Pattern reads repeat rows 3&4 for 10 cm = 151 sts. You increase 6 stitches over 2 rows 32 divided by 2 =16 16 x 6 sts=96 plus the 19 =115 You are saying 151?
30.12.2023 - 14:29A DROPS Design válasza:
Dear Mrs Brown, the tension 32 rows = 10 cm is when you work stocking stich, you work here garter stitch and you will work 24 ridges (2 rows) increasing 6 sts on each ridge (4 sts from RS + 2 sts from WS), so that you will increase 24x6=144 sts + 7 sts = 151 sts in total. And the 24 ridges (48 rows) should give you 10 cm. Happy knitting!
02.01.2024 - 10:48
![]() Lola írta:
Lola írta:
¿Qué lana alternativa recomiendan para la realización de este patrón para obtener los mejores resultados? ¿Y cuánta cantidad debería comprar de la misma?
28.06.2023 - 20:23A DROPS Design válasza:
Hola Lola, las mejores lanas para sustituir a 300 gr de BabyAlpaca Silk son: 239g de DROPS Flora (1 hilo); 287g de DROPS Baby Merino (1 hilo); 295g de DROPS Nord (1 hilo) y 300g de DROPS Alpaca (1 hilo). Para más información sobre cómo cambiar de hilos, lee la siguiente lección: https://www.garnstudio.com/lesson.php?id=14&cid=23
30.06.2023 - 20:41
![]() Moulis Lydie írta:
Moulis Lydie írta:
Bonjour, je viens de finir le point A1 et je n'ai pas du tout 229 mailles car dans ce point, il y a beaucoup de diminutions. 229 mailles c'est le nombre obtenu avec les augmentations normales mais le descriptif ne compte il pas les diminutions (2 mailles ensemble...) ? Mon châle n'est pas plat comme la photo du coup... Merci de votre reponse
24.08.2022 - 07:32A DROPS Design válasza:
Bonjour Mme Moulis, toutes les diminutions de A.1 sont compensées par 1 jeté pour former le point ajouré, autrement dit, le nombre de mailles de A.1 ne doit pas bouger et toujours être de 8 mailles, ainsi vous allez augmenter 4 mailles tous les 2 rangs soit 13 fois = 52 augmentations + 2 mailles tous les rangs sur l'envers soit 13 fois = 26 augmentations + 151 mailles = 229 mailles. En espérant que ceci puisse vous aider. Bon tricot!
24.08.2022 - 08:47
![]() Sara írta:
Sara írta:
Salve, vorrei capire meglio questa parte relativa alla "Panoramica delle sezione successiva": 4 maglie dal diritto del lavoro e 2 maglie del lavoro e 2 maglie dal rovescio rovescio del lavoro. Cosa si intende con "2 maglie del lavoro"? Grazie
10.07.2022 - 22:21A DROPS Design válasza:
Buonasera Sara, grazie per la segnalazione: abbiamo corretto il testo, erano rimasti dei refusi. Buon lavoro!
11.07.2022 - 22:02
![]() Monika Händel írta:
Monika Händel írta:
Ich bin es nocheinmal. Der Poncho ist weiss mit Muster. Habe schon alles durchsucht. Ich kann hier leider kein Foto senden.
11.04.2022 - 19:31
![]() Monika Händel írta:
Monika Händel írta:
Ich habe bei Pinterest einen Poncho entdeckt,den ich gerne nachstricken möchte. Leider suche ich vergeblich nach der Anleitung. Können Sie mir helfen? Ich wäre sehr froh darüber. Vielen Dank, Monika
11.04.2022 - 19:28A DROPS Design válasza:
Liebe Monika, Sie können in der Suchleiste "Poncho" eingeben, dann werden Ihnen die Ponchos angezeigt, die auf unserer Homepage zur Verfügung stehen. Vielleicht finden Sie Ihr Modell oder zumindest ein ähnliches. Viel Spaß beim Stöbern!
13.04.2022 - 11:31
![]() Gitte írta:
Gitte írta:
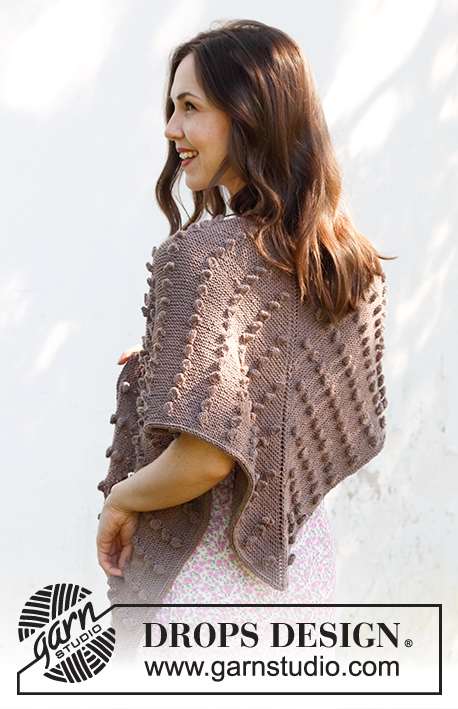
Der mangler beskrivelse af boblerne !!!!!
21.03.2022 - 10:56A DROPS Design válasza:
Hei Gitte. Ja, her var det lagt til feil tekst i den danske oppskriften. Vi har nå lagt til forklaring til boblen. Takk for at du gjorde oss oppmerksom på dette. mvh DROPS Design
21.03.2022 - 14:28
![]() Josianne Santoro írta:
Josianne Santoro írta:
Salve, vorrei sapere se i grafici del modello indicano soltanto il ferro di andata oppure se sono indicati tutti i ferri, nella spiegazione del modello non mi pare di averlo visto specificato. Grazie
10.03.2022 - 18:17A DROPS Design válasza:
Buonasera Josianne, il diagramma riporta sia i ferri di andata che quelli di ritorno come indicato nel paragrafo "motivo". Buon lavoro!
10.03.2022 - 18:52
|
||||||||||||||||||||||
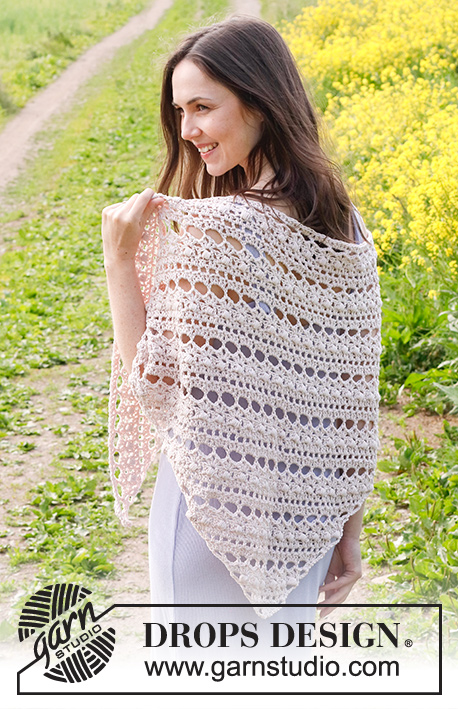
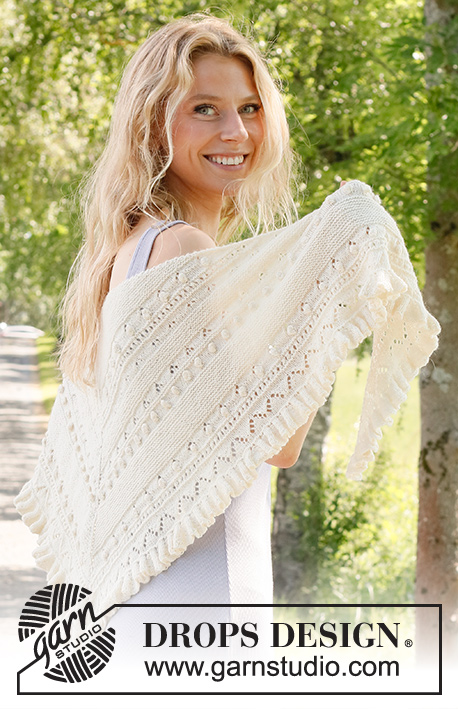
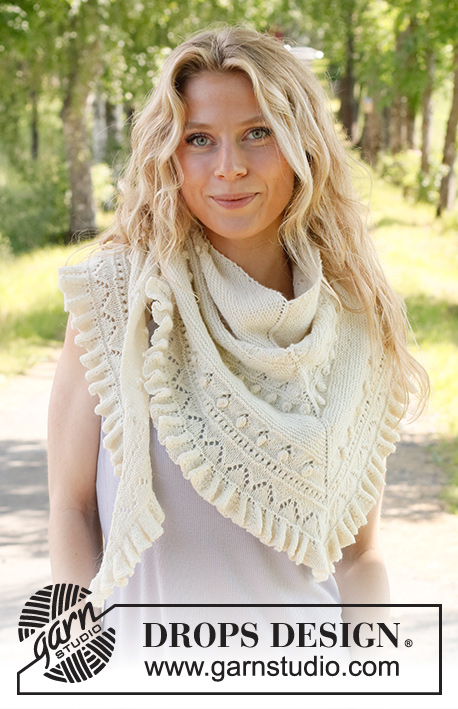
Ruffles Dream#rufflesdreamshawl |
||||||||||||||||||||||
 |
 |
|||||||||||||||||||||
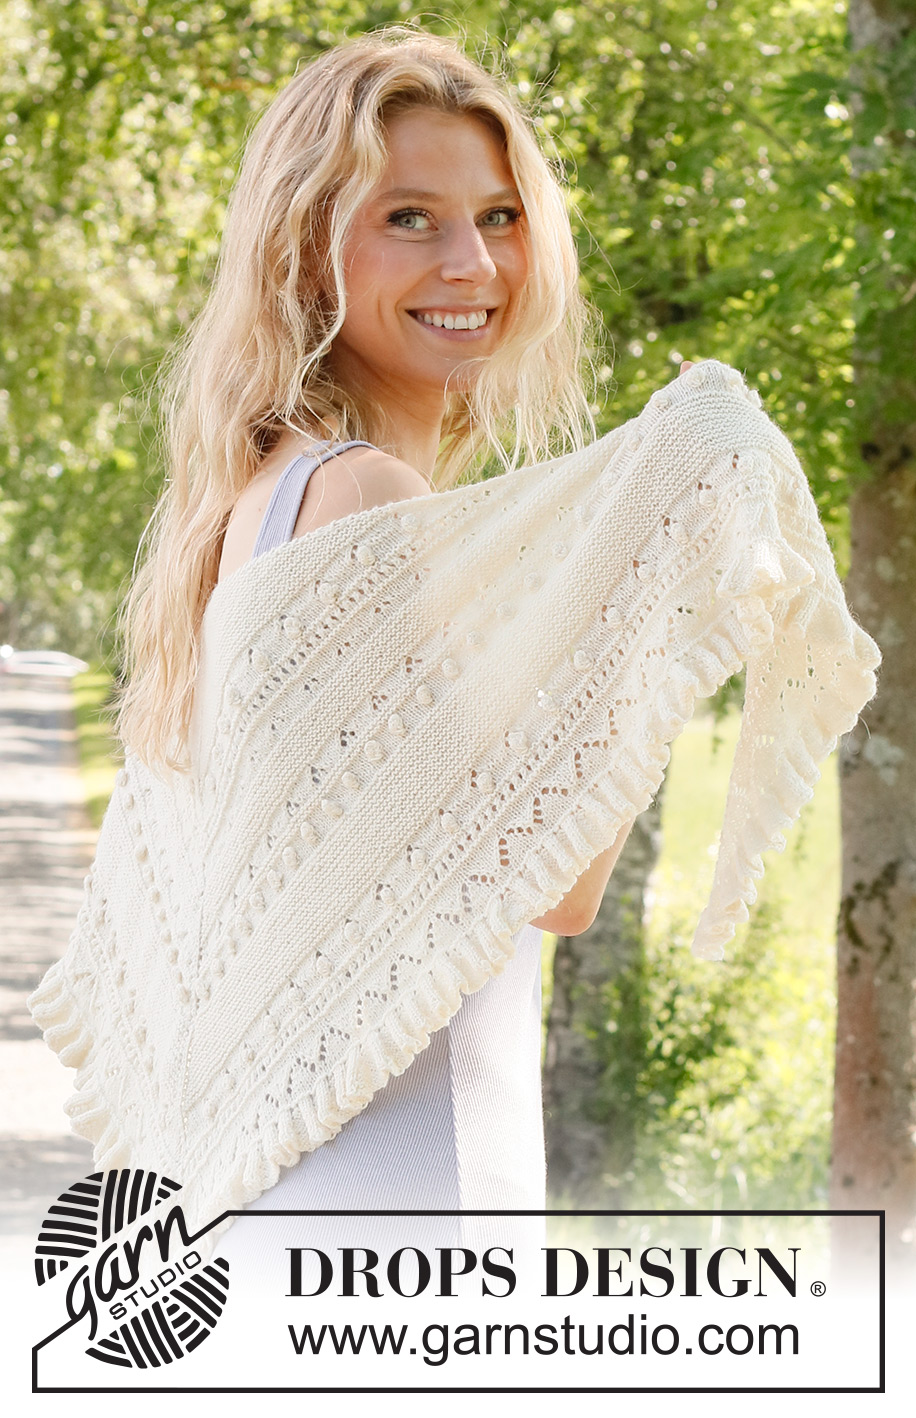
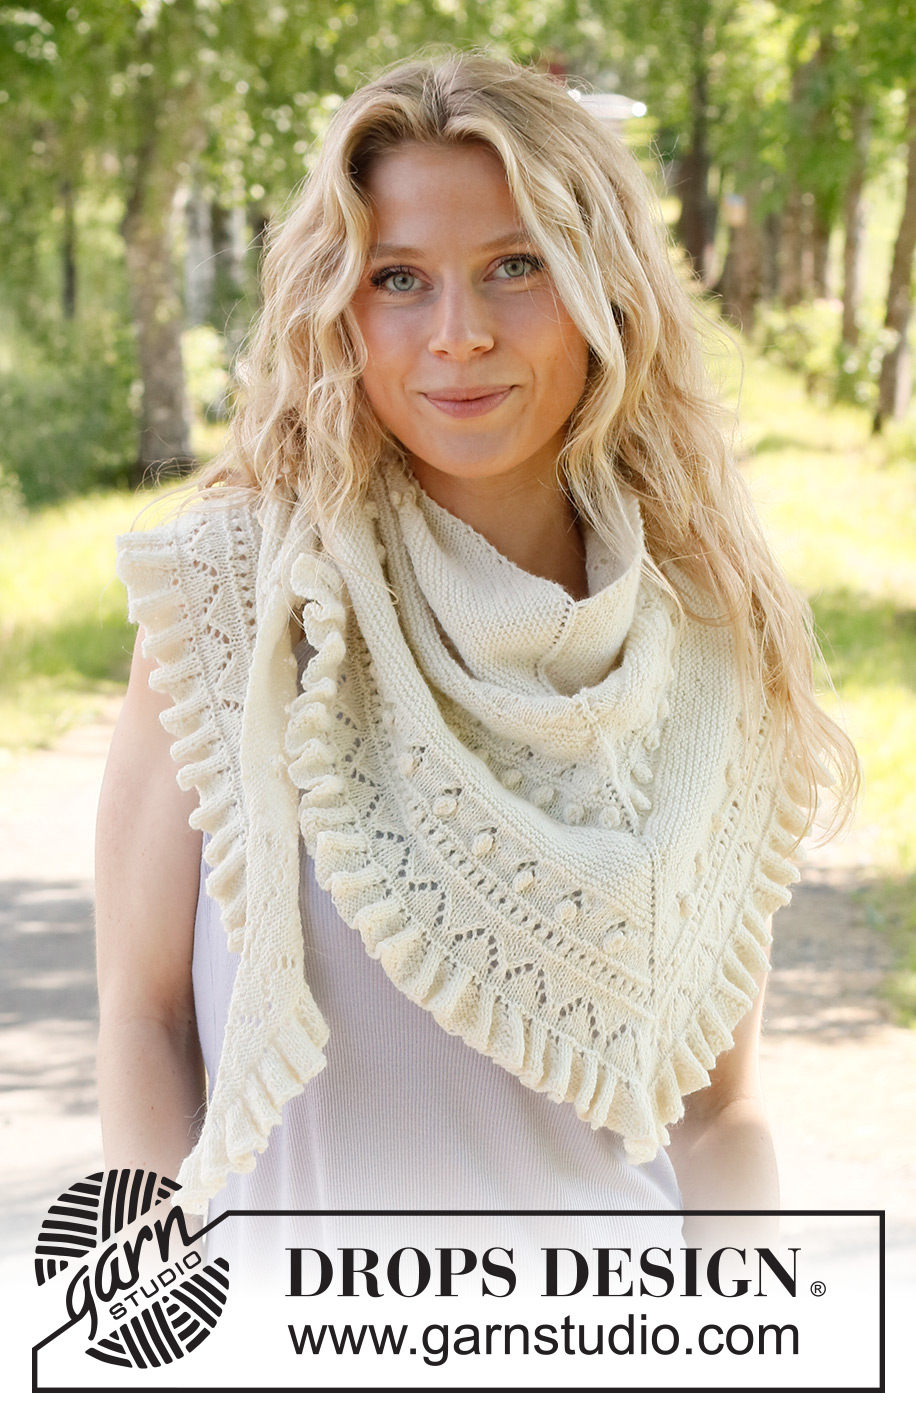
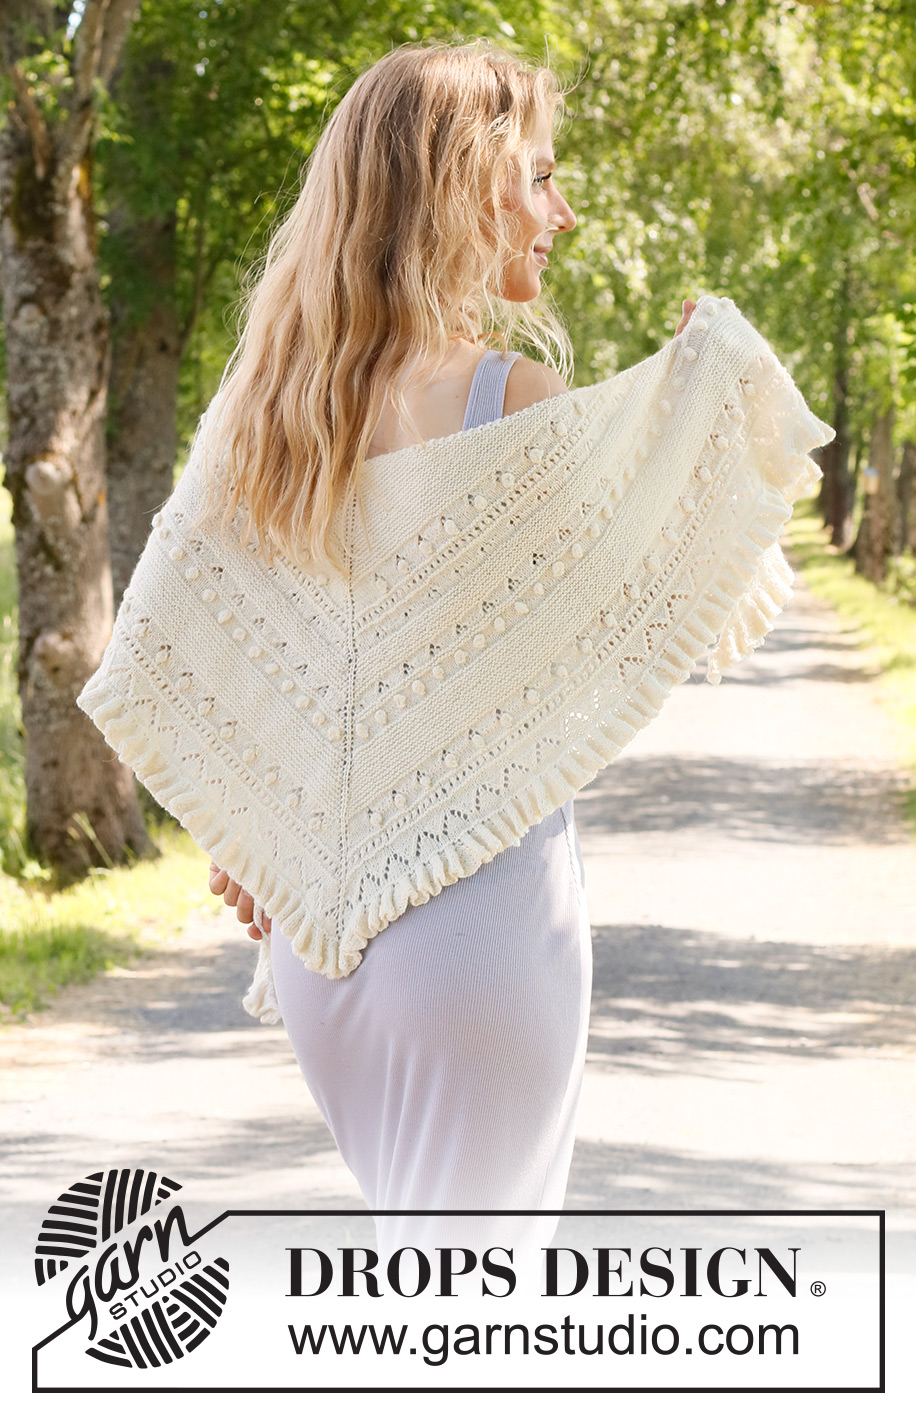
Kötött kendő DROPS Baby Alpaca Silk fonalból. A darabot fentről lefelé irányban készítjük, csipke- és csavartmintával, valamint fodrokkal
DROPS 229-9 |
||||||||||||||||||||||
|
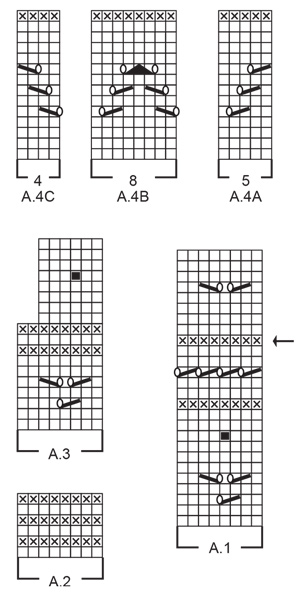
---------------------------------------------------------- TANÁCSOK A MINTA ELKÉSZÍTÉSÉHEZ: ---------------------------------------------------------- BORDA / LUSTAKÖTÉS (oda-vissza haladva - síkban - kötve). Minden sorban sima szemekkel kötünk. Minta: Lásd az A.1 - A.4 jelű diagramokat A diagramok a minták minden sorát a színe oldal felől mutatják. ---------------------------------------------------------- A MINTALEÍRÁS ITT KEZDŐDIK: ---------------------------------------------------------- KENDŐ: RÖVID ÖSSZEFOGLALÓ A darabot körkötőtűn kötjük, fentről lefelé haladva, oda-vissza. A szemek és a szaporítások nagy száma miatt egynél több vagy extra hosszú körkötőtűre lehet szükségünk. KENDŐ: A kezdéshez szedjünk fel 7 szemet a 3 mm vastag körkötőtűre, a DROPS BabyAlpaca Silk fonallal. 1 sort kötünk sima szemekkel a fonákoldal felől. Ezután haladjunk a következő módon: 1. sor (= SZO) Kössünk 1 szélszemet LUSTAKÖTÉSSEL - olvassuk el a fenti magyarázatot, 1 rh, 2 sima, 1 rh, 1 szem harisnyakötéssel (= a középső szem), 1 rh, 2 sima, 1 rh, és 1 szélszem lustakötéssel (= 4 szemet szaporítottunk):. 2. sor (= FO): Kössünk 1 szélszemet lustakötéssel, 1 rh,S a középső szemig, a középső szemet F kötjük, S, amíg 1 szem marad a sorban, 1 rh és 1 lustakötéses szélszemmel fejezzük be a sort (= 2 szemet szaporítottunk) 3. sor (= SZO) 1 szélszem lustakötéssel, 1 rh, S, amíg a középső szemig, 1 rh, 1 sima,(= a középső szem), 1 rh, S, amíg 1 szem marad a sorban, 1 rh, és 1 lustakötéssel kötött szélszem (= 4 szemet szaporítottunk). 4. sor (= FO): Kössünk 1 szélszemet lustakötéssel, 1 rh, S a középső szemig, a középső szemet F kötjük le, , S amíg 1 szem marad a sorban, 1 rh és 1 lustakötéses szélszemmel fejezzük be a sort (= 2 szemet szaporítottunk) Ism a 3. és 4. sorokat, amíg a darabunk 10 cm-es lesz = 151 szemünk lesz a kötőtűn. NE FELEDKEZZÜNK MEG A MEGFELELŐ KÖTÉSPRÓBA BETARTÁSÁRÓL! A KÖVETKEZŐ SZAKASZ ÁTTEKINTÉSE: Most kössük a mintát a diagramok szerint - olvassuk el a magyarázatot a MINTÁRÓL, mielőtt folytatnánk a munkát. Ugyanakkor, folytassuk a szaporításokat a korábbiak szerint (= 4 szem a SZO felől és 2 szem a FO felől), a kendő teljes méretéig. Minta: Minden diagramot a SZO-n kezdünk a sor elején a szaporítás után. Kössük a mintát a középső szemig. Ha a középső szem előtt nem fér ki egy teljes mintaegység, a megmaradt szemeket harisnyakötéssel kötjük. Szaporítsunk a középső szem mindkét oldalán, és kössünk ugyanannyi szemet harisnyakötéssel, mint amennyit a középső szem előtt kötöttünk, majd kössük a mintát, így a minta a kendő két oldalán szimmetrikus lesz. A szaporított szemeket harisnyakötéssel kötjük, mindkét oldalon 1-1 lustakötéssel kötött szélszemmel, a kendő középső szemét harisnyakötéssel. A diagramok mintáit a köv módon készítjük: Kössük az A.1 jelű mintát a fenti magyarázat szerint. Amikor az A.1 jelű diagram mintájának minden sorát elkészítettük egyszer 229 szemünk van a kötőtűn a körben. Kössük az A.2 jelű mintát 3 cm-ig. Amikor az A.2 jelű diagram mintájának minden sorát elkészítettük egyszer 271 szemünk van a kötőtűn a körben. Kössük az A.3-as mintát. Amikor az A.3 jelű diagram mintájának minden sorát elkészítettük egyszer 325 szemünk van a kötőtűn a körben. Kössük az A.2 jelű mintát 6 cm-ig. Amikor az A.2 jelű diagram mintájának minden sorát elkészítettük egyszer 409 szemünk van a kötőtűn a körben. Kössük az A.1 jelű mintát, de az A.1 diagramon a nyíllal jelölt sorban fejezzük be = 463 szem. Ezután az A.4 jelű mintát kössük a a következő módon: A sor elején a szaporítás után kössük az A.4A jelű mintát, majd az A.4B jelű minta, amíg 4 vagy több szem marad a középső szem előtt, kössük az A.4C jelű mintát majd, ha szükséges, harisnyakötés a középső szemig, szaporítsunk a középső szem mindkét oldalán és kössük a középső szemet a korábbiak szerint. Kössünk ugyanannyi szemet harisnyakötéssel, mint a középső szem előtt kötöttünk, kössük az A.4A jelű mintát, kössük az A.4B jelű mintát ugyanannyi alkalommal, mint a középső szem előtt és a sort a .C mintával, és a sor végén a szaporítással fejezzük be. Folytassuk a mintát a fentiek szerint, amíg az A.4 jelű mintát elkészítettük. A kendő kb 58 cm-es a középső szem mellett mérve, és 505 szem van a sorban. Kössünk 1 sort S szemekkel a SZO felől, majd 1 sort S szemekkel a FO felől (a szaporításokat készítsük a korábbiak szerint, ügyeljünk arra, hogy a szemek száma a sorban 4-gyel osztható + 1 legyen). Az alábbi magyarázat szerint kössünk fodros szélt a kendőre: FODROS SZÉL: A fodros szélt minden szemen kötjük, és nem szaporítunk a középső szem két oldalán. 1. sor (= SZO) Kössünk 1 szélszemet lustakötéssel, 1 rh. * 3 sima, 1 rh, 1 fordított, 1 rh. * Ismételjük a *-* közötti részt, amíg 4 szem marad a sorban, 3 sima, és 1 lustakötéses szélszemmel fejezzük be a sort. 2. sor (= FO): 1 szélszem lustakötéssel, 1 rh, 1 sima, * 3 F, 3. S (a rh-sokat S szemként kötjük, a helyükön lyuk marad). * Ismételjük a *-* közötti részt, amíg 5 szem marad a sorban, 3 F, 1 sima, 1 rh, és 1 lustakötéses szélszemmel fejezzük be a sort. 3. sor (= SZO) Kössünk 1 szélszemet lustakötéssel 1 1 rh, 2 F * 3 sima, 1 rh, 3. Fordított, 1 rh. * Ismételjük a *-* közötti részt, amíg 6 szem marad a sorban, 3 sima, 2 fordított szem, 1 rh, és 1 lustakötéses szélszemmel fejezzük be a sort. 4. sor (= FO): Kössünk 1 szélszemet lustakötéssel, 1 rh. 3 sima * 3 F, 5 sima. * Ismételjük a *-* közötti részt, amíg 7 szem marad a sorban, 3 F, 3 sima, 1 rh, és 1 lustakötéses szélszemmel fejezzük be a sort. Folytassuk a fodrok szaporítását, minden SZO sorban, egymás fölött összesen 5 alkalommal (= 11 szem lesz minden F szemes szakaszban a SZO felől nézve). A szegély kb 3 cm széles. A FO felől, a S szemeken simával, a F szemeken fordítottal, lazán láncoljuk le a szemeket. |
||||||||||||||||||||||
Diagram magyarázatok |
||||||||||||||||||||||
|
||||||||||||||||||||||
|
||||||||||||||||||||||
Elkészítette ezt a mintát?Akkor adja a képeihez a #dropspattern #rufflesdreamshawl tageket, vagy küldje be a képet a #dropsfan galériába. Segítségre van szüksége a modell elkészítéséhez? 19 tutorial videót találhat, és egy kérdés/felelek részt, és még többet, ha a mintát megkeresi a garnstudio.com oldalán. © 1982-2025 DROPS Design A/S. Minden jog fenntartca. Ez a documentim, az összes részével védelem alatt áll. A weboldalunkon többet olvashat arról, hogy mit tehet és mit nem a mintáinkkal. |
||||||||||||||||||||||


Több mint 40 év tapasztalattal a kötés és horgolásminták tervezésében a DROPS Design az ingyenes minták egyik legszélesebb körű gyűjtemnyét kínálja az Interneten, 17 nyelvre fordítva. A mai nappal 314 katalógust 11822 mintát tudunk számon tartani a mintákból 11804 -t fordítottunk le magyarra (európai mértékegységekkel).
keményen dolgozunk azon, hogy a kötés és a horgolás világából a legjobbat hozzuk el, remek fonalakkal, hihetetlen árakon. Ha mintáinkat nemcsak személyes használatra szeretné használni, minden minta alján a Copyright szövegben olvashat arról, mit tehet s mit nem. Sikeres kézimunkázást!
Post a comment to pattern DROPS 229-9
Szívesen vesszük, ha megosztja velünk gondolatait erről a mintáról.
Ha kérdést szeretne feltenni, ügyeljen arra, hogy a megfelelő kategóriát válassza ki, így fegyorsíthatja a válaszadás folyamatát. Það verður að merkja við svæði merktri með *.