
Popular categories
Looking for a yarn?


Megjegyzések / Kérdések (23)
![]() Leeanne írta:
Leeanne írta:
Addtnl. info for my last comments: I was confused by the first sentence in the short rows instructions stating to do 6 rows over all stitches. I thought that was part of the directions and the piece started with 6 rows before starting the short row repeat cycle but that is incorrect. This sentence is just telling you that there are 6 rows included in the short row instruction cycle that are not, in fact, short rows – 6 full rows and 2 short rows (not in that order) are listed in the row cycle.
06.09.2025 - 15:15
![]() Leeanne írta:
Leeanne írta:
(Cont. from previous two comments) next row starts with R3 and finishes with L3 and last row starts with L4 and finishes with R4. Then you start the cycle again with the first short row. So yes, the short row cycle is short row, full row, short row, full row, full row, full row, full row, full row as the pattern states (1 SR followed by 1 full row followed by 1 SR followed by 5 full rows). There are no edges in which you are not doing a picot edge instruction which allows for an even 8 row cycle
06.09.2025 - 15:08
![]() Leeanne írta:
Leeanne írta:
(continued from my previous comment) work the L2 row to the first marker and turn to work back to the “beginning” of the left side row, ending with L3, turn and start a new row with L4, working all the way across, ending with R4, (all the remaining rows in the cycle go all the way across – no more short rows) next row begins with R1 and goes all the way across to the last 4 stitches, ending in L1, turn and start with L2 and go all the way across to finish with R2, (cont. in next comment)
06.09.2025 - 15:03
![]() Leeanne írta:
Leeanne írta:
For anyone that needs it, here is the cycle of rows, combining picot edge with short rows instructions (it helps to draw this out on paper): start with right side 1 (R1) and work a short row (to first marker only, not all the way across), turn and work back to the beginning and knit the last four with R2, turn to start next row beginning with R3 and knit all the way across, ending this row with L1, then start the second short row with L2, (continued in next comment)
06.09.2025 - 14:58
![]() Leeanne írta:
Leeanne írta:
I figured it out! It is definitely not too complicated but they could have written this pattern differently so it wouldn’t take weeks or trial and error to figure out how to work the short rows in with the picot edge. Maybe we were just making it too complicated. I don’t have enough room to write the pattern in this comment so I’ll start a new one. It is easier to draw your lines and mark each end with the picot line number but I’ll try to write it here in my next comment.
06.09.2025 - 14:55
![]() Leeanne írta:
Leeanne írta:
I think I get it! I will test it in the morning and comment again trying to explain it for others if I have it right. My last two comments are wrong for sure. It helps to draw the rows as a picture on paper and mark the ends with the line number.
06.09.2025 - 05:10
![]() Leeanne írta:
Leeanne írta:
Revising my last comment: I now have it written as: short row, R1 &L1 on the same row, short row, R2 & L2, short row, R3 & L3, short row, R4 & L4. But this adds up to 8 rows on the sides and only 4 rows in the middle, not 6. Also not sure why the short rows directions refers to the middle stitches as being 70 (for the second size) when it’s only 30 (if excluding 25 on each end) or 72 (if excluding only the outermost 4 on each end).
06.09.2025 - 04:26
![]() Leanne írta:
Leanne írta:
The directions for the short rows are difficult to figure out. I’ve been working at this for a few weeks with my MIL, have restarted my project 7 times and we still don’t have it right. So we are alternating between right and left rows 1, 2, etc. when doing full rows? We are not doing any picot edge instructions when doing short rows, correct? To incoorporate the short rows, does it go: left row 1, right row 1, short row, left row 2, right row 2, short row, etc. through all four edge rows?
06.09.2025 - 02:40
![]() Leeanne írta:
Leeanne írta:
In addition to my last comment, I’m also confused because it says for garter stitch to knit two rows. The main directions says start with the right Picot edge, then knit the directions for garter stitch for the rest of the row, except for the last four and then knit the directions for the left edge on the last four. How do you knit two rows for the garter stitch directions in between doing the right and left edges?
14.07.2025 - 19:22A DROPS Design válasza:
Dear Leeanne, the garter stitch structure is 2 knit rows. So whenever most of the stitches in the row are knitted, both from the right side and the wrong side, the resulting texture will be garter stitch. In the picot edges we are already using garter stitch, since all other stitches except for the 4 stitches on each side for the picot are knitted from the right side and the wrong side. So you just need to work as indicated; the edges will have the picot texture while the remaining stitches are knitted. Happy knitting!
19.07.2025 - 17:47
![]() Leeanne írta:
Leeanne írta:
A video of the actual pattern, please! This is so confusing. I’ve now learned how to do picot edges and short rows, but I can’t understand how to do both at the same time. How do you know which row of the picot edge you’re on if you’ve turned around and gone the other direction halfway through a row? And then when you start the next row do you count as if half the row is row 5 and half is row 6 or just continue with the next direction for that edge in sequence, ignoring row numbers?
14.07.2025 - 19:18A DROPS Design válasza:
Dear Leeanne, please remember to mark your comments as questions so that we can see them and answer sooner. When you are combining the short rows and the picot edges, count only the rows where you reach the edges; those rows where you turn before reaching the edges are not taken into account for the picot edges on that side. Happy knitting!
19.07.2025 - 17:48
|
|
Berry Kiss#berrykissvest |
|
 |
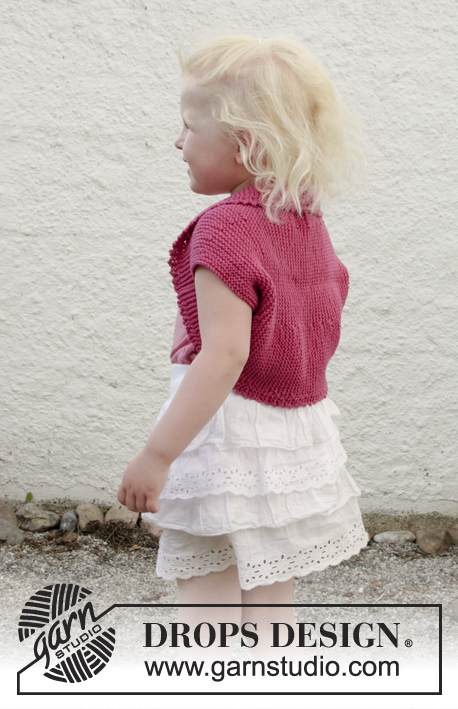 |
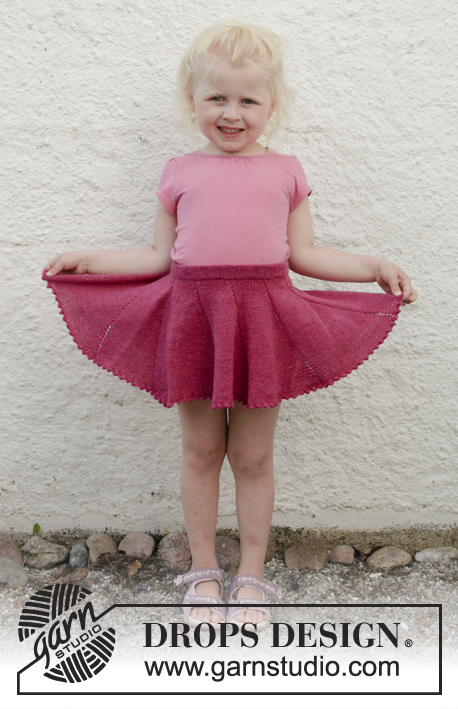
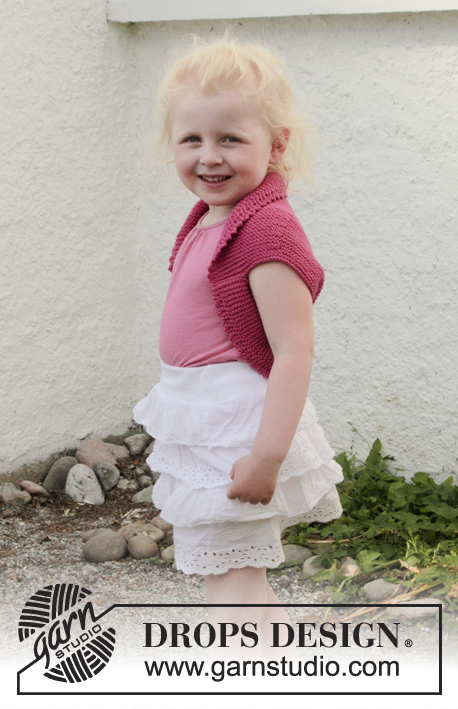
Kötött boleró rövidített sorokkal, pikós szegéllyel, és lustakötéssel, DROPS Cotton Merinó fonalból. 3-12 éves gyerekekre való méretben.
DROPS Children 28-7 |
|
|
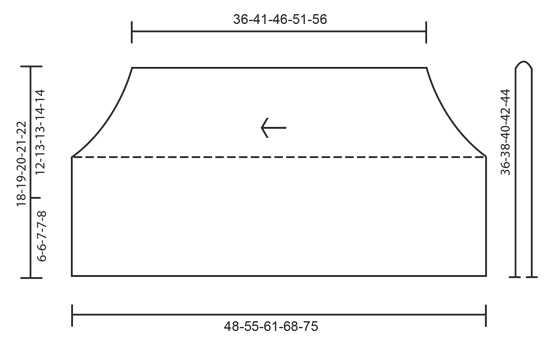
---------------------------------------------------------- BORDA / LUSTAKÖTÉS (oda-vissza haladva - síkban - kötve). 1 borda= 2 sima szemekkel kötött sor. PIKÓS SZEGÉLY (a kötőtűn oda-vissza): JOBB OLDAL: 1. sor (= SZO): Kössünk sima szemekkel. 2. sor (= FO): Kössünk, amíg 4 szem marad, ezekkel a következő módon folytatjuk: 2 szemet S összekötünk, 1 rh, az utolsó 2 szem mindegyikébe 2 szemet kötünk. 3. sor (= SZO): Az 1. szemet simán leemeljük, 1 sima, a leemelt szemet a lekötött szemen átemeljük, 1 sima, a jobboldali kötőtűn, az 1. szemet átemeljük a 2. szemen (= 2 szemet fogyasztottunk), kössük a sor többi szemét. 4. sor (= FO): Kössünk sima szemekkel. Ismételjük a 1- 4. sort BAL OLDAL: 1. sor (= SZO): Kössünk, amíg 4 szem marad, ezekkel a következő módon folytatjuk: 2 szemet S összekötünk, 1 rh, az utolsó 2 szem mindegyikébe 2 szemet kötünk. 2. sor (= FO): Az 1. szemet simán leemeljük, 1 sima, a leemelt szemet a lekötött szemen átemeljük, 1 sima, a jobboldali kötőtűn, az 1. szemet átemeljük a 2. szemen (= 2 szemet fogyasztottunk), kössük a sor többi szemét. 3. sor (= SZO): Kössünk sima szemekkel. 4. sor (= FO): Kössünk sima szemekkel. Ismételjük a 1- 4. sort RÖVIDÍTETT SOROK: Kössünk 6 sort minden szemen. * Kössünk 24-25-26-27-28 szemet (az 1. jelölőig), fordítsuk meg a munkát, húzzuk meg a fonalat, és kössünk a sor végéig. Kössünk 1 sort minden szemen. * Kössünk 24-25-26-27-28 szemet (az 1. jelölőig), fordítsuk meg a munkát, húzzuk meg a fonalat, és kössünk a sor végéig. Kössünk 5 sort minden szemen*. Ismételjük a *-* közötti részt. Más szóval: kössünk 6 sort (= 3 bordányit) lustakötéssel a középső 66-70-72-80-86 szemen, és 8 sort lustakötéssel (= 4 bordányit) minden ismétlés mindkét oldalán lévő szemeket. -------------------------------------------------------- BOLERO: A darabot oldalirányban kötjük a körkötőtűn oda-vissza haladva, az eleje közepén kezdve, a karöltőtől a karöltőig. A bolerót ezután félbehajtjuk, és az oldalvarrásokat összevarrjuk. A kezdéshez szedjünk fel 76-80-84-88-92 szemet a Cotton Merino fonallal, és a 4 mm-es körkötőtűvel. Tegyünk 1 jelölőt a darabba, mindkét oldalától 24-25-26-27-28 szemre (= 28-30-32-34-36 szem a jelölők között). Folytassuk a következő módon - a SZO felől. PIKÓS SZEGÉLY a jobboldalon, lustakötés (olvassuk el a fenti magyarázatot) a következő 68-72-76-80-84 szemen, pikós szegély, baloldal a következő 4 szemen. NE FELEDKEZZÜNK MEG A MEGFELELŐ KÖTÉSPRÓBA BETARTÁSÁRÓL! Folytassuk lustakötéssel középen, és a pikós szegéllyel a 4 szélső szemen mindkét oldalon - lásd a fenti magyarázatot- UGYANAKKOR, készítsünk rövidített sorokat- lásd a fenti magyarázatot! Amikor a darabunk kb 36-41-46-51-56 cm (a legkeskenyebb részén) lazán láncoljuk le a szemeket. ÖSSZEÁLLÍTÁS: Hajtsuk a bolerót félbe- az ábra a darabot félbehajtva mutatja. Varrjuk össze az alsó 6-6-7-7-8 cm-t, a széleket egymás mellé téve (= 12-13-13-14-14 cm). |
|
 |
|
Elkészítette ezt a mintát?Akkor adja a képeihez a #dropspattern #berrykissvest tageket, vagy küldje be a képet a #dropsfan galériába. Segítségre van szüksége a modell elkészítéséhez? 16 tutorial videót találhat, és egy kérdés/felelek részt, és még többet, ha a mintát megkeresi a garnstudio.com oldalán. © 1982-2026 DROPS Design A/S. Minden jog fenntartca. Ez a documentim, az összes részével védelem alatt áll. A weboldalunkon többet olvashat arról, hogy mit tehet és mit nem a mintáinkkal. |
|


Több mint 40 év tapasztalattal a kötés és horgolásminták tervezésében a DROPS Design az ingyenes minták egyik legszélesebb körű gyűjtemnyét kínálja az Interneten, 17 nyelvre fordítva. A mai nappal 324 katalógust 12290 mintát tudunk számon tartani a mintákból 12268 -t fordítottunk le magyarra (európai mértékegységekkel).
keményen dolgozunk azon, hogy a kötés és a horgolás világából a legjobbat hozzuk el, remek fonalakkal, hihetetlen árakon. Ha mintáinkat nemcsak személyes használatra szeretné használni, minden minta alján a Copyright szövegben olvashat arról, mit tehet s mit nem. Sikeres kézimunkázást!
Post a comment to pattern DROPS Children 28-7
Szívesen vesszük, ha megosztja velünk gondolatait erről a mintáról.
Ha kérdést szeretne feltenni, ügyeljen arra, hogy a megfelelő kategóriát válassza ki, így fegyorsíthatja a válaszadás folyamatát. Það verður að merkja við svæði merktri með *.