
Popular categories
Looking for a yarn?































Comments / Questions (62)
 Sari wrote:
Hei taas 😊 varmistan vielä, että olen ymmärtänyt oikein: keskisilmukat kudotaan aina valkoisella eikä lasketa kuvioon mukaan. Kun aloitan kuvion 3 riviltä ja 3. silmukan kohdalta, kavennan 2 silmukkaa yhteen sinisellä ja sen jälkeen 1 valkoinen, 3 sinistä jne rivin loppuun asti, ja kuvio ei ole symmetrinen V-aukon molemmilla puolilla?
22.05.2024 - 07:22
Sari wrote:
Siis molemmilla puolilla 175 silmukkaa
20.05.2024 - 13:56
Sari wrote:
Hei vielä varmistus, siis otan keskisilmukan toisesta kappaleesta jolloin jää sille puolelle 87 silmukkaa ja vastaavasti takana vastapuolelta keskisilmukan jolloin jää se 87 silmukkaa, mutta lopputuloksena molemmille puolille 75 silmukkaa ?
20.05.2024 - 13:49DROPS Design answered:
Hei, kyllä. Jatkat kavennuksia koko mallineuleen ajan (= 27 kavennuskerrosta) ja vielä joustinneuleen kohdalla.
21.05.2024 - 16:50
Sari wrote:
Kiitos yritän uudestaan
20.05.2024 - 13:31
Sari wrote:
Hei , miten lasketaan keskisilmukka? onko työssä 1 valkoinen keskisilmukka mikä kulkee koko ajan edessä ja sen molemmin puolin kavennetaan ja tehdään kuvioita? vai onko joka kappaleen 1. silmukka =keskisilmukka ja sen molemmin puolin kavennetaan ja tehdään kuvioita? yritin tehdä, mutta kuvio ei mene kohdalleen vaalean siniset silmukat eivät mene kohdalleen tummansinisten kanssa puolen välin jälkeen työtä? tarkalleen missä kohtaa on keskisilmukka miten kudotaan Kiitos
20.05.2024 - 08:36DROPS Design answered:
Keskisilmukka on koko ajan samassa kohdassa = keskellä edessä ja keskellä takana oleva silmukka. Tämän silmukan molemmin puolin tehdään kavennukset. Neulo keskisilmukan molemmin puolin mallineuletta siten, että kuvio jatkuu ennen keskisilmukkaa ja sen jälkeen rikkoutumattomana.
20.05.2024 - 13:24
Sari wrote:
Hei vielä tarkennusta, Kun olen alkamassa kutomaan 3 riviä kudonko kuviota ringin ympäri asti vai puoleen väliin ja aloitan seuraavan V-aukon uudestaan kuvion 3 silmukalta?
18.05.2024 - 11:12DROPS Design answered:
Neulot kuviota seuraavaan V-aukkoon asti ja sitten aloitat uudestaan 3. silmukan kohdalta.
20.05.2024 - 13:19
Sari Lillhonga wrote:
Hei, olen nyt nostanut 352 silmukkaa ja kutonut kauluksen mallista 2 ensimmäistä riviä ja kaventanut samalla silmukoita, nyt kun tulen 3 riville aloitanko mallin kolmannelta silmukalta, jotta kuvio keskikohdalla tulisi oikein? koska olen ne 2 silmukkaa kaventanut jo.
16.05.2024 - 08:12DROPS Design answered:
Kyllä, aloita kolmannen silmukan kohdalta, jotta kuvio jatkuisi siististi.
16.05.2024 - 12:07
Sari wrote:
Asia selvisi
26.04.2024 - 10:28
Sari wrote:
Hei haluaisin neuvon mitä tarkoittaa hihan kohdalla kun tulee lisätä silmukka hihan alla olevan silmukan molemmin puolin siis missä kohtaa??
26.04.2024 - 09:45DROPS Design answered:
Hei, kun neulot suljettua neuletta, kerroksen vaihtumiskohta on keskellä hihan alla. Eli lisäykset tehdään kerroksen ensimmäisen silmukan kummallakin puolella.
26.04.2024 - 17:06
Sari Lillhonga wrote:
Pusero Bluescape Miten tulisi kutoa tämä kohta: Lisää sitten kumpaankin sivuun 15 (12) x 2 s koossa S/M: Vuorotellen joka 3., joka 4. ja joka 4. krs t Sari
09.04.2024 - 15:15
|
|||||||||||||
Bluescape |
|||||||||||||
|
|
|||||||||||||
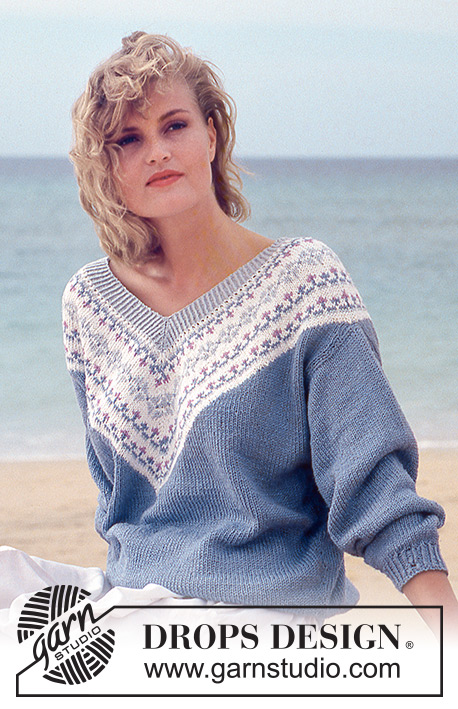
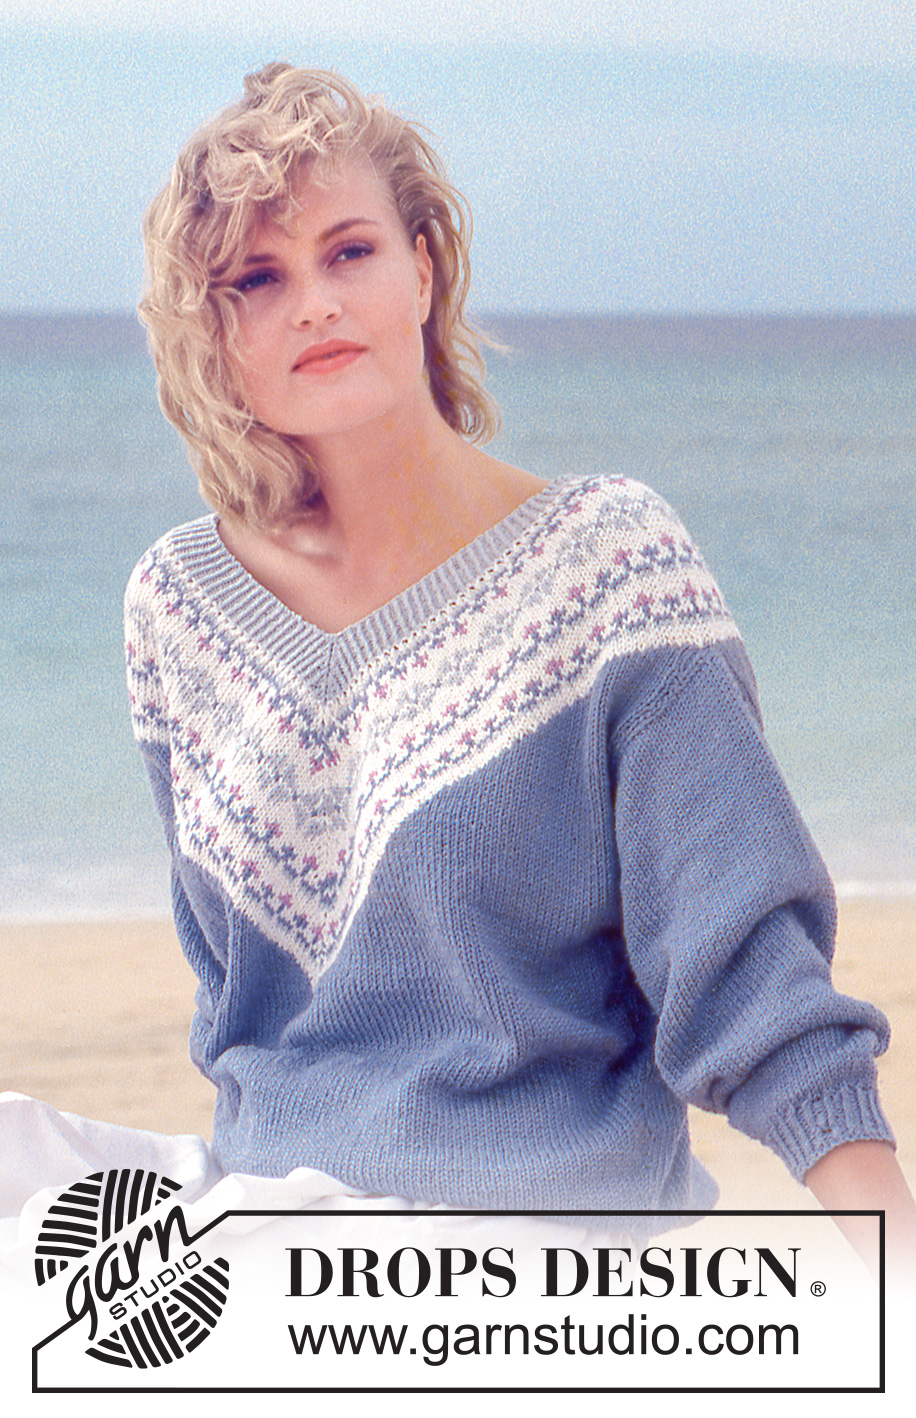
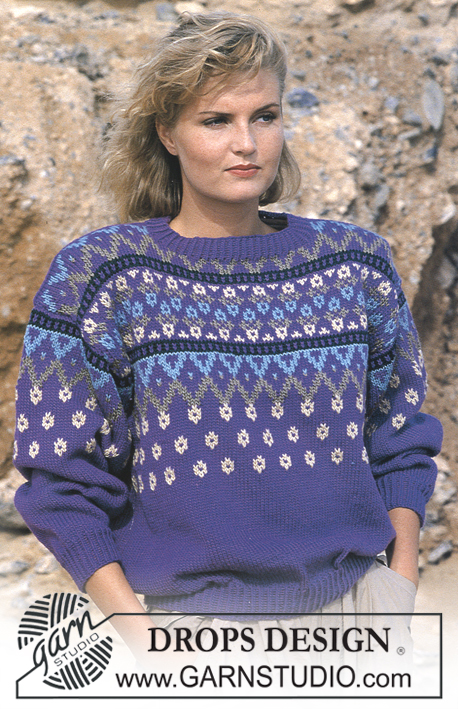
DROPS jumper with flower pattern border on V-neck in Muskat or Lima.
DROPS 14-9 |
|||||||||||||
|
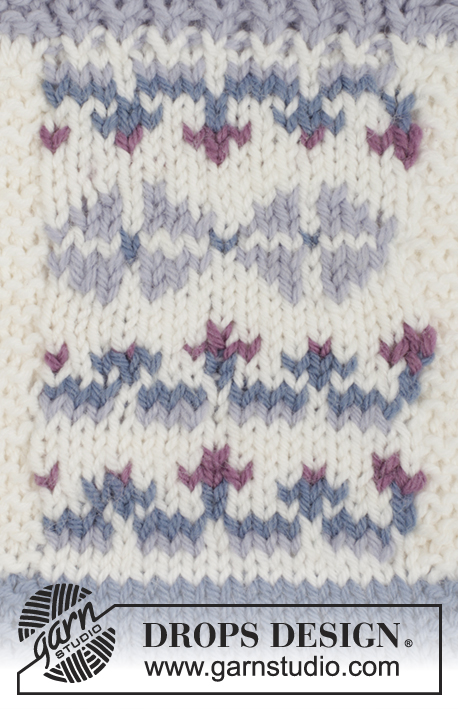
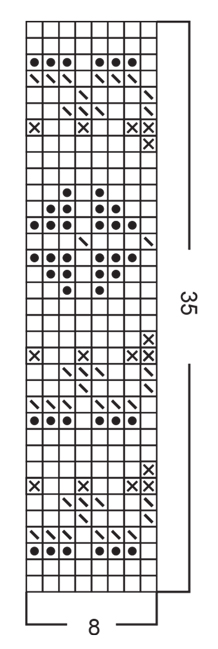
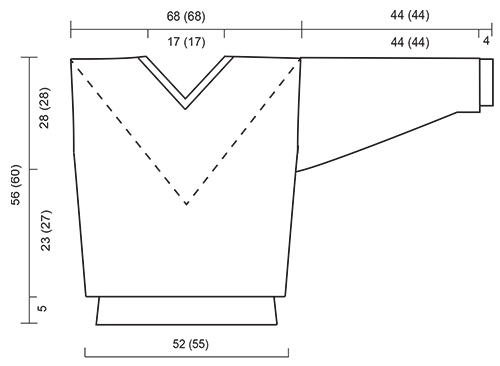
Pattern: See diagram. The diagram shows the pattern from the RS side and the entire pattern is worked in stocking st. Rib: *K1 into back of loop, P1*, repeat from *-*. Body: The jumper is worked in the round on circular needle, bottom up. Cast on 170-178 sts on circular needle size 2.5 mm with blue / grey blue and work 5 cm rib. Change to circular needle size 4.5 mm and continue in stocking st, at the same time inc 28-32 sts evenly on the first round = 198-210 sts. Remember the knitting tension. Now inc 2 sts in each side a total of 15-12 times like this: for size S/M: inc on every 3 rd , 4 th and 4 th round alternately, for size M/L : inc on every 5th and 6th round alternately = 258-258 sts. When the piece measures 22-26 cm cast off the middle st on both the front and back piece and continue working the left and right side separately. Dec to shape the V-neck towards mid front and towards mid back like this: dec 1 st in each end on every row 3 times, 1 row without dec, repeat until you have dec 124 (124) sts – 62 (62) sts on each side. At the same time; when piece measures 28-32 cm divide for armholes in the middle of the on each side. Complete the front and back pieces separately. After the final dec for V-neck there are 2 sts left on the needle for each piece, cast these off. The piece measures approx 56-60 cm. Sleeve: Cast on 40-42 sts on double pointed needles size 2.5 mm with blue / grey blue and work 5 cm rib. Change to double pointed needles size 4.5 mm and continue in stocking st, at the same time inc 15-13 sts evenly on the first round = 55-55 sts. At the same time; after the rib inc 1 sts on each side of the centre sts mid under arm a total of 26-26 times on every 3rd and 4th round alternately = 107-107 sts. When the piece measures 41-41 cm cast off 10 sts mid under arm and complete the piece back and forth on the needle. Cast off 10 sts at the beg of every row until the piece measures 44-44 cm. Cast off remaining sts. Assembly: Sew the shoulder seams. Pick up 88 sts along each side of the V-neck on needle size 4.5 mm with white = 352 sts. Work pattern (11 repeats on each side of V- neck), at the same time dec mid front and mid back like this: *K tog the 2 sts before middle st into back of loop and K tog the 2 sts after middle st on 3 rounds, and no dec on the 4 th round*. Continue *-* until the piece is complete. After the last pattern row change to needle size 2.5 mm and light blue, work 3 cm rib (continue the dec) and cast off. Sew sleeve to body. |
|||||||||||||
Diagram explanations |
|||||||||||||
|
|||||||||||||
 |
|||||||||||||
 |
|||||||||||||
Have you finished this pattern?Tag your pictures with #dropspattern or submit them to the #dropsfan gallery. Do you need help with this pattern?You'll find 17 tutorial videos, a Comments/Questions area and more by visiting the pattern on garnstudio.com. © 1982-2026 DROPS Design A/S. We reserve all rights. This document, including all its sub-sections, has copyrights. Read more about what you can do with our patterns at the bottom of each pattern on our site. |
|||||||||||||






With over 40 years in knitting and crochet design, DROPS Design offers one of the most extensive collections of free patterns on the internet - translated to 17 languages. As of today we count 333 catalogs and 12525 patterns - 12515 of which are translated into English (US/in).
We work hard to bring you the best knitting and crochet have to offer, inspiration and advice as well as great quality yarns at incredible prices! Would you like to use our patterns for other than personal use? You can read what you are allowed to do in the Copyright text at the bottom of all our patterns. Happy crafting!
Post a comment to pattern DROPS 14-9
We would love to hear what you have to say about this pattern!
If you want to leave a question, please make sure you select the correct category in the form below, to speed up the answering process. Required fields are marked *.