
Popular categories
Looking for a yarn?


Comments / Questions (210)
![]() Ljiljana Sucur Perisic wrote:
Ljiljana Sucur Perisic wrote:
Hallo, eine ihrer Antworten lautet: „Liebe Hanna, die Reihen beginnen mit dem rechten Bein und den neuen 4-6-8 Maschen (= je nach der Größe) , so daß die 3-5-7 M von jedem Bein gegeneinander sind (Mitte Rückenteil) und die 4-6-8 neuen Maschen (linke Bein) sind am ende der Reihe. Sie stricken jetzt wie zuvor, aber mit 1 Randmasche krausrechts beidseitig. Viel Spaß beim stricken! ” Die 6 neuen M an den Enden der Reihe - je 1 Randmasche = je 5 M, also 1+2+2 bzw. 2+2+1, richtig?
26.07.2021 - 05:45DROPS Design answered:
Liebe Frau Sucur Perisic, ich verstehe Ihre Frage leider nicht, welche Größe stricken Sie?
26.07.2021 - 09:20
![]() Inge Janssen wrote:
Inge Janssen wrote:
Hallo, kunnen de pijpjes en mouwen ook rondgebreid worden zodat er geen naad is?
28.06.2021 - 09:58DROPS Design answered:
Dag Inge,
De pijpjes zouden je in de rondte kunnen breien tot waar je anders de kantsteken af moet kanten (Die kant je dan dus niet af). Voor de mouwen worden er steken opgezet aan beide kanten van de panden, dus die kun je niet in de rondte breien.
28.06.2021 - 11:29
![]() Elin Bjørntvedt wrote:
Elin Bjørntvedt wrote:
Jeg sliter veldig når jeg skal sette sammen benene. Jeg har da 4 nye masker i start på pinnen. De går ikke opp med mønster når det skal strikkes kantmaske, det er i og for seg greit, kan justere antallet der. Når jeg kommer til de 6 ny maskene mellom benene så vil ikke de gå opp med mønsteret. Jeg kommer skjevt ut med rett/vrang mot mønsteret på venstre ben..
20.06.2021 - 21:15DROPS Design answered:
Hej Elin, det er ikke sikkert at maskerne som møder hinanden går op i mønsteret med det samme. Men sørg for at mønsteret over selve benene fortsætter med at stemme. Husk også at du har en kantmaske i hver side som ikke kommer til at ses efter at du har syet i den. God fornøjelse!
30.06.2021 - 14:13
![]() Rene Gould wrote:
Rene Gould wrote:
Hi I cant read a chart at all could you please write down the pattern for me off the chart into pattern mode I really want to knit this garment but chart is stopping me please help me thank you
15.06.2021 - 17:41DROPS Design answered:
Dear Rene, our patterns come with charts not only because they are available in many languages, but also because we believe that with charts you see not only the very next step, but also the bigger picture, how stitches and rows relate to each other "en large". Also we do have a lesson on how to read charts, and you can always ask for help (either over the phone or in person) in the store where you got your DROPS Yarn from. Happy Stitching!
15.06.2021 - 18:11
![]() Esther wrote:
Esther wrote:
Hoi, ik heb de rechter en linkerpijp gebreid. Als ik deze samen op een rondbreinaald zet, klopt het dan dat de 6 steken die ik gemeerderd heb (6/9 maanden) aan de buitenkant zitten en de 5 steken die gemeerderd zijn aan de binnenkant zitten? Ik kom dan namelijk niet goed uit met het breien van A1 als ik de steken van het patroon op de naald volg. Dank alvast voor de hulp.
15.05.2021 - 22:35DROPS Design answered:
Dag Esther,
Als het goed is heb je een linker en een rechter pijp; deze zijn precies gespiegeld aan elkaar. Bij het het samenvoegen begin je met de linker pijp (gezien zoals het pakje gedragen wordt) aan de goede kant, aan de kant waar 6 steken zijn opgezet. Je breit de linker pijp een aan het eind voeg je de rechterpijp ook op de naald. De 5 opgezette steken van de linker pijp en de 5 opgezette steken van de rechter pijp, zitten dus nu in het midden van de naald tegen elkaar aan. Dit is midden achter. Midden voor, dus aan de buitenkant zitten de 6 steken.
26.05.2021 - 14:04
![]() Britta wrote:
Britta wrote:
Wie bereits mehrfach geschrieben, bei Größe 1-3 Monate sind 250 gr nicht genug. Bitte in den Garnangaben ändern 😊
09.04.2021 - 16:41
![]() Hege Lundeby wrote:
Hege Lundeby wrote:
Når jeg strikker sammen beina på størrelse 6_9 mnd skal det være seks nye masker på slutten og begynnelsen. Siden jeg har felt de gamle rillemaskene i enden, og skal starte med en ny rillekantemaske, så går jo ikke mønsteret oppi starten. Er dette riktig? ( jeg starter på retten men en rett, en vrang, deretter to rett to rang, og en en igjen til slutten)
31.03.2021 - 22:27DROPS Design answered:
Hei Hege. Når du har lagt opp de nye maskene, bare pass på å justere det slik at de passer inn i mønstert (med 2 rett /2 vrang). mvh DROPS design
10.05.2021 - 15:16
![]() Sigurveig Hreinsdóttir wrote:
Sigurveig Hreinsdóttir wrote:
Það vantar í uppskrift hversu langt á að vera milli hnappagata..?
31.03.2021 - 16:28DROPS Design answered:
Blessuð Sigurveig. Ef þú ferð ofar í uppskriftina í dálkinn HNAPPAGAT þá sérðu hvar hnappagötin eru staðsett. Gangi þér vel.
02.04.2021 - 12:31
![]() Karin wrote:
Karin wrote:
Hallo kann man die Beine nicht mit dem Nadelspiel ohne Naht stricken?
19.02.2021 - 13:25
![]() Katharina wrote:
Katharina wrote:
Ich bin gerade dabei das linke und rechte Bein zu stricken. Wenn ich in Reihen Muster A1A und A1B stricken, habe ich immer vier "gleiche"Maschen hintereinander, d.h. entweder 4 rechte oder vier linke (je nachdem ob Hin- oder Rückreihe). wenn ich nun rechtes und linkes abein zusammenfüge, sind beim rechten Bein diese vier gleichen Maschen an der inneren Mitte, beim linken Bein an der hinteren Mitte. Ist dies so gewollt?
19.02.2021 - 09:17DROPS Design answered:
Liebe Katharina, Muster sollte die ganze Reihe stimmen, es sind jetzt in der Mitte von Rückenteil 6 neuen Masche, die sollten Sie 2 re, 2 li, 2 re stricken oder 2 li, 2 re, 2 li stricken, je nach der letzten Maschen von rechten Bein (letze Maschen in A.1B) und der ersten Masche von linken Bein. Viel Spaß beim stricken!
19.02.2021 - 10:14
|
|||||||
Truly Wooly#trulywoolyonesie |
|||||||
 |
 |
||||||
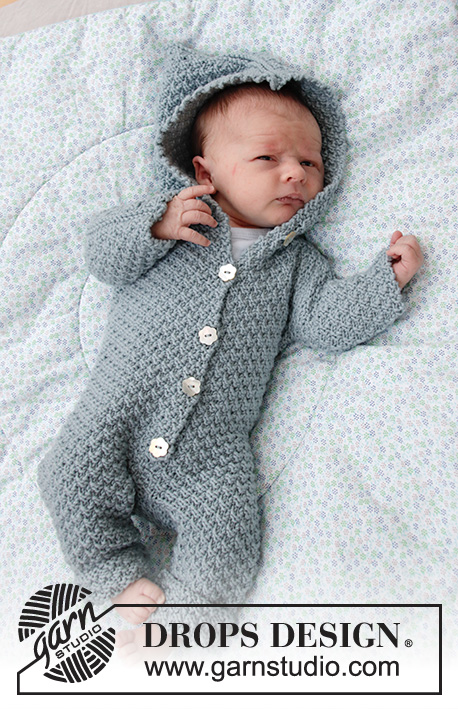
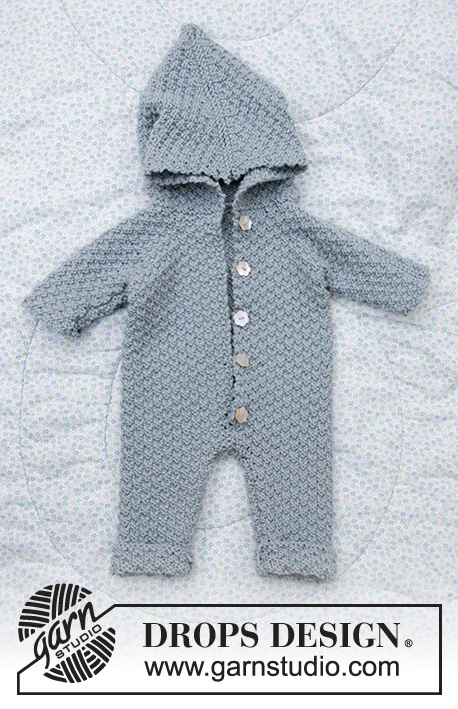
Knitted suit for baby in DROPS Merino Extra Fine. Piece is knitted with textured pattern and hood. Size premature - 4 years
DROPS Baby 33-8 |
|||||||
|
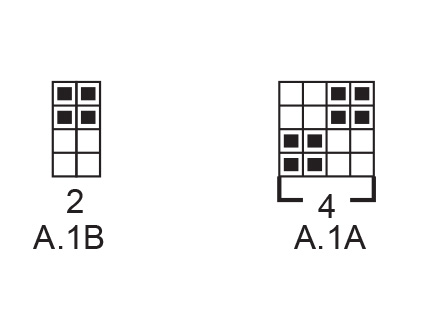
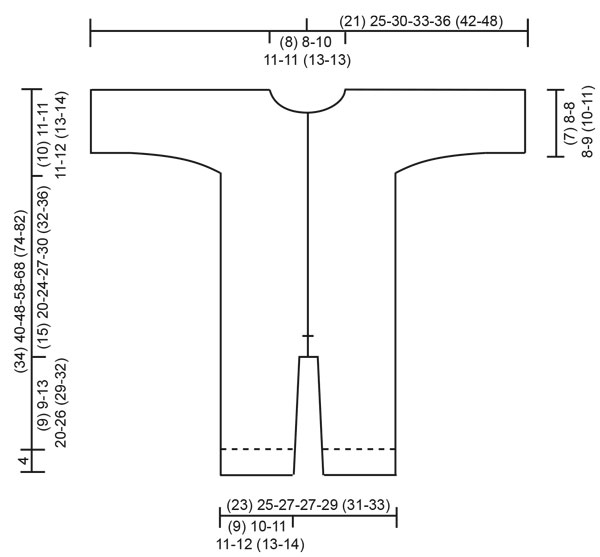
---------------------------------------------------------- EXPLANATION FOR THE PATTERN: ---------------------------------------------------------- GARTER STITCH (back and forth): 1 ridge = knit 2 rows. 1 edge stitch in garter stitch = knit stitch from right side and knit stitch from wrong side. PATTERN: See diagram A.1. Diagrams show all rows in pattern seen from the right side. INCREASE TIP-1: Increase 1 stitch inside 1 edge stitch in garter stitch by making 1 yarn over. On next row work yarn overs twisted to avoid holes. Work the increased stitches in A.1. INCREASE TIP-2 (evenly): To calculate how to increase evenly, use the total number of stitches on row (e.g. 44 stitches) and divide stitches by number of increases to be done (e.g. 14) = 3.1. In this example increase by making 1 yarn over after approx. every 3rd stitch. On next row knit yarn overs twisted to avoid holes. BUTTONHOLES (bottom up): Decrease for buttonholes on right band. 1 BUTTONHOLE = knit third and fourth stitch from edge together and make 1 yarn over. On next row purl or knit yarn over (depending on where in the diagram you are) to make holes. Decrease for buttonholes when piece measures (measured from where legs where put together): (premature): 5, 10, 15 and 20 cm = 2", 4", 6" and 8" 0/1 months: 6, 11, 16, 21 and 26 cm = 2⅜", 4⅜", 6¼", 8¼" and 10¼" 1/3 months: 5, 10, 15, 20, 25 and 30 cm = 2", 4", 6", 8", 9¾" and 11¾" 6/9 months: 6, 12, 17, 22, 27 and 32 cm = 2⅜", 4¾", 6¾", 8¾", 10⅝" and 12½" 12/18 months: 6, 12, 18, 24, 30 and 36 cm = 2⅜", 4¾", 7", 9½", 11¾" and 14¼" 2 years: 9, 15, 21, 27, 33 and 39 cm = 3½", 6", 8¼", 10⅝", 13" and 15¼" 3/4 years: 7, 13, 19, 25, 31, 37 and 43 cm = 2¾", 5⅛", 7½", 9¾", 12¼", 14½" and 17" ---------------------------------------------------------- START THE PIECE HERE: ---------------------------------------------------------- SUIT - SHORT OVERVIEW OF THE PIECE: Work each leg back and forth on circular needle, bottom up. Place legs together and work back and forth on circular needle from mid front up to sleeves. Then cast on new stitches for sleeves in each side and finish front pieces and back piece separately. Sew piece together on the shoulder. Finish by picking up stitches around the neck and work a hood. RIGHT LEG (when suit is worn): Cast on (40) 44-48-48-52 (56-60) stitches on circular needle size 4 MM = US 6 with Merino Extra Fine. Work first row as follows from right side: 1 edge stitch in GARTER STITCH – read explanation above, work A.1A until 3 stitches remain on row (= 9-10-11-11-12 (13-14) repetitions of 4 stitches), work A.1B (= 2 stitches) and finish with 1 edge stitch in garter stitch. Continue pattern like this. REMEMBER THE KNITTING GAUGE! When piece measures 4 cm = 1½", insert 1 marker in piece (marks fold). When piece measures (5) 5-7-8-10 (12-14) cm = (2") 2"-2¾"-3⅛"-4" (4¾"-5½") increase 1 stitch in each side – read INCREASE TIP-1. Repeat increase when piece measures (8) 8-12-18-20 (22-24) cm = (3⅛") 3⅛"-4¾"-7"-8" (8¾"-9½") = (44) 48-52-52-56 (60-64) stitches on needle. Work until piece measures (12) 12-16-23-31 (32-35) cm = (4¾") 4¾"-6¼"-9"-12¼" (12½"-13¾") from cast-on edge, adjust so that next row is worked from right side. Bind off 1 stitch at beginning of the next 2 rows (i.e. bind off edge stitches) = (42) 46-50-50-54 (58-62) stitches. Then work the next 2 rows as follows, begin from right side: Work as before over all stitches and cast on 3 new stitches at the end of row (= mid back). Turn piece, work A.1 as before over all stitches, but make sure to continue pattern correctly, then cast on (4) 4-4-4-4 (4-4) stitches at the end of row from wrong side (= mid front). There are now (49) 53-57-57-61 (65-69) stitches on needle and piece measures approx. (13) 13-17-24-30 (33-36) cm = (5⅛") 5⅛"-6¾"-9½"-11¾" (13"-14¼") from cast-on edge. Put piece aside and work left leg as explained below. LEFT LEG (when suit is worn): Cast on (40) 44-48-48-52 (56-60) stitches on circular needle size 4 MM = US 6 and work first row as follows from right side: 1 edge stitch in garter stitch, work A.1A until 3 stitches remain on row (=9-10-11-11-12 (13-14) repetitions of 4 stitches), work A.1B (= 2 stitches) and finish with 1 edge stitch in garter stitch. Continue pattern like this. When piece measures 4 cm = 1½", insert 1 marker in piece (marks fold). When piece measures (5) 5-7-8-10 (12-14) cm = (2") 2"-2¾"-3⅛"-4" (4¾"-5½") increase 1 stitch in each side – remember INCREASE TIP-. Repeat increase when piece measures (8) 8-12-18-20 (22-24) cm = (3⅛") 3⅛"-4¾"-7"-8" (8¾"-9½") = (44) 48-52-52-56 (60-64) stitches on needle. Work until piece measures (12) 12-16-23-31 (32-35) cm = (4¾") 4¾"-6¼"-9"-12¼" (12½"-13¾") from cast-on edge, adjust so that next row is worked from right side. Bind off 1 stitch at beginning of the next 2 rows (i.e. bind off edge stitches) = (42) 46-50-50-54 (58-62) stitches. Then work the next 2 rows as follows, begin from right side: Work as before over all stitches and cast on 4 new stitches at the end of row (= mid front). Turn piece, work A.1 as before over all stitches, but make sure to continue pattern correctly, then cast on 3 stitches at the end of row from wrong side (= mid back). There are now (49) 53-57-57-61 (65-69) stitches on needle and piece measures approx. (13) 13-17-24-30 (33-36) cm = (5⅛") 5⅛"-6¾"-9½"-11¾" (13"-14¼") from cast-on edge. Cut the yarn. Now place the parts together as explained below. BODY: Place right leg and left leg on same circular needle with right leg first. Begin from right side on right leg, work 1 edge stitch in garter stitch, continue A.1 as before over the remaining stitches on right leg (make sure to continue pattern correct according to finish on leg), then continue pattern over the first (48) 52-56-56-60 (64-68) stitches on left leg (make sure to continue pattern correct) and finish with 1 edge stitch in garter stitch = (98) 106-114-114-122 (130-138) stitches on needle. Insert another marker in piece! NOW MEASURE PIECE FROM THIS MARKER! Continue A.1 back and forth with 1 edge stitch in garter stitch in each side towards mid front. When piece measures (3) 3-3-3-4 (5-5) cm = (1⅛") 1⅛"-1⅛"-1⅛"-1½" (2"-2") from marker (adjust to work next row from right side) bind off 1 stitch at beginning of the next 2 rows (i.e. bind off edge stitches). Then work the next 2 rows as follows, begin from right side: Work as before over all stitches and cast on 4 new stitches at the end of row (= left band at the front). Turn piece, work A.1 as before over all stitches (make sure to continue pattern correctly) and cast on 4 new stitches at the end of row from wrong side (= right band at the front). There are now (104) 112-120-120-128 (136-144) stitches on needle. Continue A.1 back and forth over all stitches (i.e. do not work edge stitches in garter stitch). Remember BUTTONHOLES on right band - read explanation above. When piece measures (15) 20-24-27-30 (32-36) cm = (6") 8"-9½"-10⅝"-11¾" (12½"-14¼") from the new marker, i.e. (28) 33-41-51-60 (65-72) cm = (11") 13"-16⅛"-20"-23⅝" (25½"-28⅜") from cast-on edge, divide the piece in each side. Finish front pieces and back piece separately as explained below. RIGHT FRONT PIECE: Begin from right side and work as before over the first (27) 29-31-31-33 (35-37) stitches, then cast on (7) 13-13-17-17 (21-25) new stitches for sleeve. Slip the remaining stitches on 1 stitch holder for back piece and left front piece. Continue A.1 back and forth as before but make sure that pattern fits over all stitches. AT THE SAME TIME cast on (6) 7-11-12-14 (18-21) new stitches for sleeve at the end of the next 2 rows from right side = (46) 56-66-72-78 (92-104) stitches on needle. Continue pattern back and forth over all stitches until piece measures (22) 28-32-35-38 (41-45) cm = (8¾") 11"-12½"-13¾"-15" (16⅛"-17¾") from marker, i.e. (35) 41-49-59-68 (74-81) cm = (13¾") 16⅛"-19¼"-23¼"-26¾" (29⅛"-32") from cast-on edge. At the beginning of next row from right side slip the first (8) 8-9-11-11 (12-12) stitches on 1 stitch holder for neck but to avoid cutting the yarn work them before slipping them on the stitch holder. Continue pattern back and forth as before and bind off for neck at the beginning of every row from mid front as follows: Bind off 2 stitches 1 time and 1 stitch (1) 1-2-2-2 (3-3) times = (35) 45-53-57-63 (75-87) stitches remain on needle. Then work until the entire suit measures approx. (24) 30-34-37-41 (44-49) cm = (9½") 11¾"-13⅜"-14½"-16⅛" (17¼"-19¼") from marker, i.e. (37) 43-51-61-71 (77-85) cm = (14½") 17"-20"-24"-28" (30⅜"-33½") from cast-on edge, but adjust so that next row is worked from right side. Work 1 ridge back and forth over all stitches. Then bind off by knitting from the right side. The entire suit measures approx. (38) 44-52-62-72 (78-86) cm = (15") 17¼"-20½"-24⅜"-28⅜" (30¾"-33⅞") from cast-on edge. Now work back piece as explained below. BACK PIECE: Slip the first (50) 54-58-58-62 (66-70) stitches on stitch holder (seen from right side) on circular needle size 4 MM = US 6 and continue A.1 back and forth over these stitches as before. AT THE SAME TIME cast on new stitches for sleeves at the end of every row in each side as follows: Cast on (7) 13-13-17-17 (21-25)stitches 1 time in each side and then (6) 7-11-12-14 (18-21) stitches 2 times in each side = (88) 108-128-140-152 (180-204) stitches on needle. Continue pattern back and forth over all stitches until piece measures (23) 29-33-36-40 (43-48) cm = (9") 11⅜"-13"-14¼"-15¾" (17"-19") from marker). On next row bind off the middle (14) 14-18-22-22 (26-26) stitches for neck and finish each shoulder/sleeve separately. Then bind off 2 stitches on next row from neck = (35) 45-53-57-63 (75-87) stitches remain on needle for shoulder/sleeve. Then work until the entire suit measures approx. (24) 30-34-37-41 (44-49) cm = (9½") 11¾"-13⅜"-14½"-16⅛" (17¼"-19¼") from marker, but adjust according to front piece and make sure that next row is from right side. Work 1 ridge back and forth over all stitches. Then bind off by knitting from the right side. Work the other shoulder/sleeve the same way. Then work left front piece as explained below. LEFT FRONT PIECE: Slip the remaining (27) 29-31-31-33 (35-37) stitches on stitch holder back on needle size 4 MM = US 6. Begin from right side and continue A.1 back and forth as before. AT THE SAME TIME cast on new stitches for sleeve at the end of the next 3 rows from wrong side as follows: Cast on (7) 13-13-17-17 (21-25) stitches 1 time and then (6) 7-11-12-14 (18-21) stitches 2 times = (46) 56-66-72-78 (92-104) stitches on needle. Continue pattern back and forth over all stitches until piece measures (22) 28-32-35-36 38 (41-45) cm = (8¾") 11"-12½"-13¾"-14¼" 15" (16⅛"-17¾") from marker, i.e. (35) 41-49-59-68 (74-81) cm = (13¾") 16⅛"-19¼"-23¼"-26¾" (29⅛"-32") from cast-on edge. At the beginning of next row from wrong side slip the first (8) 8-9-11-11 (12-12) stitches on 1 stitch holder for neck but to avoid cutting the yarn work them before slipping them on the stitch holder. Continue pattern back and forth as before and bind off for neck at the beginning of every row from mid front as follows: Bind off 2 stitches 1 time and 1 stitch (1) 1-2-2-2 (3-3) times = (35) 45-53-57-63 (75-87) stitches remain on needle. Then work until the entire suit measures approx. (24) 30-34-37-41 (44-49) cm = (9½") 11¾"-13⅜"-14½"-16⅛" (17¼"-19¼") from marker, i.e. (37) 43-51-61-71 (77-85) cm = (14½") 17"-20"-24"-28" (30⅜"-33½") from cast-on edge, but measure so that next row is worked from right side. Work 1 ridge back and forth over all stitches. Then bind off by knitting from the right side. The entire suit measures approx. (38) 44-52-62-72 (78-86) cm = (15") 17¼"-20½"-24⅜"-28⅜" (30¾"-33⅞") from cast-on edge. ASSEMBLY: Sew shoulder seams inside bind-off edges. Sew the seams under the sleeve. Sew seam on inside of both legs inside 1 edge stitch in each side. Sew seam mid front from bottom of band and down inside 1 edge stitch in each side. Sew together the opening between the legs. Fold the end of legs at the marker. Sew the buttons on to the left band. HOOD: Pick up from right side approx. 44 to 70 stitches around the neck (including stitches on stitch holders at the front). Knit 1 row from wrong side while increasing evenly to (58) 70-74-74-78 (86-86) stitches – read INCREASE TIP-2. Knit 1 row from right side and knit 1 row from wrong side. Work next row as follows from right side: Work A.1A until 2 stitches remain on needle and finish with A.1B (= 2 stitches). Continue pattern like this until piece measures (17) 18-19-20-21 (22-23) cm = (6¾") 7"-7½"-8"-8¼" (8¾"-9") from ridge in the neck, but adjust so that next row is from right side. Work 1 ridge back and forth over all stitches. Then bind off by knitting from the right side. Place the hood double and sew seam at the top inside bind-off edge. |
|||||||
Diagram explanations |
|||||||
|
|||||||
 |
|||||||
 |
|||||||
Have you finished this pattern?Tag your pictures with #dropspattern #trulywoolyonesie or submit them to the #dropsfan gallery. Do you need help with this pattern?You'll find 27 tutorial videos, a Comments/Questions area and more by visiting the pattern on garnstudio.com. © 1982-2026 DROPS Design A/S. We reserve all rights. This document, including all its sub-sections, has copyrights. Read more about what you can do with our patterns at the bottom of each pattern on our site. |
|||||||


With over 40 years in knitting and crochet design, DROPS Design offers one of the most extensive collections of free patterns on the internet - translated to 17 languages. As of today we count 325 catalogs and 12298 patterns - 12288 of which are translated into English (US/in).
We work hard to bring you the best knitting and crochet have to offer, inspiration and advice as well as great quality yarns at incredible prices! Would you like to use our patterns for other than personal use? You can read what you are allowed to do in the Copyright text at the bottom of all our patterns. Happy crafting!
Post a comment to pattern DROPS Baby 33-8
We would love to hear what you have to say about this pattern!
If you want to leave a question, please make sure you select the correct category in the form below, to speed up the answering process. Required fields are marked *.