
Popular categories
Looking for a yarn?


Comments / Questions (91)
![]() Marita wrote:
Marita wrote:
Skal mønsteret A1 starte midt bak på ryggen ryggen, når omgangen begynner bak på venstre arm?
14.10.2019 - 17:31DROPS Design answered:
Hej Marita, ja ifølge opskriften skal du starte mønsteret midt bagpå. Hvis du hellere vil flytte starten af omgangen ud i den ene side, så kan du bare gøre det. God fornøjelse!
16.10.2019 - 15:04
![]() Andrea wrote:
Andrea wrote:
Hallo, ist es möglich diesen Pulli auch mit Drops Babymerino zu stricken? Wenn ich ihn einfach eine Nummer größer stricke?
24.07.2019 - 11:48DROPS Design answered:
Liebe Andrea, Sie sollten am besten bei der angegeben Garngruppe bleiben und nicht die Garngruppe wechseln. Auch wenn Sie den Pullover eine Nummer größer stricken, kann es sein, dass die Proportionen nicht richtig passen. Merino Extra Fine (Garngruppe B) ist Baby Merino (Garngruppe A) aber in der Struktur sehr ähnlich , nur etwas dicker, aber auch sehr weich zu tragen und superwash-behandelt. Alternativ schauen Sie sich einfach mal bei den Anleitungen für Garngruppe A um, ob Sie dort auch ein Modell finden, das Ihnen gefällt, vielleicht 196-2?
24.07.2019 - 16:55
![]() Anne Lise Weigand wrote:
Anne Lise Weigand wrote:
Habe A1 fertig gestrickt und habe in die letzte Reihe (grösse L) soll ich trotzdem in d erste Reihe A2 gleich abnehmen?
06.07.2019 - 09:16DROPS Design answered:
Liebe Frau Weigand, in A.1 nehmen Sie bei der vorletzten Reihe ab, dann stricken Sie die letzte Reihe in A.1 (mit natur), und jetzt stricken Sie A.2 und nehmen ab, wie im Diagram gezeigt, dh schon bei der 1. Reihe. Viel Spaß beim stricken!
08.07.2019 - 08:58
![]() Rosemarie wrote:
Rosemarie wrote:
Hallo, ihr habt so viele schöne Modelle zum Nachstricken dafür mal Daumen hoch!!! Was mir aber aufgefallen ist, dass die Wolle in Österreich doch um einiges teurer ist als in Deutschland - warum ist das so??
13.06.2019 - 17:19DROPS Design answered:
Liebe Rosemarie, je nach dem Land haben wir unterschiedlichen Preisstrukturen, deshalb sind sie unterschiedlich je nach dem Land. Viel Spaß beim stricken!
14.06.2019 - 09:06
![]() Polleke wrote:
Polleke wrote:
Kan ik dit patroon ook gebruiken op de breimachine ? Dank je wel voor het antwoord
07.04.2019 - 22:14DROPS Design answered:
Dag Polleke,
Nee, helaas hebben we alleen patrooninstructies voor breien met de hand.
09.04.2019 - 21:01
![]() Ka76 wrote:
Ka76 wrote:
Hejsan! Jag har stickat tröjan i drops merino extra fine och nu när jag tvättat den är den helt förstörd. Jättetråkigt! Tröjan har helt tappat formen. Jag har följt tvättrekommendationerna. Kan man göra något? Vår det inte att tvätt merino extra fine garnen?
04.02.2019 - 19:48DROPS Design answered:
Hej, om du har råkat tvätta fel, går det kanske att rädda. Tvättas på fintvätt 40°C / Använd aldrig sköljmedel / Torkas plant Använd en liten dos tvättmedel för ull (utan enzymer och optiskt blekmedel). Använd ALDRIG sköljmedel (ullfibrerna blir för mjuka och kan glida ifrån varandra). Tvättas separat, med mycket vatten. Låt ALDRIG våta plagg bli liggande länge i tvättmaskinen! Häng ALDRIG plagget på tork utan forma det och plantorka det.
07.05.2019 - 11:50
![]() Andrea wrote:
Andrea wrote:
Schön und flott zu stricken.
20.01.2019 - 17:45
![]() Solveig Charlotte Sivertsen wrote:
Solveig Charlotte Sivertsen wrote:
Er garnet jeg valgte avsent?? Jeg syns det er vanskelig og kommunisere med dere, helst på meil adr min. Forventer å få svar på spørsmål på min meil. Finner heller ikke en e-meil adr på dere. Kan dere svare meg???
19.01.2019 - 18:36
![]() Solveig Charlotte Sivertsen wrote:
Solveig Charlotte Sivertsen wrote:
Er garnet jeg valgte avsent?? Jeg syns det er vanskelig og kommunisere med dere, helst på meil adr min. Forventer å få svar på spørsmål på min meil. Finner heller ikke en e-meil adr på dere. Kan dere svare meg???
19.01.2019 - 18:31DROPS Design answered:
Hei Solveig. Vi selger ikke garn direkte til kunder, så du har nok bestilt det i en av nettbutikkene som selger vårt garn (kanskje var det strikkenett.no? ) Vi har derfor ikke oversikt over bestillingen din. Jeg vil tro du skal ha mottatt en bekreftelsesemail fra nettbutikken? hvis ikke, kan du se om du finner den rikitge butikken om du trykker på "bestill" her, og ta direkte kontakt med dem. God fornøyelse
21.01.2019 - 08:46Jinan wrote:
Thanks alot. i'm gonna to try knit it top down. Do u think it is going to be good experience?
22.11.2018 - 19:52DROPS Design answered:
Dear Jinan, I think it is a good idea. It is easier to adjust the length of the yoke, body and sleeves to personal measurements particularly when working a raglan or round yoke, and it is easier to try the garment on while working. Good luck!
22.11.2018 - 20:19
|
|||||||||||||
Periwinkle#periwinklesweater |
|||||||||||||
 |
 |
||||||||||||
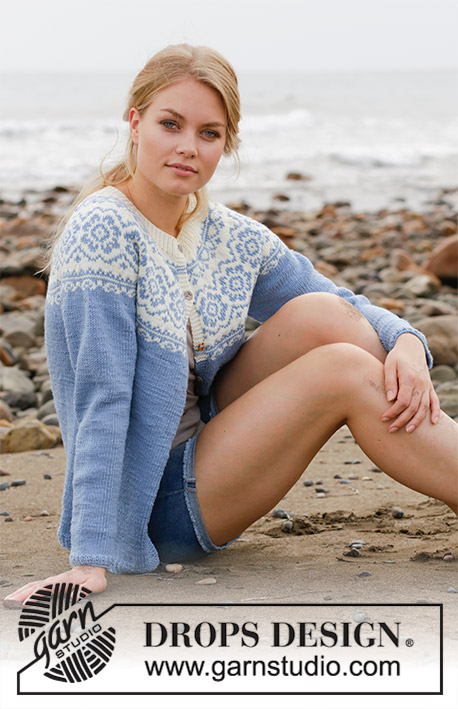
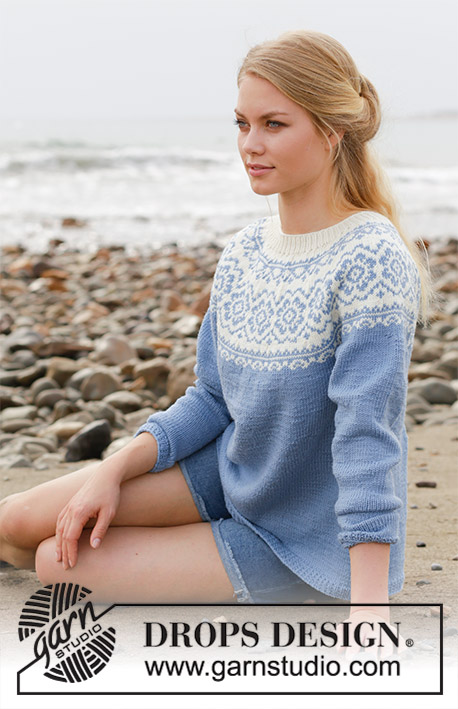
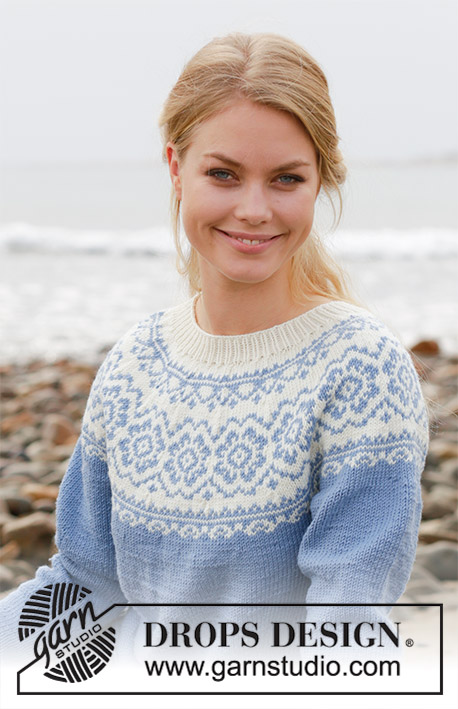
Knitted sweater with round yoke, multi-colored Nordic pattern and A-shape. Size: S - XXXL Piece is knitted in DROPS Merino Extra Fine.
DROPS 191-1 |
|||||||||||||
|
INFORMATION FOR PATTERN: PATTERN: See diagrams A.1 and A.2. Choose diagram for your size. DECREASE TIP-1 (evenly): To calculate how to decrease evenly, use the total number of stitches on round (e.g. 200 stitches) and divide stitches by number of decreases to be done (e.g. 10) = 20. In this example decrease by knitting approx. every 19th and 20th stitch together. DECREASE TIP-2 (applies to sides of body): Begin 5 stitches before marker thread in the side, knit 2 together, knit 6 (marker thread is in the middle of these 6 stitches), slip 1 stitch knitwise, knit 1, pass slipped stitch over stitch worked (= 2 stitches decreased). INCREASE TIP (applies to mid under sleeve): Begin 1 stitches before marker thread, make 1 yarn over, knit 2 (marker thread is in the middle of these 2 stitches), make 1 yarn over (= 2 stitches increased). On next round knit yarn overs twisted to avoid holes. KNITTING TIP: To avoid the knitting gauge to tighten when working pattern, it is important not to tighten the strands on back side of piece. Use a larger needle size when working pattern if needed. ---------------------------------------------------------- SWEATER: Body is worked in the round on circular needle, bottom up. Sleeves are worked in the round on double pointed needles/a short circular needle, bottom up. Then slip body and sleeves together and finish yoke in the round on circular needle. An elevation in the back of neck can be worked to get a better fit so that yoke is somewhat higher in the neck. This elevation can be skipped, to make the neck the same at the front and back - see explanation on elevation in pattern. BODY: Cast on 200-220-238-258-284-312 stitches on circular needle size 3 mm / US 2.5 with light gray blue. Work rib as follows: ROUND 1: Knit all stitches. ROUND 2: * Knit 1, purl 1 *, repeat from *-* the entire round. Repeat 1st and 2nd round until rib measures 3 cm / 1". Switch to circular needle size 4 mm / US 6. Knit 1 round while decreasing 10-10-12-12-14-14 stitches evenly - read DECREASE TIP-1 = 190-210-226-246-270-298 stitches. Insert 1 marker thread at beginning of round and 1 marker thread after 95-105-113-123-135-149 stitches (= in the sides), move the marker thread when working. Work in stockinette stitch in the round. REMEMBER THE GAUGE! When piece measures 8 cm / 3⅛", decrease 1 stitch on each side of both marker threads - read DECREASE TIP-2 (= 4 stitches decreased). Decrease like this every 8 cm / 3⅛" 4 times in total in each side = 174-194-210-230-254-282 stitches. Work until piece measures approx. 36 cm / 14¼" in all sizes. Work next round as follows: Bind off 4-4- 5-5- 6-7 stitches for armhole, knit 79-89-95-105-115-127 stitches (back piece), bind off 8-8-10-10-12-14 stitches for armhole, knit 79-89-95-105- 115-127stitches (front side), and bind off the remaining 4-4-5-5-6-7 stitches for armhole. Put piece aside and work the sleeves. SLEEVE: Cast on 44-46-48-52-52-54 stitches on double pointed needles size 3 mm / US 2.5 with light gray blue. Work rib as follows: ROUND 1: Knit all stitches. ROUND 2: * Knit 1, purl 1 *, repeat from *-* the entire round. Repeat 1st and 2nd round until rib measures 3 cm / 1". Switch to double pointed needles size 4 mm / US 6. Insert 1 marker thread at beginning of round (= mid under sleeve) and move the marker thread upwards. Work in stockinette stitch in the round. When piece measures 9-7-9-7-9-7 cm / 3½"-2¾"-3½"-2¾"-3½"-2¾", increase 2 stitches mid under sleeve - read INCREASE TIP. Increase like this every 3½-3-2-2-1½-1½ cm / 1¼"-1⅛"-¾"-¾"-½"-½" 11-13-16-17-19-20 times in total = 66-72-80-86-90-94 stitches (switch to a short circular needle when there are enough stitches). Continue until sleeve measures 46-45-43-41-40-38 cm / 18"-17¾"-17"-16"-15¾"-15" (shorter measurements in the larger sizes because of wider neck and longer yoke). Work next round as follows: bind off 4-4-5-5-6-7 stitches, knit 58-64-70-76-78-80 stitches and bind off the remaining 4-4-5-5-6-7 stitches. Put piece aside and make another sleeve the same way. YOKE: Slip sleeves on to same circular needle as body where armholes were bound off = 274-306-330-362-386-414 stitches. NOW MEASURE THE PIECE FROM HERE! Read KNITTING TIP! Begin round mid back where body is finished. Continue with light gray blue. Knit 1 round while decreasing 4-6-0-2-6-4 stitches evenly = 270-300-330-360-380-410 stitches - remember DECREASE TIP-1. Work stockinette stitch in the round. When piece measures 1-2-3-3-4-6 cm / ⅜"-¾"-1"-1"-1½"-2 ½" from where body and sleeves were put together, work A.1 in the round (= 27-30-33-36-38-41 repetitions of 10 stitches). Continue pattern like this. AT THE SAME TIME on row marked with arrow in A.1 decrease 10-0-10-20-20-30 stitches evenly = 260-300-320-340-360-380 stitches. NOTE! In size S and L decrease in the off white sections. Now work A.2 in the round (= 13-15-16-17-18-19 repetitions of 20 stitches). Continue pattern like this and decrease as shown in A.2. When A.2 has been worked, there are 130-150-160-170-180-190 stitches on needle. Now work elevation in the back of neck or start to work the neck edge if you do not want an elevation. ELEVATION IN BACK OF NECK: Skip this paragraph if you do not want an elevation. Insert 1 marker at beginning of round = mid back. Begin from right side with off white and knit 15-16-17-18-19-20 stitches past stitch with marker, turn, tighten yarn and purl 30-32-34-36-38-40. Turn, tighten yarn and knit 45-48-51-54-57-60, turn, tighten yarn and purl 60-64-68-72-76-80. Turn, tighten yarn and knit 75-80-85-90-95-100, turn, tighten yarn and purl 90-96-102-108-114-120, turn, tighten yarn and knit until mid back. NECK EDGE: Knit 1 round with off white while decreasing 24-40-44-48-54-58 stitches evenly = 106-110-116-122-126-132 stitches. Switch to a short circular needle size 3 mm / US 2.5. Work rib as follows: * Knit 1, purl 1 *, repeat from *-* the entire round. Continue rib like this for 3 cm / 1". Bind off stitches with knit over knit and purl over purl. Sweater measures approx. 58-60-62-64-66-68 cm / 22¾"-23⅝"-24⅜"-25¼"-26"-26¾" from shoulder and down. ASSEMBLY: Sew the openings under the sleeves. |
|||||||||||||
Diagram explanations |
|||||||||||||
|
|||||||||||||
 |
|||||||||||||
 |
|||||||||||||
 |
|||||||||||||
 |
|||||||||||||
Have you finished this pattern?Tag your pictures with #dropspattern #periwinklesweater or submit them to the #dropsfan gallery. Do you need help with this pattern?You'll find 31 tutorial videos, a Comments/Questions area and more by visiting the pattern on garnstudio.com. © 1982-2026 DROPS Design A/S. We reserve all rights. This document, including all its sub-sections, has copyrights. Read more about what you can do with our patterns at the bottom of each pattern on our site. |
|||||||||||||


With over 40 years in knitting and crochet design, DROPS Design offers one of the most extensive collections of free patterns on the internet - translated to 17 languages. As of today we count 324 catalogs and 12291 patterns - 12281 of which are translated into English (US/in).
We work hard to bring you the best knitting and crochet have to offer, inspiration and advice as well as great quality yarns at incredible prices! Would you like to use our patterns for other than personal use? You can read what you are allowed to do in the Copyright text at the bottom of all our patterns. Happy crafting!
Post a comment to pattern DROPS 191-1
We would love to hear what you have to say about this pattern!
If you want to leave a question, please make sure you select the correct category in the form below, to speed up the answering process. Required fields are marked *.