
Popular categories
Looking for a yarn?


Comments / Questions (14)
![]() Marianne wrote:
Marianne wrote:
Jeg vil godt finde et alternativ, da jeg godt vil nøjes med 1 tråd. Hvad anbefaler i?
19.10.2025 - 10:31DROPS Design answered:
Hi Marianne, you will obtaint the same swatch when knitting in DROPS Snow, needle number 9. Make sure to knit a swatch before starting your work. Happy knitting!
19.10.2025 - 19:26
![]() Lina wrote:
Lina wrote:
Hej. Jag stickar tröjan i storlek xl. Jag får inte ihop det när det kommer till raglanmarkörerna. Räknar jag ihop antal maskor så blir det 64 även i storlek xl fast jag bara har 56 från början. Har dte blivit fel i mönstret?
27.08.2025 - 16:45DROPS Design answered:
Hej Lina. Tack för info, vi ska se över mönstret så fort som möjligt. Mvh DROPS Design
28.08.2025 - 07:14
![]() Ruth Adelheid wrote:
Ruth Adelheid wrote:
Haben Sie auch eine anleitung für mich, wenn ich nicht 5 Fäden sondern nur drei Fäden stricke? und mit welcher nadelstärke muss ich dann stricken,? das wäre sehr nett. Danke Mit freundlichen Grüssen Ruth Benning
30.07.2025 - 18:19DROPS Design answered:
Liebe Frau Adelheid, hier finden Sie alle unsere Anleitungen für Pullover, filtern und sortieren Sie die Modellen je nach der gewünschten Maschenprobe, Konstruktion, usw. Viel Spaß beim Stricken!
31.07.2025 - 09:12
![]() Emelie O-P wrote:
Emelie O-P wrote:
Hej! Jag gör denna tröja i storlek M och med garntyp F (dubbel snow), och just nu gör jag de sista ökningarna till raglan där jag repeterar varv 1-4 4 gånger. Det står att jag därefter ska slätsticka tills jag når 25 cm, men jag har redan nått 30 cm och är inte ännu klar med alla 16 varv. Vad bör jag göra? Tack på förhand!
18.07.2025 - 17:48DROPS Design answered:
Hei Emelie. Hva er strikkefastheten din? Den skal være 10 masker i bredden og 14 pinner i høyden med glattstrikk og 2 tråder på pinne nr 8 = 10 x 10 cm. Husk at pinne nr kun er veiledende. Får du for mange masker på 10 cm, bytt til tykkere pinner eller får du for få masker på 10 cm, bytt til tynnere pinner. Når du er ferdig med raglanøkningene skal det være strikket 34 omganger = ca 25 cm. mvh DROPS Design
04.08.2025 - 13:56
![]() Julia wrote:
Julia wrote:
Hallo, kann es sein dass die Maschenanzahl für den zweiten Ärmel bei den Größen XL und XXL nicht korrekt ist. Müsste es hier nicht auch 8 sein. Sonst sind die beiden Ärmel nicht regelmäßig und man kommt mit der Anzahl der Maschen nicht hin. Oder verstehe ich die Anleitung falsch? Liebe Grüße, Julia
29.06.2025 - 11:07DROPS Design answered:
Liebe Julia, ja Sie sind wahrscheinlich rechts, unser Designteam wird das noch mal prüfen. Danke für den Hinweis.
30.06.2025 - 08:49
![]() SP wrote:
SP wrote:
Hi! I would like to use Drops Air yarn instead. ..how many balls I need? Unfortunately your calculation feature doesn’t allow me to calculate it. Thank you! 🙏🏼☺️
05.06.2025 - 07:06DROPS Design answered:
Dear SP, as Air belong to same yarn group C as Brushed Alpaca Silk use the weight for each colour (or the total weight for the whole garment with just one colour) to get the matching amount in DROPS Air in our converter (just use then 1 strand as each colour - 1 strand and 5 colors - whole garment) - just note that the garment might have another texture as yarns are different and, as always, remember to check and keep the correct tension.. Happy knitting!
05.06.2025 - 09:04
![]() Lila wrote:
Lila wrote:
If I want to knit this pattern by combining Alpaca and Melody, how many balls of yarn do I need?
21.05.2025 - 22:25
![]() Elke wrote:
Elke wrote:
Guten Abend, kann man diesen Pullover auch von unten nach oben stricken? Ich komme mit den Anleitungen von oben nach unten überhaupt nicht zurecht. Vielen Dank!
05.05.2025 - 20:50DROPS Design answered:
Liebe Elke, ja wahrscheinlich kann das man so machen; können wir Ihnen aber mit dieser Anleitung helfen? Hier finden Sie eine Lektion, die zeigt, wie man so einen Pullover von oben nach unten strickt, vielleicht kann das Ihnen helfen? Sonnst finden Sie hier alle unsere Anleitungen für Pullover von unten nach oben gestrickt - benutzen Sie Filters um die Suche einzugrenzen. Viel Spaß beim Stricken!
06.05.2025 - 09:36
![]() Katja wrote:
Katja wrote:
Hallo! Die Anleitung gefällt mir sehr gut. Doch habe ich eine Frage: Wenn die Ärmel und der Rumpfteil geteilt werden, wo genau werden die neuen Maschen angeschlagen? Auf dem Ärmel- oder Rumpfteil? Vielen Dank!
03.05.2025 - 09:49DROPS Design answered:
Liebe Katja, bei der Aufteilung sollen die neuen Maschen die der Ärmel ersetzen, schauen Sie mal in diese Lektion, ab Bild 9) zeigen wir die Aufteilung, Bild 11 und 14, wie die neuen Maschen angeschlagen werden und Bild 18 A/B wie man später die Ärmel strickt. Viel Spaß beim Stricken!
05.05.2025 - 07:27
![]() Liz wrote:
Liz wrote:
Could I make this with two strands only? I don’t want it to be too thick and warm but I really like the style. I also want a fairly loose stitch
17.03.2025 - 20:28DROPS Design answered:
Dear Liz, you can work it with 2 strands yarn group E to get the same thickness but if you like to work with only 2 strands Brushed Alpaca Silk, tension would be different (approx. yarn group D) so you would have to recalculate the pattern with your own tension - for ex. here for a tension 15-14 stitches - adjuster filters/tension if required. Happy knitting!
18.03.2025 - 10:06
|
|
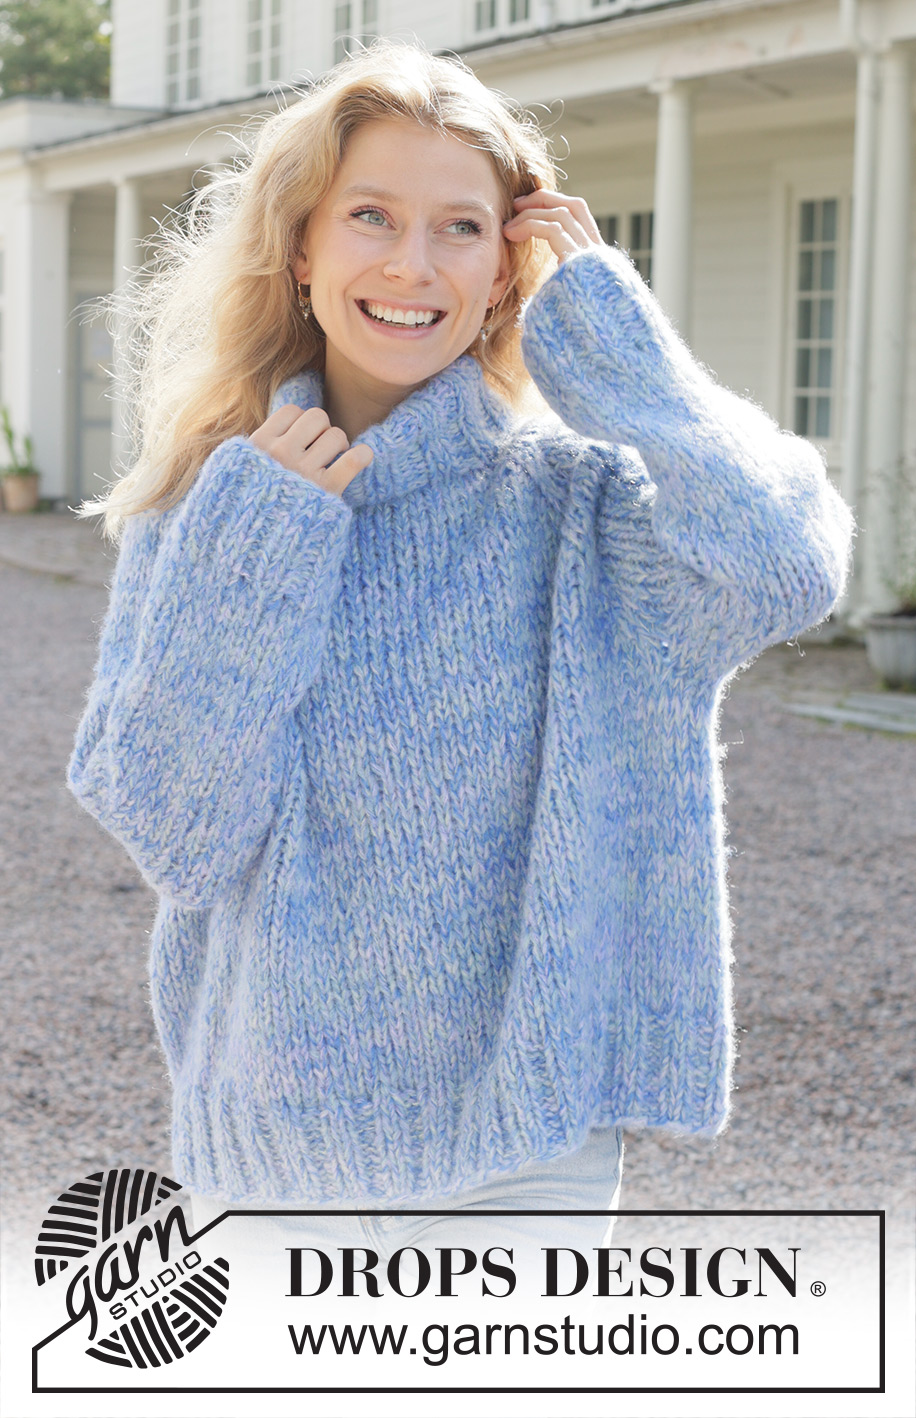
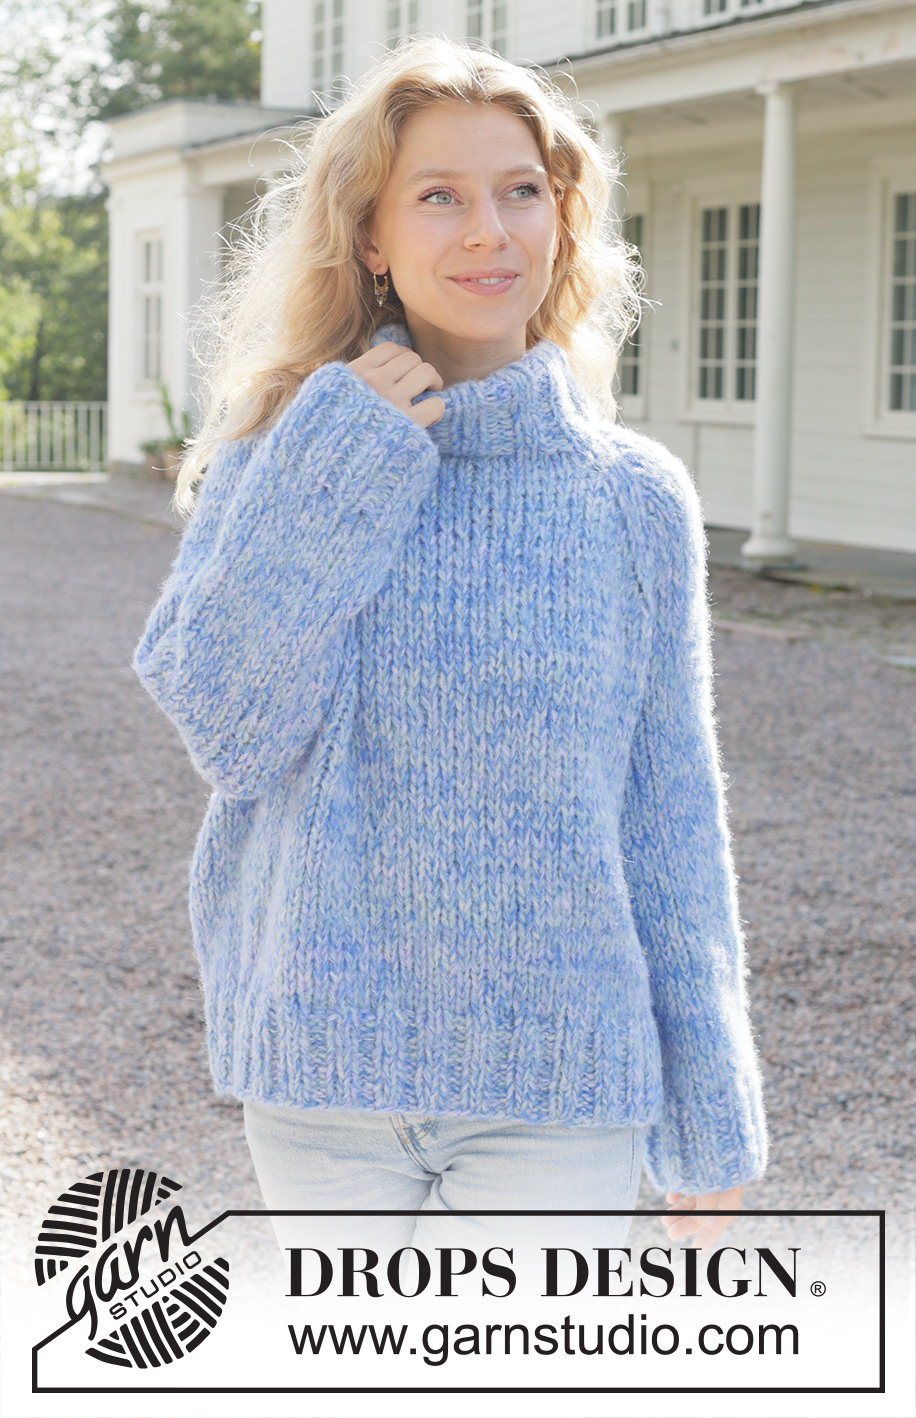
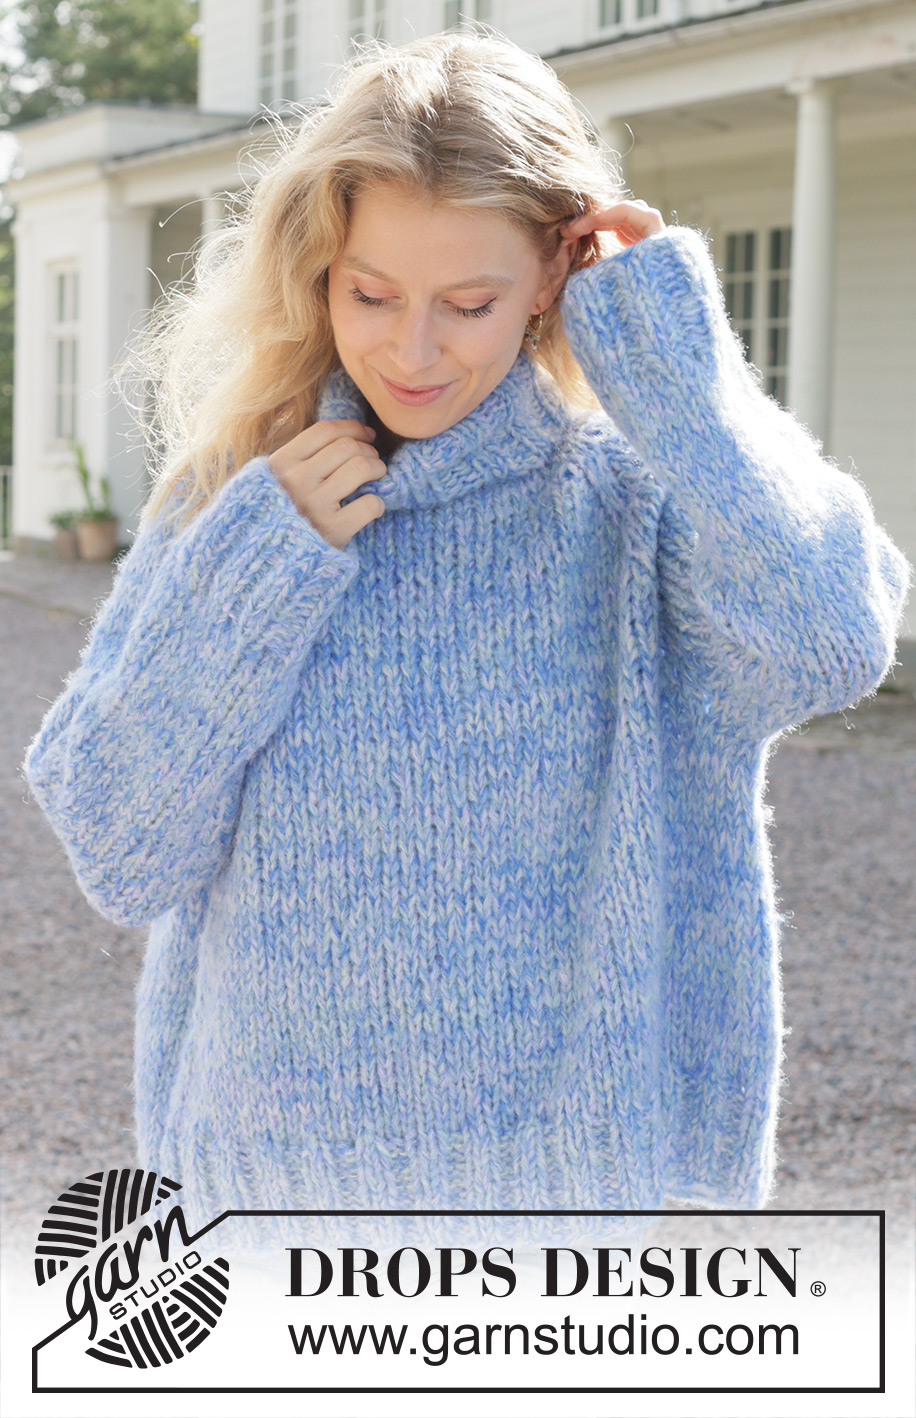
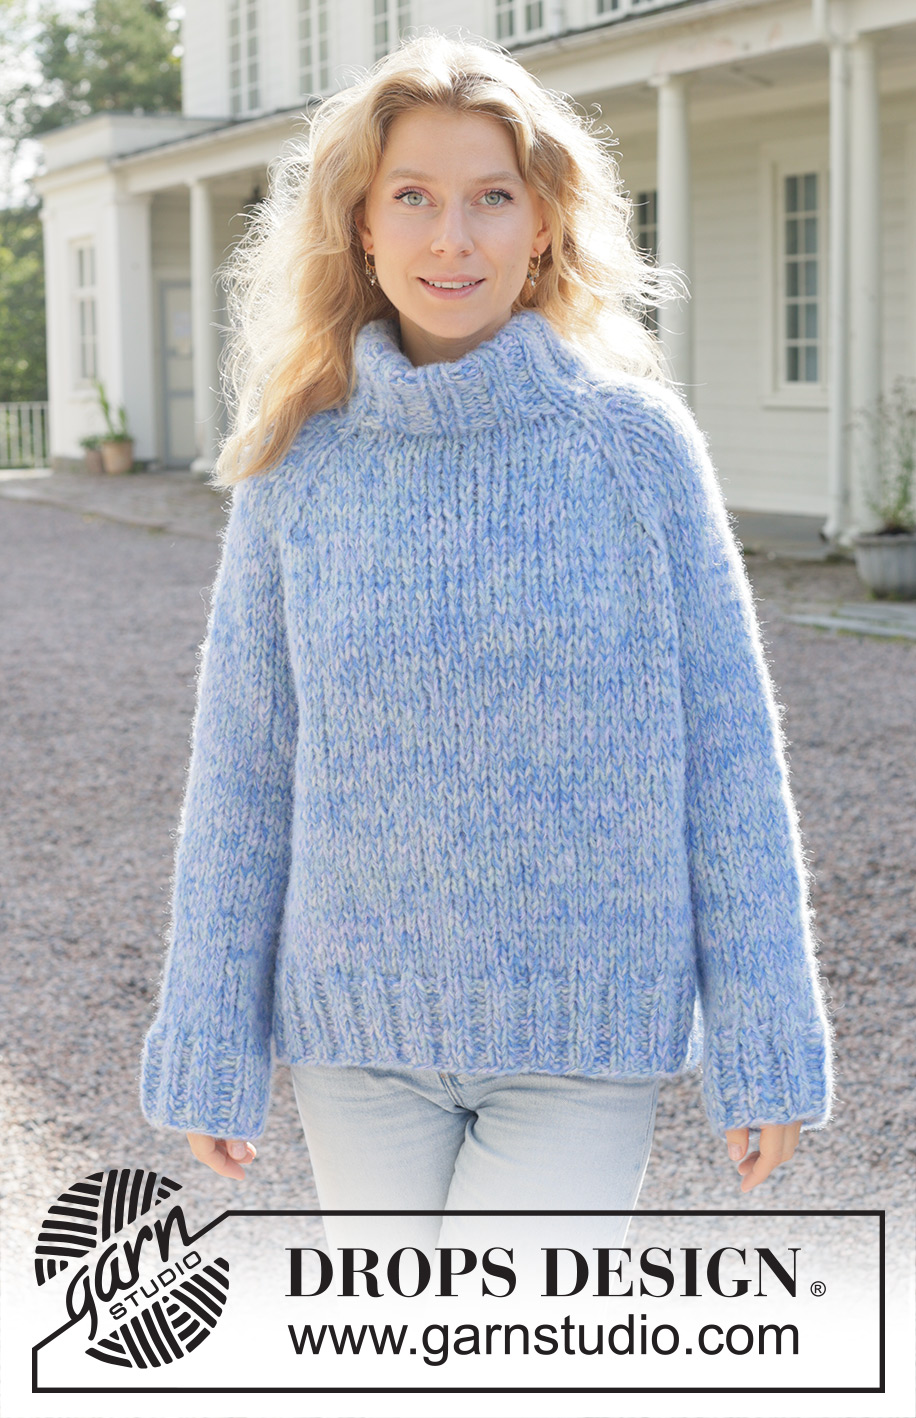
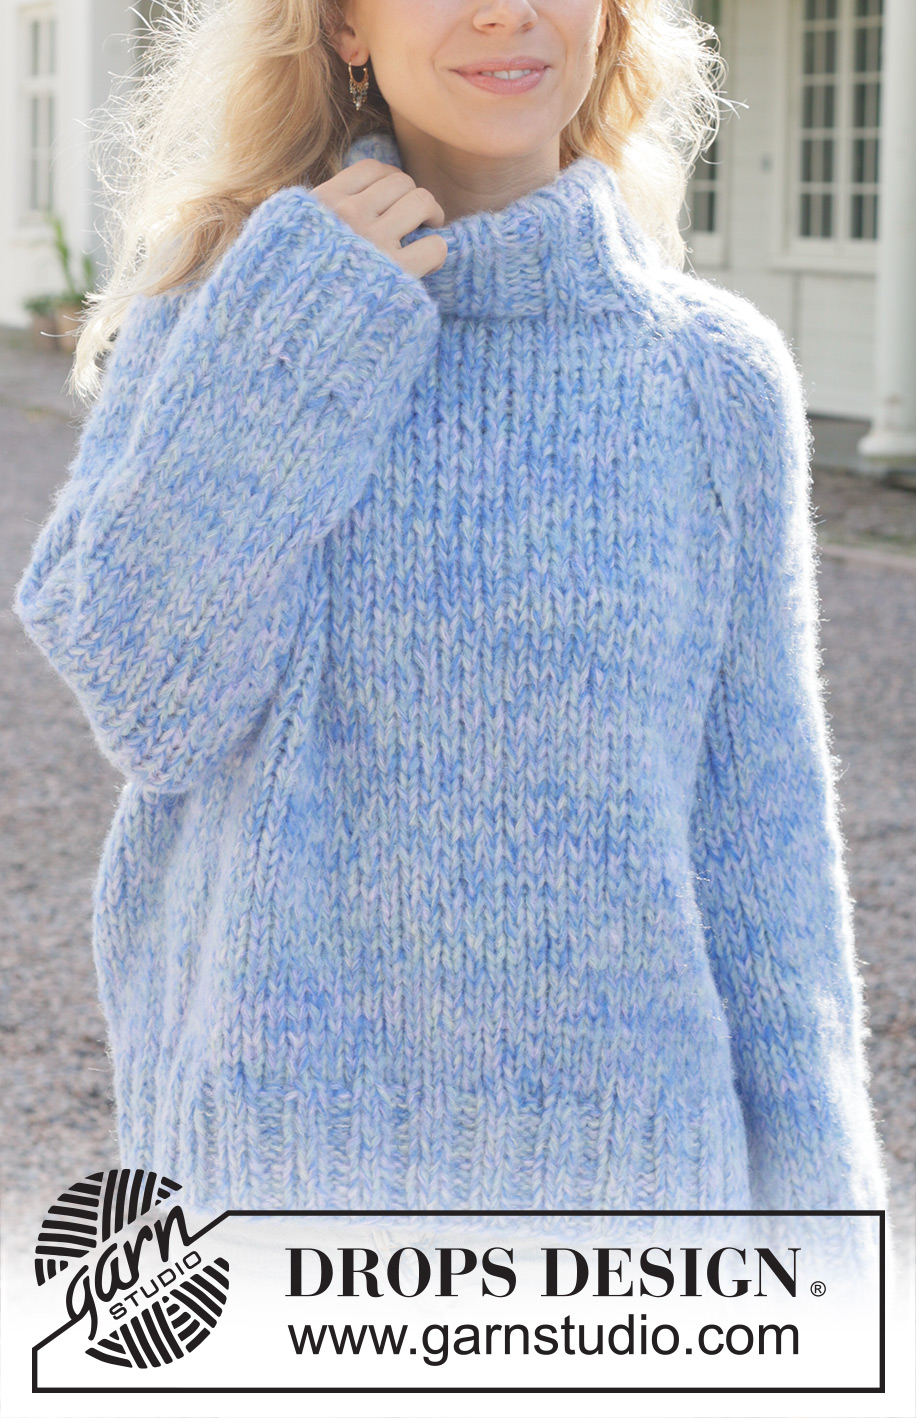
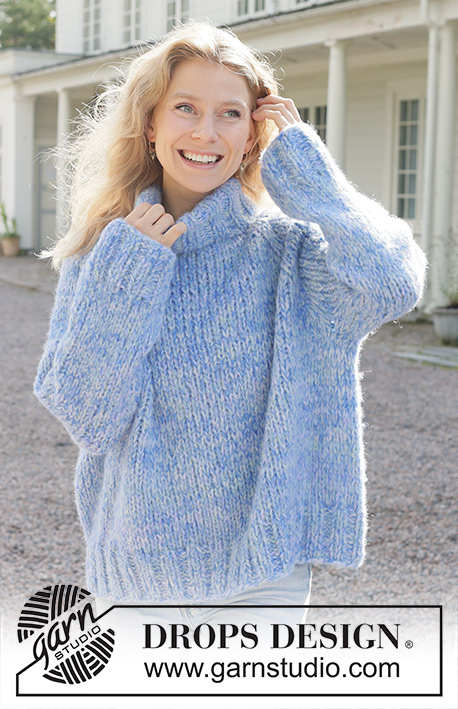
Azure Bliss Sweater#azureblisssweater |
|
 |
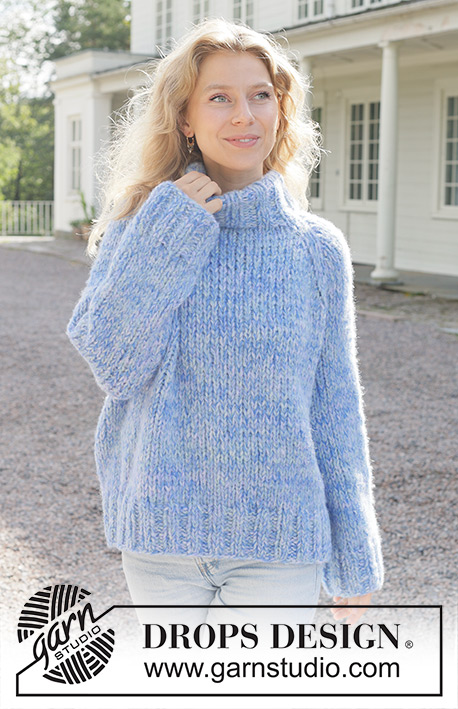 |
Knitted over-sized sweater in 5 strands DROPS Brushed Alpaca Silk. The piece is worked top down with stockinette stitch and raglan. Sizes S - XXXL.
DROPS 259-27 |
|
|
------------------------------------------------------- EXPLANATIONS FOR THE PATTERN: ------------------------------------------------------- RAGLAN: INCREASE 1 STITCH TOWARDS THE RIGHT BEFORE RAGLAN-STITCHES: Make 1 yarn over the right needle by taking the strand from the back and forwards. On the next round knit through the front loop. Then work the new stitch in stockinette stitch. INCREASE 1 STITCH TOWARDS THE LEFT AFTER RAGLAN-STITCHES: Make 1 yarn over the right needle by taking the strand in front of the needle then backwards. On the next round knit through the back loop. Then work the new stitch in stockinette stitch. INCREASE TIP (evenly spaced): To work out how to increase evenly, count the total number of stitches on the needle (e.g., 116 stitches) and divide by the number of increases to be made (e.g., 12) = 9.6. In this example, increase by making 1 yarn over after alternately each 9th and 10th stitch (approx.). On the next round knit the yarn overs twisted to avoid holes. SLEEVE TIP: When knitting up stitches under the sleeve, you can get a small hole in the transition between stitches on the body and sleeve. This hole can be closed by picking up the strand between 2 stitches and working this strand twisted together with the first stitch between body and sleeve. DECREASE TIP (for sleeves): Decrease 1 stitch on each side of the marker-thread as follows: Work until there are 3 stitches left before the marker-thread, knit 2 together, knit 2 (marker-thread sits between these 2 stitches), slip 1 stitch knit-wise, knit 1 and pass the slipped stitch over the knitted stitch (2 stitches decreased). ------------------------------------------------------- START THE PIECE HERE: ------------------------------------------------------- SWEATER – SHORT OVERVIEW OF THE PIECE: The pattern uses both long and short needles; start with the length which fits the number of stitches and change when necessary. The neck and yoke are worked in the round with circular needle, top down and from the right back shoulder. When the yoke is finished, it is divided for the body and sleeves and the body continued in the round, while the sleeves wait. The sleeves are worked top down, in the round. The neck is folded double from the wrong side and sewn down. If there is a «0» in your chosen size, skip the information and go straight to the next instruction. NECK: Cast on 48-48-56-56-56-64 stitches with circular needle size 8 MM = US 11 and 1 strand of each color DROPS Brushed Alpaca Silk (= 5 strands), casting on with a thicker needle makes the cast-on edge elastic. Change to circular needle size 7 MM = US 10.75. Work rib in the round (knit 2, purl 2) for 14 cm = 5½" in all sizes. Neck will be folded later towards the wrong side and should be only approx. 7 cm = 2¾". The beginning of the round is on right shoulder back. YOKE: Insert 4 marker-threads, without working the stitches and each thread inserted between 2 knitted stitches in the rib; these are the raglan-stitches. Count 1 stitch (belongs to the back piece), insert marker-thread-1 before the next stitch, count 8-8-8-8-8-12 stitches (= sleeve), insert marker-thread-2 before the next stitch, count 16-16-20-20-20-20 stitches (= front piece), insert marker-thread-3 before the next stitch, count 8-8-8-8-8-12 stitches (= sleeve), insert marker-thread-4 before the next stitch, there are 15-15-19-19-19-19 stitches left after the last marker-thread (= back piece). Insert 1 marker after the first 17-17-19-19-19-19 stitches (approx. mid-front); the piece is measured from here. Change to circular needle size 8 MM = US 11. Work stockinette stitch and increase for RAGLAN – read description above, as follows: ROUND 1: Increase on each side of all raglan-stitches (= 8 increased stitches) – NOTE: At the beginning of the round increase after the first 2 stitches, then increase at the end of the round. ROUND 2: Knit. Work ROUNDS 1 and 2 a total of 8-9-7-10-13-10 times (16-18-14-20-26-20 rounds worked) = 112-120-112-136-160-144 stitches. Now increase for raglan as follows: ROUND 1: Knit and increase on each side of all raglan-stitches (= 8 increased stitches). ROUND 2: Knit. ROUND 3: Knit and increase only on the front and back pieces (i.e., before marker-threads 1 and 3 and after marker-threads 2 and 4 – do not increase on the sleeves (= 4 increased stitches). ROUND 4: Knit. Work ROUNDS 1 to 4 a total of 4-4-6-5-4-6 times (= 16-16-24-20-16-24 rounds worked = you have increased 4-4-6-5-4-6 times on the sleeves and 8-8-12-10-8-12 times on the front and back pieces) = 160-168-184-196-208-216 stitches. When all the increases for raglan are finished, you have increased 16-17-19-20-21-22 times on the front and back pieces and 12-13-13-15-17-16 times on the sleeves. Remove the marker-threads and continue working without further increases until the yoke measures 23-25-27-29-30-32 cm = 9"-9¾"-10⅝"-11⅜"-11¾"-12½" from the marker mid-front. Now divide for the body and sleeves. DIVIDE FOR BODY AND SLEEVES: Knit 2-3-1-2-3-4 (stitches belong to the back piece), place the next 28-28-32-34-36-36 stitches on a thread for the sleeve, cast on 6-8-8-10-10-12 stitches (under the sleeve), knit 52-56-60-64-68-72 (= front piece), place the next 28-28-32-34-36-36 stitches on a thread for the sleeve, cast on 6-8-8-10-10-12 stitches (under the sleeve), knit the last 50-53-59-62-65-68 stitches (= back piece). The body and sleeves are finished separately. BODY: = 116-128-136-148-156-168 stitches. Work stockinette stitch until the piece measures 48-50-52-53-55-55 cm = 19"-19¾"-20½"-21"-21⅝"-21⅝" from the marker mid-front. Change to circular needle size 7 MM = US 10.75. Work rib (knit 2, purl 2), AT THE SAME TIME increase 12-12-12-16-16-16 stitches evenly on round 1 – read INCREASE TIP in explanations above = 128-140-148-164-172-184 stitches. When the rib measures 8-8-8-9-9-9 cm = 3⅛"-3⅛"-3⅛"-3½"-3½"-3½", bind off slightly loosely with rib. The sweater measures approx. 56-58-60-62-64-64 cm = 22"-22¾"-23⅝"-24⅜"-25¼"-25¼" from the marker mid-front and 60-62-64-66-68-70 cm = 23⅝"-24⅜"-25¼"-26"-26¾"-27½" from top of shoulder. SLEEVES: Place the 28-28-32-34-36-36 sleeve-stitches from one thread on circular needle size 8 MM = US 11 and knit up 1 stitch in each of the 6-8-8-10-10-12 stitches cast on under the sleeve – read SLEEVE TIP = 34-36-40-44-46-48 stitches. Insert a marker-thread in the middle of the 6-8-8-10-10-12 stitches under the sleeve. Start at the marker-thread and work stockinette stitch in the round. AT THE SAME TIME, when the sleeve measures 0-0-2-2-2-2 cm = 0"-0"- ¾"-¾"-¾"-¾", decrease 2 stitches under the sleeve – read DECREASE TIP. Decrease like this every 0-0-2-2-2-2 cm = 0"-0"- ¾"-¾"-¾"-¾" a total of 0-0-1-2-2-2 times = 34-36-38-40-42-44 stitches. Continue working until the sleeve measures 35-34-31-29-29-27 cm = 13¾"-13⅜"-12¼"-11⅜"-11⅜"-10⅝" from the division. Change to double pointed needles size 7 MM = US 10.75. Work rib (knit 2, purl 2), AT THE SAME TIME increase 2-4-2-4-6-4 stitches evenly on the first round = 36-40-40-44-48-48 stitches. When the rib measures 8-8-8-9-9-9 cm = 3⅛"-3⅛"-3⅛"-3½"-3½"-3½", bind off slightly loosely with rib. The sleeve measures approx. 43-42-39-38-38-36 cm = 17"-16½"-15¼"-15"-15"-14¼". ASSEMBLY: Fold rib at the top of neck down on inside of garment. Fasten rib to get a double neck edge. To avoid a tight neck edge that sticks out it is important to keep the seam elastic. |
|
 |
|
Have you finished this pattern?Tag your pictures with #dropspattern #azureblisssweater or submit them to the #dropsfan gallery. Do you need help with this pattern?You'll find 27 tutorial videos, a Comments/Questions area and more by visiting the pattern on garnstudio.com. © 1982-2026 DROPS Design A/S. We reserve all rights. This document, including all its sub-sections, has copyrights. Read more about what you can do with our patterns at the bottom of each pattern on our site. |
|


With over 40 years in knitting and crochet design, DROPS Design offers one of the most extensive collections of free patterns on the internet - translated to 17 languages. As of today we count 324 catalogs and 12290 patterns - 12280 of which are translated into English (US/in).
We work hard to bring you the best knitting and crochet have to offer, inspiration and advice as well as great quality yarns at incredible prices! Would you like to use our patterns for other than personal use? You can read what you are allowed to do in the Copyright text at the bottom of all our patterns. Happy crafting!
Post a comment to pattern DROPS 259-27
We would love to hear what you have to say about this pattern!
If you want to leave a question, please make sure you select the correct category in the form below, to speed up the answering process. Required fields are marked *.