
Popular categories
Looking for a yarn?


Comments / Questions (20)
![]() Anna wrote:
Anna wrote:
Hur delar man 58 maskor på 4 strumpstickor? Det blir 14,5 maskor/sticka. Jag provar göra 14 maskor/per sticka och ser hur det blir.
06.01.2026 - 20:50DROPS Design answered:
Hej Anna. Då får du 14 maskor på 2 av stickorna och 15 maskor på 2 av stickorna. Mvh DROPS Design
07.01.2026 - 13:28
![]() Priscille wrote:
Priscille wrote:
Il est indiqué pour l'échantillon que : 22 mailles en largeur et 30 rangs en hauteur, en jersey = 10 x 10 cm 32 mailles en largeur et 30 rangs en hauteur, en jersey = 10 x 10 cm Est-ce une erreur ? Quelle est la taille d'aiguilles utilisées pour les deux indications ? Est-ce que deux indications sont bien en point jersey ? Merci
01.01.2026 - 15:31DROPS Design answered:
Bonjour Priscille, le deuxieme echantillon est fait en cotes. Il y a une erreur la-bas. Je vais la notifier. Bon tricot!
02.01.2026 - 13:06
![]() Maëliss wrote:
Maëliss wrote:
Bonjour, Je suis en train de faire le patron du bonnet. Je suis à la partie où il faut diminuer 14 fois tous les 2 tours et 7 fois tous les tours. Je ne comprend pas cette partie.. Merci de votre réponse
16.10.2025 - 21:46DROPS Design answered:
Bonjour Maëliss, une fois que vous avez placé vos 6 marqueurs, vous avez diminué 1 m avant chaque marqueur (vous avez diminué 6 m et il vous reste 126 ou 138 m); vous tricotez les mailles comme elles se présentent au tour suivant (les côtes ne tombent plus juste à cause des diminutions ); puis vous diminuez de la même façon 1 m avant chaque marqueur (tricotez ensemble à l'envers les 2 mailles avant chaque marqueur); diminuez ainsi 13 fois au total tous les 2 tours puis 7 fois tous les tours. Bon tricot!
17.10.2025 - 08:05
![]() Philippine Cochet wrote:
Philippine Cochet wrote:
Bonjour Est-il possible de réaliser ce modèle avec des aiguilles droite ? Si oui, comment peut-on adapter ?
21.11.2024 - 13:11DROPS Design answered:
Bonjour Mme Cochet, pour le bonnet cette leçon pourra vous aider, pour les mitaines, ce sera bien plus simple de les tricoter en rond. Bon tricot!
21.11.2024 - 16:05
![]() Jo wrote:
Jo wrote:
Hi. I’m knitting the mittens. When increasing for the thumb (smallest size) the pattern says to increase one stitch either side of last knit stitch, every other round for 9 times in total. I can’t understand how that gives 19 new stitches and not 18. Can you explain please.
12.03.2024 - 20:13DROPS Design answered:
Dear Jo, you should increase on both sides of the last stitch. The 19 stitch includes this one stitch and those that are increased of both sides of it. I hope this helps. Happy knitting.
13.03.2024 - 00:51
![]() Sidsel Wohlen wrote:
Sidsel Wohlen wrote:
Dere må rette opp strikkefastheten i oppskriften. Den skal umulig være 32 m på 10 cm !
23.01.2024 - 11:53
![]() Linn Persson wrote:
Linn Persson wrote:
Höger vante Det står höger vante i beskrivningen. Gör man annorlunda på vänster vante?
03.10.2022 - 23:18
![]() Janne Havrevold wrote:
Janne Havrevold wrote:
Hei. Jeg forstår ikke helt hva man skal gjøre når man har satt i merkene og skal felle på lua. Det med å felle hver 2 omgang ved merket er greit, men det 7-7 ganger greiene forstår jeg ikke. Kan noen hjelpe?
10.12.2021 - 14:19DROPS Design answered:
Hei Janne, Man feller ved alle merkene på en runde, strikke en runde uten felling, feller ved alle merkene på neste runde, strikker en runde uten felling. Gjør dette syv ganger i høyde (7 omganger med felling og 7 omganger uten felling). God fornøyelse!
13.12.2021 - 07:16
![]() Nadine Dujardin wrote:
Nadine Dujardin wrote:
Lieve Paula, ik ben een beginnende breister en had een uileg gekregen van hoe je een muts ? brei op 2 gewone naalden ( geen rondbreien) ?
05.01.2021 - 16:31DROPS Design answered:
Dag Nadine,
De meeste patronen van mutsen worden met rondbreinaalden gebreid, maar er staan ook een aantal op die je met rechte naalden kunt breien. Mocht je wel willen leren met rondbreinaalden te breien, bekijk dan deze video.
09.01.2021 - 17:01
![]() Annita Fjord Pedersen wrote:
Annita Fjord Pedersen wrote:
Kære Drops Design. I opskriften til fingervanterne, er jeres udtagningstips, at man tager masker ud via omslag. Hvordan gør man det før en vrangmaske? Skal man slå garnet om en gang for at tage en maske ud og derefter slå garnet om strikkepinden igen, for så at kunne strikke vrangmasken? Tak for hjælpen.
17.03.2020 - 12:35DROPS Design answered:
Hej Annita, Ja det stemmer, omslaget gør du på samme måde uanset om du skal strikke en ret eller en vrangmaske bagefter. God fornøjelse!
19.03.2020 - 14:00
|
|
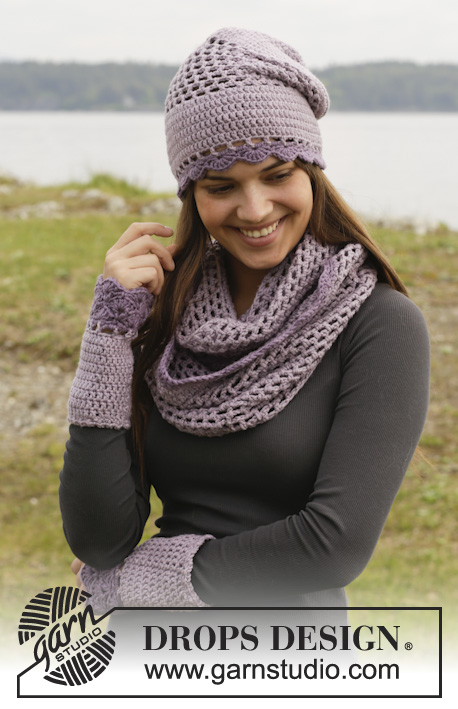
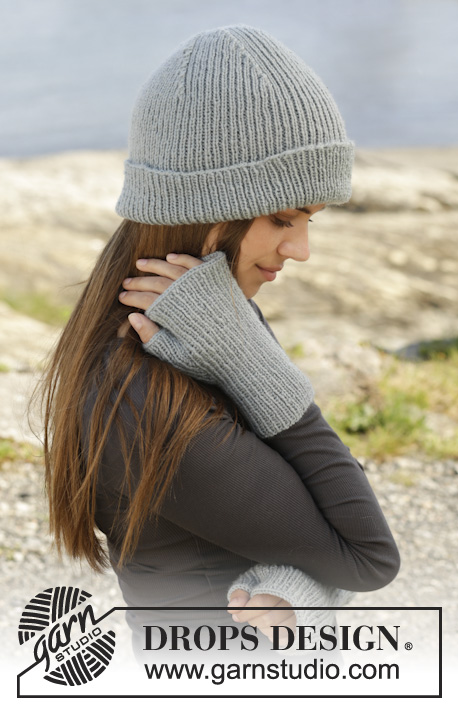
Paula#paulaset |
|
 |
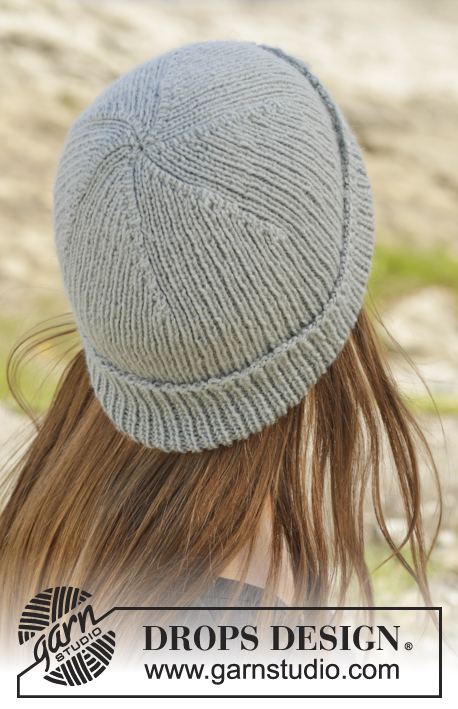 |
Knitted DROPS hat and open-finger mittens with rib in ”Karisma”.
DROPS 156-15 |
|
|
RIB: * K 1, P 1 *, repeat from *-*. INCREASE TIP: Inc 1 st by making 1 YO, on next round K YO twisted (i.e. work in back loop of st instead front) to avoid holes. ---------------------------------------------------------- HAT: Cast on 132-144 sts on circular needle size 3.5 mm / US 4 with Karisma. Work RIB – see explanation above – until piece measures 19-20 cm / 7½"-8". REMEMBER THE GAUGE! On next round, work as follows: * Rib over the next 22-24 sts, AT THE SAME TIME insert a marker in first st (= K st) *, repeat from *-* 5 more times = 6 markers. Work next round as follows: Work until 2 sts before 1st marker, P 2 tog, * continue with rib until 2 sts before next marker, P 2 tog *, repeat from *-* the entire round = 126-138 sts remain. Continue with K over K and P over P AT THE SAME TIME dec every other round 12-14 more times and every round 7-7 times = 12 sts remain. NOTE: Always work 1 P st before st with marker. St with marker will displace over rib. Cut the yarn and pull it through the last 12 sts and fasten. Fold an edge approx. 5 cm / 2" at the bottom of hat upwards. ---------------------------------------------------------- RIGHT MITTEN: Worked in the round on double pointed needles. Cast on 52-54-58 sts on double pointed needles size 3.5 mm / US 4 with Karisma. Work RIB – see explanation above – until piece measures 7 cm / 2¾". REMEMBER THE GAUGE! On next round continue rib as before, AT THE SAME TIME inc for thumb on each side of the last K st on round – READ INCREASE TIP! Inc every other round 9-10-12 times in total = 19-21-25 thumb sts - work inc sts in rib. When piece measures 12½-13½-14 cm / 4⅞"-5¼"-5½", slip these 19-21-25 thumb sts on 1 safety pin. Then cast on 1 new st over sts on safety pin on next round = 52-54-58 sts. Continue with rib until piece measures 17-18-19 cm / 6¾"-7"-7½". Bind off in rib. THUMB: Slip the 19-21-25 sts from safety pin back on needle and pick in addition up 1 st behind theses sts = 20-22-26 sts on needle. Distribute sts on 3 double pointed needles and work for 1 cm / ½", bind off in rib. Knit another mitten the same way. |
|
Have you finished this pattern?Tag your pictures with #dropspattern #paulaset or submit them to the #dropsfan gallery. Do you need help with this pattern?You'll find 23 tutorial videos, a Comments/Questions area and more by visiting the pattern on garnstudio.com. © 1982-2026 DROPS Design A/S. We reserve all rights. This document, including all its sub-sections, has copyrights. Read more about what you can do with our patterns at the bottom of each pattern on our site. |
|


With over 40 years in knitting and crochet design, DROPS Design offers one of the most extensive collections of free patterns on the internet - translated to 17 languages. As of today we count 324 catalogs and 12290 patterns - 12280 of which are translated into English (US/in).
We work hard to bring you the best knitting and crochet have to offer, inspiration and advice as well as great quality yarns at incredible prices! Would you like to use our patterns for other than personal use? You can read what you are allowed to do in the Copyright text at the bottom of all our patterns. Happy crafting!
Post a comment to pattern DROPS 156-15
We would love to hear what you have to say about this pattern!
If you want to leave a question, please make sure you select the correct category in the form below, to speed up the answering process. Required fields are marked *.