Comments / Questions (7)
![]() Elena wrote:
Elena wrote:
Dear Garnstudio-Team, can this pullover be knitted in the round bottom-up until armholes? Thank you!
22.03.2021 - 22:05DROPS Design answered:
Dear Elene, yes, it can be pretty easily done. Add up the stitches of teh front and the back to cast on, but omit the edge stitches (4 stitch on theround all together), and knit straight up with the pattern until the armhole should begin. Divide the stitches to the front and back and continue according to the instructions. Happy Knitting!
22.03.2021 - 23:40
![]() Wenche Olsen wrote:
Wenche Olsen wrote:
Hei. Jeg finner ikke ut om det skal strikkes vrangbord på bol og ermer, og hvor mange omganger det skal være?
18.01.2019 - 14:03DROPS Design answered:
Hei Wenche. Det strikkes kun vrangbord rundt halsen. Rundt ermene og nederst på bolen strikkes det mønster med en gang. God fornøyelse
23.01.2019 - 15:29Amy wrote:
What does 'adjust to end after 2 rows stockinette st ' mean?
28.05.2018 - 10:30DROPS Design answered:
Dear Amy, you start working M.2 after 64-70 cm (see size) and at least after 2 rows stocking stitch in M.1. Happy knitting!
28.05.2018 - 11:33
![]() Miriam wrote:
Miriam wrote:
Hei. I diagram m1, hvor befinner kastene seg?
01.09.2017 - 23:31DROPS Design answered:
Hei Miriam. Forklaringen til diagram ikonene finner du over målskissen og diagrammet. I denne oppskriften har kastet en sort sirkel. God Fornøyelse!
04.09.2017 - 11:34
![]() RODRIGUEZ wrote:
RODRIGUEZ wrote:
Effectivement le sigle "2m ens à l'end "n'est pas le même sur le diagramme. Est ce une erreur d'imprimerie? Merci
25.03.2013 - 13:33DROPS Design answered:
Bonjour Madame Rodriguez, le 3ème symbole est inversé dans la légende effectivement, mais il s'agit bien de 2 m à tricoter ens à l'end. Bon tricot !
25.03.2013 - 13:49
![]() SUSINI wrote:
SUSINI wrote:
Je pense qu'il y un problème par rapport au diagramme qui ne correspond pas aux signes. En effet, le signe signifiant "Sur l'endroit : 2 m ens à l'end" est inversé sur le diagramme, est ce que cela veut dire que les 2 m doivent être prises ensemble à l'envers ?
22.11.2012 - 13:21DROPS Design answered:
Bonjour Madame Susini, ce symbole dans le diagramme de ce modèle signifie bien de tricoter 2 m ens à l'end sur l'endroit. N'hésitez pas à vous référer à la vidéo dont le lien figure en bas de page si nécessaire. Bon tricot !
22.11.2012 - 14:11
![]() Hanna Marie wrote:
Hanna Marie wrote:
Nydelig genser, strikket den i burgunder.
06.04.2012 - 22:29
Sandy Waves |
|||||||||||||
|
|
|||||||||||||
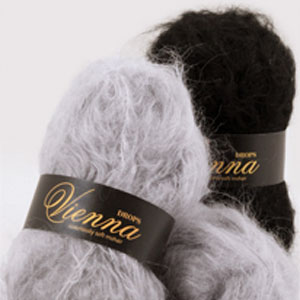
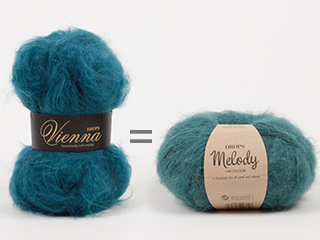
Pullover in DROPS Snow and DROPS Vienna or DROPS Snow and DROPS Melody. Gloves in DROPS Karisma Superwash. Scarf in DROPS Vivaldi or DROPS Brushed Alpaca Silk.
DROPS 76-13 |
|||||||||||||
|
PULLOVER: Gauge: 10 sts x 14 rows = 10 x 10 cm in pattern. Measuring-tips: Measure the garment when held up due to the pattern. Pattern: See chart. The pattern is seen from the right side. The chart is placed sideways on the page with the bottom of the chart toward the outside edge of the page. Note: Pattern 3 (M.3) is incorrectly marked on the chart. Pattern 3 is the first 12 rows of the chart. Rib: * P 2, K 2 *, repeat from * - *. Front: Loosely cast on 53-59-65-70 sts on smaller needles with 2 strands Vienna or Melody. Change to 1 strand Snow and knit as follows (row 1 = right side): K 1 (edge st knit in garter st), 0-3-6-0 sts stockinette st, Pattern 1 over 51-51-51-68 sts, 0-3-6-0 sts stockinette st, K 1 (edge st knit in garter st). Continue the pattern as established – note: for sizes M/L and L/XL on the rows where you K all sts from the wrong side, you need to continue to K across the sts in stockinette st at each side so that the ridge will continue all the way across the row. When the piece measures 52-53-54-55 cm - see Measuring-tips - bind off 1 edge st at each side to mark armholes = 51-57-63-68 sts, continue the pattern. When the piece measures approx. 64-66-68-70 cm - adjust to end after 2 rows stockinette st - knit Pattern 2 to finished measurements. At the same time after row 2 of Pattern 2 put the center 9-9-9-10 sts on a st holder for the neck. Then bind off at each neck edge every other row: 2 sts 1 time and 1 st 1 time = 18-21-24-26 sts remain on shoulder. Bind off when the piece measures 72-74-76-78 cm. Back: Cast on and knit the same as the front. Bind off for armhole as on front. When the piece measures approx. 64-66-68-70 cm (match front) continue with Pattern 2 to finished measurements. When the piece measures 70-72-74-76 cm bind off the center 15-15-15-16 sts for the neck = 18-21-24-26 sts remain on each shoulder. Bind off when the piece measures 72-74-76-78 cm. Sleeve: Loosely cast on 29-29-31-31 sts with 2 strands Vienna or Melody. Change to 1 strand Snow and knit as follows (row 1 = right side): K 1 (edge st knit in garter st), 5-5-6-6 sts stockinette st, Pattern 1 over 17 sts, 5-5-6-6 sts stockinette st, K 1 (edge st knit in garter st). Continue in pattern as established – note that on the rows where you K all sts from the wrong side, you need to continue to K across the sts in stockinette st at each side so that the ridge will continue across the row. When the piece measures 8 cm inc 1 st at each side every 8-6-5.5-4.5 cm a total of 6-7-7-8 times = 41-43-45-47 sts. When sleeve measures 50-48-46-44 cm, bind off all sts. Assembly: Sew right shoulder. Collar: Pick up approx. 38 to 46 sts incl. sts on st holder (divisible by 4 + 2) around the neck with 2 strands Vienna. If you pick up more than 46 sts you must dec evenly distributed on the 1st row so the collar will not be stretched out. Knit rib keeping 1 edge st at each side in garter st for approx. 12 cm - or as long as desired, bind off in rib. Sew left shoulder and up collar. Sew in sleeves. Sew sleeve and side seams using edge sts as a seam allowance. GLOVES: Sizes: S/M - M/L Materials: DROPS KARISMA SUPERWASH from Garnstudio 150-150 gr nr 01, natural. DROPS 3 mm [US 2] and 3.5 mm [US 4] double-pointed needles, or sizes needed to obtain correct gauge. Gauge: 22 sts x 30 rows on larger needles in stockinette st = 10 x 10 cm. Rib: * K 2, P 2 *, repeat from * - *. Garter st, when knitting flat: Knit all sts, all rows. Garter st, when knitting in the round: *Rnd 1, knit. Rnd 2, purl.* Repeat from * - *. Gloves: Cast on 52-56 sts on smaller double-pointed needles; join and knit 4 rows garter st. Change to rib and knit until the piece measures 15 cm, decreasing 8 sts evenly distributed on the last row = 44 (48) sts. Measure the piece from here. Change to larger double pointed needles and knit the next row in stockinette st as follows: 22-24 sts (upper hand), 1-1 st for the thumb (put a marker in this st), 21-23 sts (inside hand). Continue in stockinette st over all sts. When the piece measures 1-2 cm inc 1 st each side of thumb st every 4-3 rows a total of 5-6 times = 54-60 sts - knit the increased sts in stockinette st. Put the 11-13 thumb sts on a st holder. Cast on 1 new st in back of these sts on the next row= 44-48 sts. Continue until the piece measures 9-10 cm. Put the 22-24 upper hand sts on a st holder (st holder-1) and the 22-24 inside hand sts (incl. st in back of thumb) on a second st holder (st holder-2).Now knit fingers as follows: Little finger: Pick up 4-5 sts from st holder-1 and 5-5 sts from st holder-2 and cast on 2 new sts toward ring finger = 11-12 sts. Join and knit stockinette st until finger measures 5-6 cm. Now K 2 tog across row, 1 strand through the remaining sts and fasten neatly. Put all sts from st holders back on needles and knit 3 rows stockinette st. Put back on st holders 1 and 2. Ring finger: Pick up 6-6 sts from st holder-1 and 5-6 sts from st holder-2 and cast on 1 st between fingers at each side = 13-14 sts. Join and knit stockinette st until finger measures 7-8 cm. Now K 2 tog across row, then pull 1 strand through the remaining sts and fasten neatly. Middle finger: Pick up 6-7 sts from st holder-1 and 6 6 sts from st holder-2 and cast on 1 st between fingers at each side = 14-15 sts. Join and knit stockinette st until finger measures 8-9 cm. Now K 2 tog across row, then pull 1 strand through the remaining sts and fasten neatly. Index finger: Pick up the remaining 6-6 sts from st holder-1 and 6-7 sts from st holder-2 and cast on 2 new sts toward middle finger = 14-15 sts. Join and knit stockinette st until finger measures 6-7 cm. Now K 2 tog across row, then pull 1 strand through the remaining sts and fasten neatly. Thumb: Put the 11-13 thumb sts onto needles, pick up 3-3 sts in back of thumb = 14-16 sts. Join and knit stockinette st until thumb measures 5-6 cm. Now K 2 tog across row, pull 1 strand through the remaining sts and fasten neatly. Assembly: Fold hem to wrong side and stitch in place. Sew a small st between fingers so that there will not be a hole in the transitions. Knit a second glove, reversing shaping. SCARF: Length: approx. 150 cm [59"] Width: approx. 40 cm [15.75"] Materials: DROPS VIVALDI from Garnstudio 100 gr nr 06, natural. DROPS 5 mm [US 8] needles, or size needed to obtain correct gauge. Gauge: 18 sts in Pattern 3 = 10 cm. Garter st, when knitting flat: Knit all sts, all rows. Pattern: See chart. The scarf uses only Pattern 3 (M.3) and the pattern is seen from the right side. The chart is placed sideways on the page with the bottom of the chart towards the outer edge of the page. Note: Pattern 3 (M.3) is incorrectly marked on the chart. Pattern 3 is the first 12 rows of the chart. Scarf: Cast on 74 sts with 2 strands of Vivaldi. Take away 1 strand and knit 4 rows garter st. Continue with Pattern 3, keeping 3 sts in garter st at each side edge. When the piece measures approx. 148 cm knit 4 rows garter st over all sts then bind off with 2 strands of yarn. |
|||||||||||||
Diagram explanations |
|||||||||||||
|
|||||||||||||
 |
|||||||||||||
 |
|||||||||||||
Have you finished this pattern?Tag your pictures with #dropspattern or submit them to the #dropsfan gallery. Do you need help with this pattern?You'll find 25 tutorial videos, a Comments/Questions area and more by visiting the pattern on garnstudio.com. © 1982-2026 DROPS Design A/S. We reserve all rights. This document, including all its sub-sections, has copyrights. Read more about what you can do with our patterns at the bottom of each pattern on our site. |
|||||||||||||






Post a comment to pattern DROPS 76-13
We would love to hear what you have to say about this pattern!
If you want to leave a question, please make sure you select the correct category in the form below, to speed up the answering process. Required fields are marked *.