
Popular categories
Looking for a yarn?


































Comments / Questions (34)
 Regina wrote:
Ich würde gerne den Pulli Merry Santas nach stricken und hätte gerne gewusst wo es die Wolle dafür gibt .Danke schön und liebe Grüße
16.09.2026 - 13:43DROPS Design answered:
Liebe Regina, hier finden Sie die List von DROPS Händlern in Deutschland. Viel Spaß beim Stricken!
17.09.2026 - 09:01
 Laila wrote:
Hvor køber jeg denne opskrift , når jeg køber garn ?
03.09.2026 - 16:31DROPS Design answered:
Hei Laila, Oppskriften er gratis. Du kan enten strikke med oppskriften åpen på PCen, eller skrive oppskriften ut på papir (ikon øverst på høyre siden). Hilsen Drops Team.
05.09.2026 - 07:01
Aase wrote:
Kan man strikke den i andre garn der kan komme vaskemaskine
21.08.2026 - 13:15DROPS Design answered:
Hei Aase. Ja, du kan strikke genseren i andre kvaliteter i samme garngruppe (garngruppe C). F.eks DROPS Paris, men som er et bomulsgarn eller DROPS Big Merino (100% merino ull, men vær obs /les vaskeanvisningen godt). Du kan også bruke 2 tråder med garn fra garngruppe A, feks DROPS Fabel eller DROPS Nord. Bruk vår Garnkalkulator for å finne riktig garnmengde i den størrelsen du ønsker åstrikke. mvh DROPS Design
24.08.2026 - 07:41
Gitte wrote:
Hvilken farve vil i erstatte nr. 25 hindbær med??
07.08.2026 - 15:36DROPS Design answered:
Hei Gitte, Hvis du klikker på Garn & Pinner på toppen og velger Air, er det 4 forskjellige rødfarger du kan velge fra - 44 eller 61 er sterke farger som kunne erstatte 25. Hilsen Drops Team.
11.08.2026 - 06:37
 Elizabeth wrote:
The sleeve decreases don’t add up, for my size it says decrease every 7cm 4 times which takes the sleeve to 28 cm plus 3 for first decrease but then states total length should be 26cm. Am I reading to wrong?
21.11.2025 - 11:27DROPS Design answered:
Dear Elizabeth, the first decrease is worked after 3 cm, then the 2nd one after 10 cm (7 cm afterwards), then the 3rd one after 17 cm and the 4th one after 24 cm, you now work 2 more cm before ribbing. Happy knitting!
21.11.2025 - 16:04
Dorthe wrote:
Hvor finder jeg diagram til mønstret??? Vh Dorthe
10.11.2025 - 12:11DROPS Design answered:
Hei Dorthe. Den finner du helt nederst på oppskriften.mvh DROPS Design
17.11.2025 - 19:11
Sue wrote:
I used smaller sized needles & it is now a perfect size for a 1 year old !
30.10.2025 - 15:59
Sue wrote:
Hello - is there anyway I could make this in a smaller size for a 1 year old boy who is gorgeous ?
22.09.2025 - 14:02DROPS Design answered:
Hi Sue,
Unfortunately, we only have this pattern for ages 2 and up. You might find a suitable pattern among our baby patterns.
29.10.2025 - 18:39
 Yolande wrote:
Bonjour Je ne comprends pas trop le diagramme J'ai l'impression qu'il est à l'envers en commençant par le haut 🤔 Merci pour votre réponse et bonne année à tous
09.01.2025 - 17:46DROPS Design answered:
Bonjour Yolande, le pull se tricote de haut en bas, donc, en tricotant les pères Noël de haut en bas (en commençant le diagramme par le bas), ils seront automatiquement à l'endroit - retrouvez cette partie de l'empiècement ici, cela pourra peut-être vous aider à mieux visualiser. Bon tricot!
09.01.2025 - 18:16
Maria Magdalena Baltat wrote:
Merci
03.01.2025 - 21:56
|
|||||||||||||||||||
Merry Santas#merrysantassweater |
|||||||||||||||||||
 |
 |
||||||||||||||||||
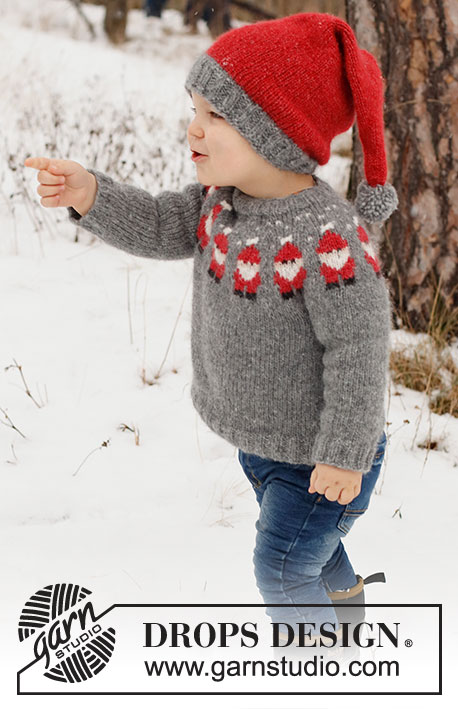
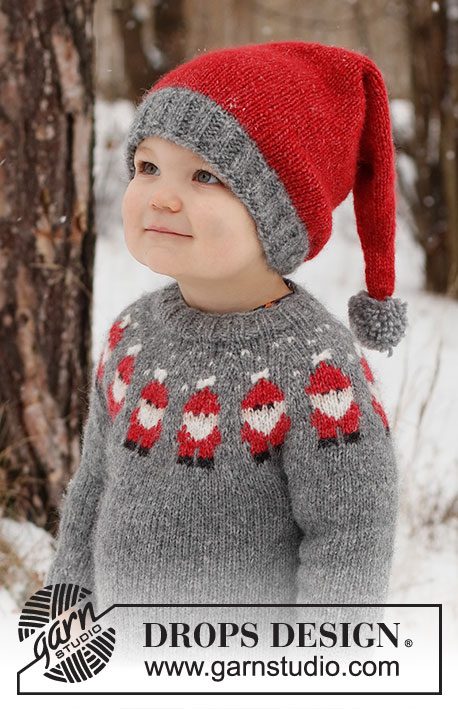
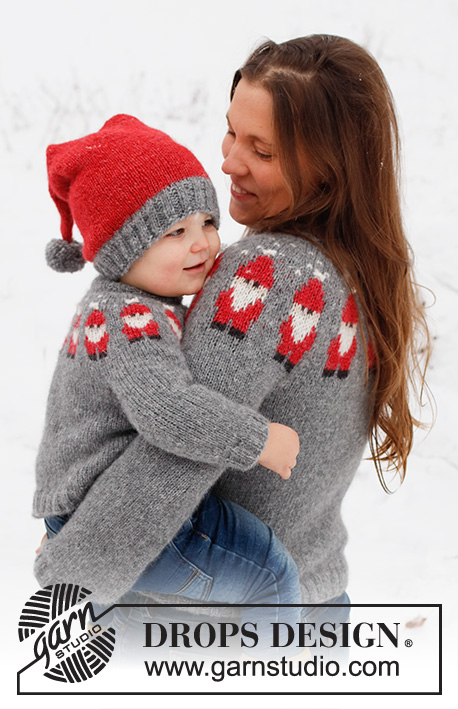
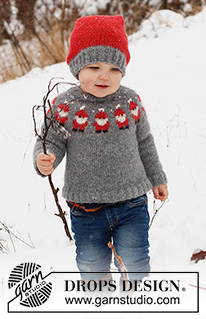
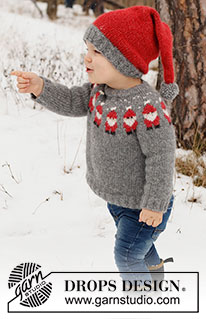
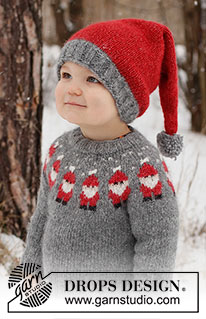
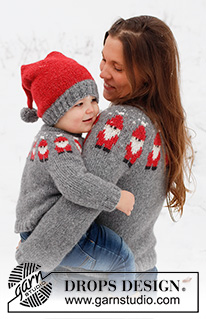
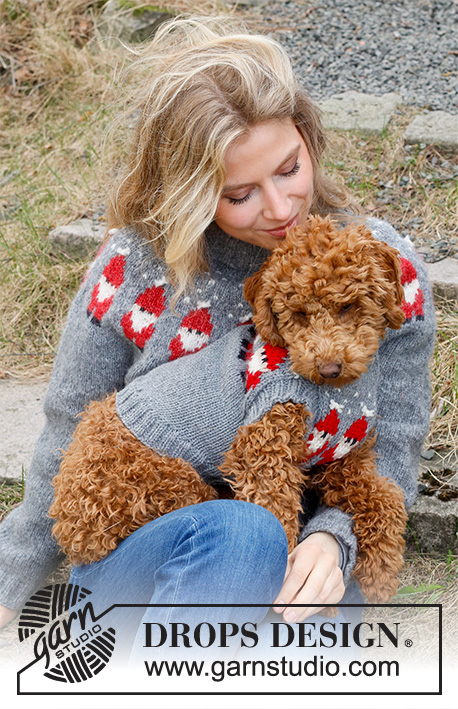
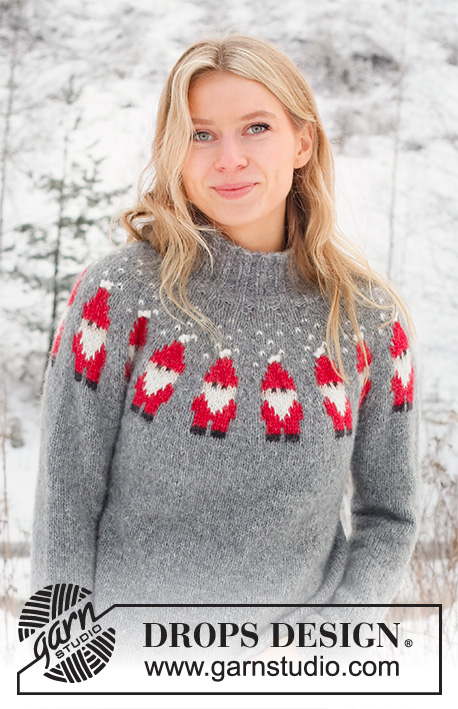
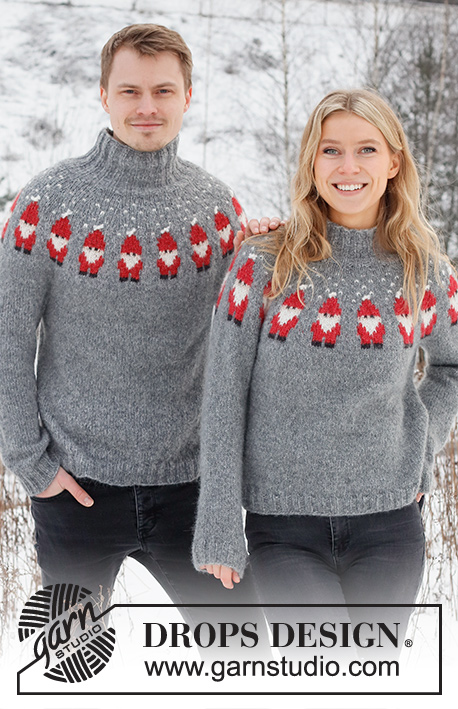
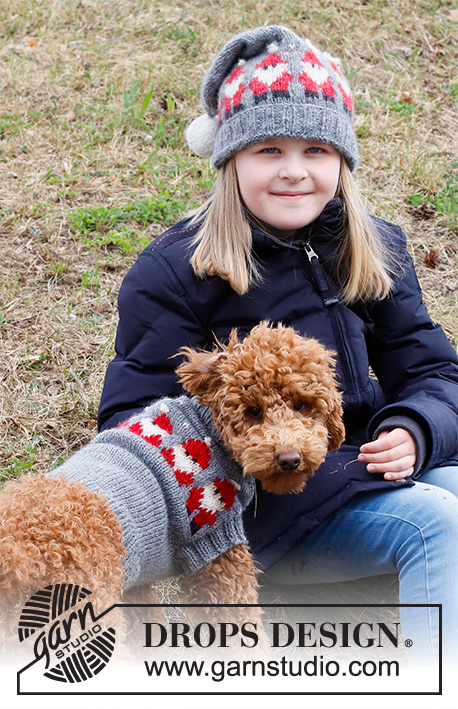
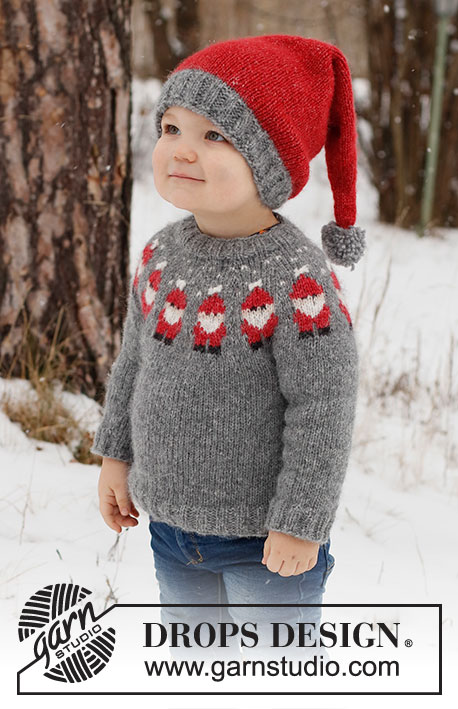
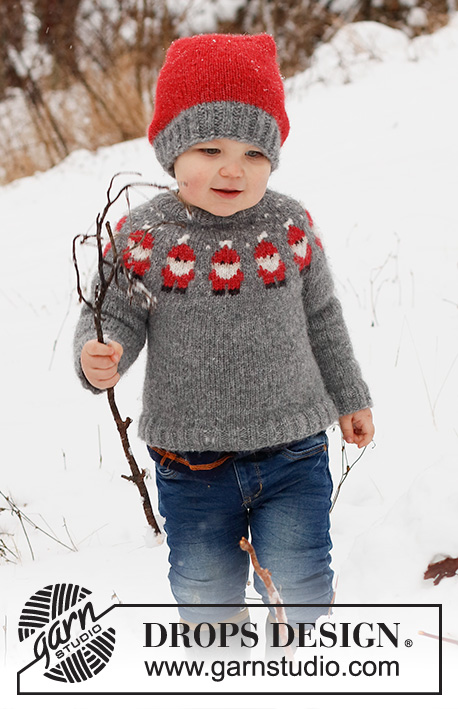
Knitted sweater and hat for children in DROPS Air. The sweater is worked top down with round yoke and Santa pattern. The hat is worked in the round, bottom up. Sizes 2 - 14 years. Theme: Christmas.
DROPS Children 41-1 |
|||||||||||||||||||
|
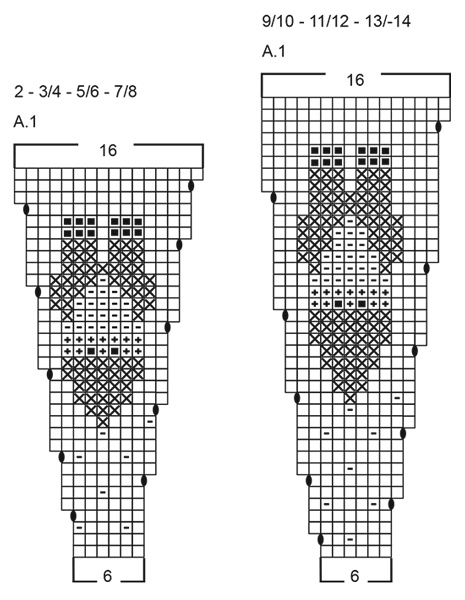
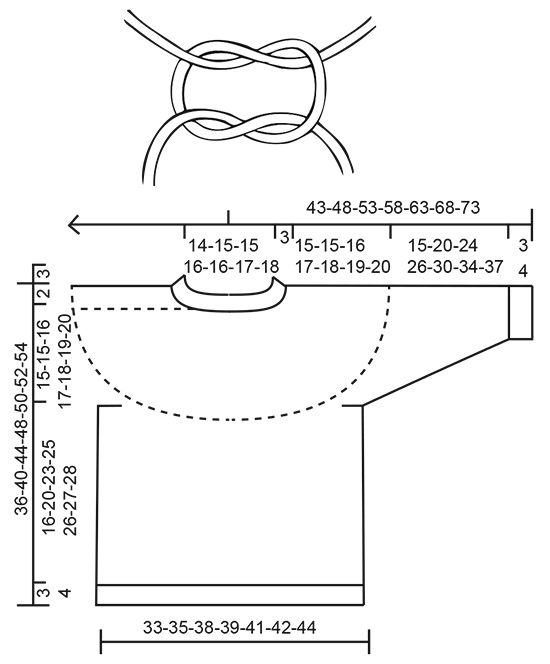
------------------------------------------------------- EXPLANATIONS FOR THE PATTERN: ------------------------------------------------------- INCREASE/DECREASE TIP (evenly spaced): To work out how to increase/decrease evenly, count the total number of stitches on needle (e.g. 60 stitches), and divide by the number of increases/decreases to be made (e.g. 6) = 10. In this example, increase by making 1 yarn over after each 10th stitch. On the next round knit the yarn overs twisted to avoid holes. When decreasing, knit together each 9th and 10th stitch. PATTERN: See diagram A.1. Choose the diagram for your size. The pattern is worked in stockinette stitch. KNITTING TIP: To avoid the garment losing its elasticity when working pattern, it is important that the strands at the back are not tight. Use a larger size needle when working pattern if the piece becomes tight. DECREASE TIP-2 (for sleeves): Decrease 1 stitch on either side of the marker thread as follows: Work until there are 3 stitches left before the marker thread, knit 2 together, knit 2 (marker thread sits between these 2 stitches), slip 1 stitch as if to knit, knit 1 and pass the slipped stitch over the knitted stitch. DECREASE TIP-3 (for hat): Work until there are 2 stitches left before the marker, knit 2 together (= 1 stitch decreased). Repeat at each marker. BINDING-OFF TIP: To avoid the bind-off edge being tight you can bind off with a larger size needle. If the edge is still tight, make 1 yarn over after approx. each 4th stitch at the same time as binding off; the yarn overs are bind off as normal stitches. ------------------------------------------------------- START THE PIECE HERE: ------------------------------------------------------- SWEATER – SHORT OVERVIEW OF THE PIECE: The neck and yoke are worked in the round with circular needle, from mid back and top down. The yoke is divided for body and sleeves and the body is continued in the round with circular needle. The sleeves are worked with double pointed needles/short circular needle, top down. NECK: Cast on 60-64-64-68-68-72-76 stitches with double pointed needles/short circular needle size 4 MM = US 6 and medium grey DROPS Air. Knit 1 round. Then work rib in the round (knit 2, purl 2) for 3 cm = 1⅛". Change to circular needle size 5 MM = US 8. YOKE: Insert 1 marker at the beginning of the round; the yoke is measured from this marker! Knit 1 round where you increase 6-8-14-10-16-12-14 stitches evenly spaced – read INCREASE/DECREASE TIP = 66-72-78-78-84-84-90 stitches. Now work according to diagram A.1 (= 11-12-13-13-14-14-15 repeats of 6 stitches). NOTE! Choose diagram for your size. Read KNITTING TIP! REMEMBER THE KNITTING GAUGE! When A.1 is finished in height there are 176-192-208-208-224-224-240 stitches. Knit 1 round with medium grey where you decrease 4-8-12-8-12-4-8 stitches evenly spaced = 172-184-196-200-212-220-232 stitches. Continue with stockinette stitch and medium grey until the yoke measures 15-15-16-17-18-19-20 cm = 6"-6"-6¼"-6¾"-7"-7½"-8" from the marker. Now divide for the body and sleeves: Knit 25-27-29-30-32-33-34 (= half back piece), place the next 36-38-40-40-42-44-48 stitches on 1 thread, cast on 6 stitches (= in side under sleeve), knit 50-54-58-60-64-66-68 (= front piece), place the next 36-38-40-40-42-44-48 stitches on 1 thread, cast on 6 stitches (= in side under sleeve), knit the last 25-27-29-30-32-33-34 stitches (= half back piece). The body and sleeves are finished separately. THE PIECE IS NOW MEASURED FROM HERE! BODY: There are now 112-120-128-132-140-144-148 stitches on needle. Continue in the round with stockinette stitch and medium grey for 16-20-23-25-26-27-28 cm = 6¼"-8"-9"-9¾"-10¼"-10⅝"-11" (or to desired length; there is approx. 3-3-3-4-4-4-4 cm = 1⅛"-1⅛"-1⅛"-1½"-1½"-1½"-1½" left to finished length). Change to circular needle size 4 MM = US 6. Work rib (knit 2, purl 2) for 3-3-3-4-4-4-4 cm = 1⅛"-1⅛"-1⅛"-1½"-1½"-1½"-1½". Loosely bind off with knit over knit and purl over purl – BINDING-OFF TIP. Cut and fasten the strand. The sweater measures approx. 36-40-44-48-50-52-54 cm = 14¼"-15¾"-17¼"-19"-19¾"-20½"-21¼" from the shoulder down. SLEEVES: Place the 36-38-40-40-42-44-48 stitches from the thread on the one side of the piece on double pointed needles/short circular needle size 5 MM = US 8 and knit up 1 stitch in each of the 6 stitches cast on under the sleeve = 42-44-46-46-48-50-54 stitches. Insert a marker thread in the middle of the 6 stitches under the sleeve. Allow the thread to follow your work onwards; it will be used when decreasing under the sleeve. Start at the marker thread and work stockinette stitch in the round, with medium grey, for 3 cm = 1⅛". Now decrease 2 stitches under the sleeve – read DECREASE TIP-2. Decrease like this every 3-5-6-7-8-9-10 cm = 1⅛"-2"-2⅜"-2¾"-3⅛"-3½"-4" a total of 4 times = 34-36-38-38-40-42-46 stitches. Continue working until the sleeve measures 15-20-24-26-30-34-37 cm = 6"-8"-9½"-10¼"-11¾"-13⅜"-14½" from the division. There is approx. 3-3-3-4-4-4-4 cm = 1⅛"-1⅛"-1⅛"-1½"-1½"-1½"-1½" left to finished length; try the sweater on and work to desired length. Knit 1 round where you increase 6-4-6-6-4-6-2 stitches evenly spaced = 40-40-44-44-44-48-48 stitches. Change to double pointed needles size 4 MM = US 6. Work rib (knit 2, purl 2) for 3-3-3-4-4-4-4 cm = 1⅛"-1⅛"-1⅛"-1½"-1½"-1½"-1½". Bind off with knit over knit and purl over purl – remember BINDING-OFF TIP! The sleeve measures approx. 18-23-27-30-34-38-41 cm = 7"-9"-10⅝"-11¾"-13⅜"-15"-16⅛" from the division. Work the other sleeve in the same way. KNOT: Make a knot at the top of each Santa hat. Cut 2 strands off-white, each 10 cm = 4" long. Put the strands together and thread them through the top off-white stitch on the hat, with both ends on the right side. Tie a knot, then another knot but in the opposite direction – see sketch. Cut the strands leaving ½ cm = ⅛" ends. Repeat at the top of each Santa hat. ------------------------------------------------------- HAT – SHORT OVERVIEW OF THE PIECE: The piece is worked with circular needle, in the round and bottom up. Change to double pointed needles when necessary, after decreasing stitches at the top. HAT: Cast on 96-100-104-108-112 stitches with circular needle size 3.5 MM = US 4 and medium grey DROPS Air. Purl 1 round. Then work rib in the round (knit 2, purl 2) for 4-5-5-6-6 cm = 1½"-2"-2"-2⅜"-2⅜". Change to circular needle size 4.5 MM = US 7 and knit 1 round where you decrease 12-12-12-12-12 stitches evenly spaced – read INCREASE/DECREASE TIP = 84-88-92-96-100 stitches. Change to raspberry and continue with stockinette stitch. REMEMBER THE KNITTING GAUGE! When the piece measures 18-19-19-19-20 cm = 7"-7½"-7½"-7½"-8" from the cast-on edge, decrease 0-4-2-0-4 stitches evenly spaced = 84-84-90-96-96 stitches. Insert 6 markers with 14-14-15-16-16 stitches between each one. On the next round decrease 1 stitch before each marker – read DECREASE TIP-3 (= 6 stitches decreased). Decrease like this every 2nd round a total of 2-2-2-3-3 times. Then every 6th-7th-7th-7th-7th round 10-10-11-11-11 times = 12 stitches. Work until the hat measures 50-52-54-56-58 cm = 19¾"-20½"-21¼"-22"-22¾", then knit all stitches together 2 and 2 = 6 stitches. Cut the strand and pull it through the remaining stitches, tighten and fasten well. POM-POM: Make a pom-pom of 5 cm = 2" in diameter with medium grey. Sew it to the top of the hat. |
|||||||||||||||||||
Diagram explanations |
|||||||||||||||||||
|
|||||||||||||||||||
 |
|||||||||||||||||||
 |
|||||||||||||||||||
Have you finished this pattern?Tag your pictures with #dropspattern #merrysantassweater or submit them to the #dropsfan gallery. Do you need help with this pattern?You'll find 23 tutorial videos, a Comments/Questions area and more by visiting the pattern on garnstudio.com. © 1982-2026 DROPS Design A/S. We reserve all rights. This document, including all its sub-sections, has copyrights. Read more about what you can do with our patterns at the bottom of each pattern on our site. |
|||||||||||||||||||






With over 40 years in knitting and crochet design, DROPS Design offers one of the most extensive collections of free patterns on the internet - translated to 17 languages. As of today we count 333 catalogs and 12532 patterns - 12522 of which are translated into English (US/in).
We work hard to bring you the best knitting and crochet have to offer, inspiration and advice as well as great quality yarns at incredible prices! Would you like to use our patterns for other than personal use? You can read what you are allowed to do in the Copyright text at the bottom of all our patterns. Happy crafting!
Post a comment to pattern DROPS Children 41-1
We would love to hear what you have to say about this pattern!
If you want to leave a question, please make sure you select the correct category in the form below, to speed up the answering process. Required fields are marked *.