
Popular categories
Looking for a yarn?


Comments / Questions (24)
![]() Lorraine wrote:
Lorraine wrote:
1 Please show me how to make Santa's eyes. I did see a tut somewhere but cannot find it now. 2 How can I embroider Santa's boots please? I did not knit them.
22.12.2023 - 14:09DROPS Design answered:
Dear Lorraine, the Santa eyes and boots are worked according to the pattern in the yoke; you can see the chart after the pattern instructions. Here, you will use the fair-isle method to change colours, including the black colour for the eyes and boots. They aren't embroidered later, but worked alongside the rest of the piece. If you skipped over them when working the piece, you can use the following method of duplicate stitches to embroider the eyes and boots: https://www.garnstudio.com/video.php?id=40&lang=en. Happy knitting!
28.12.2023 - 19:44
![]() Manuela García Osorio wrote:
Manuela García Osorio wrote:
Hola! Estoy tejiendo la talla XL, llegué hasta el ovalo negro. Es una sola repetición en una vuelta o son varias? No se cuantos puntos debe quedar al final. Gracias
21.08.2023 - 06:26
![]() Yvonne Raczkowski wrote:
Yvonne Raczkowski wrote:
I am knitting Merry Santa in a small woman's size. I do not see how to increase the stitches in A1 pattern. I do see the black dots on the grid that are probably increases but I do not see by how many stiches in the pattern? If you could clarify that would be great. thanks Yvonne
07.04.2023 - 00:21DROPS Design answered:
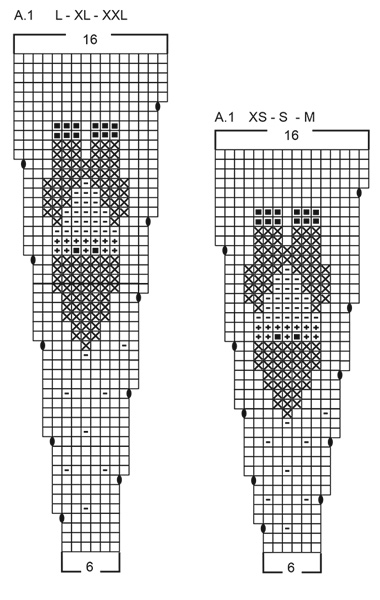
Dear Yvonne, the number of increased stitches on the round will depend on the number of repeats of A.1 on the round. The black oval or dot represents the yarn over for increases; each round of increases has one yarn over per repeat of A.1. Since, for size S, you have 16 repeats of A.1 on the round, you will increase 16 stitches on each round with increases. After finishing A.1, you should have 256 stitches in total (you have increased 160 stitches). Happy knitting!
08.04.2023 - 20:47
![]() Xxx wrote:
Xxx wrote:
Bei der Mädchenanzahl bei dieser Anleitung scheint ein Fehler vor zu liegen Wenn ich mit 105 machen starte und dann in jeder links Rippe abnehme (=21 abnahmen) kommt man auf 84 und nicht 88 maschen. Bei der passe geht es weiter Wenn ich nun mit 84 statt 88 weiter Stricke müsste ich laut Anleitung 16 machen dazu nehmen dir komme ich allerdings auf 100 statt der benötigten 96 ....
26.12.2022 - 23:36
![]() Lucia wrote:
Lucia wrote:
Buongiorno, 1) se volessi alzare il collo dietro con i ferri accorciati come devo fare? 2), dove trovo le spiegazioni per fare i fiocchi di neve prima dei babbi Natale? Grazie
17.11.2022 - 17:16DROPS Design answered:
Buonasera Lucia, per i ferri accorciati può rivolgersi al suo rivenditore DROPS di fiducia oppure seguire un altri modello DROPS che li prevede; i fiocchi di neve vengono lavorati all'inizio del diagramma A.1. Buon lavoro!
19.11.2022 - 22:11
![]() Lisbeth Jacobsen wrote:
Lisbeth Jacobsen wrote:
Hei! Jeg strikker str. XL ogl har 115 m på pinnen. Skal øke 28 m og det skal bli 120 m ifølge oppskriften. Hvordan er det mulig? Er det feil i oppskriften? Hvordan kan jeg heretter følge maske antallet?
28.08.2022 - 10:41DROPS Design answered:
Hej Lisbeth, efter 4 cm tager du 1 maske ind i hvert vrangparti, så du har 92 masker. 92 + 28 = 120 masker :)
29.08.2022 - 12:06
![]() Lisbeth Jacobsen wrote:
Lisbeth Jacobsen wrote:
Hei! Jeg strikker str. XL ogl har 115 m på pinnen. Skal øke 28 m og det skal bli 120 m ifølge oppskriften. Hvordan er det mulig? Er det feil i oppskriften? Hvordan kan jeg heretter følge maske antallet?
28.08.2022 - 10:40
![]() Rachel wrote:
Rachel wrote:
Hello, reading the pattern, it says to follow diagram A1 which I understand, but, looking at the diagram, the santas will be upside down. How am I misreading this so badly please !
28.01.2022 - 13:56DROPS Design answered:
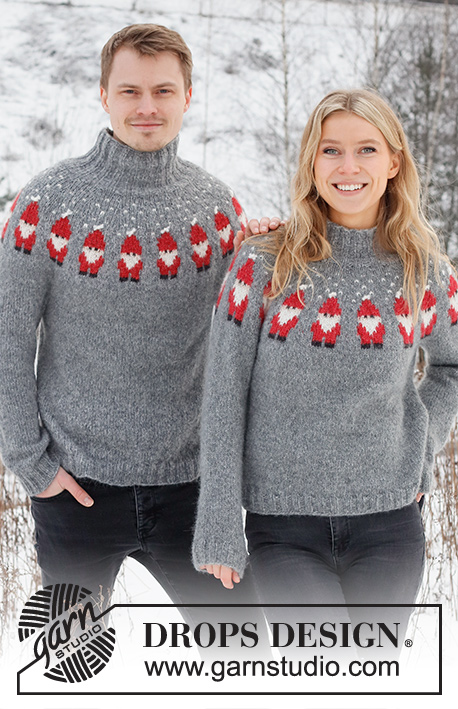
Dear Rachel, jumper is worked top down, you will then work the santas top down so that they appear "bottom up" when you wear the jumper. See more pictures here. Happy knitting!
28.01.2022 - 14:05
![]() Karina Nyby Rasmussen wrote:
Karina Nyby Rasmussen wrote:
Jeg kan ikke finde en overvidde på trøjen. Hvordan finder jeg ud af hvilken størrelse jeg skal strikke?
18.12.2021 - 08:10DROPS Design answered:
Hej Karina, jo du finder måleskitsen nederst i opskriften, her finder du også en lektion: således læser du måleskitsen :)
21.12.2021 - 08:25
![]() Correne wrote:
Correne wrote:
What needle size do I knit my gauge swatch with? And won’t my gauge be different from my swatch when I work in the round?
19.11.2021 - 04:05DROPS Design answered:
Dear Correne, use the larger needles to check your tension - if you are used to have a different tension when working in the round or straight, or if you are not used to knit in the round, then rather work your swatch also in the round. Happy knitting!
19.11.2021 - 07:30
|
|||||||||||||||||||
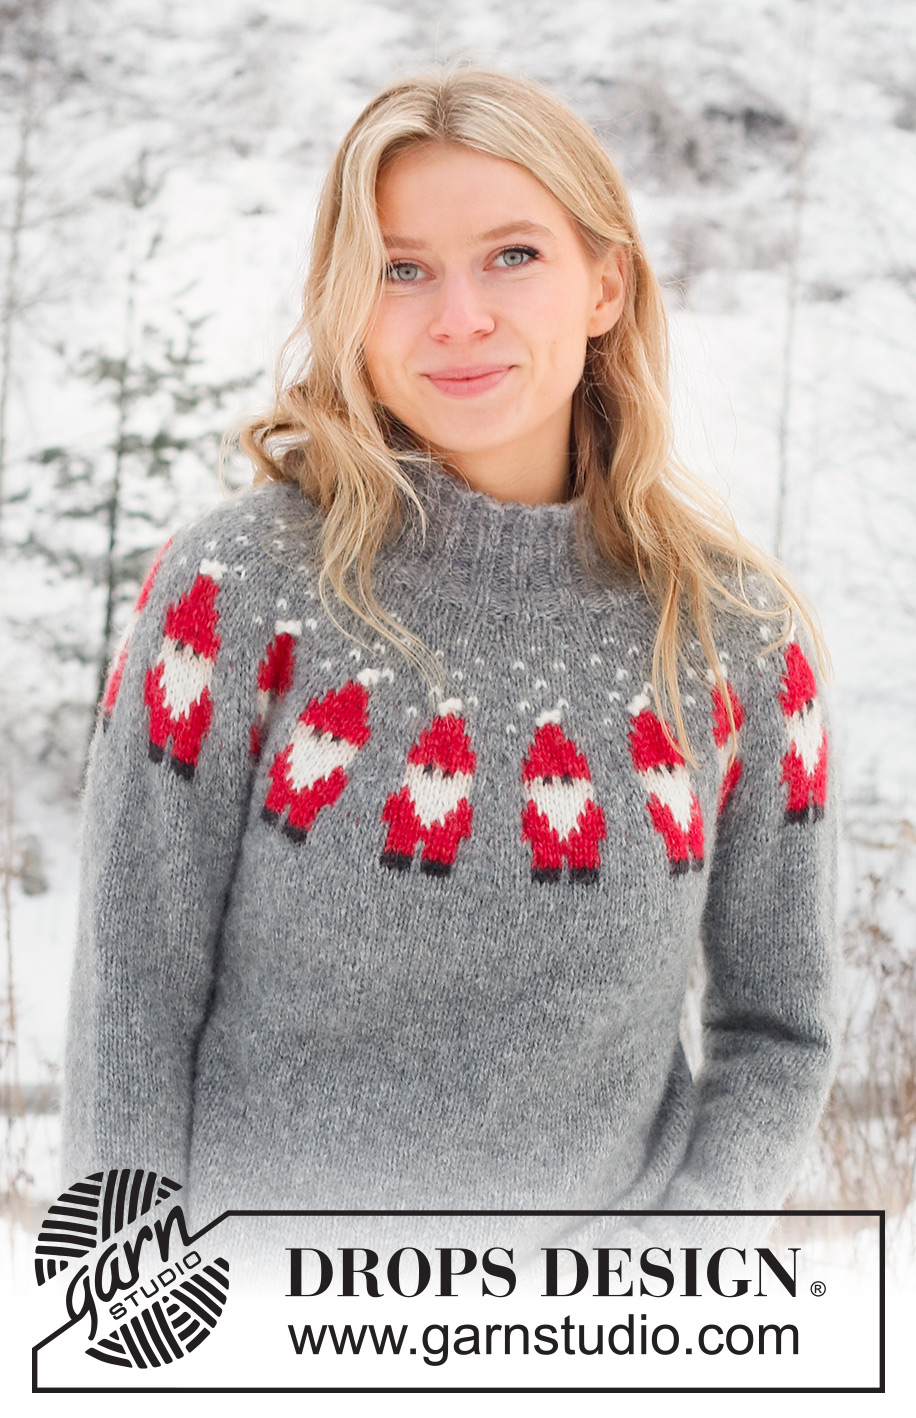
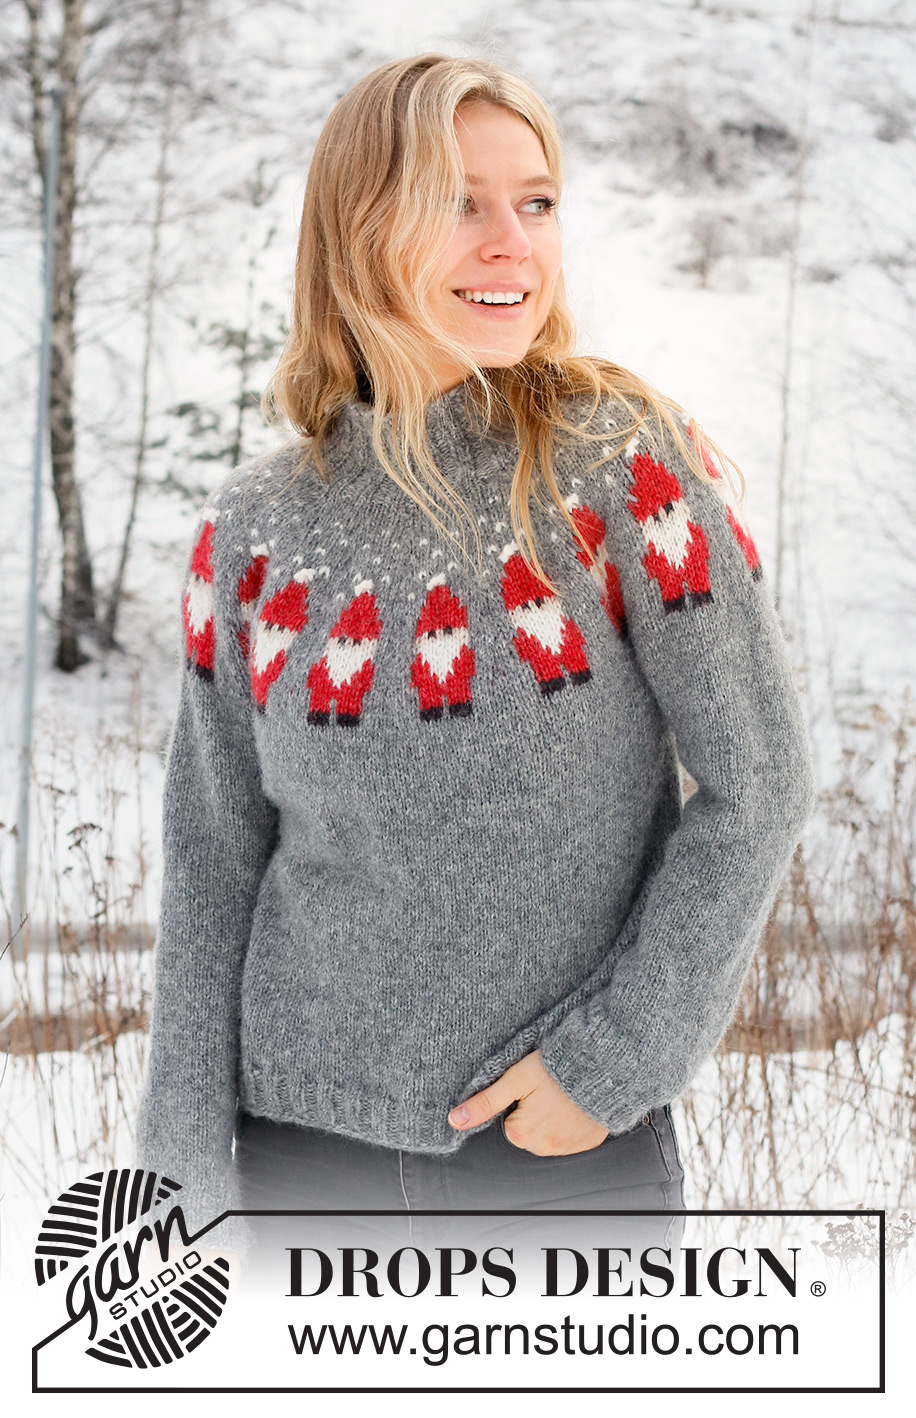
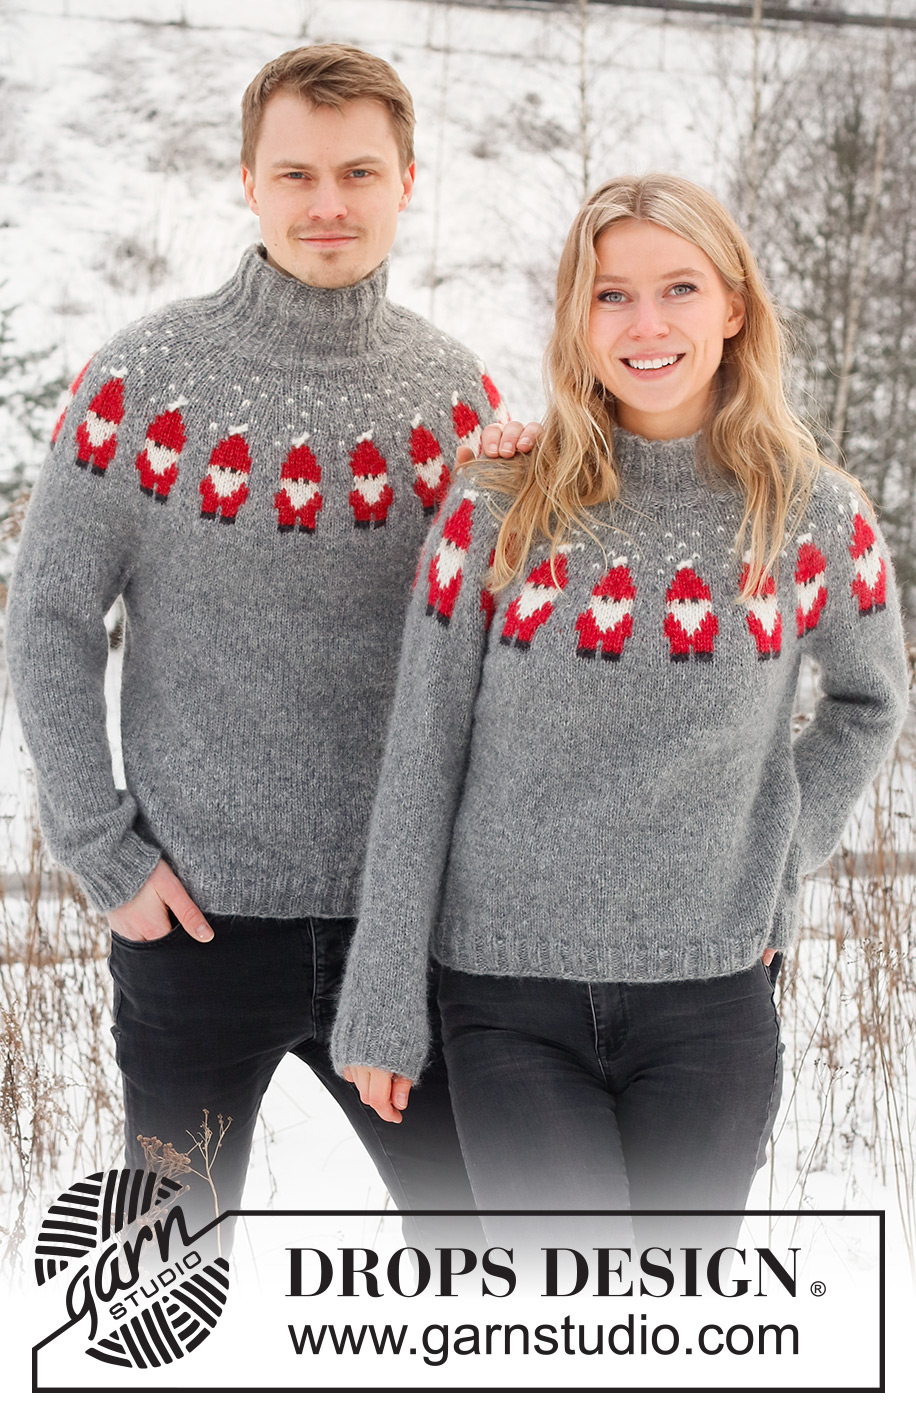
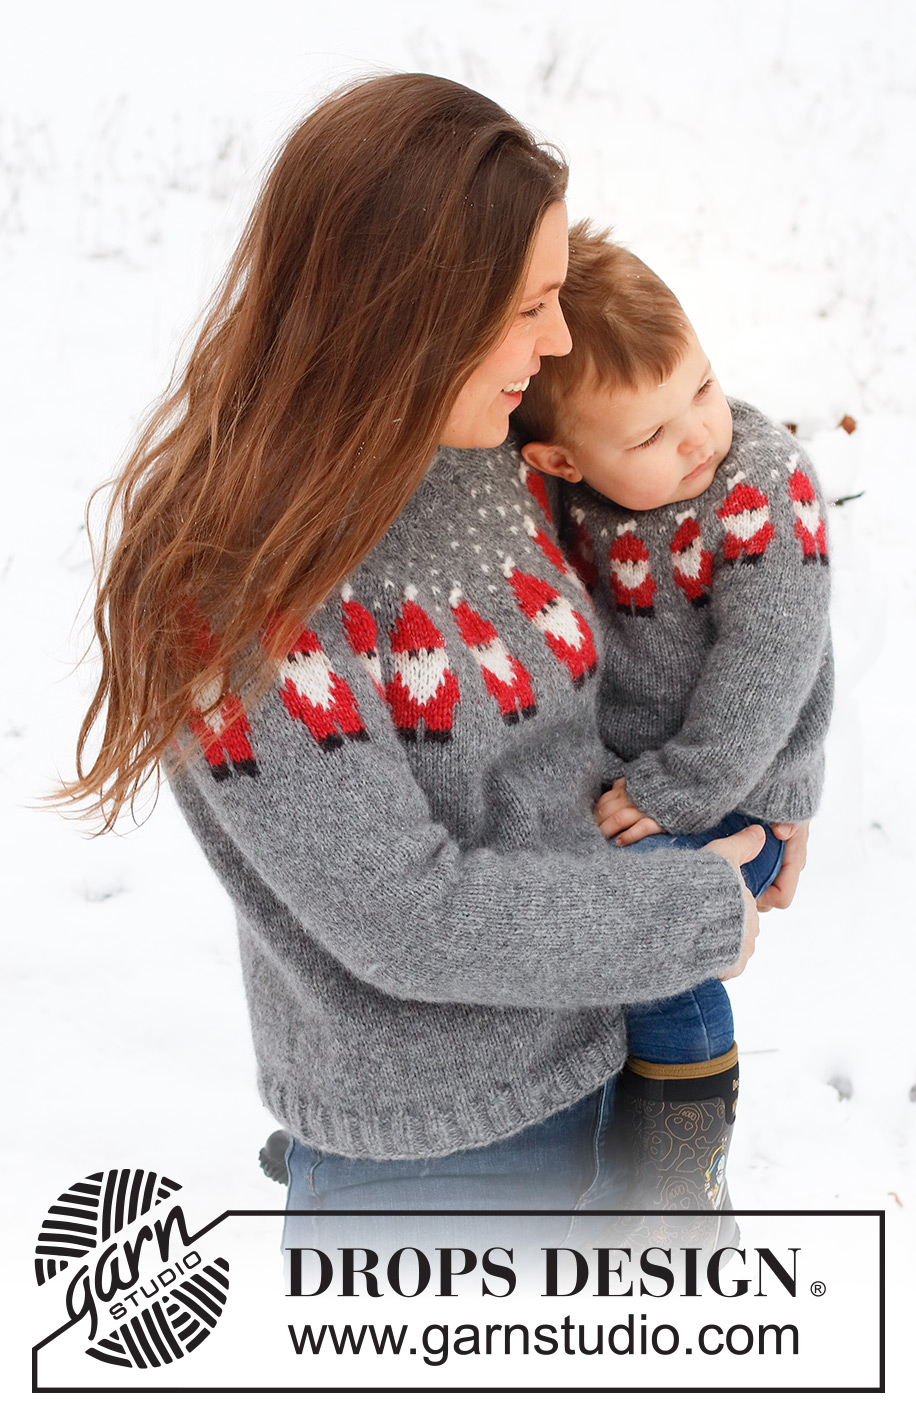
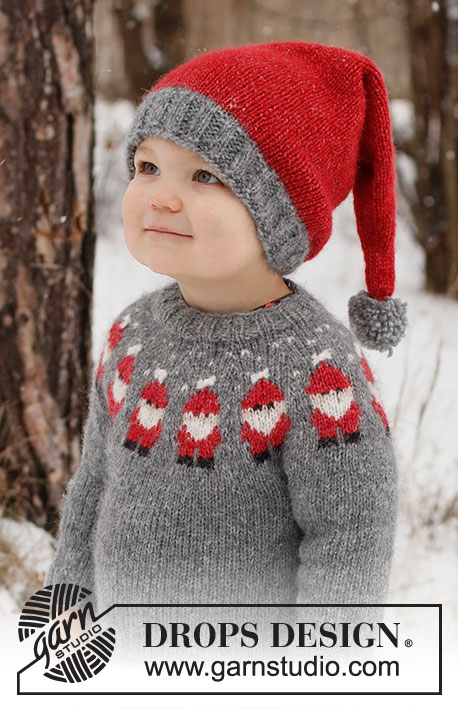
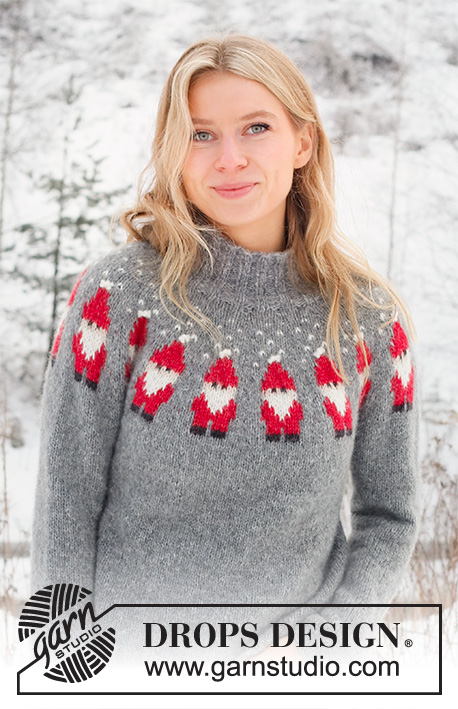
Merry Santas#merrysantassweater |
|||||||||||||||||||
 |
 |
||||||||||||||||||
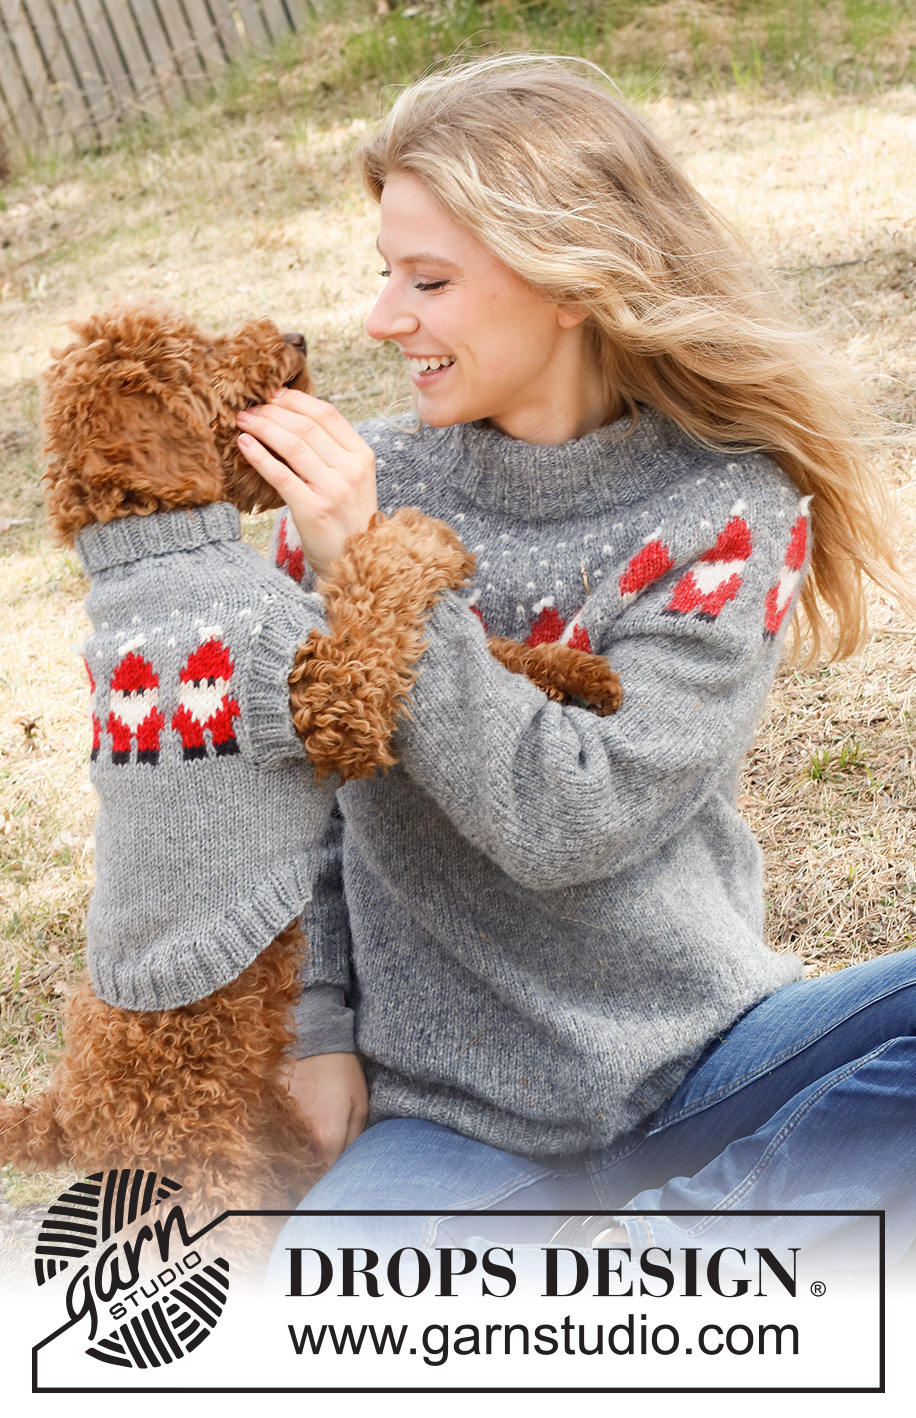
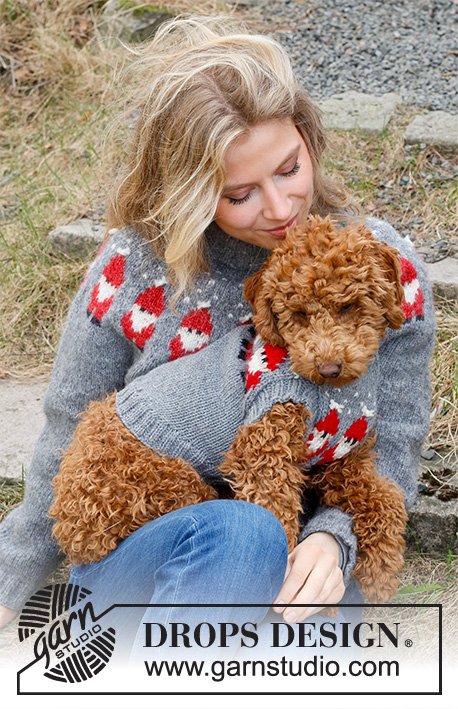
Knitted sweater in DROPS Air. Piece is knitted top down, with round yoke and Santa pattern. Size XS – XXL. Theme: Christmas.
DROPS 228-48 |
|||||||||||||||||||
|
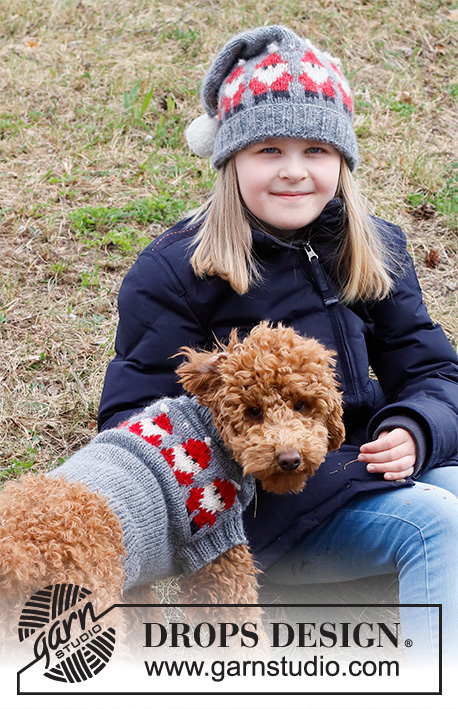
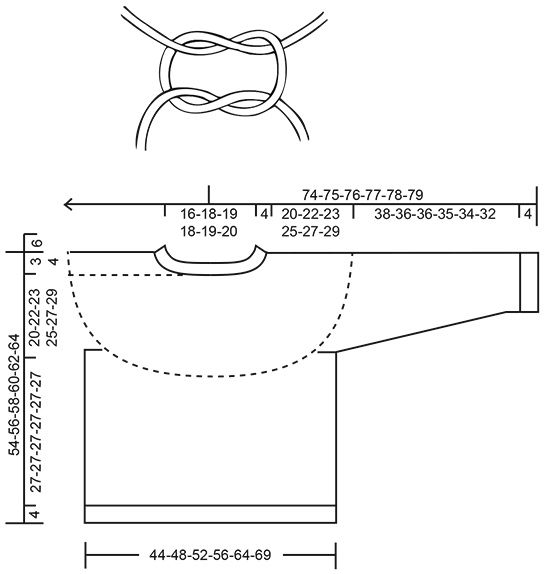
---------------------------------------------------------- EXPLANATION FOR THE PATTERN: ---------------------------------------------------------- INCREASE TIP (evenly): To calculate how to increase evenly, use the total number of stitches on row (e.g. 80 stitches) and divide stitches by number of increases to be done (e.g. 16) = 5. In this example increase by making 1 yarn over after every 5th stitch. On next round knit yarns over twisted to avoid holes. PATTERN: See diagram A.1. Choose diagram for your size. Work the entire pattern in stockinette stitch. KNITTING TIP: To avoid the garment losing elasticity when working pattern, it is important not to tighten the strands on back side of piece. Switch to a higher needle number when working pattern if the pattern is somewhat tight. DECREASE TIP (applies to sleeves): Decrease 1 stitch on each side of marker thread as follows: Work until 3 stitches remain before marker thread and knit 2 together, knit 2 (marker thread is between these 2 stitches), slip 1 stitch knitwise, knit 1, pass slipped stitch over stitch worked. BIND-OFF TIP: To avoid a tight bind-off edge when binding off, you may use a larger needle. If this still is too tight make 1 yarn over after approx. every 4th stitch while binding off (bind off yarn overs as stitches). ---------------------------------------------------------- START THE PIECE HERE: ---------------------------------------------------------- SWEATER - SHORT OVERVIEW OF THE PIECE: Work neck edge and yoke in the round on circular needle from mid back, top down. Now divide yoke for body and sleeves. Work body in the round on circular needle, top down. Work sleeves in the round on double pointed needles/a short circular needle, top down. NECK EDGE: Cast on 95-100-105-110-115-120 stitches on short circular needle size 4 MM = US 6 with color medium grey in DROPS Air. Knit 1 round. Work rib (knit 2/purl 3) for 4 cm = 1½". Now decrease 1 stitch in every purl section, decrease by purling 2 together = 76-80-84-88-92-96 stitches. Continue with rib = knit 2/purl 2. Work until rib measures 12 cm = 4¾" in total. Switch to a short circular needle size 5 MM = US 8. YOKE: Insert 1 marker at beginning of round, measure yoke from this marker! Knit 1 round while increasing 8-16-18-26-28-30 stitches evenly - read INCREASE TIP = 84-96-102-114-120-126 stitches. Now work according to diagram A.1 (= 14-16-17-19-20-21 repetitions of 6 stitches). NOTE: Choose diagram for your size and read KNITTING TIP! REMEMBER THE KNITTING GAUGE! When entire A.1 has been worked vertically, there are 224-256-272-304-320-336 stitches on round. Knit 1 round with color medium grey while increasing 8-0-0-0-4-8 stitches evenly = 232-256-272-304-324-344 stitches. Continue in medium grey and stockinette stitch until piece measures approx. 20-22-23-25-27-29 cm = 8"-8¾"-9"-9¾"-10⅝"-11⅜" from marker. Now divide yoke for body and sleeves as follows: Knit 34-38-40-44-49-53 (= half back piece), slip the next 48-52-56-64-64-66 stitches on 1 thread for sleeve, cast on 6-6-8-8-10-12 new stitches on row (= in the side under sleeve), knit 68-76-80-88-98-106 (= front piece), slip the next 48-52-56-64-64-66 stitches on 1 thread for sleeve, cast on 6-6-8-8-10-12 new stitches on row (= in the side under sleeve) and knit the remaining 34-38-40-44-49-53 stitches (= half back piece). Finish body and sleeves separately. NOW MEASURE THE PIECE FROM HERE! BODY: There are now 148-164-176-192-216-236 stitches on round. Continue with stockinette stitch and color medium grey. Work until piece measures approx. 27-27-27-27-27-27 cm = 10⅝"-10⅝"-10⅝"-10⅝"-10⅝"-10⅝" from division (or desired length, approx. 4 cm = 1½" remain until finished measurements). Switch to circular needle size 4 MM = US 6 and work rib = knit 2/purl 2 in the round. Work rib for 4 cm = 1½". Bind off loosely with knit over knit and purl over purl - read BIND-OFF TIP. Sweater measures approx. 54-56-58-60-62-64 cm = 21¼"-22"-22¾"-23⅝"-24⅜"-25¼" from shoulder and down. SLEEVE: Slip the 48-52-56-64-64-66 stitches from thread in one side of piece on double pointed needles or a short circular needle size 5 MM = US 8 and pick up 1 stitch in each of the 6-6-8-8-10-12 new stitches cast on under sleeve = 54-58-64-72-74-78 stitches. Insert 1 marker thread mid under sleeve, i.e. in the middle of the 6-6-8-8-10-12 stitches that were cast on under sleeves. Move the marker thread upwards when working; it should be used for decrease mid under sleeve. Begin round at the marker thread and work stockinette stitch in the round with medium grey. When sleeve measures 3 cm = 1⅛" from division, decrease 2 stitches mid under sleeve - read DECREASE TIP. Decrease like this every 8-6-4-3-2½-2½ cm = 3⅛"-2⅜"-1½"-1⅛"-1"-1" 5-6-8-11-11-12 times in total = 44-46-48-50-52-54 stitches. Work without decreases until sleeve measures 38-36-36-35-34-32 cm = 15"-14¼"-14¼"-13¾"-13⅜"-12½" from division (approx. 4 cm = 1½" remain before finished measurements, try the sweater on and work to desired length). Shorter measurements in the larger sizes because of wider neck and longer yoke. Knit 1 round while increasing 4-2-4-2-4-2 stitches evenly = 48-48-52-52-56-56 stitches. Switch to double pointed needles size 4 MM = US 6. Work rib in the round = knit 2/purl 2 for 4 cm = 1½". Bind off with knit over knit and purl over purl - remember BIND-OFF TIP. Sleeve measures approx. 42-40-40-39-38-36 cm = 16½"-15¾"-15¾"-15¼"-15"-14¼" from division. Work the other sleeve the same way. ASSEMBLY: The neck edge can be folded and sewn into a double neck edge or use it as a high collar. If you want a double neck edge do the following: Fold rib at the top of neck down on inside of garment. Fasten rib to get a double neck edge. To avoid a tight neck edge that sticks out it is important to keep the seam elastic. KNOT: Make a knot at the top of every Santa hat. Tie the knot around a stitch. Cut 2 lengths of color off white. approx. 10 cm = 4". Place strands together, use a needle and pull strands through the top off white stitch so that both yarn ends are on the right side of piece, on each side of stitch. Tie a knot, then tie another knot but in the opposite direction - see figure. Cut the yarn ends approx. ½ cm = ⅛" long. Repeat at the top of on each Santa hat. |
|||||||||||||||||||
Diagram explanations |
|||||||||||||||||||
|
|||||||||||||||||||
 |
|||||||||||||||||||
 |
|||||||||||||||||||
Have you finished this pattern?Tag your pictures with #dropspattern #merrysantassweater or submit them to the #dropsfan gallery. Do you need help with this pattern?You'll find 30 tutorial videos, a Comments/Questions area and more by visiting the pattern on garnstudio.com. © 1982-2026 DROPS Design A/S. We reserve all rights. This document, including all its sub-sections, has copyrights. Read more about what you can do with our patterns at the bottom of each pattern on our site. |
|||||||||||||||||||


With over 40 years in knitting and crochet design, DROPS Design offers one of the most extensive collections of free patterns on the internet - translated to 17 languages. As of today we count 324 catalogs and 12290 patterns - 12280 of which are translated into English (US/in).
We work hard to bring you the best knitting and crochet have to offer, inspiration and advice as well as great quality yarns at incredible prices! Would you like to use our patterns for other than personal use? You can read what you are allowed to do in the Copyright text at the bottom of all our patterns. Happy crafting!
Post a comment to pattern DROPS 228-48
We would love to hear what you have to say about this pattern!
If you want to leave a question, please make sure you select the correct category in the form below, to speed up the answering process. Required fields are marked *.