
Looking for a yarn?


Comments / Questions (24)
![]() Angélique Piétrement wrote:
Angélique Piétrement wrote:
Bonjour, Quelles sont les mesures pour les tailles XS et S ? Merci ;
16.01.2025 - 00:02DROPS Design answered:
Bonjour Mme Pétrement, retrouvez toutes les mesures finales pour chaque taille dans le schéma en bas de page - plus d'infos ici. Bon tricot!
16.01.2025 - 16:29
![]() Laurel Wright wrote:
Laurel Wright wrote:
I love this pattern and Drops Air! I am dividing the yoke for the body and sleeves. After slipping the stitches for the sleeve it says to cast on 8 new stitches on row. Are these stitches the slipped on to the sleeve thread?or are these stitches added to the front piece? And likewise for the next sleeve. This part is not clear to me.
13.01.2025 - 17:12DROPS Design answered:
Dear Mrs Wright, these 8 new stitches are replacing sleeves and are on the sides of the jumper - see in this lesson from picture 9) how the division is worked. Happy knitting!
14.01.2025 - 10:08
![]() Christen Monica wrote:
Christen Monica wrote:
Ich stricke einen Pullover mit Rollkragen und Raglanärmeln von oben nach unten . Wie muss ich dtricken, dass auf der Vorderseite der Ausschnitt etwas tiefer gesetzt werden kann. \r\nDie totale Maschenzahl für den Halsausschnitt beträgt 92Maschen. \r\nBesten Dank für Ihre Unterstützung.\r\nMonics Christen
23.12.2024 - 14:08
![]() Lene wrote:
Lene wrote:
Har ingen kommentar
15.11.2024 - 20:34
![]() Meg Reeves wrote:
Meg Reeves wrote:
I cannot make gauge with a US 8 needle for The Merry Santa’s sweater. I was able to get guauge with a US 10. Is this unusual? I ordered enough Drops Air for a size Medium. Am I going to have enough yarn to complete the size medium sweater using the larger 10 needle ? I have 6 balls of grey, 1 of off white and 1 ball of red. Yikes! Thanks for your guidance! Meg Reeves
04.11.2024 - 14:42DROPS Design answered:
Dear Mrs Reeves, knitting tension is very individual, some people knit loosely while others work tightly; that's the reason why you have to adjust the needle size to get the recommended tension. Remember that the needle size in the pattern is always a suggestion. So if you tension is matching in both width and height, you should have the requested finished measurements with the given amount of yarn. Read more about tension here. Happy knitting!
05.11.2024 - 09:05
![]() Linda wrote:
Linda wrote:
Hyper agréable à tricoter
31.10.2024 - 13:15
![]() Maj Rasmussen wrote:
Maj Rasmussen wrote:
Æhm jeg læste forkert i opskriften. Alt er godt 😅
30.10.2024 - 15:59
![]() Maj Rasmussen wrote:
Maj Rasmussen wrote:
Jeg strikker str M og er igang med diagram A.1. Jeg har (som opskriften angiver) 102 masker, men kan ikke få det til at passe med diagrammet, hvor jeg oplever at ‘mangle’ en maske. Hvad kan jeg gøre, da det jo vil forskyde hele mønsteret/diagrammet?
30.10.2024 - 15:36DROPS Design answered:
Hej Maj, jo du starter med 6 masker ifølge diagrammet og strikker det 17 gange (6x17=102m). Sæt 1 mærke imellem hver rapport, så ser du tydeligt hvor du skal starte diagrammet :)
31.10.2024 - 08:51
![]() Gitte Kastberg wrote:
Gitte Kastberg wrote:
Hejsa jeg har et spørgsmål til mønstret Jeg kan ikke helt forstå det der står med bærestykket det der står i parentes Skal jeg gentage det Jeg laver ekstra large skal jeg så gentage seks masker 20 gange for jeg kan ikke få mønster til at passe
12.10.2024 - 16:25DROPS Design answered:
Hej Gitte. Ja det är riktigt, du ska gentage A.1 (= 6 masker) 20 ganger. 20 x 6= 120m. Mvh DROPS Design
14.10.2024 - 14:07
![]() Amanda Holloway wrote:
Amanda Holloway wrote:
Re Santa jumper. My nearest Drops stockist only has Nepal, Alaska, Lima and Charisma. The pattern states Air. Which of these weights are similar to Air?
02.01.2024 - 15:24DROPS Design answered:
Hi Amanda, DROPS Air belongs to yarn group C. In the same group are also DROPS Alaska and DROPS Nepal, so you can use them instead of DROPS Air. See overview of DROPS Yarn Groups. Happy knitting!
03.01.2024 - 05:55
|
|||||||||||||||||||
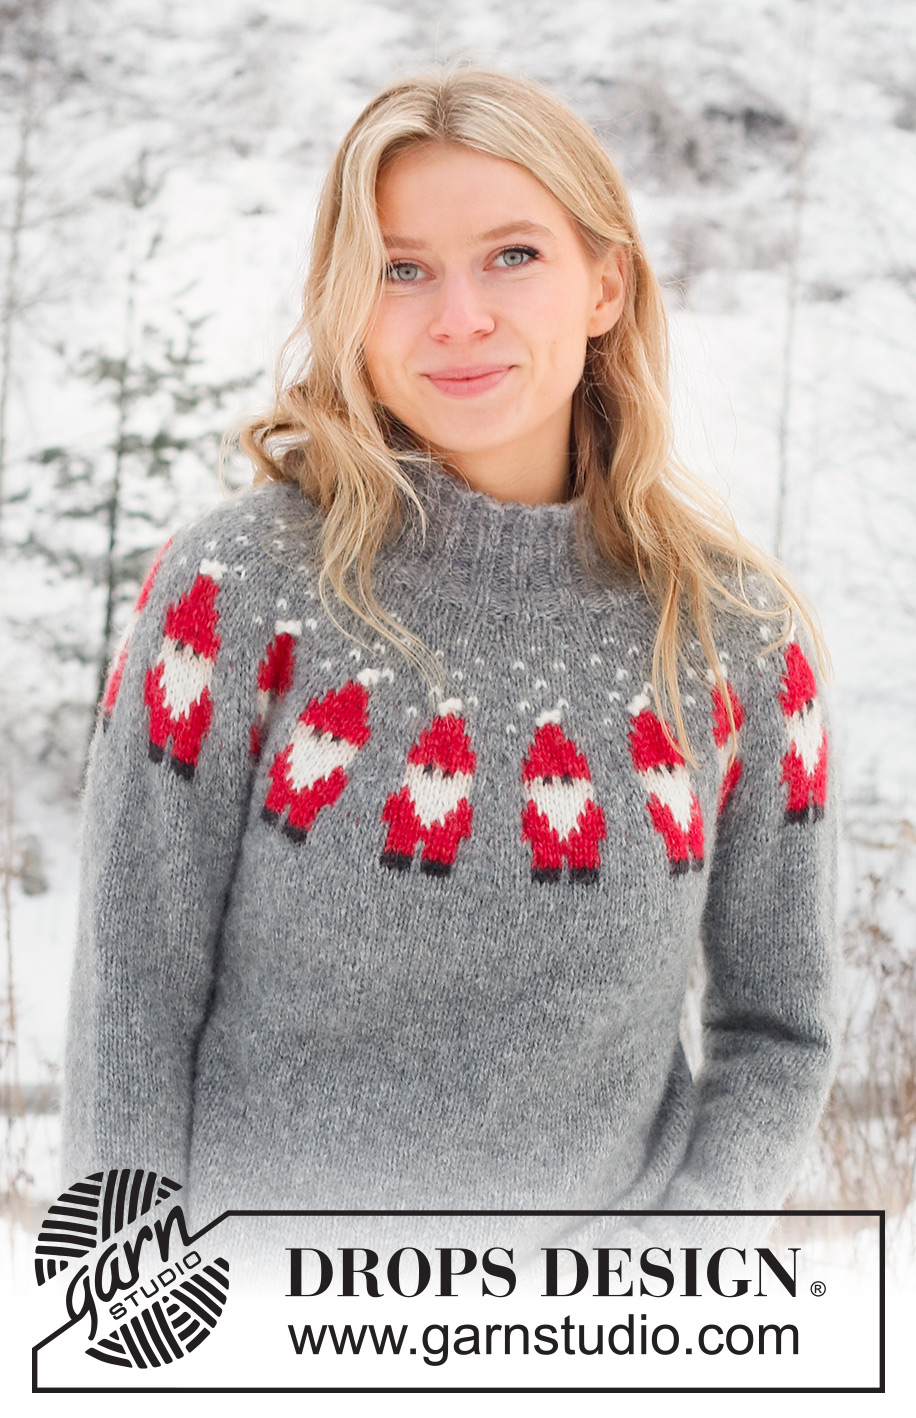
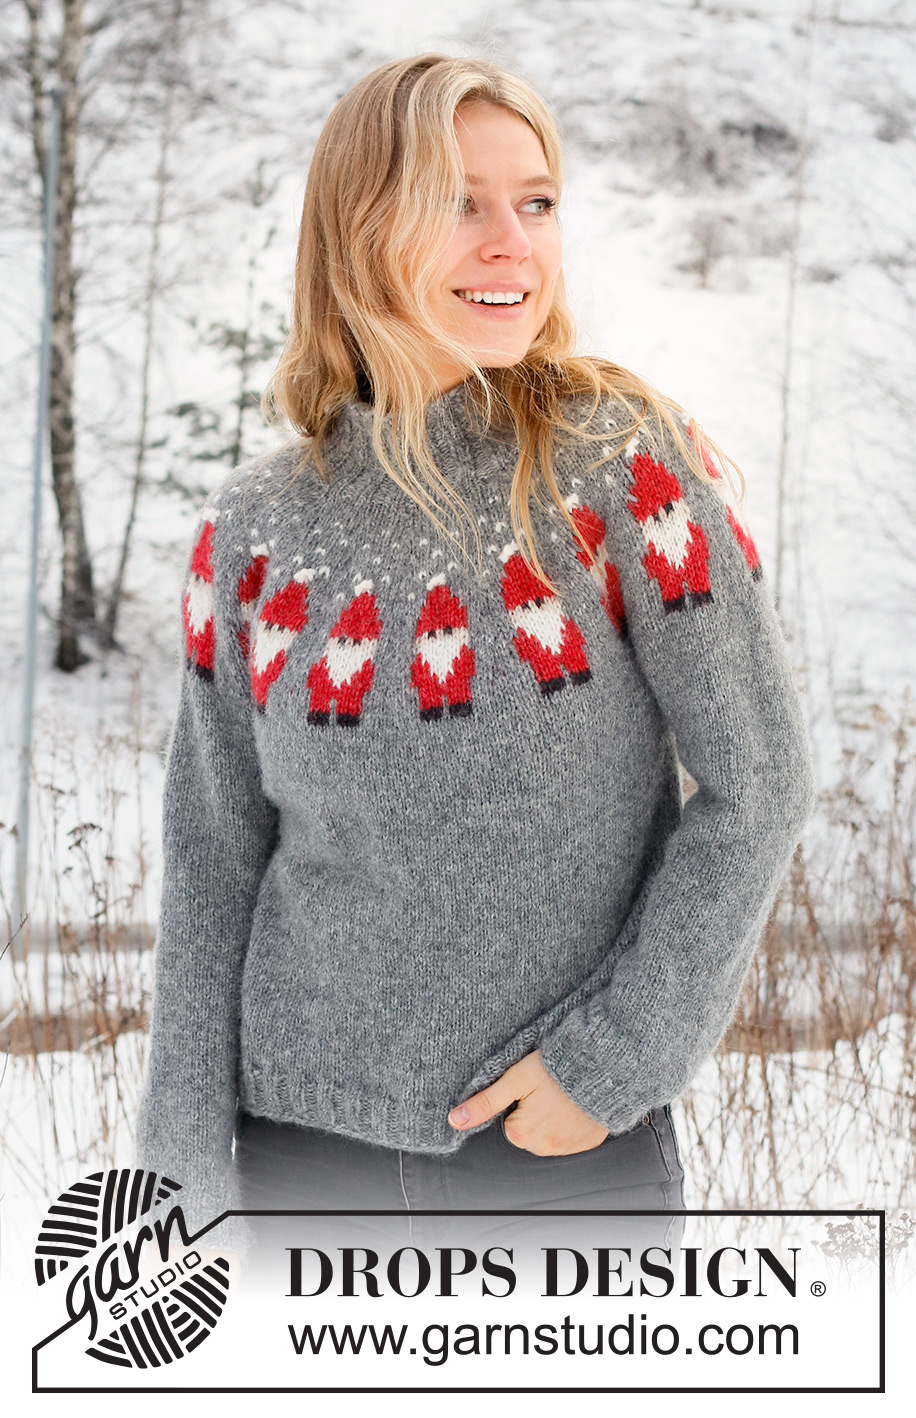
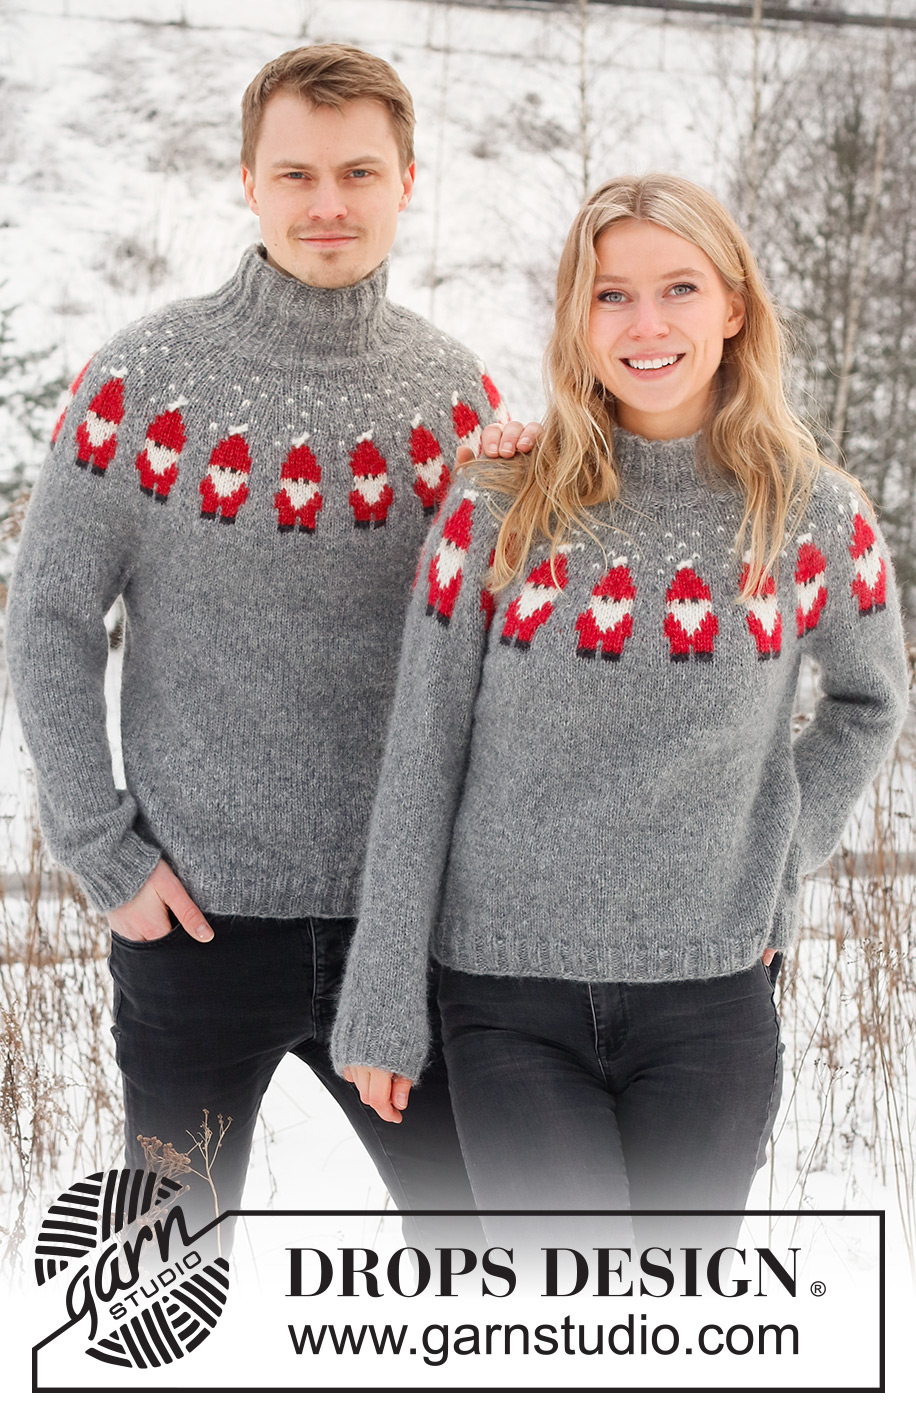
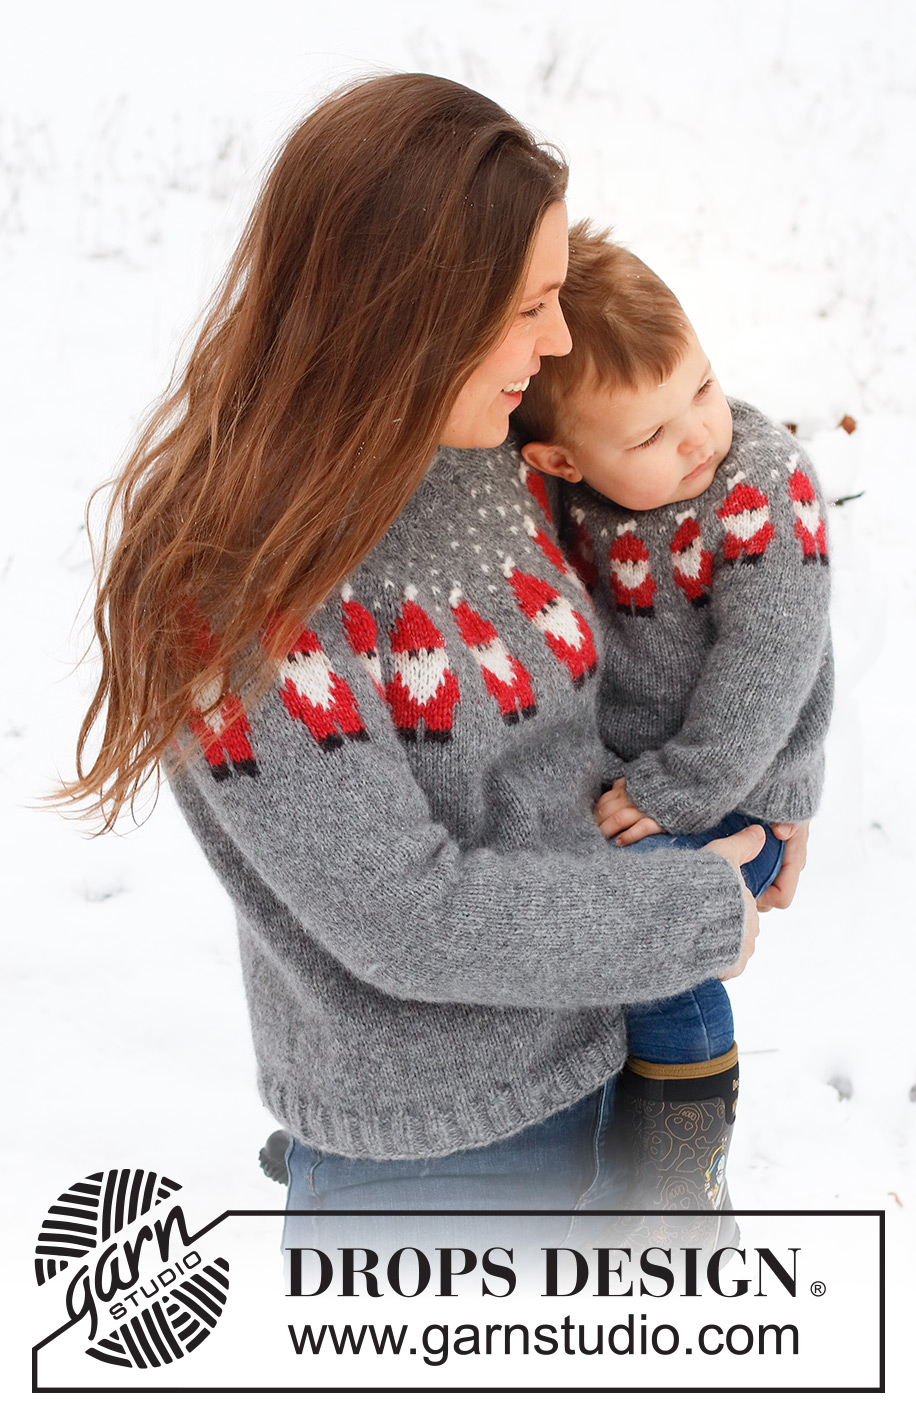
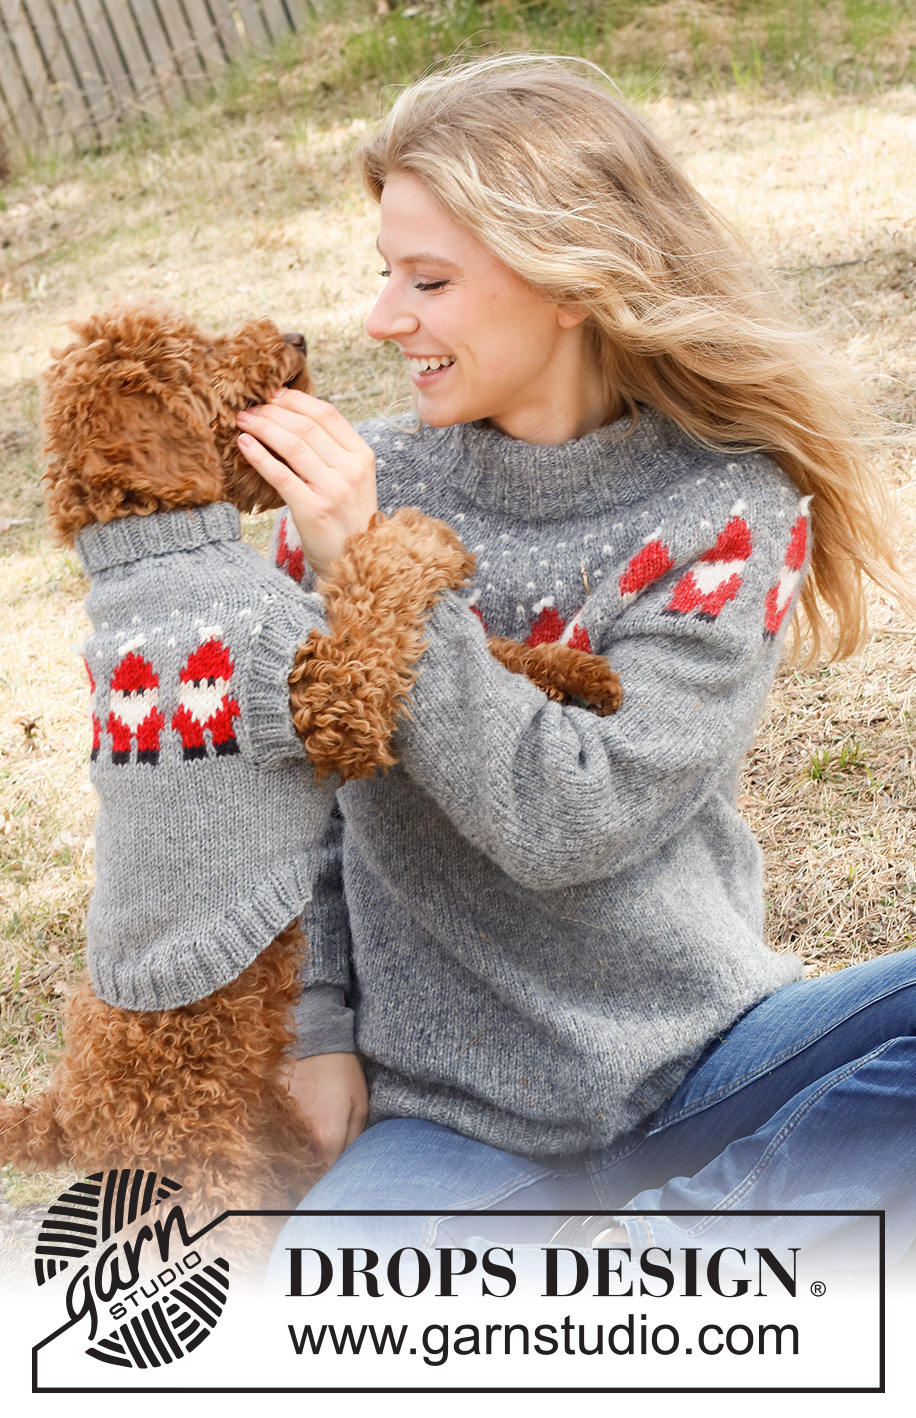
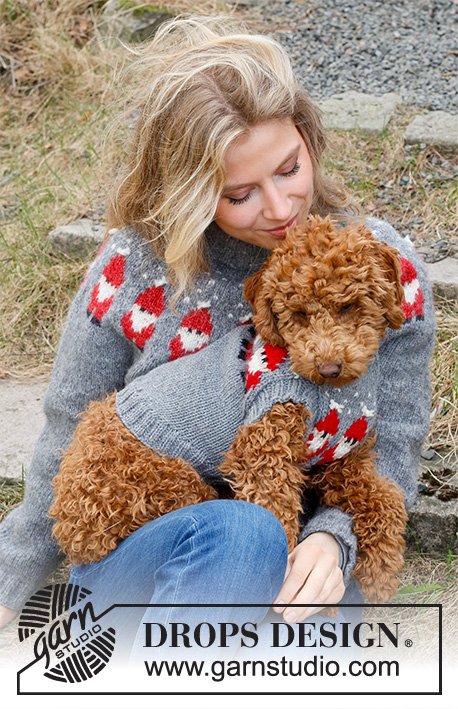
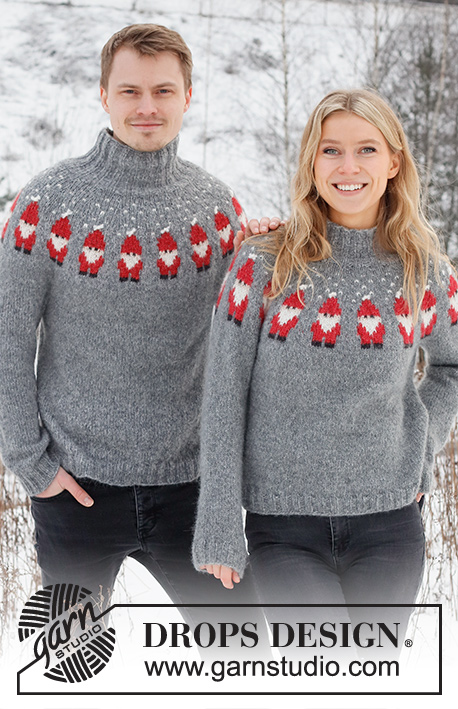
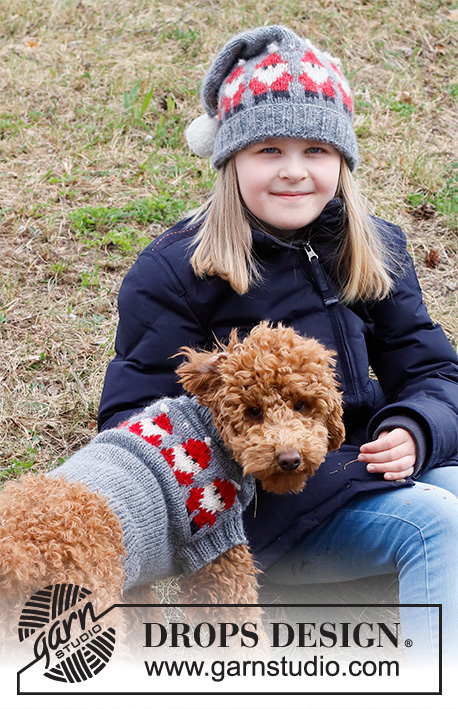
Merry Santas#merrysantassweater |
|||||||||||||||||||
 |
 |
||||||||||||||||||
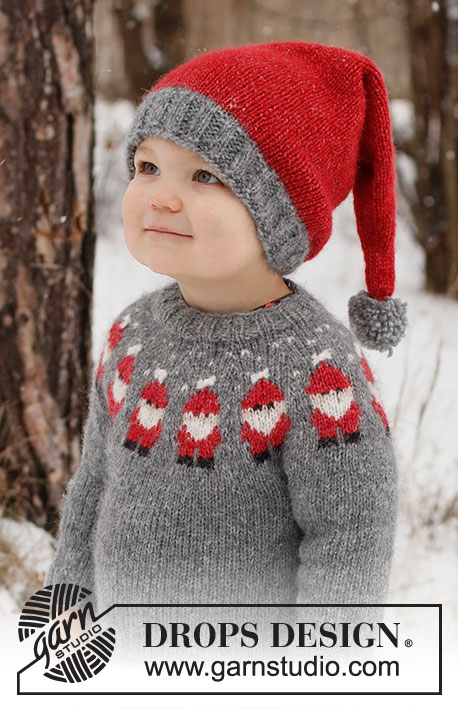
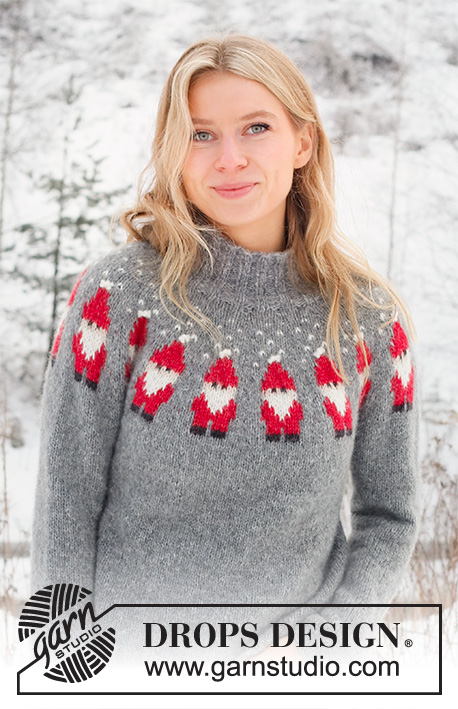
Knitted sweater in DROPS Air. Piece is knitted top down, with round yoke and Santa pattern. Size XS – XXL. Theme: Christmas.
DROPS 228-48 |
|||||||||||||||||||
|
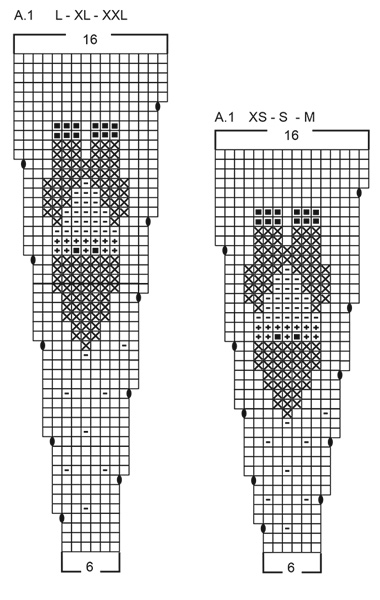
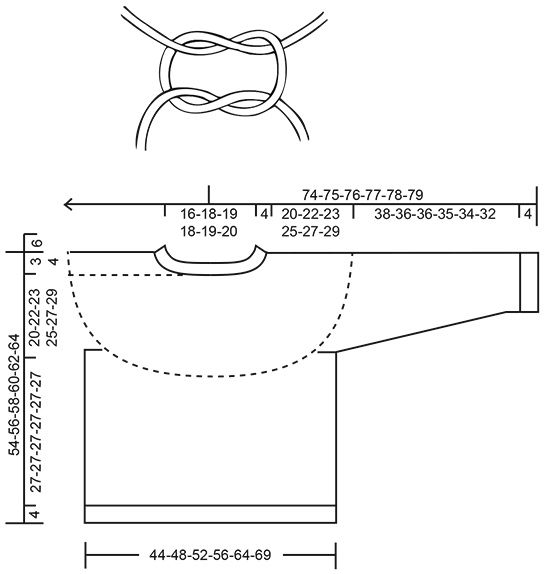
---------------------------------------------------------- EXPLANATION FOR THE PATTERN: ---------------------------------------------------------- INCREASE TIP (evenly): To calculate how to increase evenly, use the total number of stitches on row (e.g. 80 stitches) and divide stitches by number of increases to be done (e.g. 16) = 5. In this example increase by making 1 yarn over after every 5th stitch. On next round knit yarns over twisted to avoid holes. PATTERN: See diagram A.1. Choose diagram for your size. Work the entire pattern in stockinette stitch. KNITTING TIP: To avoid the garment losing elasticity when working pattern, it is important not to tighten the strands on back side of piece. Switch to a higher needle number when working pattern if the pattern is somewhat tight. DECREASE TIP (applies to sleeves): Decrease 1 stitch on each side of marker thread as follows: Work until 3 stitches remain before marker thread and knit 2 together, knit 2 (marker thread is between these 2 stitches), slip 1 stitch knitwise, knit 1, pass slipped stitch over stitch worked. BIND-OFF TIP: To avoid a tight bind-off edge when binding off, you may use a larger needle. If this still is too tight make 1 yarn over after approx. every 4th stitch while binding off (bind off yarn overs as stitches). ---------------------------------------------------------- START THE PIECE HERE: ---------------------------------------------------------- SWEATER - SHORT OVERVIEW OF THE PIECE: Work neck edge and yoke in the round on circular needle from mid back, top down. Now divide yoke for body and sleeves. Work body in the round on circular needle, top down. Work sleeves in the round on double pointed needles/a short circular needle, top down. NECK EDGE: Cast on 95-100-105-110-115-120 stitches on short circular needle size 4 MM = US 6 with color medium grey in DROPS Air. Knit 1 round. Work rib (knit 2/purl 3) for 4 cm = 1½". Now decrease 1 stitch in every purl section, decrease by purling 2 together = 76-80-84-88-92-96 stitches. Continue with rib = knit 2/purl 2. Work until rib measures 12 cm = 4¾" in total. Switch to a short circular needle size 5 MM = US 8. YOKE: Insert 1 marker at beginning of round, measure yoke from this marker! Knit 1 round while increasing 8-16-18-26-28-30 stitches evenly - read INCREASE TIP = 84-96-102-114-120-126 stitches. Now work according to diagram A.1 (= 14-16-17-19-20-21 repetitions of 6 stitches). NOTE: Choose diagram for your size and read KNITTING TIP! REMEMBER THE KNITTING GAUGE! When entire A.1 has been worked vertically, there are 224-256-272-304-320-336 stitches on round. Knit 1 round with color medium grey while increasing 8-0-0-0-4-8 stitches evenly = 232-256-272-304-324-344 stitches. Continue in medium grey and stockinette stitch until piece measures approx. 20-22-23-25-27-29 cm = 8"-8¾"-9"-9¾"-10⅝"-11⅜" from marker. Now divide yoke for body and sleeves as follows: Knit 34-38-40-44-49-53 (= half back piece), slip the next 48-52-56-64-64-66 stitches on 1 thread for sleeve, cast on 6-6-8-8-10-12 new stitches on row (= in the side under sleeve), knit 68-76-80-88-98-106 (= front piece), slip the next 48-52-56-64-64-66 stitches on 1 thread for sleeve, cast on 6-6-8-8-10-12 new stitches on row (= in the side under sleeve) and knit the remaining 34-38-40-44-49-53 stitches (= half back piece). Finish body and sleeves separately. NOW MEASURE THE PIECE FROM HERE! BODY: There are now 148-164-176-192-216-236 stitches on round. Continue with stockinette stitch and color medium grey. Work until piece measures approx. 27-27-27-27-27-27 cm = 10⅝"-10⅝"-10⅝"-10⅝"-10⅝"-10⅝" from division (or desired length, approx. 4 cm = 1½" remain until finished measurements). Switch to circular needle size 4 MM = US 6 and work rib = knit 2/purl 2 in the round. Work rib for 4 cm = 1½". Bind off loosely with knit over knit and purl over purl - read BIND-OFF TIP. Sweater measures approx. 54-56-58-60-62-64 cm = 21¼"-22"-22¾"-23⅝"-24⅜"-25¼" from shoulder and down. SLEEVE: Slip the 48-52-56-64-64-66 stitches from thread in one side of piece on double pointed needles or a short circular needle size 5 MM = US 8 and pick up 1 stitch in each of the 6-6-8-8-10-12 new stitches cast on under sleeve = 54-58-64-72-74-78 stitches. Insert 1 marker thread mid under sleeve, i.e. in the middle of the 6-6-8-8-10-12 stitches that were cast on under sleeves. Move the marker thread upwards when working; it should be used for decrease mid under sleeve. Begin round at the marker thread and work stockinette stitch in the round with medium grey. When sleeve measures 3 cm = 1⅛" from division, decrease 2 stitches mid under sleeve - read DECREASE TIP. Decrease like this every 8-6-4-3-2½-2½ cm = 3⅛"-2⅜"-1½"-1⅛"-1"-1" 5-6-8-11-11-12 times in total = 44-46-48-50-52-54 stitches. Work without decreases until sleeve measures 38-36-36-35-34-32 cm = 15"-14¼"-14¼"-13¾"-13⅜"-12½" from division (approx. 4 cm = 1½" remain before finished measurements, try the sweater on and work to desired length). Shorter measurements in the larger sizes because of wider neck and longer yoke. Knit 1 round while increasing 4-2-4-2-4-2 stitches evenly = 48-48-52-52-56-56 stitches. Switch to double pointed needles size 4 MM = US 6. Work rib in the round = knit 2/purl 2 for 4 cm = 1½". Bind off with knit over knit and purl over purl - remember BIND-OFF TIP. Sleeve measures approx. 42-40-40-39-38-36 cm = 16½"-15¾"-15¾"-15¼"-15"-14¼" from division. Work the other sleeve the same way. ASSEMBLY: The neck edge can be folded and sewn into a double neck edge or use it as a high collar. If you want a double neck edge do the following: Fold rib at the top of neck down on inside of garment. Fasten rib to get a double neck edge. To avoid a tight neck edge that sticks out it is important to keep the seam elastic. KNOT: Make a knot at the top of every Santa hat. Tie the knot around a stitch. Cut 2 lengths of color off white. approx. 10 cm = 4". Place strands together, use a needle and pull strands through the top off white stitch so that both yarn ends are on the right side of piece, on each side of stitch. Tie a knot, then tie another knot but in the opposite direction - see figure. Cut the yarn ends approx. ½ cm = ⅛" long. Repeat at the top of on each Santa hat. |
|||||||||||||||||||
Diagram explanations |
|||||||||||||||||||
|
|||||||||||||||||||
|
|||||||||||||||||||
|
|||||||||||||||||||
Have you finished this pattern?Tag your pictures with #dropspattern #merrysantassweater or submit them to the #dropsfan gallery. Do you need help with this pattern?You'll find 30 tutorial videos, a Comments/Questions area and more by visiting the pattern on garnstudio.com. © 1982-2025 DROPS Design A/S. We reserve all rights. This document, including all its sub-sections, has copyrights. Read more about what you can do with our patterns at the bottom of each pattern on our site. |
|||||||||||||||||||


With over 40 years in knitting and crochet design, DROPS Design offers one of the most extensive collections of free patterns on the internet - translated to 17 languages. As of today we count 314 catalogs and 11822 patterns - 11812 of which are translated into English (US/in).
We work hard to bring you the best knitting and crochet have to offer, inspiration and advice as well as great quality yarns at incredible prices! Would you like to use our patterns for other than personal use? You can read what you are allowed to do in the Copyright text at the bottom of all our patterns. Happy crafting!
Post a comment to pattern DROPS 228-48
We would love to hear what you have to say about this pattern!
If you want to leave a question, please make sure you select the correct category in the form below, to speed up the answering process. Required fields are marked *.