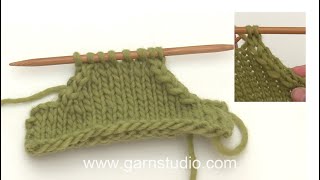
European yoke 4/4 – Neck is finished after the stitches for sleeves are knitted up
In this DROPS video, we show you how to increase for the sleeves and for the front and back pieces when working a European yoke while, at the same time, casting on stitches under each sleeve.
When all the increases are finished and the yoke is the correct length, it is divided for the body and sleeves. The body is continued in the round with circular needle, top down, while the sleeves wait.
Work as follows:
ROUND 1: Knit all stitches (we only show the beginning and end of this round).
ROUND 2: Knit until there are 2 stitches left before the first marker, increase towards the right, knit 2, move the marker onto the right needle, increase towards the left, knit across the sleeve-stitches, increase towards the right, move the marker onto the right needle, knit 2, increase towards the left, knit until there are 2 stitches left before the next marker, increase towards the right, knit 2, move the marker onto the right needle, increase towards the left, knit across the sleeve-stitches, increase towards the right, move the marker onto the right needle, knit 2, increase towards the left, knit to end of round (= 1 stitch increased on each side of 2 stitches in each transition between body and sleeves = a total of 8 increased stitches).
Repeat these 2 rounds the stated number of times in your pattern. The piece now measures X cm measured down the middle of the sleeve, from where stitches were knitted up, when the jumper is folded double at the shoulder. The piece measures X cm outermost along the armhole. Work to the first marker (= transition between front piece and left shoulder). Now divide the yoke for the body and sleeves, casting on stitches under both sleeves. Follow your pattern for how many stitches are placed on a thread, how many stitches are cast on and how you continue the body.
INCREASE TIP-1:
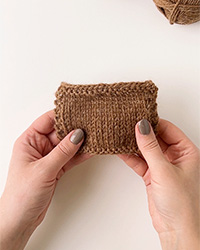
INCREASE 1 STITCH TOWARDS THE LEFT – from right side: Use the left needle to pick up the front strand between 2 stitches from the previous row, knit through the back loop.
INCREASE 1 STITCH TOWARDS THE RIGHT – from right side: Use the left needle to pick up the back strand between 2 stitches from the previous
row, knit through the front loop.
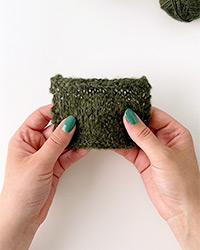
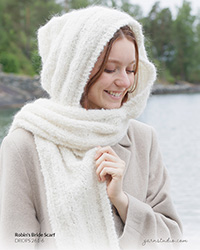
Yarn used: DROPS Andes.
You need to read your chosen pattern and work the correct number of stitches. You can find pattern using this technique and more related videos below.