
Popular categories
Looking for a yarn?


































Comments / Questions (173)
 Jette wrote:
Jeg strikker str. S. Efter A3 har jeg 192 masker, altså 80 masker op til de 172 masker. Men ny omgang af A3, så passer mønstret ikke (som mange andre har skrevet). Vil I for klare helt præcis, hvad jeg skal gøre. Måske jeg har strikket det første af A3 forkert, tror jeg dog ikke, da mønstret passer. Hvis I vil hjælpe videre 🧶🙂
27.10.2026 - 12:38DROPS Design answered:
Hej Jette, Jo du fortsætter med udtagningerne, som strikkes ind i mønster A.3, nøjagtig som du har strikket hele tiden, og det fortsætter du med til du har 272 masker på pinden :)
27.10.2026 - 13:37
 Abc wrote:
På bolen, skal man ikke starte på første maske av A4? Ingenting som går opp og man må trikse med starten hele tiden, så regner med at man egentlig skal begynne et annet sted? Burde i så fall vært beskrevet mye tydeligere i oppskriften da alt er veldig forvirrende og vanskelig forklart.
18.10.2026 - 17:42DROPS Design answered:
Hei Abc, Du starter A4 på bolen i den 3. masken før de 7 nye maskene under ermet på en side av bolen. Du begynner med en ny rapport av A.1 i bredden over de 3 + 7 maskene slik at mønsteret passer maskene på bærestykke. Deretter, burde det ikke være nødvendig å justere mønsteret mens du strikker videre rundt. Hilsen Drops Team.
19.10.2026 - 06:26
Ragnhild Brudevik wrote:
216-3 Frosted Leaves Lurer også på: På bildene ovenfor ser det ut for at det skal bli en «hullrand» langs hele raglanfellingen, men får ikke dette til å stemme når diagram A3 starter?
14.10.2026 - 16:24DROPS Design answered:
Hei Ragnhild. Man fortsett økningene som vist i A.1 og A.2 = kast på hver 2. omgang = hullmønster ved raglanlinjen. mvh DROPS Design
19.10.2026 - 10:58
Ragnhild Brudevik wrote:
216-3 Froste Leaves str L Bærestykke - Det står «Når A1 og A2 er strikket 1 gang i høyden..» Men for str L startes diagrammet A1 etter første «rapport» og det gjenstår da 2 rapporter i høyden for str. Diagram A2 har 3 rapporter i høyden, så når er man da ferdig med A1 og A2 1 gang i høyden? Vil det si at ferdig 1 gang i høyden=3 rapporter i høyden? Og når man starter med A3 fortsetter økning med 8m for hver 2 omgang som før?
14.10.2026 - 12:19DROPS Design answered:
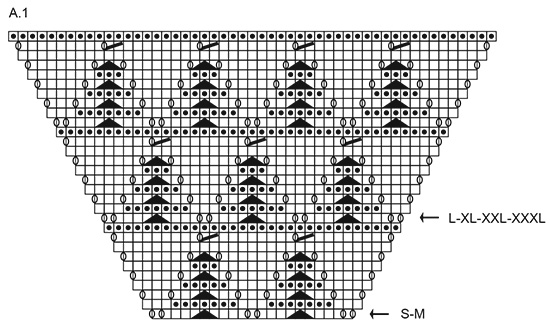
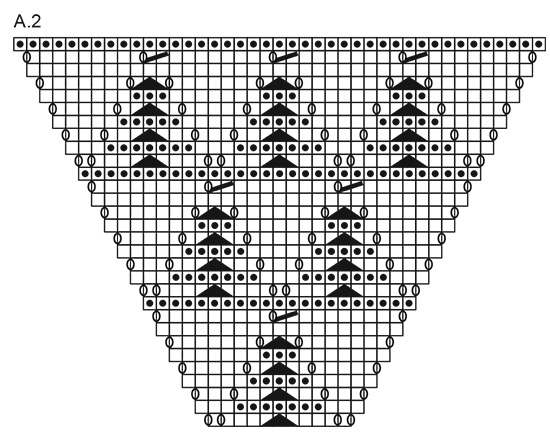
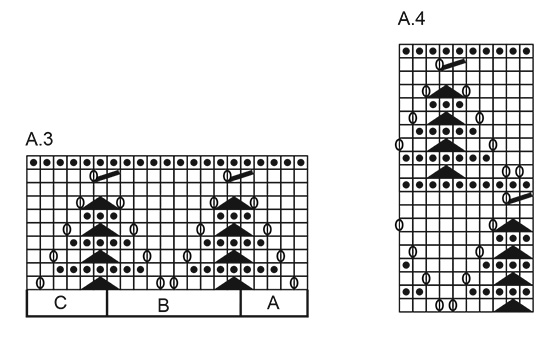
Hei Ragnhild. Når A.1 er strikket 1 gang i høyden, strikkes det videre med A.3. Når A.2 er strikket 1 gang i høyden, strikkes det videre med A.3. Strikk A.3 A over de første 5 maskene, gjenta A.3 B til det gjenstår 6 masker over A.1/A.2, og strikk A.3 C over de siste 6 maskene. For hver gang A.3 er strikket 1 gang i høyden, strikkes det 1 rapport mer av A.3 B i bredden. Fortsett økningene som vist i A.1 og A.2. mvh DROPS Design
19.10.2026 - 10:56
 Fråga Om Slätstickningen Samt A3 wrote:
Skall slätmaskorna (2-2-2-1) som stickas efter A1 resp A2 fortsättas med även när man går över till A3? Tycker mönstret/instruktionen är otydlig kring det. När man börjar med A3, är det A3A första 5 maskorna av varvet, sedan A3B tills det återstår 6 m av varvet då man går över till A3C, eller gäller hela A3 mönstret för resp A1 och A2.
22.06.2026 - 08:05DROPS Design answered:
Hei. Vi skal hjelpe deg så godt vi kan, men fint om du kan opplyse hvilken str. du strikker og mer nøyaktig hvor i oppskriften du mener / er? mvh DROPS Design
30.06.2026 - 06:41
 Sinimari wrote:
Hei, voisitteko vielä tarkentaa että miten lisäykset tehdään, kun kuvio 3ABC on tehty ensimmäisen kerran? Ja tehdäänkö lisäykset siis kierroksen alkuun ja loppuun?
01.05.2026 - 11:52DROPS Design answered:
Hei, aina kun olet neulonut piirroksen A.3 loppuun, kerrokselle tulee 1 piirroksen A.3B mallikerta enemmän. Eli neulo seuraavasti: Neulo ensimmäisillä 5 silmukalla mallineuletta piirroksen A.3 A mukaisesti, toista piirroksen A.3 B mallikertaa, kunnes jäljellä 6 silmukkaa, neulo viimeisillä 6 silmukalla mallineuletta piirroksen A.3 C mukaisesti. Lisäykset tehdään ennen piirroksen A.3A mallikertaa ja piirroksen A.3C mallikerran jälkeen. Ennen piirroksen A.3A mallineuletta lisätyt silmukat neulotaan kuten piirroksen A.1 mallineuleen alussa ja piirroksen A.3C jälkeen lisätyt silmukat neulotaan kuten piirroksen A.1 mallineuleen lopussa.
01.05.2026 - 17:12
 Delia wrote:
Buongiorno, ho qualche difficoltà con A3, dopo averlo finito in altezza e ricominciato dal basso, il motivo non corrisponde, devo ripartire da A1 e A2?
24.03.2026 - 07:02DROPS Design answered:
Buonasera Delia, dopo aver lavorato A.3, deve continuare sempre con A.3. Buon lavoro!
25.03.2026 - 08:37
Delia wrote:
Buonasera, ho qualche difficoltà con A3, dopo averlo finito in altezza e ricominciato dal basso, il motivo non corrisponde, devo ripartire da A1 e A2?
24.03.2026 - 00:48DROPS Design answered:
Buonasera Delia, no, deve ripartire con A.3. Buon lavoro!
04.04.2026 - 18:17
 Cristina wrote:
I'm having difficulty with A3. I've concluded that the increases are the first yarn over after the raglan stitches. But it's not clear what it means to increase like A1 and A2 while doing A3. Does that mean only the YO (and the correspondent knit next row), or more? because as I go along A3 I'm "missing" more and more stitches after the YO to match the scheme of A1. So before A3 should I do YO (first row), then YO+1 (third row), YO+2 (fifth row), YO+3 (seventh row), YO+4 (ninth row) ?
14.03.2026 - 17:45DROPS Design answered:
Dear Cristina, you can insert a marker before A.3A and after A.3C so that you will know how to work the new stitches before / after, ie work the new stitches before A.3A as at the beg of A.1 before and work the new stitches after A.3C as you worked at the end of A.1 before (ie yarn overs and all new stitches created). Happy knitting!
16.03.2026 - 09:06
Eva wrote:
Jeg får ikke mønsteret til å stemme når jeg begynner på A. 4 etter å ha delt i bol og ermer, og lagt opp 7 masker i hver side.
09.03.2026 - 17:52
|
||||||||||||||||
Frosted Leaves#frostedleavessweater |
||||||||||||||||
 |
 |
|||||||||||||||
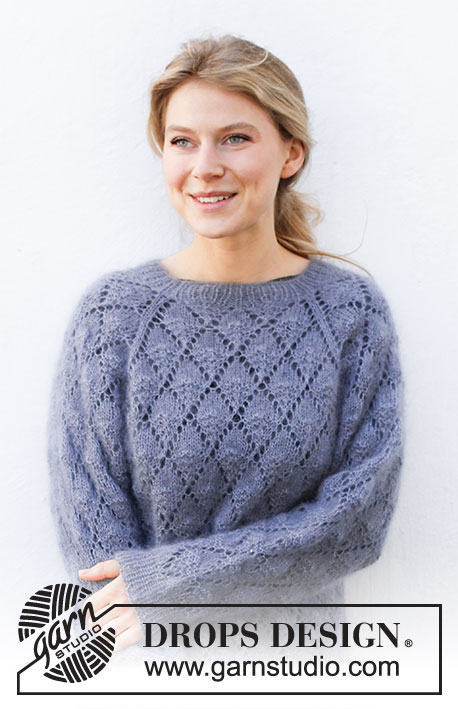
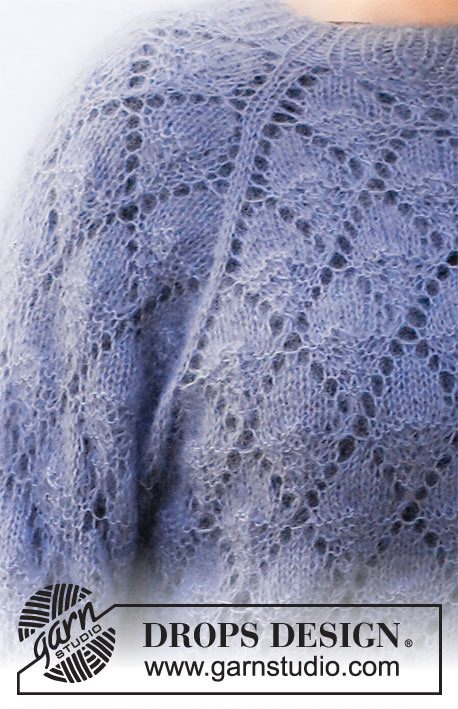
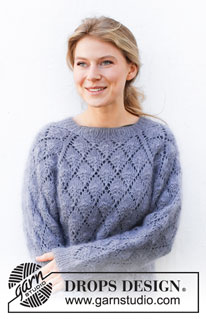
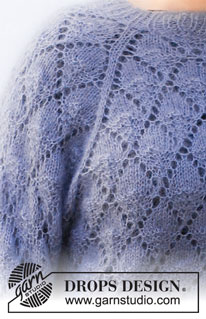
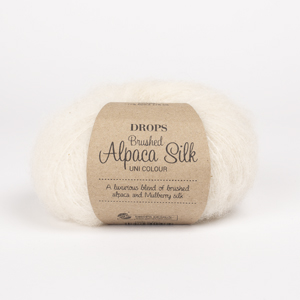
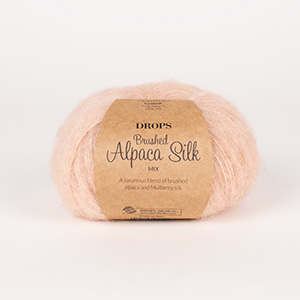
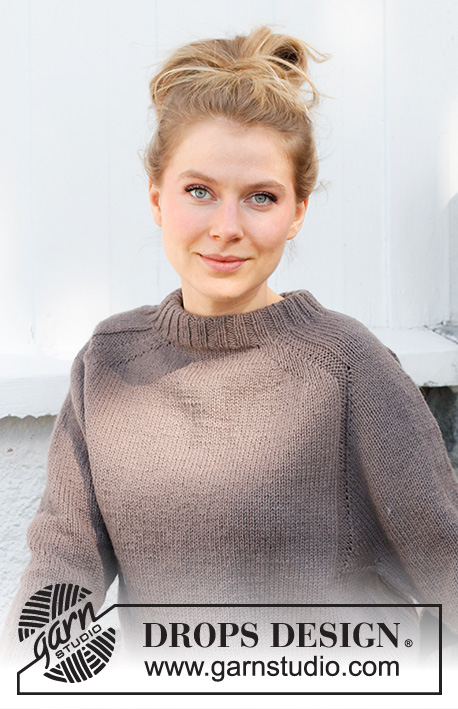
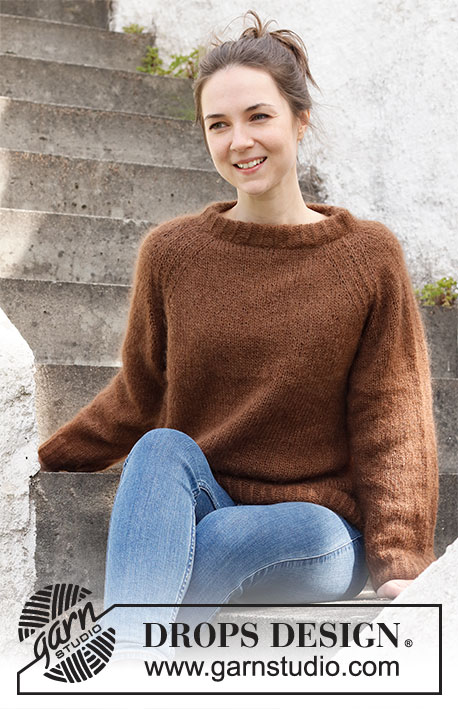
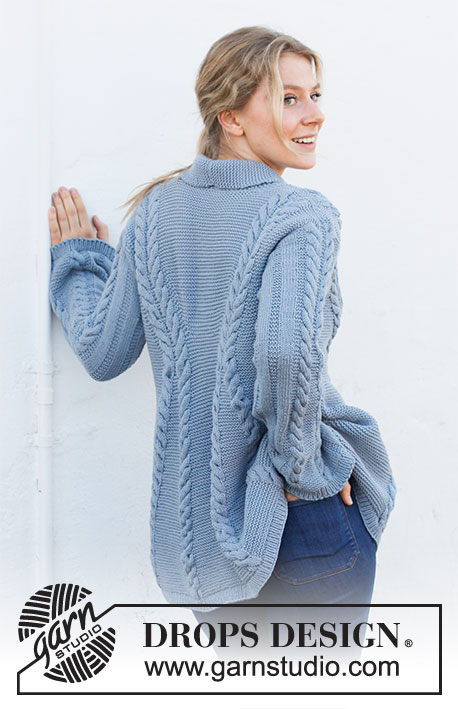
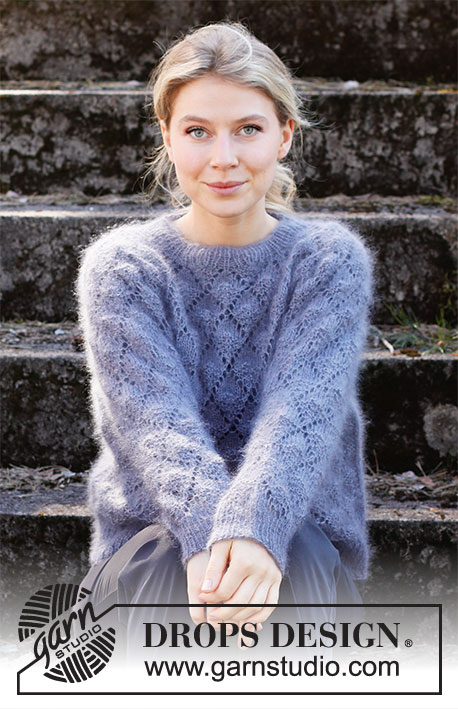
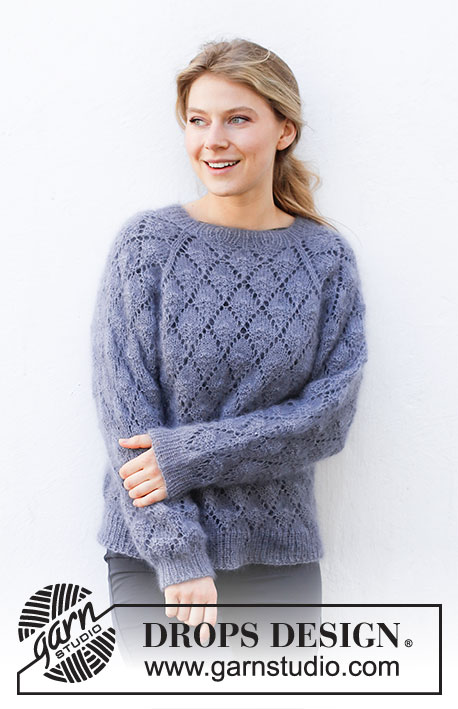
Knitted sweater in 1 strand DROPS Brushed Alpaca Silk or 2 strands DROPS Kid-Silk. The piece is worked top down with raglan and lace pattern. Sizes S - XXXL.
DROPS 216-3 |
||||||||||||||||
|
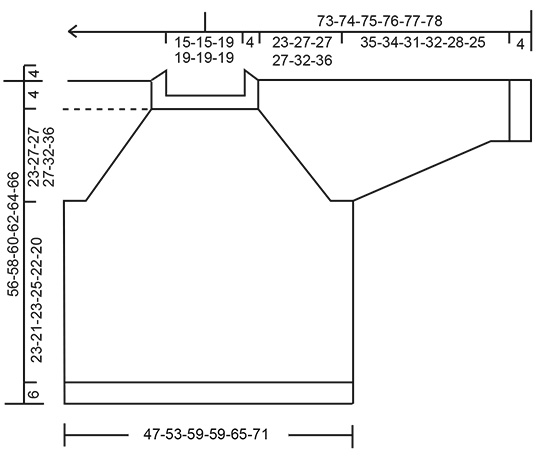
------------------------------------------------------- EXPLANATIONS FOR THE PATTERN: ------------------------------------------------------- PATTERN: See diagrams A.1 to A.4 DECREASE TIP-1 (evenly spaced): To work out how to decrease evenly, count the total number of stitches on needle (e.g. 48 stitches) and divide by number of decreases to be made (e.g. 8) = 6. In this example decrease by knitting each 5th and 6th stitch together. DECREASE TIP-2 (for sleeves): Decrease 1 stitch on either side of the marker thread as follows: Work until there are 3 stitches left before the marker thread, knit 2 together, knit 2 (marker thread sits between these 2 stitches), slip 1 stitch as if to knit, knit 1 and pass the slipped stitch over the knitted stitch (= 2 stitches decreased). BINDING-OFF TIP: To avoid the bind-off edge being tight you can bind off with a larger size needle. If the edge is still tight, make 1 yarn over after approx. each 4th stitch at the same time as binding off; the yarn overs are bind off as normal stitches. ------------------------------------------------------- START THE PIECE HERE: ------------------------------------------------------- SWEATER – SHORT OVERVIEW OF THE PIECE: The neck and yoke are worked in the round with circular needle. The yoke is divided for body and sleeves and the body continued in the round with circular needle. The rounds start at the transition between sleeve and back piece. The sleeves are worked in the round with short circular needle/double pointed needles, top down. The piece is worked with 1 strand Brushed Alpaca Silk or 2 strands Kid-Silk. NECK: Cast on 72-72-92-92-92-92 stitches with circular needle size 4 mm = US 6 and 1 strand Bruched Alpaca Silk or 2 strands Kid-Silk. Knit 1 round. Then work rib (knit 1, purl 1) for 4 cm = 1½". Insert 1 marker at the beginning of the round. The yoke will be measured from this marker. Change to circular needle size 5 mm = US 8 and work the yoke as described below. REMEMBER THE KNITTING GAUGE! YOKE: On the next round work pattern as follows: Work 1 stitch in stockinette stitch, A.1 (= 21-21-31-31-31-31 stitches, see start-arrow for your size), 2 stitches in stockinette stitch, A.2 (= 11 stitches), 2 stitches in stockinette stitch, A.1 (= 21-21-31-31-31-31 stitches, see start-arrow for your size), 2 stitches in stockinette stitch, A.2 (= 11 stitches) and 1 stitch in stockinette stitch. Continue this pattern; all increases are drawn into the diagrams. 8 stitches are increased every 2nd round. When A.1 and A.2 have been worked 1 time in height, continue with A.3. Work A.3 A over the first 5 stitches, repeat A.3 B until there are 6 stitches left on the row and work A.3 C over the last 6 stitches. Each time A.3 has been worked 1 time in height there is room for 1 more repeat of A.3 B in width. Continue the increases as shown in A.1 and A.2. Increase every 2nd round a total of 25-30-30-30-35-40 times = 272-312-332-332-372-412 stitches. The piece measures approx. 23-27-27-27-32-36 cm = 9"-10⅝"-10⅝"-10⅝"-12½"-14¼" from the marker thread. Now divide the yoke for body and sleeves as follows (continue the pattern as before; you should be on the last round in a repeat of A.3, where all stitches are purled): Work 73-83-93-93-103-113 stitches (= back piece), place the next 63-73-73-73-83-93 stitches on 1 thread for the sleeve, cast on 7 new stitches on the needle (= in side under sleeve), work 73-83-93-93-103-113 stitches as before (= front piece), place the next 63-73-73-73-83-93 stitches on 1 thread for the sleeve and cast on 7 new stitches on the needle (= in side under sleeve). Body and sleeves are finished separately. Cut the strand. BODY: = 160-180-200-200-220-240 stitches. Start 3 stitches before the 7 new stitches cast on in the side and work A.4 over all stitches; make sure the pattern matches the pattern on the yoke. Continue working until the piece measures 23-21-23-25-22-20 cm = 9"-8¼"-9"-9¾"-8¾"-8" from the division (there is approx. 6 cm = 2⅜" left to finished length; you can try the sweater on and work to desired length). Change to circular needle size 4 mm = US 6 and work rib (knit 1, purl 1) for 6 cm = 2⅜". Bind off with knit over knit and purl over purl – read BINDING-OFF TIP! The sweater measures approx. 56-58-60-62-64-66 cm = 22"-22¾"-23⅝"-24⅜"-25¼"-26" from the shoulder down. SLEEVES: Place the 63-73-73-73-83-93 stitches from the thread on the one side of the piece on short circular needle/double pointed needles size 5 mm = US 8 and knit up 1 stitch in each of the 7 stitches cast on under the sleeve = 70-80-80-80-90-100 stitches. Insert a marker thread in the middle of the 7 stitches under the sleeve. Allow the thread to follow your work onwards; it will be used when decreasing under the sleeve. Cut the strand and start working 3 stitches before the new stitches under the sleeve and continue the pattern in the round according to A.4; make sure the pattern matches the pattern on the yoke. When the sleeve measures 3 cm = 1⅛" from the division in all sizes, decrease 2 stitches mid under the sleeve – read DECREASE TIP-2. Decrease like this every 3-2-1½-2-1-1 cm = 1⅛"-¾"-½"-¾"-⅜"-⅜" a total of 11-15-15-13-17-21 times = 48-50-50-54-56-58 stitches. The stitches which do not fit into the pattern when decreasing are worked in stockinette stitch. Continue working until the sleeve measures 35-34-31-32-28-25 cm = 13¾"-13⅜"-12¼"-11"-9¾" from the division (there is approx. 4 cm = 1½" left to finished length; you can try the sweater on and work to desired length). NOTE: Shorter measurements in larger sizes due to wider neck and longer yoke. Knit 1 round where you decrease 8 stitches evenly spaced – read DECREASE TIP-1 = 40-42-42-46-48-50 stitches. Change to double pointed needles size 4 mm = US 6 and work rib (knit 1, purl 1) for 4 cm = 1½". Bind off with knit over knit and purl over purl – remember BINDING-OFF TIP! The sleeve measures approx. 39-38-35-36-32-29 cm = 15¼"-15"-13¾"-14¼"-12½"-11⅜" from the division. Work the other sleeve in the same way. |
||||||||||||||||
Diagram explanations |
||||||||||||||||
|
||||||||||||||||
 |
||||||||||||||||
 |
||||||||||||||||
 |
||||||||||||||||
 |
||||||||||||||||
Have you finished this pattern?Tag your pictures with #dropspattern #frostedleavessweater or submit them to the #dropsfan gallery. Do you need help with this pattern?You'll find 17 tutorial videos, a Comments/Questions area and more by visiting the pattern on garnstudio.com. © 1982-2026 DROPS Design A/S. We reserve all rights. This document, including all its sub-sections, has copyrights. Read more about what you can do with our patterns at the bottom of each pattern on our site. |
||||||||||||||||






With over 40 years in knitting and crochet design, DROPS Design offers one of the most extensive collections of free patterns on the internet - translated to 17 languages. As of today we count 333 catalogs and 12525 patterns - 12515 of which are translated into English (US/in).
We work hard to bring you the best knitting and crochet have to offer, inspiration and advice as well as great quality yarns at incredible prices! Would you like to use our patterns for other than personal use? You can read what you are allowed to do in the Copyright text at the bottom of all our patterns. Happy crafting!
Post a comment to pattern DROPS 216-3
We would love to hear what you have to say about this pattern!
If you want to leave a question, please make sure you select the correct category in the form below, to speed up the answering process. Required fields are marked *.