
Popular categories
Looking for a yarn?


Comments / Questions (38)
![]() Iris Wolf wrote:
Iris Wolf wrote:
Nach den verkürzten Reihen linkes Vorderteil soll man im Muster weiterstricken, bis die Abnahmen an den Vorderteilen beginnen. Bei einer Länge von 6 cm ab Anschlag bis Markierungsfaden (=Höhe Strickstück?) Was ist gemeint mit "am Markierungsfaden an der Seite lang gemessen"? Zu diesem Zeitpunkt bin ich fast schon 6 cm von Anschlagrand bis Höhe Strickstück. Heisst das, dass die Abnahmen kurz nach Ende der verkürzten Reihen beginnen?
09.04.2026 - 17:15DROPS Design answered:
Liebe Frau Wolf, die verkürzten Reihen werden über die Maschen von den Vorderteilen gestrickt, kurz davor haben Sie 1 Markierungsfaden beidseitig eingebracht (Aufteilung Vorderteile und Rückenteil); die 6 cm messen Sie ab Anschlagskante an die Seite (wo der ein Markierungsfäden eingebracht wurde). Viel Spaß beim Stricken!
10.04.2026 - 07:23
![]() Marja-Liisa wrote:
Marja-Liisa wrote:
Olen neulonut oikean etukappaleen ja A4 malli neuletta vasempaan etureunaan saakka sekä A3 mallineuleen. 1kerros ok 2 kerros ok 3kerros(nurja) ei aukea minulle. Kuinka voin kutoa lyhennetty kerrokset siten, että kuvio pysyy ehjänä ja samalla tasolla? Oikeassa etureunassa onnistuin. Vasemmassa en saa millään täsmäämään kuviota, koska ensimmäinen kerros on kudottu A4 malli kerran 1.kerroksella. Siis ohjeen 3 (nurja)ja 4 (oik)kerros eivät aukea minulle.
21.03.2026 - 17:30DROPS Design answered:
Hei, neulo kolmannella kerroksella (nurja puoli) mallineuletta piirroksen A.4 toisen kerroksen mukaan, niin kuvio pysyy ehjänä.
27.03.2026 - 17:38
![]() Marja-Liisa wrote:
Marja-Liisa wrote:
Hei, haluan kutoa koko S langasta drops brushed alpaca. Kuinka paljon malliin menee lankaa? Kiitos
12.03.2026 - 15:39DROPS Design answered:
Tarvitset noin 7 kerää DROPS Brushed Alpaca Silk -lankaa, yhdessä kerässä on 25 grammaa.
13.03.2026 - 19:14
![]() Marja-Liisa wrote:
Marja-Liisa wrote:
Koska drops baby alpaca silk lankaa ei enää saa, mikä olisi vastaava lanka, jos teen yksinkertaisesta langasta, enkä kuten ohjeessa kahdesta eri langasta. Kesään sopivan. Voinko saada ihan langan nimellä vaihtoehdon.
08.03.2026 - 21:15DROPS Design answered:
Hei, DROPS Brushed Alpaca Silk muistuttaa eniten ohjeen lankayhdistelmää, mutta neuleesta tulee melko lämmin. DROPS Bomull-Lin -lanka on kevyempi vaihtoehto.
10.03.2026 - 18:53
![]() Marja-Liisa wrote:
Marja-Liisa wrote:
Koska baby alpaca on poistunut, mikä lanka voisi olla ohjeessa sen tilalla?
08.03.2026 - 14:45
![]() Brigitte wrote:
Brigitte wrote:
Ich verstehe die Abnahme an den Vorderseiten nicht. Ist es eine Doppelabnahme am Übergang zum Ärmel, oder nehme ich an der Vorderkante und am Übergang ab? 2 M abgenommen.
12.10.2025 - 08:50DROPS Design answered:
Liebe Brigitte, es handelt sich bei den Vorderteilen um eine Doppelabnahme an der Raglanlinie (Übergang zum Ärmel), wie sie unter RAGLANABNAHMEN beschrieben ist - dort wird ja erklärt, wie Sie 2 Maschen vor bzw. nach dem Markierungsfaden abnehmen. Gutes Gelingen weiterhin!
24.10.2025 - 10:30
![]() Jara wrote:
Jara wrote:
Hallo, muss man in einer verkürzten Hin-Reihe alle Rapporte gleich stricken? Also zum Beispiel A4 1. Reihe (bzw. A2 1. Reihe) und in der nächsten verkürzten Hin-Reihe dann A4 3. Reihe (bzw. A2 3. Reihe)? Oder muss man in einer verkürzten Hin-Reihe die Rapporte abwechseln? "...damit das Lochmuster in den verschiedenen Rapporten über die "ganze" Reihe hinweg gleich wird" Mit "ganze Reihe" ist gemeint alle Maschen, die auf der Stricknadel sind, oder nur die verkürzte Reihe? Vielen Dank
21.05.2025 - 16:05DROPS Design answered:
Liebe Jana, ja am besten stricken Sie die gleiche Reihe über alle A.4 damit das Muster immer gleich auf einer Reihe gestrickt wird, besonders wenn Sie später alle Maschen stricken. Viel Spaß beim Stricken!
22.05.2025 - 08:45
![]() Jara wrote:
Jara wrote:
Hallo, richtig sollte es bei meiner letzten Frage heißen: Oder muss man zuvor beim Rückenteil und "linken" Vorderteil A4, 1. und 3. Reihe abwechseln? Vielen Dank
20.05.2025 - 14:35DROPS Design answered:
Liebe Jara, also ja genau so wird A.4 gestrickt; bei den Hinreihen abwechslungsweise die 1. und die 3. Reihe wiederholen. Kann das Ihnen helfen oder habe ich noch was misverstanden?
20.05.2025 - 15:54
![]() Jara wrote:
Jara wrote:
Hallo, ich verstehe die verkürzten Reihen beim linken Vorderteil nicht. Bei der ersten verkürzten Hinreihe strickt man also A4, 3. Reihe. Bei der zweiten verkürzten Hinreihe muss man dann A4, 1. Reihe stricken? Aber dann ist ja beim zweiten Rapport (zweite verkürzte Hinreihe) A4, 1. Reihe auch darunter. Da ja zuvor der Rückenteil und das linke Vorderteil A4, 1. Reihe gestrickt wurde. Oder muss man zuvor beim Rückenteil und rechten Vorderteil A4, 1. und 3. Reihe abwechseln? Vielen Dank
20.05.2025 - 14:30DROPS Design answered:
Liebe Jana, die verkürzten Reihen bei dem linken Vorderteil beginnen mit einer Rückreihe. Dann stricken Sie einfach A.4 weiter, dh die nächste Reihe, da Sie die 1. Reihe bei der Hinreihe schon gestrickt haben, so die 3 Reihe beim Rückenteil ist eine Rückreihe, bei der 2. Reihe (Hinreihe) stricken Sie die nächste Hinreihe wie im Diagram (sollte die 3. Reihe sein). Viel Spaß beim Stricken!
20.05.2025 - 15:52
![]() Jara wrote:
Jara wrote:
Hallo, bei meiner vorigen Frage habe ich versehentlich "rechtes" Vorderteil geschrieben. Ich meinte jeweils das "linke" Vorderteil. Hier nochmals ausgebessert: Muss ich bei der ersten verkürzten Reihe linkes Vorderteil (nach den 11 Maschen) mit A4, 1. Reihe beginnen, oder 3. Reihe? Es wurde A4, 1. Reihe ja bereits davor über das Rückenteil und das linke Vorderteil hinübergestrickt. Das verwirrt mich. Vielen Dank
19.05.2025 - 19:34DROPS Design answered:
Liebe Jana, stricken Sie A.4 weiter, dh da die 1. Reihe war schon gestrickt, Stricken Sie jetzt die 3. Reihe bei der 1. Hinreihe beim linken Vorderteil. Viel Spaß beim Stricken!
20.05.2025 - 09:30
|
||||||||||||||||
Summer Promise#summerpromisewrap |
||||||||||||||||
 |
 |
|||||||||||||||
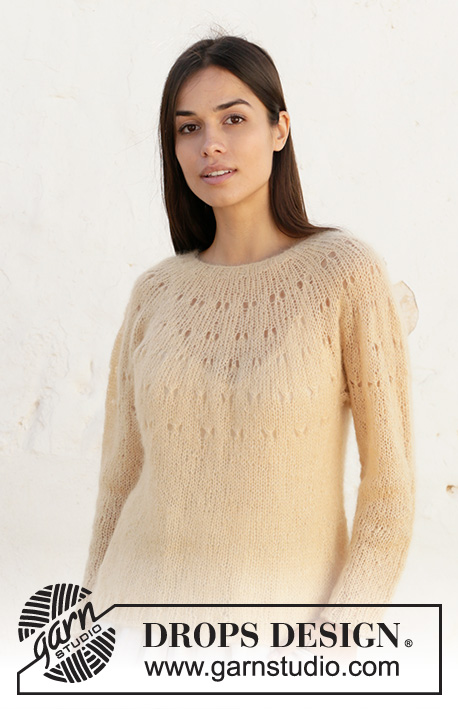
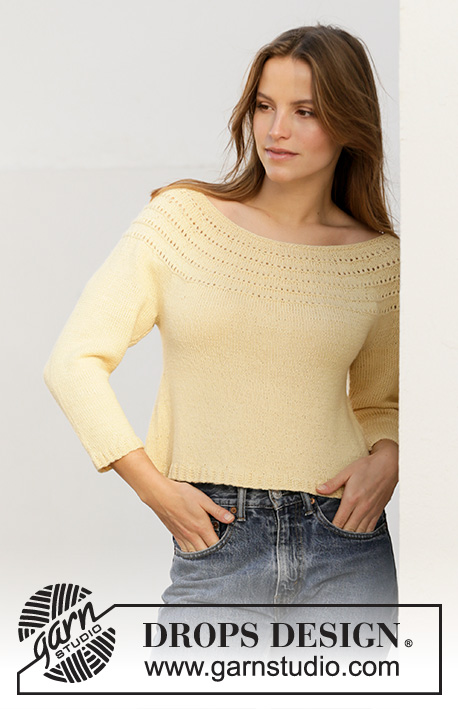
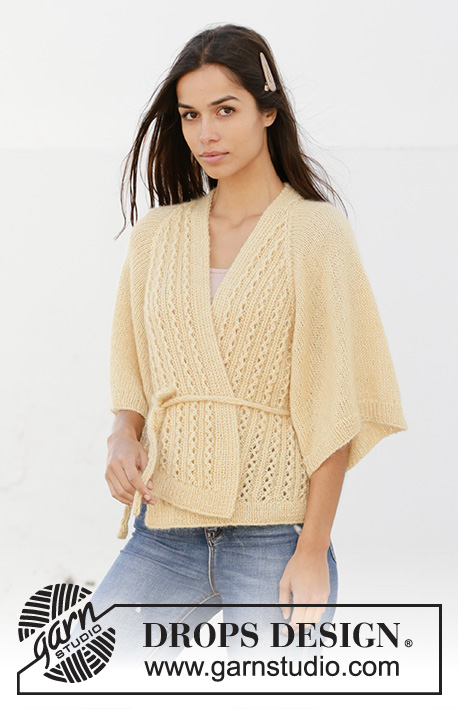
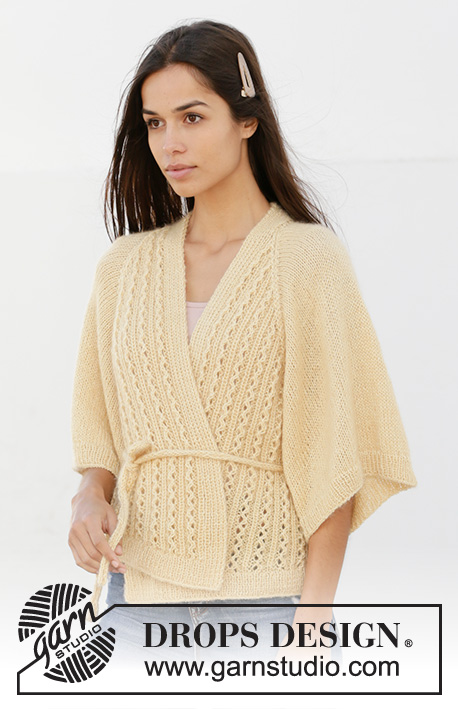
Knitted wrap-around jacket with raglan in DROPS BabyAlpaca Silk and DROPS Kid-Silk. Piece is knitted with lace pattern and ¾ sleeves. Size: S - XXXL
DROPS 213-24 |
||||||||||||||||
|
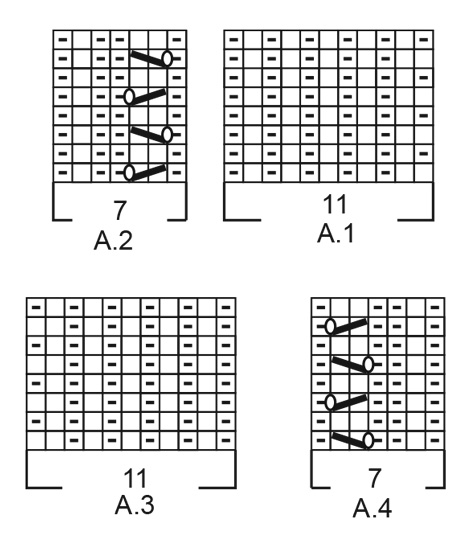
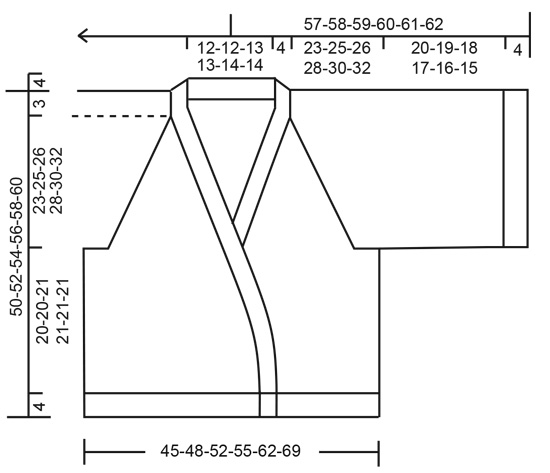
---------------------------------------------------------- EXPLANATION FOR THE PATTERN: ---------------------------------------------------------- GARTER STITCH (back and forth): Knit all rows. 1 ridge vertically = knit 2 rows. PATTERN: See diagrams A.1 to A.4. Diagrams show all rows in pattern seen from the right side. DECREASE TIP-1 (evenly): To calculate how to decrease evenly, use the total number of stitches on row (e.g. 261 stitches), minus bands (e.g. 22 stitches) and divide the remaining stitches by number of decreases to be done (e.g. 34) = approx. 7. In this example decrease by knitting approx. every 6th and 7th stitch together and do not decrease of the outermost 11 stitches in each side. DECREASE TIP-2 (applies to sides on front pieces): All decreases are done from the right side! Decrease in the side on right and left front piece (= 2 stitches decreased on row) as follows: Work until 2 stitches remain before marker thread in transition between right front piece and back piece, knit 2 together (= 1 stitch decreased), knit until marker thread in transition between back piece and left front piece, slip 1 stitch knitwise, knit 1, pass slipped stitch over stitch worked (= 1 stitch decreased). Where there is not enough stitches to work both yarn over and decrease in pattern (i.e. 2Nd and 3rd stitch in A.2 and 5th and 6th stitch in A.4), knit over these 2 stitches until they have been decreased. RAGLAN: Decrease 1 stitch before marker thread as follows: Work until 2 stitches remain before marker thread, knit the next 2 stitches together (= 1 stitch decreased). Decrease 1 stitch after marker thread as follows: Slip 1 stitch knitwise, knit 1, pass slipped stitch over (= 1 stitch decreased). Decrease 2 stitches before marker thread as follows: Work until 3 stitches remain before marker thread, knit the next 3 stitches together (= 2 stitches decreased). Decrease 2 stitches after marker thread as follows: Slip 1 stitch knitwise, knit 2 together, pass slipped stitch over stitches worked together (= 2 stitches decreased). ---------------------------------------------------------- START THE PIECE HERE: ---------------------------------------------------------- WRAP-AROUND JACKET - SHORT OVERVIEW OF THE PIECE: Work body back and forth on circular needle up to armholes. Work sleeves in the round on circular needle up to armholes. Then slip sleeves on to same circular needle as body, and work yoke back and forth. Then finish right and left band before sewing them together in the back of neck. BODY: Cast on 261-285-309-317-349-381 stitches on circular needle size 4 mm = US 6 (including 11 band stitches in each side) with 1 strand BabyAlpaca Silk and 1 strand Kid-Silk (= 2 strands). Purl 1 row (= wrong side). Work next row as follows from right side: 1 edge stitch in GARTER STITCH - read explanation above - * knit 1, purl 1 *, repeat from *-* until 2 stitches remain on needle, knit 1 and finish with 1 edge stitch in garter stitch. Continue rib like this for 4 cm = 1½", adjust so that next row is worked from right side. When rib is done, work next row as follows: A.1 over the first 11 stitches (= band), knit the next 239-263-287-295-327-359 stitches (i.e. until 11 stitches remain on row), AT THE SAME TIME decrease 34-37-40-41-45-49 stitches evenly over these stitches – read DECREASE TIP-1, A.3 over the last 11 stitches (= band) = 227-248-269-276-304-332 stitches. Purl 1 row from wrong side. Switch to circular needle size 5 mm = US 8. Insert 1 marker thread after 69-76-83-83-90-97 stitches in from each side (= in the side of body). There are 89-96-103-110-124-138 stitches between marker threads on back piece. Move the marker threads upwards when working; they should be used for decrease later on front pieces. Now work pattern and short rows on front pieces, begin from right side. ROW 1 (= right side): Work A.1 over the first 11 stitches (pattern should fit with knit over knit and purl over purl), slip next stitch purlwise, place yarn on right side of work, lift outermost stitch on right needle back on left needle, turn piece and tighten yarn. ROW 2: Work back in pattern. ROW 3: Work A.1 over the first 11 stitches, A.2 over the next 7 stitches, slip next stitch purlwise, place yarn on right side of work, lift outermost stitch on right needle back on left needle, turn piece and tighten yarn. ROW 4: Work back in pattern. Continue back and forth like this, and work a new repetition of A.2 over the next 7 stitches on row every time a row is worked from right side – adjust to begin alternately on 1st and 3rd row in pattern every time a new repetition of A.2 is started, so that lace pattern (decrease + yarn over) is worked the same in the different repetitions on row. REMEMBER THE KNITTING GAUGE! When there has been worked short rows and 8-9-10-10-11-12 repetitions with A.2 in width (2 stitches remain before marker thread in the side), work pattern from right side over the remaining stitches on row as follows: Purl 1, knit 1, marker thread is here, purl 1, A.4 over the next 84-91-98-105-119-133 stitches (= 12-13-14-15-17-19 repetitions of 7 stitches), purl 1, knit 1, purl 2, marker thread is here, knit 1, purl 1, A.4 over the next 56-63-70-70-77-84 stitches, A.3 over the last 11 stitches. Now work short rows the same way as on right front piece as follows: ROW 1 (= wrong side): Work A.3 over the first 11 stitches (pattern should fit with knit over knit and purl over purl), slip next stitch purlwise, place yarn on wrong side of work, lift outermost stitch on right needle back on left needle, turn piece and tighten yarn. ROW 2: Work back in pattern. ROW 3: Work A.3 over the first 11 stitches, A.4 over the next 7 stitches, slip next stitch purlwise, place yarn on wrong side of work, lift outermost stitch on right needle back on left needle, turn piece and tighten yarn. ROW 4: Work back in pattern. Continue back and forth like this, and work a new repetition of A.4 over the next 7 stitches on row every time a row is worked from wrong side – adjust to begin alternately on 1st and 3rd row in pattern on next row from right side every time a new repetition of A.4 is started, so that lace pattern (decrease + yarn over) is worked the same in the different repetitions on row. When there has been worked short rows and 8-9-10-10-11-12 repetitions with A.4 in width (2 stitches remain before marker thread in the side), work pattern from wrong side over the remaining stitches on row. The short rows are now finished. Continue back and forth with pattern as before. When piece measures 6 cm = 2⅜" from cast-on edge and along marker thread in the side, begin decrease in the side on front pieces – read DECREASE TIP-2. Decrease like this approx. every 2 cm = ¾" 9 times in total (= 18 stitches decreased in total) = 209-230-251-258-286-314 stitches. When piece measures 24-24-25-25-25-25 cm = 9½"-9½"-9¾"-9¾"-9¾"-9¾" from cast-on edge (along marker thread in the side), bind off 3-4-5-5-6-7 stitches for armhole on each side of marker thread in the sides on next row from wrong side. There are now 83-88-93-100-112-124 stitches on back piece, and 57-63-69-69-75-81 stitches on each front piece. Put piece aside and work the sleeves. SLEEVES: Cast on 110-112-116-118-120-122 stitches on circular needle size 4 mm = US 6 with 1 strand BabyAlpaca Silk and 1 strand Kid-Silk (= 2 strands). Knit 1 round. Then work rib (= knit 1/purl 1) in the round for 4 cm = 1½". Knit 1 round while decreasing 14-14-16-16-16-16 stitches evenly - remember DECREASE TIP-1 = 96-98-100-102-104-106 stitches. Switch to circular needle size 5 mm = US 8. Work in stockinette stitch in the round. When sleeve measures 24-23-22-21-20-19 cm = 9½"-9"-8¾"-8¼"-8"-7½", bind off 6-8-10-10-12-14 stitches under sleeve = 90-90-90-92-92-92 stitches. Put piece aside and knit another sleeve the same way. YOKE: Slip sleeves on to same circular needle as body where armholes were bind off in each side= 377-394-411-422-446-470 stitches. Insert a marker thread in all transitions between sleeves and body. Continue back and forth with pattern as before on front pieces and back piece, and work in stockinette stitch over all stitches on sleeves. When piece measures 2-1-0-2-1-0 cm = ¾"-⅜"-0"-¾"-⅜"-0", begin decrease for RAGLAN – read explanation above. The decrease on front pieces, back piece and sleeves are uneven. Right and left front piece: Decrease 2 stitches on every other row 23-26-29-29-32-35 times in total (= 46-52-58-58-64-70 stitches decreased on each front piece). Back piece: Decrease 1 stitch on every other row 23-26-29-29-32-35 times in total (= total 46-52-58-58-64-70 stitches decreased on back piece). Sleeve: Decrease 1 stitch every other row 10-14-18-21-25-29 times in total, then decrease 2 stitches every other row 15-13-11-10-8-6 times (= 80-80-80-82-82-82 stitches decrease in total on each sleeve). When all decreases for raglan are done, 79-78-77-84-90-96 stitches remain on needle. Work next row from right side as follows: Work A.1 over the first 11 stitches, knit the next 10 stitches, knit the next 37-36-35-42-48-54 stitches and decrease at the same time 3-2-0-6-11-17 stitches evenly, knit the next 10 stitches, A.3 as before over the last 11 stitches = 76-76-77-78-79-79 stitches. Work next row from wrong side as follows: Work the first 11 stitches before slipping them on a stitch holder (= left band), bind off the next 54-54-55-56-57-57 stitches, work the last 11 stitches (= right band). RIGHT BAND: Now work band back and forth with knit over knit, purl over purl with 1 edge stitch in garter stitch in each side. When band measures 4 cm = 1½", work short rows as follows – begin from right side: ROW 1 (= right side): Work all stitches, turn. ROW 2: Work the first 7 stitches, turn, tighten yarn. ROW 3: Work back, turn ROW 4: Work all stitches, turn. Repeat row 1-4 1 more time (= 2 times in total). Continue with knit over knit and purl over purl until band measures 15-15-15½-15½-16-16 cm = 6"-6"-6⅛"-6⅛"-6¼"-6¼" along the longest side. Bind off stitches with knit over knit and purl over purl. LEFT BAND: Slip stitches from stitch holder back on needle and work band back and forth with knit over knit, purl over purl with 1 edge stitch in garter stitch in each side. When band measures 4 cm = 1½", work short rows as follows – begin from wrong side: ROW 1 (= wrong side): Work all stitches, turn. ROW 2: Work the first 7 stitches, turn, tighten yarn. ROW 3: Work back, turn ROW 4: Work all stitches, turn. Repeat row 1-4 1 more time (= 2 times in total). Continue with knit over knit and purl over purl until band measures 15-15-15½-15½-16-16 cm = 6"-6"-6⅛"-6⅛"-6¼"-6¼" along the longest side. Bind off stitches with knit over knit and purl over purl. ASSEMBLY: Sew the opening under the sleeves. Sew together mid back, and sew it on to neck at the back of neck. TIE AND STRAPS: Cast on 5 stitches on circular needle size 4 mm = US 6 with 1 strand BabyAlpaca Silk and 1 strand Kid-Silk (= 2 strands). Work in stockinette stitch back and forth over the 5 stitches. When tie measures approx. 180 to 250 cm = 71" to 99" – or desired length, bind off. Fasten strands in each end of the tie. Crochet a strap in each side along knit stitch in transition between front pieces and back piece with 1 strand of each quality (= 2 strands) with crochet hook size 3 mm = US C. Fasten strands with a slip stitch in the side approx. 5 cm = 2" below bind off for armholes, work chain stitches for approx. 4 cm = 1½". Fasten strand with 1 slip stitch approx. 4 cm = 1½" below where the strap started. Cut the yarn and fasten. Repeat in the other side. |
||||||||||||||||
Diagram explanations |
||||||||||||||||
|
||||||||||||||||
 |
||||||||||||||||
 |
||||||||||||||||
Have you finished this pattern?Tag your pictures with #dropspattern #summerpromisewrap or submit them to the #dropsfan gallery. Do you need help with this pattern?You'll find 23 tutorial videos, a Comments/Questions area and more by visiting the pattern on garnstudio.com. © 1982-2026 DROPS Design A/S. We reserve all rights. This document, including all its sub-sections, has copyrights. Read more about what you can do with our patterns at the bottom of each pattern on our site. |
||||||||||||||||


With over 40 years in knitting and crochet design, DROPS Design offers one of the most extensive collections of free patterns on the internet - translated to 17 languages. As of today we count 324 catalogs and 12290 patterns - 12280 of which are translated into English (US/in).
We work hard to bring you the best knitting and crochet have to offer, inspiration and advice as well as great quality yarns at incredible prices! Would you like to use our patterns for other than personal use? You can read what you are allowed to do in the Copyright text at the bottom of all our patterns. Happy crafting!
Post a comment to pattern DROPS 213-24
We would love to hear what you have to say about this pattern!
If you want to leave a question, please make sure you select the correct category in the form below, to speed up the answering process. Required fields are marked *.