
Popular categories
Looking for a yarn?


Comments / Questions (27)
![]() Patricia wrote:
Patricia wrote:
Hola, muy linda la propuesta. Tengo una duda, como hago las disminuciones (cierre) de los 8 puntos seguidos en la delantera y la espalda?
27.08.2025 - 15:12
![]() Mariángeles wrote:
Mariángeles wrote:
Hola, he realizada el proyecto y reconiendo agujas de 5 mm y la capucha medir estirada; el jersey pesa, se expande
04.03.2025 - 14:05
![]() Maria wrote:
Maria wrote:
Hola, he terminado la talla M pero pesa y se deforma; algún truco para contener el cuello?
17.02.2025 - 13:31DROPS Design answered:
Hola Maria, puedes poner un bies alrededor de la costura del cuello, para reforzarla y que no se deforme. También puedes hacer lo mismo alrededor de la costura de la sisa y la manga.
23.02.2025 - 20:53
![]() Marianne wrote:
Marianne wrote:
Jeg prøver igen. Ærmelængden. Strik 6 cm. Rib, strik glat til ærmet måler 10 cm. Tag ud ved hver 6 5 cm. Ialt 6 gange, det er 39 cm. 10 + 39 = 49 cm, Strik videre til ærmet måler 47 cm. Men ved at følge opskriften, måler ærmet jo så 49 cm.
09.12.2024 - 17:55DROPS Design answered:
Hei Marianne. Se vårt svar gitt til deg den 10.12.2024 :) mvh DROPS Design
10.12.2024 - 15:12
![]() Marianne wrote:
Marianne wrote:
Ærmelængden. Strik 6 cm. Rib, strik glat til ærmet måler 10 cm. Tag så ud ved hver 6,5 cm. I alt 6 gange det er 39 cm. Og strik videre til ærmet måler 47 cm. Men 6+10+39 er jo 55 cm. Jeg strikker str. S
07.12.2024 - 09:35DROPS Design answered:
Hei Marianne. Når arbeidet måler 10 cm (6 cm vrangbord + 4 cm glattstrikk) øker du 1.gang, så strikkes det 6,5 cm og det økes 2. gang (ermet måler da 16,5 cm), strikk 6,5 cm til og øk 3. gang (ermet måler da 23 cm). Strikk nye 6,5 cm og øk for 4.gang (ermet måler da 29,5 cm). Strikk nye 6,5 cm, øk for 5. gang (ermet måler da 36 cm). Strikk nye 6,5 cm og øk for 6. gang (ermet skal da måle 42,5 cm). Du har nå økt 6 ganger og skal fortsette å strikke til ermet måler 47 cm. mvh DROPS Design
10.12.2024 - 09:10
![]() Raphaëlle Fritsch wrote:
Raphaëlle Fritsch wrote:
Bonjour, il y a des incohérences entre la longueur des pelotes indiquée dans le tableau des correspondances et la longueur des pelotes indiquée dans chaque fiche de chaque laine. Je me suis faite avoir avec brushed alpaca silk pour laquelle sont indiqué 280 m alors qu'il n'y en a que 140. Sur ce modèle, par ailleurs il est noté 2 pelotes de Kid silk alors qu'il en faudrait 4.
05.11.2024 - 19:49DROPS Design answered:
Bonjour Mme Fritsch, dans ce tableau tous les métrages sont indiqués pour 50 grammes, mais quelques laines - Brushed Alpaca Silk et Kid-Silk sont des pelotes de 25 g; de même Andes et Polaris sont des pelotes de 100 g mais également indiquées dans ce tableau avec un métrage pour 50 g. Pensez à toujours bien vérifier le nuancier pour retrouver toutes les informations relatives à la laine choisie/souhaitée. Pour ce modèle, il est effectivement indiqué 100 g Kid-Silk, soit 100 /25 g la pelote = 4 pelotes. Bon tricot!
06.11.2024 - 09:12
![]() Amélie wrote:
Amélie wrote:
Bonjour, est-il possible possible de remplacer les fils Alpaca bouclé et Kid-Silk par seulement un fil Air ? Merci, bonne journée !
23.08.2024 - 13:49DROPS Design answered:
Bonjour Amélie, vous risquez de ne pas avoir la même tension car Air appartient au groupe de fils C comme Alpaca Bouclé, mais si vous rajoutez 1 fil du groupe A (Kid-Silk ou un autre, cf convertisseur), vous aurez davantage de chance d'avoir la bonne tension. Bon tricot!
23.08.2024 - 15:57
![]() Vibeke wrote:
Vibeke wrote:
Hej garnstudio, Jeg forstår ikke hvordan hætten afsluttes. I opskriften står “Buk hætten dobbelt midt bagpå og sy sammen øverst på hætten”. Kan det forklares på en anden måde? Vh Vibeke
14.06.2024 - 12:33DROPS Design answered:
Hei Vibeke. Når hetten måler ca 37-37-38-38-39-39 cm – eller til ønsket lengde legges den dobbelt. Blir som en U, der starten på raden (øverst på U`en) ligger sammen med slutten av raden (også øverst på Uèn). Nedserst på U er midt bak på hetten. Sy sammen toppen av hetten. Ta gjerne en titt på hjelpevideoen: Hætte. Den viser en "løs" hette, men ved tiden 01:47 vil du se hvordan den sys sammen på toppen. mvh DROPS Design
24.06.2024 - 10:34
![]() Irene Steiner wrote:
Irene Steiner wrote:
Hallo, Die Angabe von 15 cm Länge beim VORDERTEIL - ist das ZUSAMMEN mit den 8 cm Rippenmuster gemeint, oder ab dem Teil wo rechts gestrickt wird? Ich habe den Absatz kopiert - damit es klarer wird was ich meine..... -----Bei einer Länge von 15 cm – daran angepasst, dass die nächste Reihe eine Hin-Reihe ist – die Arbeit zur Seite legen.---- GLG Irene Steiner
18.03.2024 - 16:03DROPS Design answered:
Liebe Frau Steiner, diese 15 cm messen Sie ab der Anschlagskante. Viel Spaß beim Stricken!
19.03.2024 - 10:57
![]() Maria wrote:
Maria wrote:
Kan man godt bare strikke den rundt, hvis man ikke vil have slidser i siderne?
28.02.2024 - 19:59DROPS Design answered:
Hei Maria. Det kan man fint gjøre, bare huskå tilpass maskeantallet. mvh DROPS Design
04.03.2024 - 13:11
|
|||||||
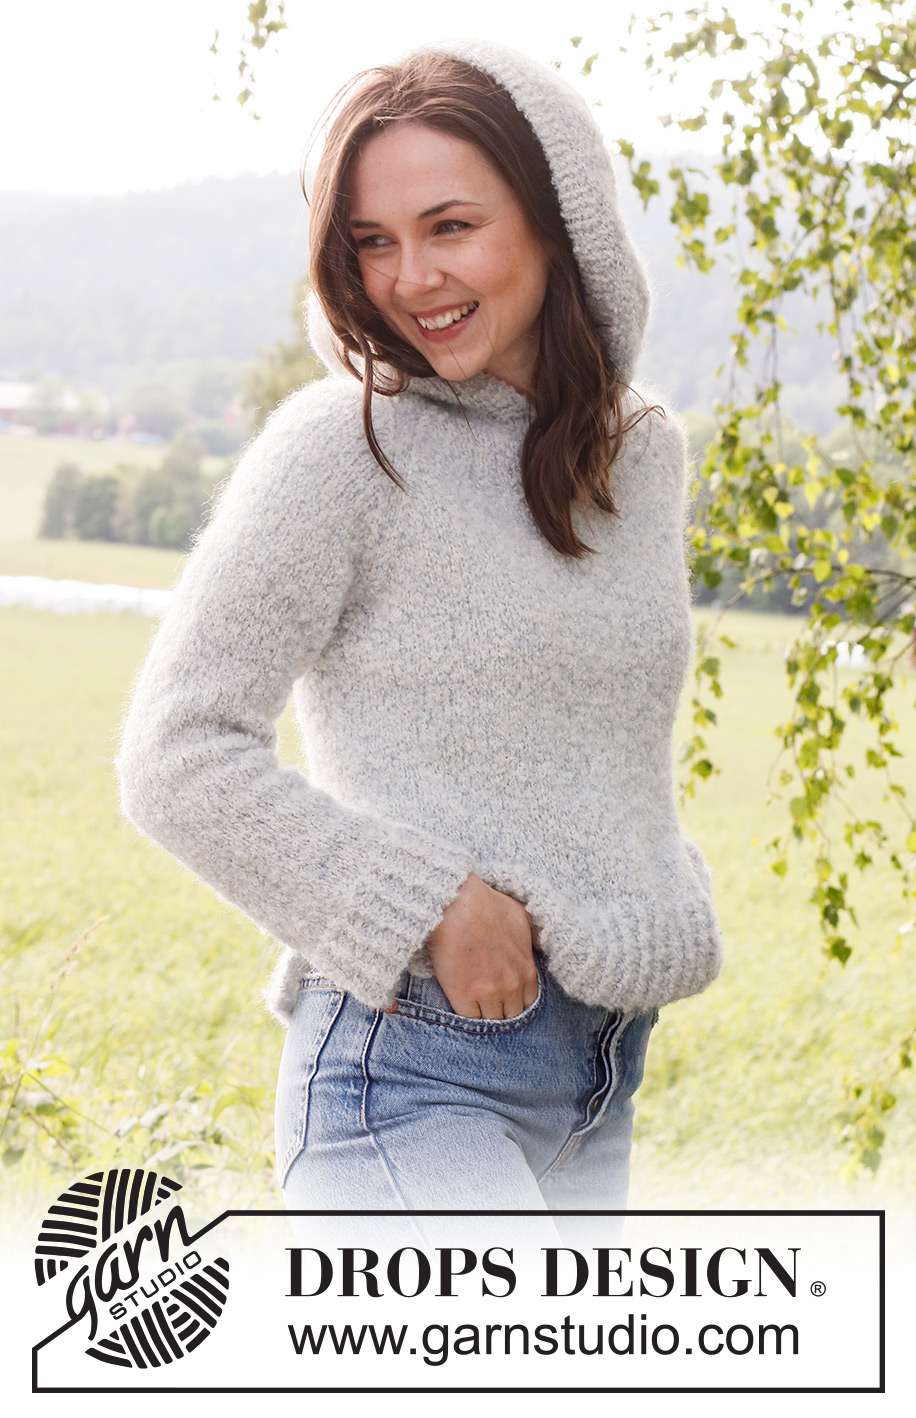
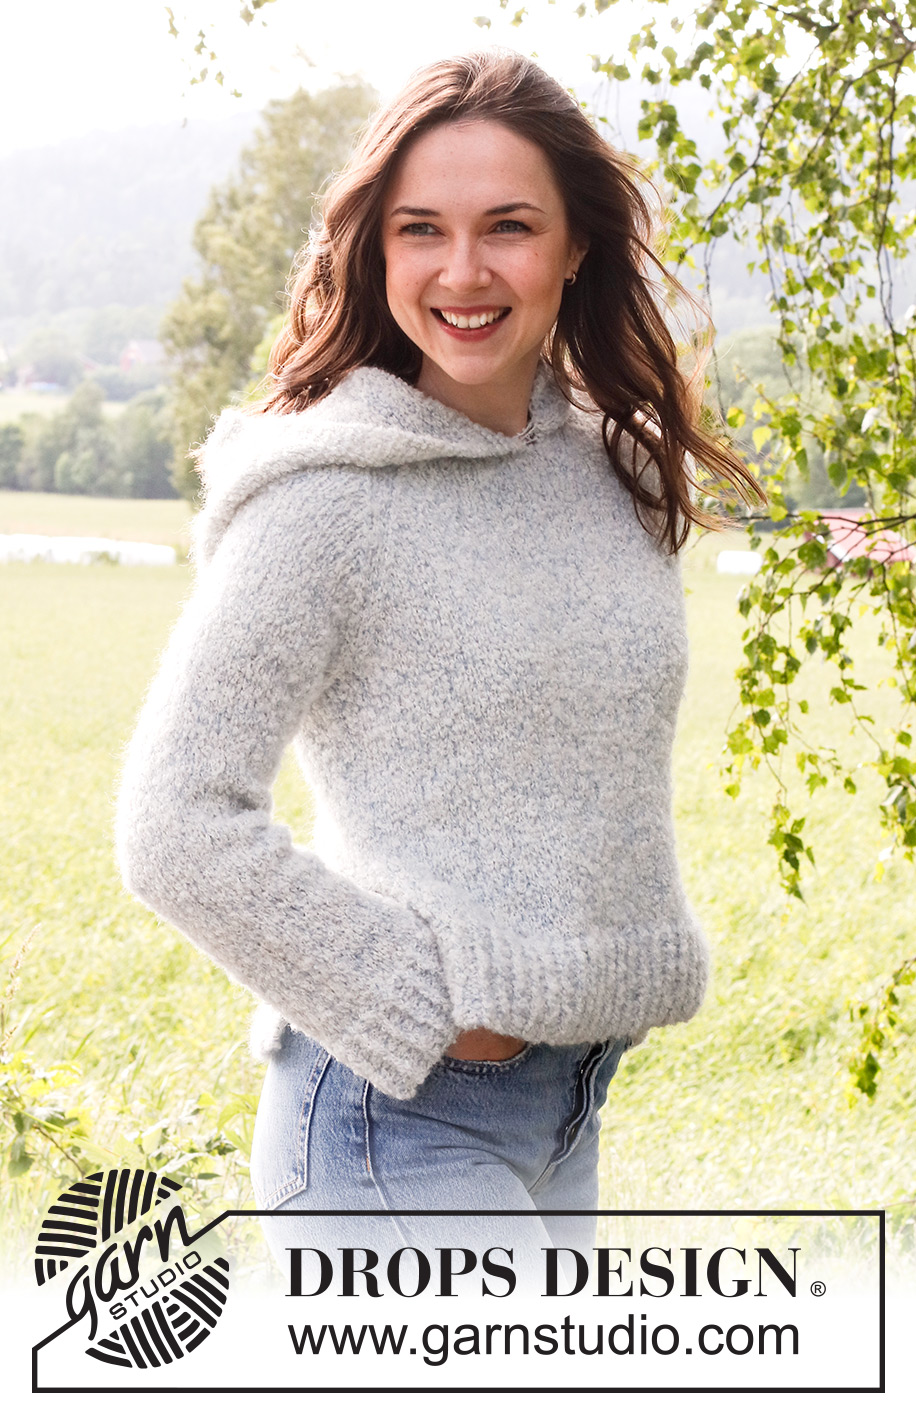
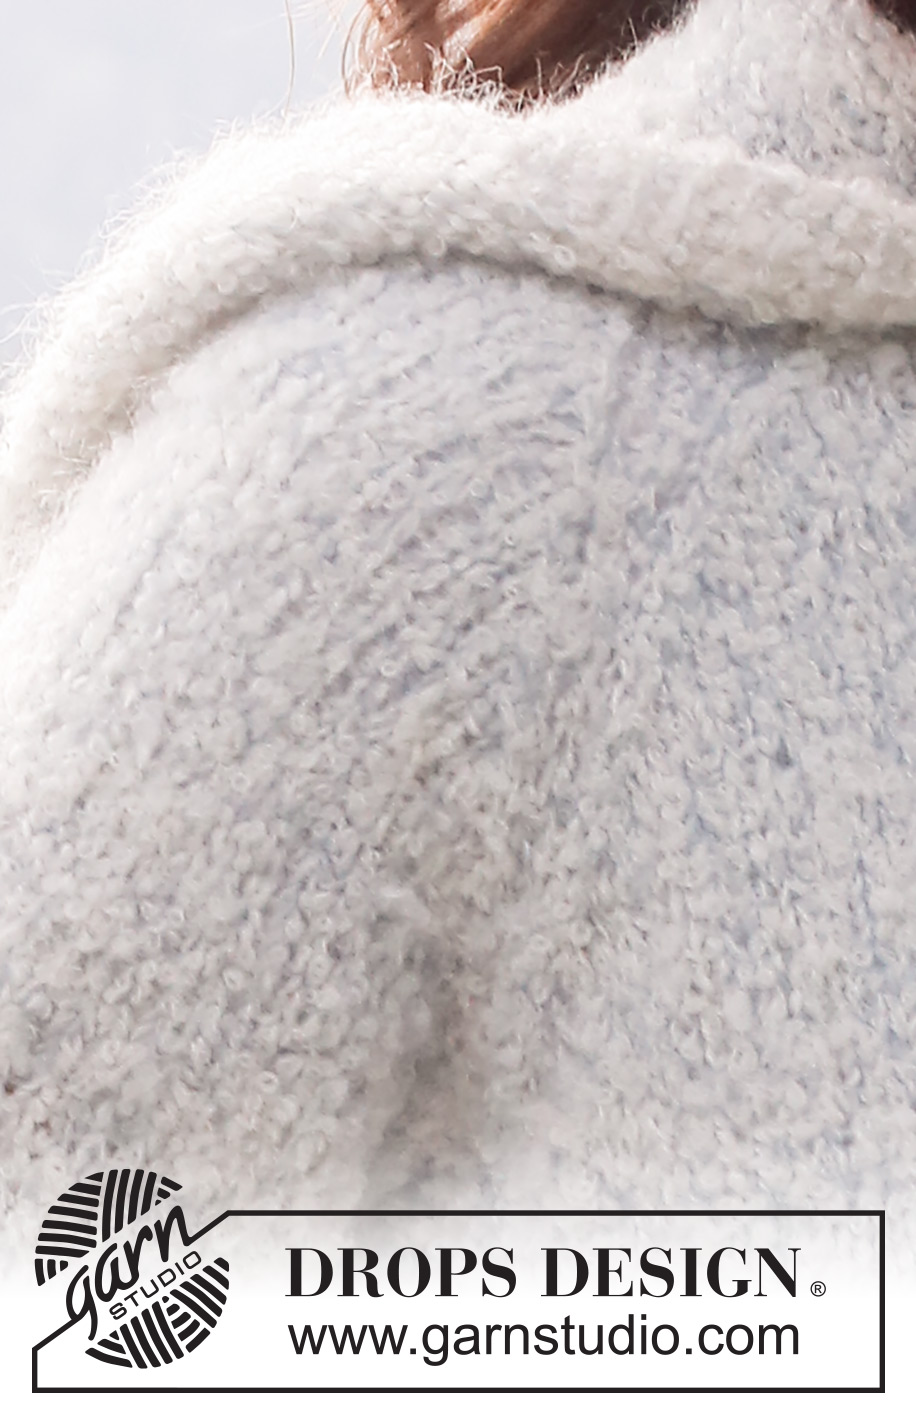
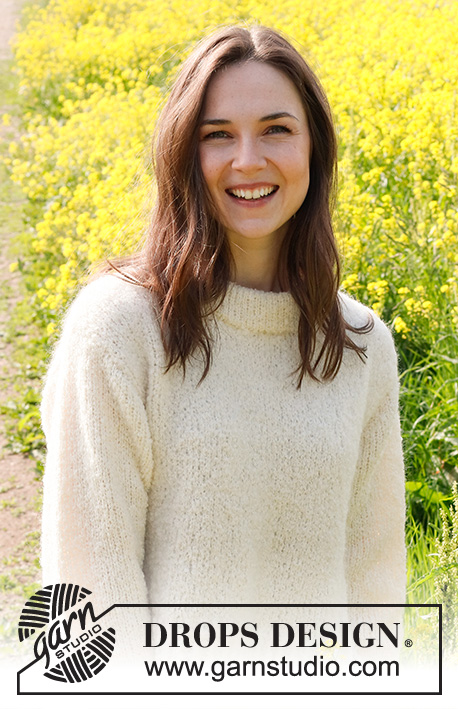
Mist Cover#mistcoverhoodie |
|||||||
 |
 |
||||||
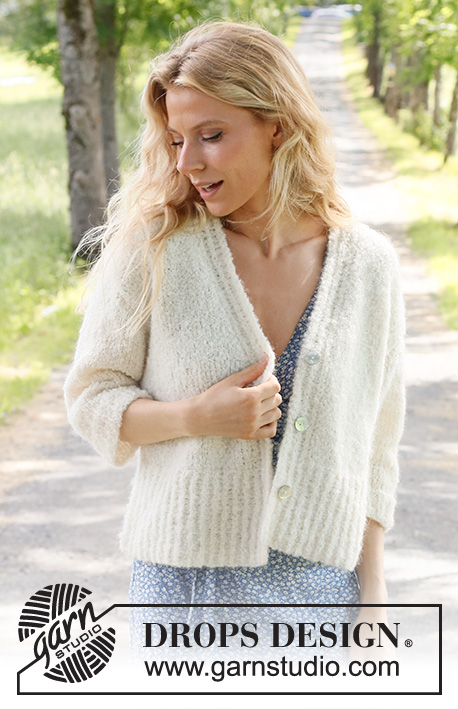
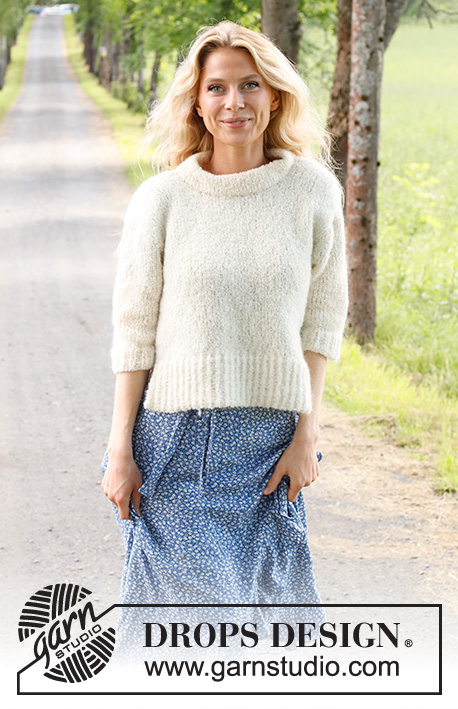
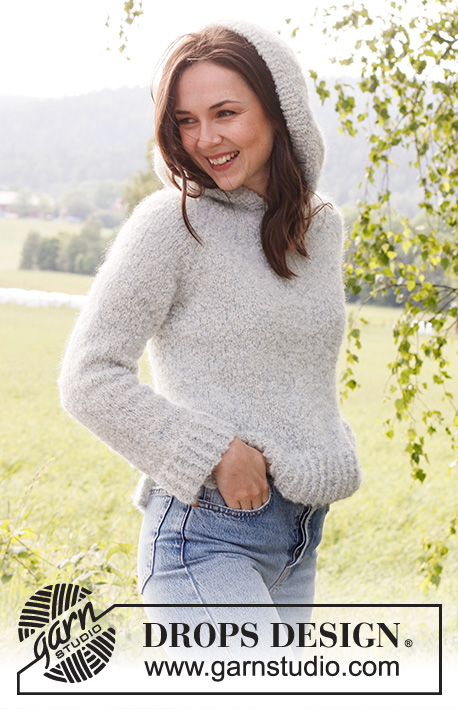
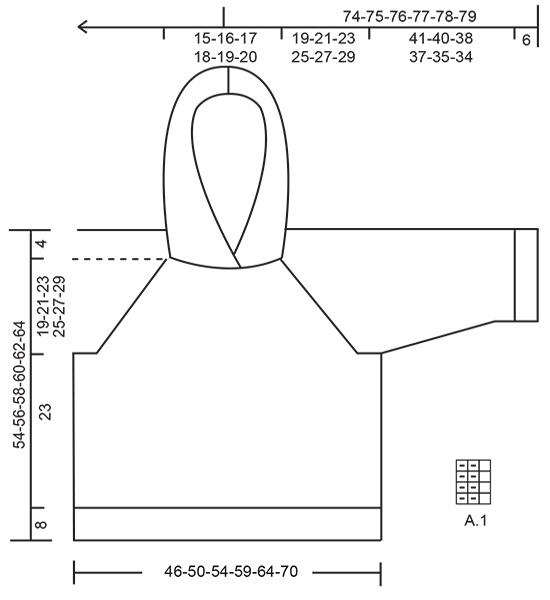
Knitted sweater in DROPS Alpaca Bouclé and DROPS Kid-Silk. Piece is knitted bottom up, in stockinette stitch with raglan, hood and vents in the sides. Size: S - XXXL
DROPS 230-5 |
|||||||
|
---------------------------------------------------------- EXPLANATION FOR THE PATTERN: ---------------------------------------------------------- GARTER STITCH (back and forth): Knit all rows. 1 ridge vertically = knit 2 rows. GARTER STITCH (in the round): 1 ridge in height = 2 rounds, i.e. Knit 1 round and purl 1 round. PATTERN: See diagram A.1. Diagrams show all rows in pattern seen from the right side. DECREASE TIP (evenly): To calculate how to decrease evenly, use the total number of stitches on row (e.g. 79 stitches) minus stitches in garter stitch (6 stitches), and divide the remaining 73 stitches by number of decreases to be done (e.g. 15) = 4.8. In this example decrease by knitting approx. every 4th and 5th stitch together and do not decrease over stitches in garter stitch. INCREASE TIP-1 (applies to sleeves): Work until 2 stitches remain before marker thread, make 1 yarn over, knit 4 (marker thread is in the middle of these 4 stitches), make 1 yarn over. On next round knit yarns over twisted to avoid holes. Then work the new stitches in stockinette stitch. INCREASE TIP-2 (applies to hood): Work until 2 stitches remain before marker thread, make 1 yarn over, knit 4 (marker thread is in the middle of these 4 stitches), make 1 yarn over. On next row work yarn overs twisted to avoid holes. Then work the new stitches in stockinette stitch. RAGLAN: Decrease 1 stitch on each side of each marker thread as follows: Work until 3 stitches remain before marker thread, knit 2 together (= 1 stitch decreased), knit 2 stitches (marker thread is in the middle of these 2 stitches), slip 1 stitch knitwise, knit 1, pass slipped stitch over stitch worked (= 1 stitch decreased). ---------------------------------------------------------- START THE PIECE HERE: ---------------------------------------------------------- SWEATER - SHORT OVERVIEW OF THE PIECE: Work front and back piece back and forth separately until vent is done. Then work body in the round on circular needle up to armholes. Sleeves are worked in the round on double pointed needles/a short circular needle up to armhole. Then slip sleeves on to same circular needle as body and work the yoke in the round. Then work hood back and forth on circular needle. FRONT PIECE: Cast on 79-88-94-103-112-124 stitches on circular needle size 4.5 MM = US 7 with 1 strand of each quality (= 2 strands). Work rib as follows: 3 stitches in GARTER STITCH - read explanation above, A.1 until 4 stitches remain, work first stitch in A.1 so that pattern begins and ends the same, work 3 stitches in garter stitch. Continue back and forth like this until piece measures 8 cm = 3⅛". Work next row from right side as follows: 3 stitches in garter stitch, knit the next 73-82-88-97-106-118 stitches and decrease at the same time 15-18-18-21-22-26 stitches evenly – read DECREASE TIP, work 3 stitches in garter stitch = 64-70-76-82-90-98 stitches. Switch to circular needle size 6 MM = US 10. Work next row from wrong side as follows: 3 edge stitches in garter stitch, purl until 3 stitches remain, 3 edge stitches in garter stitch. Continue back and forth with stockinette stitch with 3 stitches in garter stitch in each side. When piece measures 15 cm = 6" – adjust so that next row is worked from right side, put piece aside. BACK PIECE: Work as on front piece. BODY: Slip stitches on front piece and back piece on to same circular needle size = 128-140-152-164-180-196 stitches. Insert a marker thread in transition between front and back piece (= sides). Work in stockinette stitch in the round with 6 stitches in garter stitch in each side (i.e. over the 3 stitches in garter stitch in each side of front and back piece). When 2 ridges have been worked over these 6 stitches in each side, work in stockinette stitch over all stitches. When piece measures 31 cm = 12¼" from cast-on edge, bind off 6-6-8-8-10-10 stitches for armhole in each side (= 3-3-4-4-5-5 stitches on each side of marker threads) = 58-64-68-74-80-88 stitches on front piece and 58-64-68-74-80-88 stitches on back piece. Put piece aside and work the sleeves. SLEEVES: Cast on 48-48-48-51-51-54 stitches on double pointed needles size 4.5 MM = US 7 with 1 strand of each quality (= 2 strands). Work A.1 in the round for 6 cm = 2⅜". Knit 1 round while decreasing 10-8-8-9-9-10 stitches evenly = 38-40-40-42-42-44 stitches. Switch to double pointed needles size 6 MM = US 10. Insert a marker thread at beginning of round (= mid under sleeve). Work in stockinette stitch in the round. When piece measures 10-10-8-8-8-8 cm = 4"-4"-3⅛"-3⅛"-3⅛"-3⅛", increase 1 stitch on each side of marker thread - read INCREASE TIP-1. Increase like this every 6½-4½-3½-3-3-2½ cm = 2½"-1⅝"-1¼"-1⅛"-1⅛"-1" 6-8-10-10-11-12 times in total = 50-56-60-62-64-68 stitches. Continue until sleeve measures 47-46-44-43-41-40 cm = 18½"-18"-17¼"-17"-16⅛"-15¾" (shorter measurements in the larger sizes because of wider neck and longer yoke). Now bind off the middle 6-6-8-8-10-10 stitches mid under sleeve, i.e. 3-3-4-4-5-5 stitches on each side of marker thread = 44-50-52-54-54-58 stitches. Put piece aside. Work another sleeve the same way. YOKE: Slip sleeves on to same circular needle size 6 MM = US 10 as body, where armholes were bind off = 204-228-240-256-268-292 stitches. Now insert 4 marker threads in the piece. In size S, M, L and XL insert marker threads 1-2-2-1 stitch in on each sleeve, and in XXL and XXXL insert marker threads in transition between body and sleeves. I.e. there are 60-68-72-76-80-88 stitches between marker threads on front and back piece and there are 42-46-48-52-54-58 stitches between marker threads on each sleeve. Begin round mid back and work in stockinette stitch in the round, AT THE SAME TIME on 1st-1st-1st-1st-2nd-1st round begin decrease for RAGLAN – read explanation above. Decrease like this every other round 15-17-18-20-21-23 times in total = 84-92-96-96-100-108 stitches. Piece should now measure 19-21-23-25-27-29 cm = 7½"-8¼"-9"-9¾"-10⅝"-11⅜" from where body and sleeves were put together. Knit 1 round while decreasing 20-24-26-24-24-30 stitches evenly = 64-68-70-72-76-78 stitches. HOOD: Work with 1 strand of each quality (= 2 strands) and circular needle size 6 MM = US 10. Knit 1 round while increasing 10-6-6-4-4-2 stitches evenly = 74-74-76-76-80-80 stitches. Insert a marker thread mid front and 1 marker thread mid back to have the same number of stitches between marker threads. Work until 3 stitches remain before marker thread mid front (this is now the beginning of row) - work back and forth. ROW 1 (= right side): Knit over de 74-74-76-76-80-82, cast on 5 stitches at end of row = 79-79-81-81-85-85 stitches. The 5 new stitches should later be fastened on the inside of piece, to get an overlap mid front. ROW 2 (= wrong side): Work 5 stitches in garter stitch, purl until 5 stitches remain, work 5 stitches in garter stitch. Now work back and forth in stockinette stitch with 5 stitches in garter stitch in each side, AT THE SAME TIME increase 1 stitch on each side of marker thread mid back - read INCREASE TIP-2. Increase like this on every row from right side 5 times in total = 89-89-91-91-95-95. Work until hood measures approx. 37-37-38-38-39-39 cm = 14½"-14½"-15"-15"-15¼"-15¼" or desired length. Bind off. Fold the hood double mid back and sew together at the top of hood. Place the 5 stitches cast on at the beginning of hood on the inside of piece to make an overlap of 5 stitches mid front. Fasten with neat little stitches. ASSEMBLY: Sew the openings under sleeves. |
|||||||
Diagram explanations |
|||||||
|
|||||||
 |
|||||||
Have you finished this pattern?Tag your pictures with #dropspattern #mistcoverhoodie or submit them to the #dropsfan gallery. Do you need help with this pattern?You'll find 31 tutorial videos, a Comments/Questions area and more by visiting the pattern on garnstudio.com. © 1982-2026 DROPS Design A/S. We reserve all rights. This document, including all its sub-sections, has copyrights. Read more about what you can do with our patterns at the bottom of each pattern on our site. |
|||||||


With over 40 years in knitting and crochet design, DROPS Design offers one of the most extensive collections of free patterns on the internet - translated to 17 languages. As of today we count 324 catalogs and 12290 patterns - 12280 of which are translated into English (US/in).
We work hard to bring you the best knitting and crochet have to offer, inspiration and advice as well as great quality yarns at incredible prices! Would you like to use our patterns for other than personal use? You can read what you are allowed to do in the Copyright text at the bottom of all our patterns. Happy crafting!
Post a comment to pattern DROPS 230-5
We would love to hear what you have to say about this pattern!
If you want to leave a question, please make sure you select the correct category in the form below, to speed up the answering process. Required fields are marked *.