
Popular categories
Looking for a yarn?


Comments / Questions (72)
![]() Kasia wrote:
Kasia wrote:
Dziękuję za odpowiedź, ale niestey dal mam problem. Mam z obu stron zamknąć oczka... wiem jak zrobić to na początku rzędu, ale jak zamknąć oczka na końcu? bo po obu stronach mam taką samą ilość oczek do zamknięcia, a nie wiem jak po zamknięciu oczek na ońcu rzędu ddal przerabiać robótkę :(
06.03.2025 - 08:56DROPS Design answered:
Witaj Kasiu, zamykasz oczka na podkroje rękawów tylko na początku rzędu z każdej strony (na prawej i na lewej stronie). Pozdrawiamy!
06.03.2025 - 10:37
![]() Kasia wrote:
Kasia wrote:
Czy możecie mi podpowiedzieć jak zamyka się oczka na podkroje rękawów? Nigdy nie zamykałam w ten sposób oczek, przez to zamykanie oczek na końcu robótki z wizją dalszego dziergania mnie zatrzymało w pracy nad swetrem.
01.03.2025 - 13:18
![]() Greta wrote:
Greta wrote:
Hi! Do I have to use two yarns together, or would it be possible to knit this sweater using only one yarn, so I would only use Drops Sky, for example, instead of both Sky and Kid-Silk?
24.01.2025 - 17:30DROPS Design answered:
Dear Greta, working only with DROPS Sky wouldn't get the necessary thread thickness to work this piece. You could try working with a group C yarn, like DROPS Air. If the gauge matches then you can use it for this pattern without making any changes. Happy knitting!
25.01.2025 - 20:13
![]() Elvina Granholm wrote:
Elvina Granholm wrote:
Hej! Går det bra att använda garnet Kos istället för sky?
22.01.2025 - 18:09DROPS Design answered:
Hej Elvina, det har en helt anden strikkefasthed.... så du vil ikke opnå samme resultat som du ser på billedet...
23.01.2025 - 12:25
![]() Nora wrote:
Nora wrote:
For Joe5, France How did you make the lower neck .one ?
10.11.2024 - 05:57DROPS Design answered:
Dear Nora, if you are interested in a dropsfan design variation, click on the photo and on the "see project" link; it should take you to the knitter's project link. You might find a way to contact them there. Happy knitting!
10.11.2024 - 21:37
![]() Lou wrote:
Lou wrote:
Hey, what colour combination was used in the pattern?
22.10.2024 - 15:10DROPS Design answered:
Dear Lou, find the colours used under header, ie colour 13 in Sky and 07 in Kid-Silk - both yarns are worked together. Happy knitting!
22.10.2024 - 15:23
![]() Beth wrote:
Beth wrote:
If I have a 40" bust and 42 hips, what size do you recommend ? And would DROPS Air work?
27.09.2024 - 06:47DROPS Design answered:
Hi Beth, There is a size chart at the bottom of the pattern with all measurements for the different sizes. 2 strands, one from each of groups A + B = 1 strand from group D in the Drops range. Drops Air belongs to yarn group C, so you will need to adjust you needle size to get the correct knitting tension. Happy crafting!
27.09.2024 - 08:30
![]() Linda wrote:
Linda wrote:
Bij een hoogte van 26 cm moet ik afkanten voor de mouwen. Doe ik dit in een tour? Of moet ik eerst een tour 3 steken afkanten, de volgende vier touren elke keer 2 etc? Alvast bedankt
14.05.2024 - 13:33DROPS Design answered:
Dag Linda,
Dit doe je de eerste toer 3 steken, de volgende toer 2, etc. Hierdoor ontstaat een rondig in het armsgat.
15.05.2024 - 19:04
![]() Alexandra wrote:
Alexandra wrote:
Ich habe diesen Pullover für meine Tochter gestrickt und der ist nach der Wäsche 30 Grad etwa 15 % geschrumpft. Erst dachte ich, daß sie den Pullover vielleicht zu warm gewaschen hatte, aber da ich dann selber einen Test mit den Faden machte, konnte ich sehen, daß das stimmte. Drops Sky und Kids-Silk werde ich nicht mehr benutzen
05.06.2023 - 19:08DROPS Design answered:
Liebe Alexandra, hier lesen Sie mehr über Pflegehinweise, dh zusätzliche allgemeinen Tipp zu den Hinweise auf den Banderolen; gerne wird Ihnen Ihr DROPS Händler noch mehr mit Waschen helfen (auch per Telefon oder per E-mail). Viel Spaß beim stricken!
06.06.2023 - 09:33
![]() Vera Kölbel wrote:
Vera Kölbel wrote:
Hallo Model 210/34 kann die Materialangabe nicht stimmen. Es wird zweifädig gestrickt und angegeben wird Drops Sky mit 250 g und Drops Kid-Silk mit 100 g. Das bemerkte ich erst als das Rückenteil fertig war. Ärgerlich musste Wolle nachbestellen mit 6,95 € extra Porto. Dieses ist bereits das zweite Mal bei Ihren Anleitungen. Sonst bin ich sehr zufrieden. MFG Vera Kölbel
06.02.2023 - 10:53
|
|
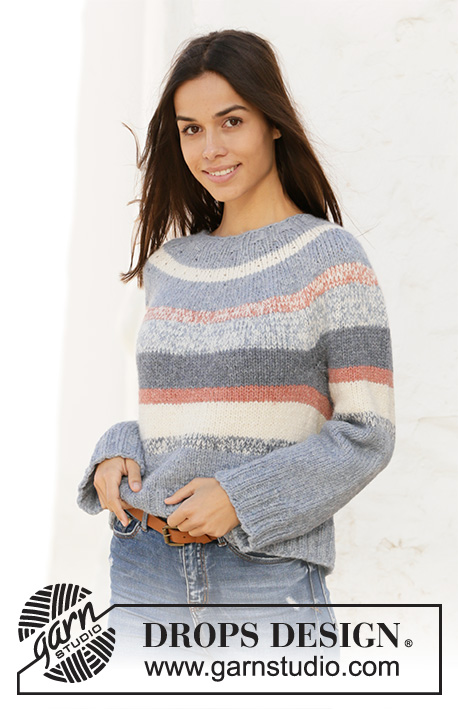
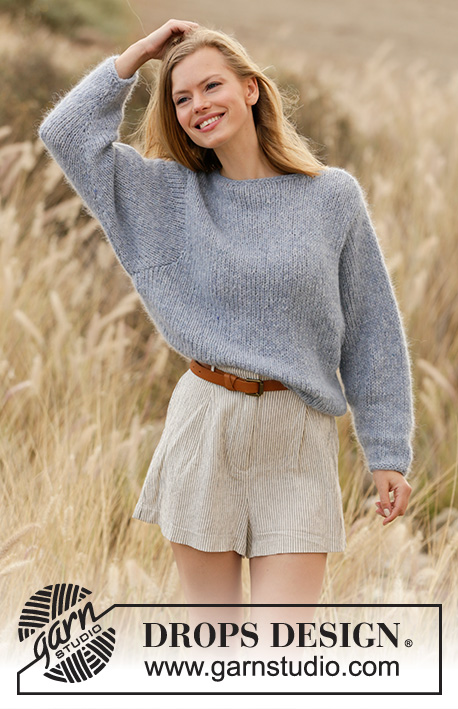
Set Sail#setsailsweater |
|
 |
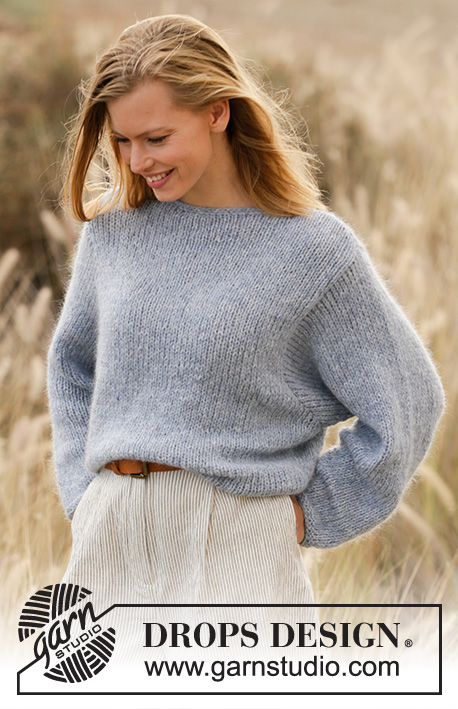 |
Knitted sweater in DROPS Sky and DROPS Kid-Silk. Size XS–XXL.
DROPS 210-34 |
|
|
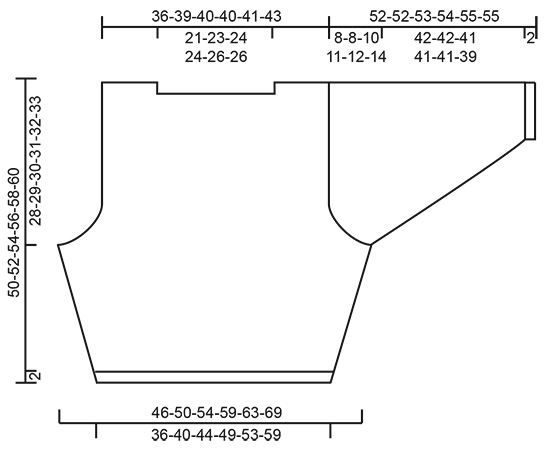
---------------------------------------------------------- EXPLANATION FOR THE PATTERN: ---------------------------------------------------------- GARTER STITCH (back and forth): 1 ridge vertically = knit 2 rows. INCREASE TIP (applies to sides of body): Increase 1 stitch inside 1 edge stitch in garter stitch in each side by making 1 yarn over. On next row work yarn overs twisted to avoid holes. Then work the new stitches in stockinette stitch. KNITTING TIP: Because of many increases in each side on sleeve, the increases are explained in rows vertically. If the knitting gauge does not match vertically this will impact the finished measurement on sleeve. Check the knitting gauge! If the knitting gauge does not match you can adjust the distance between increases by dividing the number of increases to be done with desired sleeve length in cm. ---------------------------------------------------------- START THE PIECE HERE: ---------------------------------------------------------- SWEATER - SHORT OVERVIEW OF THE PIECE: Work front piece, back piece and sleeves separately, back and forth on circular needle, bottom up. Sew piece together. Finally crochet an edge around the neck. FRONT PIECE: Cast on 52-58-64-70-76-84 stitches (including 1 edge stitch in each side) on circular needle size 6 mm = US 10 with 1 strand Sky and 1 strand Kid-Silk (= 2 strands). Work 2 ridges in GARTER STITCH - read explanation above. Switch to circular needle size 7 mm = US 10,75, and work in stockinette stitch back and forth with 1 edge stitch in garter stitch in each side. REMEMBER THE KNITTING GAUGE! When piece measures 3 cm = 1⅛", increase 1 stitch in each side - read INCREASE TIP! Increase like this every 2½-2½-3-3-3-3 cm = ⅞"-⅞"-1⅛"-1⅛"-1⅛"-1⅛" 7 times in total in each side = 66-72-78-84-90-98 stitches. When piece measures 22-23-24-25-26-27 cm = 8¾"-9"-9½"-9¾"-10¼"-10⅝", bind off for armholes at the beginning of row in each side as follows: Bind off 3 stitches 1 time, 2 stitches 1-2-2-3-4-4 times and 1 stitch 3-2-4-5-5-8 times = 50-54-56-56-58-60 stitches. Continue to work until piece measures 48-50-52-54-56-58 cm = 19"-19¾"-20½"-21¼"-22"-22¾". On next row bind off the middle 30-32-34-34-36-36 stitches for neck and finish each shoulder separately. Work over the 10-11-11-11-11-12 stitches on one shoulder until piece measures 50-52-54-56-58-60 cm = 19¾"-20½"-21¼"-22"-22¾"-23⅝". Loosely bind off. Work the other shoulder the same way. BACK PIECE: Work as front piece. SLEEVE: Cast on 28-28-30-32-32-34 stitches (including 1 edge stitch in each side) on circular needle size 6 mm = US 10 with 1 strand Sky and 1 strand Kid-Silk (= 2 strands). Work 2 ridges. Switch to circular needle size 7 mm = US 10,75, and work in stockinette stitch back and forth with 1 edge stitch in garter stitch in each side. When piece measures 2-2-2-2-4-4 cm = ¾"-¾"-¾"-¾"-1½"-1½", increase 1 stitch in each side – remember INCREASE TIP. Increase like this 24-26-26-27-29-29 times in total, in XS: On every 3rd row (equivalent to approx. 1,7 cm = ⅝"), in S, M and L: Alternately every 2nd and 3rd row (equivalent to approx. 1,5 cm = ½"), and in XL and XXL: On every other row (equivalent to approx.1,2 cm = ¼") = 76-80-82-86-90-92 stitches- read KNITTING TIP. After last increase work until sleeve measures 44-44-43-43-43-41 cm = 17¼"-17¼"-17"-17"-17"-16⅛". Now bind off for sleeve cap at the beginning of every row in each side as follows: Bind off 3 stitches 1 time and 2 stitches 2-2-2-2-3-3 times. Then bind off 1 stitch in each side until sleeve measures 51-51-52-53-54-54 cm = 20"-20"-20½"-21"-21¼"-21¼". Bind off 3 stitches 1 time in each side, and then bind off the remaining stitches. Sleeve measures approx. 52-52-53-54-55-55 cm = 20½"-20½"-21"-21¼"-21⅝"-21⅝" from top and down. Work the other sleeve the same way. ASSEMBLY: Sew the shoulder seams. Sew in sleeves inside 1 edge stitch. Sew underarm and side seams in one inside 1 edge stitch. NECK EDGE: Crochet 2 rounds with single crochets around the neck on hook size 5 mm = US H/8 with 1 strand in each quality. I.e. begin mid on top of one shoulder, work 1 slip stitch in first stitch, work 1 chain stitch, then work single crochets around the neck with approx. 1 single crochet in every stitch - make sure to make a nice and even edge and not too tight. Finish round with 1 slip stitch in chain stitch from beginning of round. Work next round the same way with 1 single crochet in every stitch from previous round. Fasten off. |
|
 |
|
Have you finished this pattern?Tag your pictures with #dropspattern #setsailsweater or submit them to the #dropsfan gallery. Do you need help with this pattern?You'll find 19 tutorial videos, a Comments/Questions area and more by visiting the pattern on garnstudio.com. © 1982-2026 DROPS Design A/S. We reserve all rights. This document, including all its sub-sections, has copyrights. Read more about what you can do with our patterns at the bottom of each pattern on our site. |
|


With over 40 years in knitting and crochet design, DROPS Design offers one of the most extensive collections of free patterns on the internet - translated to 17 languages. As of today we count 324 catalogs and 12290 patterns - 12280 of which are translated into English (US/in).
We work hard to bring you the best knitting and crochet have to offer, inspiration and advice as well as great quality yarns at incredible prices! Would you like to use our patterns for other than personal use? You can read what you are allowed to do in the Copyright text at the bottom of all our patterns. Happy crafting!
Post a comment to pattern DROPS 210-34
We would love to hear what you have to say about this pattern!
If you want to leave a question, please make sure you select the correct category in the form below, to speed up the answering process. Required fields are marked *.