
Popular categories
Looking for a yarn?





































Comments / Questions (79)
 Asma wrote:
Je sais qu’en aller-retour le diagramme se lit de droite à gauche et de gauche à droite, mais ce que je ne comprends pas c’est comment faire des torsades sur l’envers, peut être qu’il faut tricoter les mailles comme elles se présentent…
02.11.2026 - 11:34DROPS Design answered:
Bonjour Asame, les torsades doivent être faites sur l'endroit uniquement, ajustez le 1er rang du dos/devant si besoin pour que les torsades soient toujours faites sur l'endroit. Sur l'envers, tricotez les mailles comme indiqué dans le diagramme (celles des torsades se tricotent à l'envers sur l'envers). Bon tricot!
03.11.2026 - 09:05
 Asma wrote:
Bonjour, ça ne répond pas à ma question . Comment tricoter les torsades sur l’envers? Merci
02.11.2026 - 11:20
Asma wrote:
Bonsoir, pouvez-vous m’expliquer comment tricoter les torsades en aller-retour sur l’envers pour le dos? Merci !
01.11.2026 - 19:10DROPS Design answered:
Bonjour Asma, veillez à bien continuer les diagrammes correctement pour que les torsades soient toujours sur l'endroit, sur l'endroit, continuez à lire les diagrammes de droite à gauche, sur l'envers, vous lirez désormais les diagrammes de gauche à droite. Bon tricot!
02.11.2026 - 09:52
 Maritta wrote:
Kysyin tuosta palmikon teosta noin suurella silmukkamäärällä. Minä osaan kyllä palmikon teon, mutta vaikka kuinka olen yrittänyt, neulonut ja purkanut, niin ei onnistu millään. Eli teen nyt vaan suoran pannan, jätän solmun pois.
31.10.2026 - 11:20
Maritta wrote:
Miten neulepannan palmikko neulotaan, kun keskellä siirretään 18s apupuikolle? En ole onnistunut mitenkään, vaikka olen kokeillut jo monta kertaa.
29.10.2026 - 10:40DROPS Design answered:
Hei, siirrä aluksi 18 silmukkaa apupuikolle, neulo sitten työn 18 silmukalla mallineuletta kuten aiemmin, neulo lopuksi apupuikon 18 silmukalla mallineuletta kuten aiemmin. Katso myös seuraava video: Ohjeen DROPS 173-8 otsanauha (eri ohje, mutta näet, miten palmikonkierto tehdään).
29.10.2026 - 17:22
Andreani Francoise wrote:
Bonjour pour le bandeau comment procéder pour la torsade centrale ?
15.10.2026 - 14:05DROPS Design answered:
Bonjour Mme Andreani, vous allez procéder comme pour une torsade normale mais en divisant les mailles en 2 parties: vous tricotez les 18 dernières mailles au début du rang et vous terminez par les 18 premières mailles - vous pouvez aussi tricoter d'abord quelques cm sur chaque partie comme on le propose dans cette vidéo si vous êtes plus à l'aise ainsi. Bon tricot!
15.10.2026 - 17:15
FRANÇOISE ANDREANI wrote:
Pour le modèle bandeau le diagramme A5 représente 6 mailles et dans la description il est précisé 5 mailles au premier rang. 2) doit on faire une maille envers pour la 1ere et 6e maille ? Merci
11.10.2026 - 17:12DROPS Design answered:
Bonjour Mme Andreani, le 1er rang de A.1 se tricote bien sur 5 mailles, mais on va augmenter 1 maille au 1er rang, autrement dit vous tricotez ainsi le 1er rang de A.5: 1 m env, 2 m end, 1 jeté (= augmentation), 1 m end, 1 m env = vous avez maintenant 6 mailles. Bon tricot!
12.10.2026 - 09:41
 Evie wrote:
Klopt het dat bij het innaaien van de mouwen aan het achterpand een middenachternaad ontstaat die dichtgenaaid moet worden? Nu staat er alleen "Naai de naad vanaf het armsgat en naar boven over de schouder op het achterpand tot midden achter. Herhaal aan de andere kant." Klopt het dat het schouderdeel voor het achterpand de halsrand achter vormt?
27.08.2026 - 07:14DROPS Design answered:
Dag Evie,
Ja, dat klopt. Midden achter zit een naad in de hoogte bij de hals waar de mouwen tegen elkaar komen. Dit is de afkantrand van de mouw, dus waar je op het eind de mouw hebt afgkant.
30.08.2026 - 13:38
Sylvie Vandevelde wrote:
Bonjour, Je tricote le bandeau. J'en suis à la moitié. Et je n'arrive pas à à faire la grosse torsade de 18 mailles. En effet, après avoir mis les 18 premières mailles sur une aiguille auxiliaire, je tricote les 18 suivantes. J'ai tricoté quelques rangs supplémentaires. Mais je me retrouve sur l'envers ! J'ai recommencé en faisant bien attention, maix c'est toujours pareil. Pouvez-vous m'éclairer svp? Bien à vous. Sylvie
18.07.2026 - 18:03DROPS Design answered:
Bonjour Mme Vandevelde, on doit faire une torsade ici, on a juste beaucoup plus de mailles que d'habitude car on va croiser la moitié des mailles - vous pouvez si vous le souhaitez, tricoter quelques rangs en plus sur chaque côté séparément avant de croiser les mailles, retrouvez comment faire dans cette vidéo. Bon tricot!
04.08.2026 - 09:04
Guenaelle wrote:
Bonjour je ne comprends pas les explications pr le point fantaisie car avec27 m Jersey puis 22 m A1,A210m ok au dessus des 30m suivantes????(3 fois en largeur),A3(22m),27m en jersey je ne retrouve jamais mes 256 m du tour complet??? Pouvez vous m éclairer merci Cordialement
15.04.2026 - 17:37DROPS Design answered:
Bonjour Guenaelle, tricotez vos 256 mailles ainsi: : *27 m jersey, A.1 (= 22 m), A.2 (= 10 m) au-dessus des 30 m suivantes (= 3 fois en largeur), A.3 (= 22 m), 27 mailles jersey* = (27+22+30+22+27=128), répétez de *à* = 128x2=256 mailles. Bon tricot!
16.04.2026 - 08:44
|
|||||||||||||||||||||||||||||||
Waiting for Snow#waitingforsnowsweater |
|||||||||||||||||||||||||||||||
 |
 |
||||||||||||||||||||||||||||||
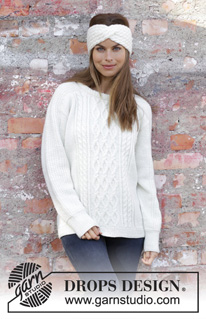
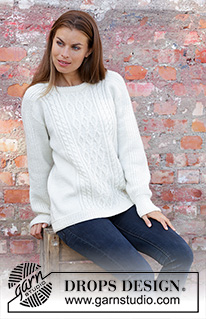
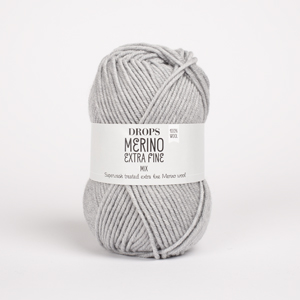
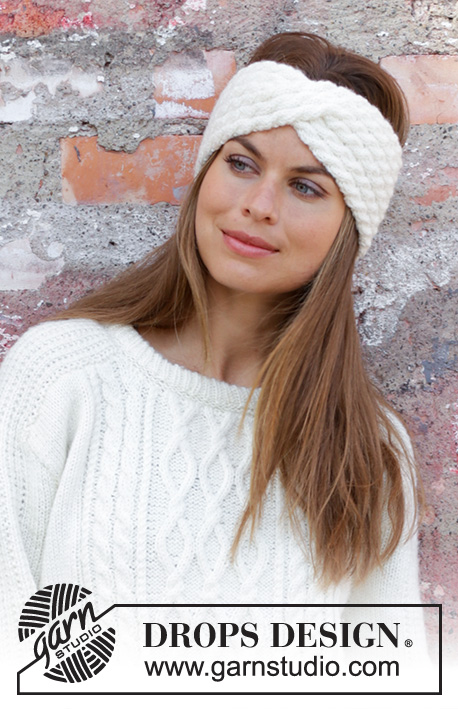
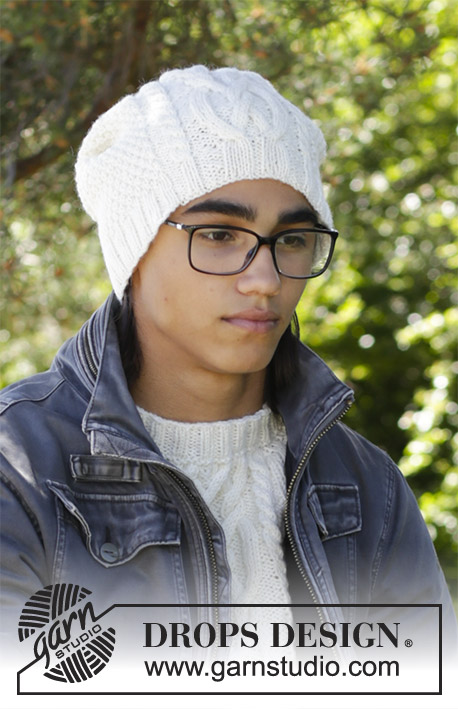
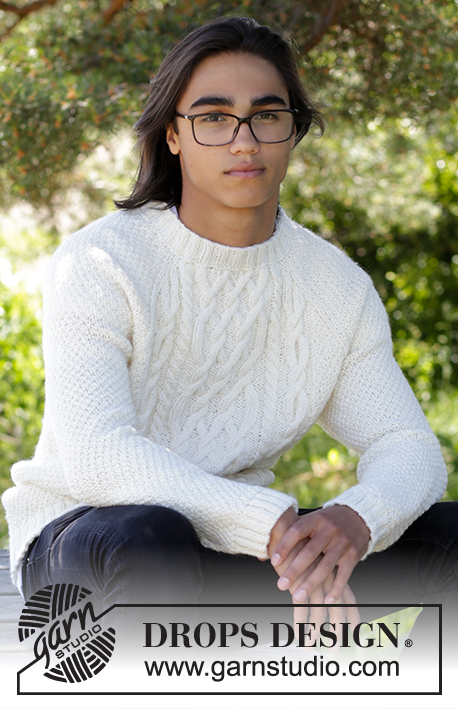
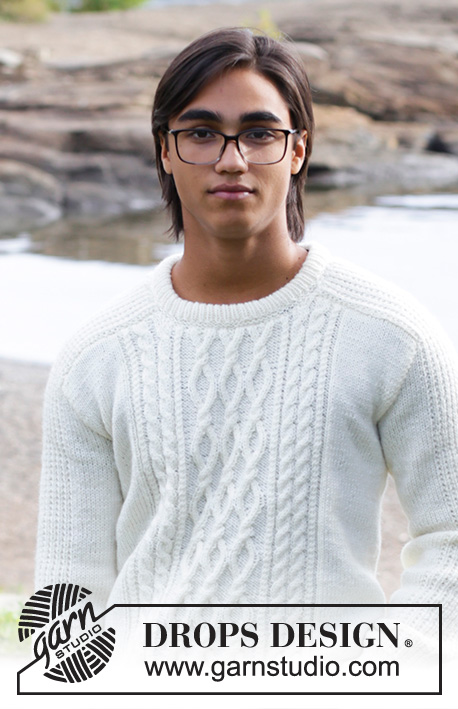
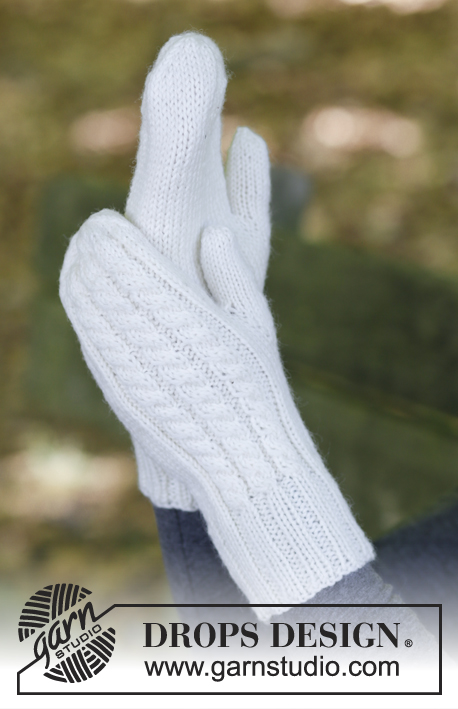
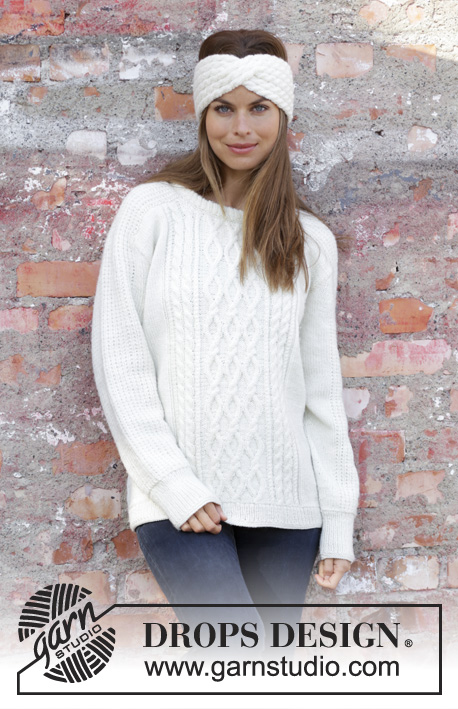
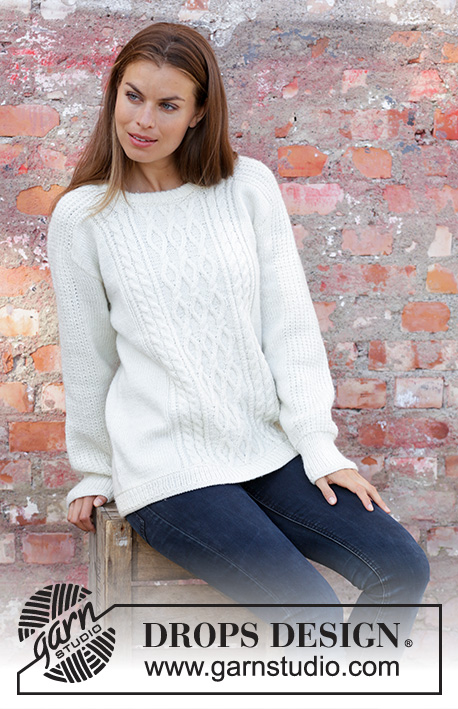
Knitted sweater in DROPS Merino Extra Fine or DROPS Karisma. Piece is knitted with cables and texture. Size: S - XXXL Knitted head band in DROPS Merino Extra Fine or DROPS Karisma. Piece is knitted back and forth with cables.
DROPS 195-1 |
|||||||||||||||||||||||||||||||
|
---------------------------------------------------------- EXPLANATION FOR THE PATTERN: ---------------------------------------------------------- GARTER STITCH (worked in the round): 1 ridge = 2 rounds. Knit 1 round and purl 1 round. GARTER STITCH (back and forth): 1 ridge = knit 2 rows. PATTERN: Sweater: See diagrams A.1 to A.4. Head band: See diagrams A.5 to A.7. Diagrams show all rows in pattern seen from the right side. INCREASE/DECREASE TIP (evenly): To calculate how to increase/decrease evenly, use the total number of stitches on row (e.g. 240 stitches) and divide stitches by number of increases/decreases to be done (e.g. 26) = 9.2. In this example increase after approx. every 9th stitch by making 1 yarn over. On next row work yarn overs twisted to avoid holes. To decrease evenly in this example knit approx. every 8th and 9th stitch together. INCREASE TIP (applies to sleeves): Work until 1 stitch remains before marker thread, make 1 yarn over, knit 2 (marker thread is in the middle of these two stitches), make 1 yarn over. On next round knit yarn overs twisted to avoid holes. Then work the new stitches in stockinette stitch. DECREASE TIP (applies to sleeves): Decrease 1 stitch on each side of marker thread as follows: Work until 3 stitches remain before marker thread and knit 2 together, knit 2 (marker thread is between these stitches), slip 1 stitch knitwise, knit 1, pass slipped stitch over stitch worked. ---------------------------------------------------------- START THE PIECE HERE: ---------------------------------------------------------- SWEATER - SHORT OVERVIEW OF THE PIECE: Worked in the round on circular needle up to armhole, then work front and back piece back and forth separately. Work sleeves in the round on double pointed needles up to armhole, then work shoulders back and forth. Then sew sleeves in armholes and shoulders on front and back piece. BODY: Cast on 214-230-246-266-286-308 stitches on circular needle size 3.5 mm / US 4 with Merino Extra Fine or Karisma. Work 2 ridges in GARTER STITCH in the round - read explanation above. Then work rib = knit 1/purl 1. When piece measures 5 cm / 2", work 1 ridge in garter stitch. Knit 1 round while increasing 26-26-26-30-30-36 stitches evenly - read INCREASE/DECREASE TIP = 240-256-272-296-316-344 stitches. Insert 2 marker threads in piece; one at the beginning of round and one after 120-128-136-148-158-172 stitches (= in each side). Switch to circular needle size 4 mm / US 6 and work pattern as follows: * Work 23-27-31-32-37-39 stitches in stockinette stitch, A.1 (= 22 stitches), A.2 (= 10 stitches) over the next 30-30-30-40-40-50 stitches (= 3-3-3-4-4-5 repetitions in width), A.3 (= 22 stitches), 23-27-31-32-37-39 stitches in stockinette stitch, marker is here *, work from *-* 1 more time. REMEMBER THE GAUGE! Continue the pattern like this and repeat diagrams vertically. When piece measures 41-42-43-44-45-46 cm / 16⅛"-16½"-17"-17¼"-17¾"-18", bind off 6 stitches for armholes in each side (bind off 3 stitches on each side of marker thread in each side), and finish each part separately. BACK PIECE: = 114-122-130-142-152-166 stitches. Then work back and forth on circular needle. Continue with pattern, stockinette stitch and 1 edge stitch in garter stitch in each side, AT THE SAME TIME bind off stitches on beginning of every row in each side for armholes as follows: bind off 2 stitches 2-2-3-3-4-5 times and 1 stitch 1-1-2-3-3-3 times = 104-112-114-124-130-140 stitches. When piece measures 51-53-55-57-59-61 cm / 20"-21"-21⅝"-22½"-23¼"-24", work 1 row while decreasing 18-18-18-22-22-25 stitches evenly over stitches in A.1, A.2 and A.3 = 86-94-96-102-108-115 stitches. Bind off. FRONT PIECE: = 114-122-130-142-152-166 stitches. Then work back and forth on circular needle. Continue with pattern, stockinette stitch and 1 edge stitch in garter stitch in each side, AT THE SAME TIME bind off stitches on beginning of every row in each side for armholes as on back piece = 104-112-114-124-130-140 stitches. When piece measures 48-50-52-54-56-58 cm / 19"-19¾"-20½"-21¼"-22"-22¾", decrease 10-10-12-12-12-12 stitches evenly over the middle 38-38-46-46-46-46 stitches on needle before slipping them on a stitch holder for neck (= 28-28-34-34-34-34 stitches on a stitch holder for neck) = 33-37-34-39-42-47 stitches for shoulder. Then finish each shoulder separately as follows: On next row from neck bind off 2 stitches = 31-35-32-37-40-45 stitches for shoulder. When piece measures 51-53-55-57-59-61 cm / 20"-21"-21⅝"-22½"-23¼"-24", work 1 row while decreasing 4-4-3-5-5-6 stitches evenly over stitches in pattern = 27-31-29-32-35-39 stitches. Bind off. Work the other shoulder the same way. RIGHT SLEEVE: Worked in the round on double pointed needles. Cast on 48-50-52-54-56-60 stitches on double pointed needles size 3.5 mm / US 4 with Merino Extra Fine or Karisma. Work 2 ridges. Then work rib = knit 1/purl 1 until piece measures 9 cm / 3½". Work 1 ridge. Knit 1 round while decreasing 1-1-1-1-1-1 stitch on round = 47-49-51-53-55-59 stitches. Insert 1 marker thread at beginning of round. Switch to double pointed needles size 4 mm / US 6 and work pattern as follows: Work in stockinette stitch over the first 7-8-9-10-11-13 stitches, work A.4 over the next 32 stitches, work first stitch in A.4, 7-8-9-10-11-13 stitches in stockinette stitch. Continue pattern upwards, AT THE SAME TIME when piece measures 10-10-10-12-11-10 cm / 4", increase 1 stitch on each side of marker thread - read INCREASE TIP! Increase like this approx. every 6th-5th-5th-4th-4th-4th round 16-17-18-19-20-20 times in total = 79-83-87-91-95-99 stitches. When piece measures 44-44-44-42-42-40 cm / 17 ¼"-17 ¼"-17 ¼"-16 ½"-16 ½"-15 ¾", bind off 6 stitches mid under sleeve (bind off 3 stitches on each side of marker thread) = 73-77-81-85-89-93 stitches. Then continue back and forth on circular needle and bind off for sleeve cap at the beginning of row in each side as follows: 2 stitches 6-8-10-10-12-12 times and 1 stitch 8-6-4-6-4-6 times = 33 stitches remain in all sizes. Piece now measures 54-54-54-53-53-52 cm / 21 ¼"-21 ¼"-21 ¼"-20⅞"-20⅞"-20⅜". NOW MEASURE PIECE FROM HERE! Continue with pattern over the remaining 33 stitches until piece measures 13-15-14-15-17-18 cm / 6 3/4-7". Continue to bind off in the right side, at the beginning of every row from right side as follows: 17 stitches 1 time, 2 stitches 1 time, 1 stitch 2 times = 12 stitches. Work over these 12 stitches until piece measures 20-22-23-24-26-27 cm / 7⅞"-8⅝"-9"-9⅜"-10 ¼"-10⅝". Bind off. The entire sleeve measures approx. 74-76-77-77-79-79 cm / 29⅛"-29⅞"-30 ¼"-30 ¼"-31"-31". LEFT SLEEVE: Work as right sleeve but bind off at the top in opposite side, i.e. at the beginning of every row from wrong side. ASSEMBLY: Sew sleeves together mid back inside bind-off edge on each sleeve. Sew sleeves to front and back piece on body in outermost stitch as follows: Sew seam from armhole and up along shoulder on back piece until mid back. Repeat in the other side. Sew the same way from armhole and up along shoulder on front piece up to neck. Repeat in the other side. NECK EDGE: Pick up 94-94-108-108-108-108-108 stitches around neck edge (including stitches from stitch holder) on a short circular needle size 3.5 mm / US 4 with Merino Extra Fine or Karisma. Work 2 ridges, AT THE SAME TIME on last row increase 22-22-26-26-26-26-26 stitches evenly = 116-116-134-134-134-134-134 stitches. Then work rib = knit 1/purl 1. When rib measures 8 cm / 3⅛", work 1 ridge in garter stitch. Bind off. Fold neck edge double and sew on the inside, ridge against ridge. ---------------------------------------------------------- HEAD BAND - SHORT OVERVIEW OF THE PIECE: Worked back and forth from mid back and sewn together when finished. HEAD BAND: Cast on 30 stitches on needle size 4 mm / US 6 with Merino Extra Fine or Karisma. Work 1 ridge in GARTER STITCH back and forth - read explanation above! Now work pattern as follows: Work A.5 (= 5 stitches on first row) 6 times in total on needle. After first row in A.5 there has been 6 stitches increased in total = 36 stitches. When A.5 has been worked, work A.6 (= 6 stitches) over every repetition of A.5. REMEMBER THE GAUGE! When piece measures 26 cm/10¼", work a cable mid front on head band as follows: Slip the first 18 stitches on cable needle, work the remaining 18 stitches and then the 18 stitches on cable needle. Continue with pattern A.6 back and forth until piece measures approx. 49 cm – adjust to finish after a whole repetition of A.6 vertically (approx. 3 cm / 1" remain until finished measurements). Now work A.7 over every repetition of A.6. When A.7 has been worked, there are 30 stitches on row. Work 1 ridge over all stitches. Bind off. Sew head band together mid back by sewing one and one stitch inside cast-on edge and bind-off edge. Fasten off. |
|||||||||||||||||||||||||||||||
Diagram explanations |
|||||||||||||||||||||||||||||||
|
|||||||||||||||||||||||||||||||
 |
|||||||||||||||||||||||||||||||
 |
|||||||||||||||||||||||||||||||
 |
|||||||||||||||||||||||||||||||
Have you finished this pattern?Tag your pictures with #dropspattern #waitingforsnowsweater or submit them to the #dropsfan gallery. Do you need help with this pattern?You'll find 25 tutorial videos, a Comments/Questions area and more by visiting the pattern on garnstudio.com. © 1982-2026 DROPS Design A/S. We reserve all rights. This document, including all its sub-sections, has copyrights. Read more about what you can do with our patterns at the bottom of each pattern on our site. |
|||||||||||||||||||||||||||||||






With over 40 years in knitting and crochet design, DROPS Design offers one of the most extensive collections of free patterns on the internet - translated to 17 languages. As of today we count 333 catalogs and 12532 patterns - 12522 of which are translated into English (US/in).
We work hard to bring you the best knitting and crochet have to offer, inspiration and advice as well as great quality yarns at incredible prices! Would you like to use our patterns for other than personal use? You can read what you are allowed to do in the Copyright text at the bottom of all our patterns. Happy crafting!
Post a comment to pattern DROPS 195-1
We would love to hear what you have to say about this pattern!
If you want to leave a question, please make sure you select the correct category in the form below, to speed up the answering process. Required fields are marked *.