
Popular categories
Looking for a yarn?





































Comments / Questions (233)
 Ulla Pålsson wrote:
Hur ökar man maskorna mönstret Drops baby 31-3, förstår inte vilket varv? Har börjat på första mönstret. Hälsn Ulla
01.11.2026 - 11:33
 Dea wrote:
Buonasera, manca una frase nella spiegazione della pantofola. Dove c'è scritto "Quando A.4 è stato lavorato in altezza continuare con A.3 come segue: lavorare 1 maglia a maglia legaccio ... " bisogna continuare così " A3 fino a quando rimane una maglia , lavorare una maglia a legaccio." poi si prosegue con il pezzo seguente del cordino. Spero di avere spiegato bene.
31.10.2026 - 18:15DROPS Design answered:
Buonasera Dea, grazie per la segnalazione: abbiamo corretto il testo. Buon lavoro!
01.11.2026 - 21:43
Mandy wrote:
#odetajacket DROPS Design: Modell bm-084-by Hejsan! Jag håller på att sticka koftan. Färdig med höger sidan och börjar med vänster och där står jag ska fortsätta med minskningen?? Men på högersidan står ingenting? Nur har jag inte minskat... ska man fortsätta minska eller inte?
19.10.2026 - 09:43DROPS Design answered:
Hej Mandy, det kommer an på om du er færdig med denne minskning?: – läs MINSKNINGSTIPS. Minska så på vartannat varv totalt (18) 18-22-24-26 (28-32) ggr, sedan minskas det på vart 4:e varv totalt 2 ggr. ARBETET DELAS OCH DET LÄGGS UPP MASKOR TILL ÄRM SÅ HÄR: HÖGER FRAMSTYCKE: - Husk at skrive hvilken størrelse du strikker hvis du har flere spørgsmål :)
20.10.2026 - 12:07
Mandy wrote:
Hejsan! Jag håller på att sticka koftan. Färdig med höger sidan och börjar med vänster och där står jag ska fortsätta med minskningen?? Men på högersidan står ingenting? Nur har jag inte minskat... ska man fortsätta minska eller inte?
16.10.2026 - 17:24DROPS Design answered:
Hei Mandy. Du har lagt ditt spørsmål under en oppskrift på en Baby lue (DROPS Baby 31-1). Hvillken kofte tenker du på? Fint om du legger ditt spørsmål under den oppskriften det gjelder og husk å oppgi hvilken str. du strikker. mvh DROPS Design
19.10.2026 - 09:39
 Rinie wrote:
Er was een stuk van het patroon weggevallen bij het printen. Ik zie nu dat alle naalden er op staan.
11.10.2026 - 18:53
Rinie wrote:
In de beschrijving staat dat het telpatroon de naalden aan de goede kant laat zien. Wat doe ik aan de verkeerde kant .? En begin ik meteen met het patroon of brei ik eerst een paar naalden ribbels.?
09.10.2026 - 17:06DROPS Design answered:
Dag Rinie,
Je volgt de beschrijving waarin precies staat wanneer je moet starten met het telpatroon. (In de telpatronen zijn ook ribbels getekend.) Je leest de telpatronen van onder naar boven en je begint de eerste naald van het telpatroon aan de goede kant, rechts onder van het telpatroon. Je leest dan van rechts naar links en als je terug breit lees je de telpatronen van links naar rechts. De even naalden brei je steeds aan de goede kant en de oneven naalden van het telpatroon aan de verkeerde kant.
13.10.2026 - 16:46
 Dee wrote:
My first try to knit a sweater
09.09.2026 - 16:45
 Pierrette wrote:
J'aurais d'explications afin de bien commencer le chandail Odeta. Je ne comprends pas très bien le début
30.07.2026 - 21:55DROPS Design answered:
Bonjour Pierrette, on tricote le bas du gilet de bas en haut en commençant par le devant droit, sur l'endroit. On va tricoter ainsi: 2 à 4 m point mousse (cf. taille), puis on répète les 8 m du diagramme A.1 entre 13 et 25 fois, et on termine par le diagramme A.2 (pour que le motif soit symétrique) et 2 à 4 m point mousse. Bon tricot!
10.08.2026 - 11:03
Rachel H wrote:
Pour les manches, je montes un total de 24+19 mailles=43 mailles cote droit, gauche et chaque côté du dos? et ensuite on graft? Cette partie porte a confusion. Merci
16.07.2026 - 20:45DROPS Design answered:
Bonjour Rachel, on monte les mailles du devant droit en fin de rang sur l'endroit (en même temps, on va continuer à diminuer pour l'encolure). On montera les mailles de la manche gauche en fin de rang sur l'envers, et pour le dos, on monte les mailles des manches en fin de rang de chaque côté. Bon tricot!
10.08.2026 - 10:06
 Brenda wrote:
What level of knitting does it take to make this jacket, beginner,intermediate or experienced?
06.07.2026 - 03:13DROPS Design answered:
Dear Brenda, this is something quite personnal and tricky to answer as every beginner doesn't have the same experience; just read thoroughly the whole pattern, look at the videos and the lessons on the top of the page if necessary and if you have any question feel free to use that section to ask them. Happy knitting!
06.07.2026 - 07:53
|
|||||||||||||||||||
Odeta#odetajacket |
|||||||||||||||||||
 |
 |
||||||||||||||||||
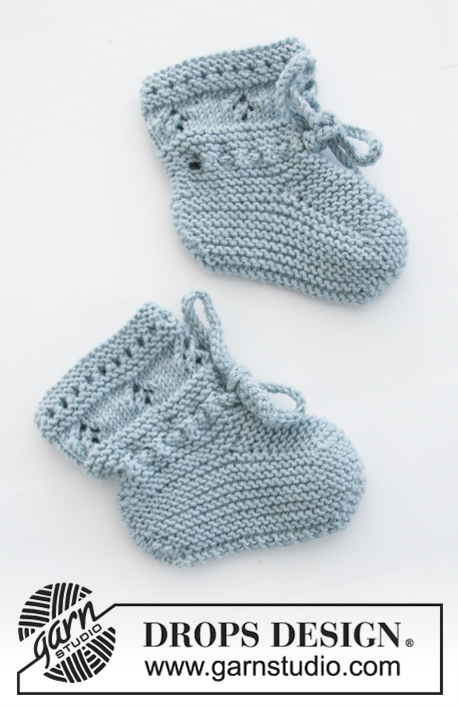
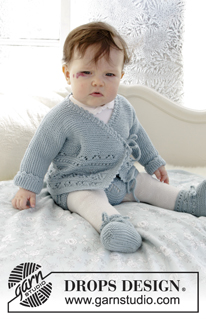
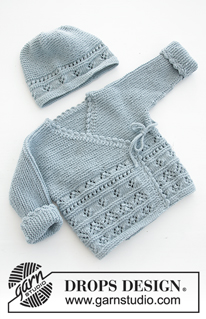
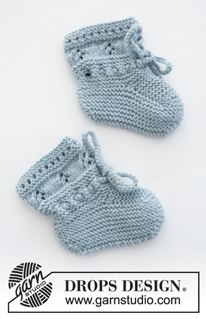
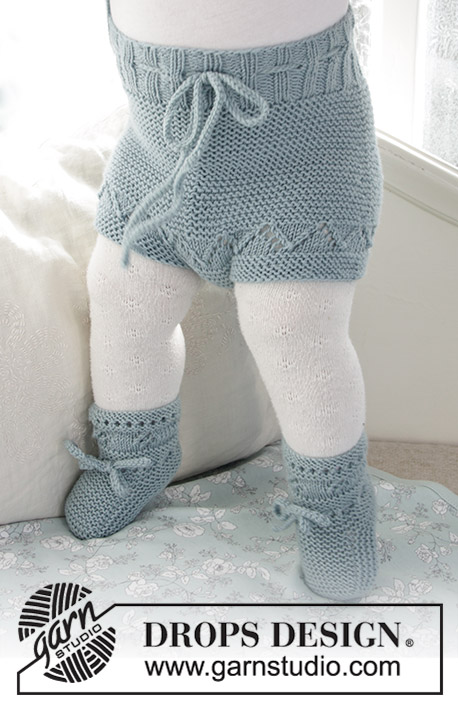
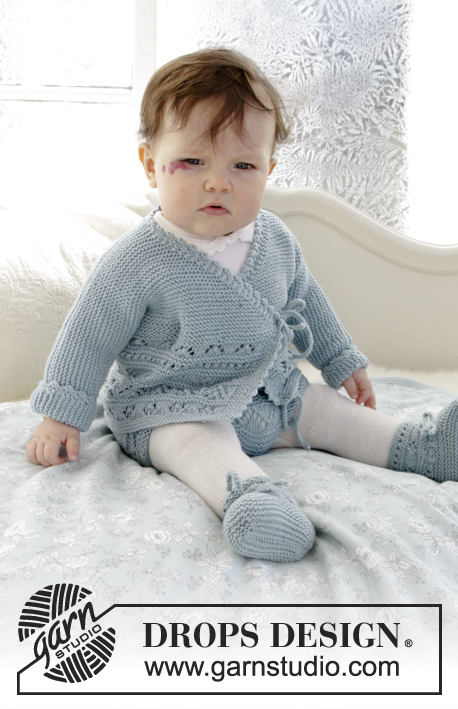
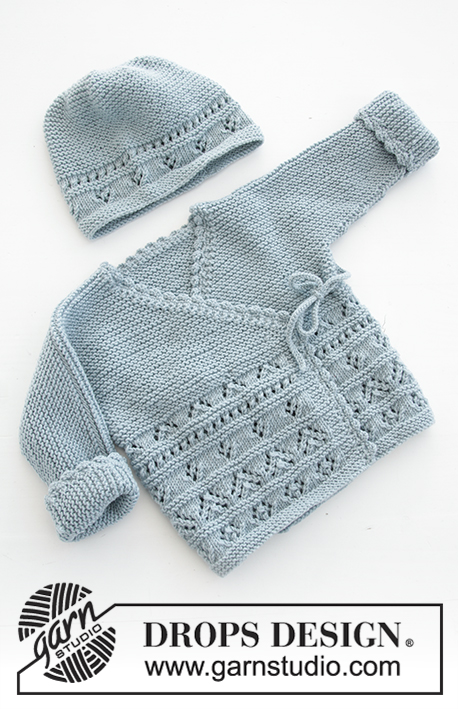
The set consists of: Knitted baby jacket and slippers with lace pattern and garter stitch. Sizes premature - 4 years. The set is worked in DROPS BabyMerino.
DROPS Baby 31-3 |
|||||||||||||||||||
|
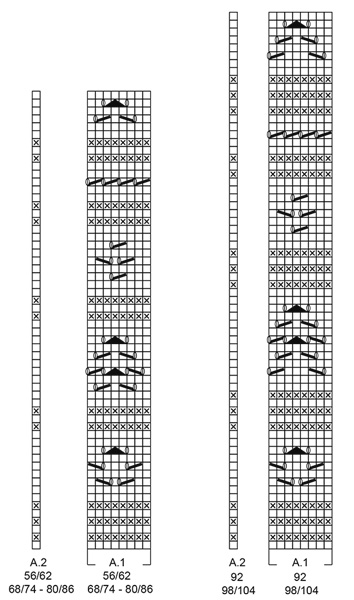
INFORMATION FOR THE PATTERN: RIDGE/GARTER STITCH (worked back and forth): 1 ridge = Knit 2 rows. PATTERN: Jacket: See diagrams A.1 and A.2. Choose diagram for your size. Slippers: See diagrams A.3 and A.4. The diagrams show all the rows in the pattern seen from the right side. DECREASE TIP (for jacket): Decrease inside the 1 band stitch in garter stitch. All decreases are made from the right side! Decrease as follows after the 1 band stitch: Slip 1 stitch as if to knit, knit 1, pass the slipped stitch over. Decrease as follows before the 1 band stitch: Knit 2 together. ---------------------------------------------------------- JACKET: The piece is worked back and forth with circular needle. The body is worked first, then stitches are cast on for sleeves and the front and back pieces are finished separately. BODY: Cast on (111) 125-145-157-173 (181-205) stitches with circular needle size 3 mm and BabyMerino. Work as follows from the right side: Work (3) 2-4-2-2 (2-2) stitches GARTER STITCH – see description above – (= band), work A.1 (= 8 stitches) over the next (104) 120-136-152-168 (176-200) stitches (= (13) 15-17-19-21 (22-25) times in width), work A.2 (= 1 stitch) and finish with (3) 2-4-2-2 (2-2) stitches garter stitch. REMEMBER THE KNITTING TENSION! On the last row in A.1 adjust the number of stitches to (112) 124-146-158-172 (182-204) stitches. When A.1 has been worked 1 time in height, continue in garter stitch to finished length. The piece measures approx. (10) 12-16-16-16 (19-19) cm or (4") 4 ¾"-6 ¼"-6 ¼"-6 ¼" (7 ½"-7 ½"). Insert 1 marker (34) 37-44-48-52 (55-62) stitches in from each side. Allow the markers to follow your work onwards, they mark the front and back pieces = (44) 50-58-62-68 (72-80) stitches on back piece. READ THE WHOLE OF THE NEXT SECTION BEFORE CONTINUING! DECREASE FOR NECK INSIDE 1 BAND STITCH IN EACH SIDE OF THE PIECE AT THE SAME TIME AS THE PIECE IS DIVIDED AND STITCHES ARE CAST ON FOR SLEEVES. DECREASE MID FRONT AS FOLLOWS: When the piece measures (10) 12-16-16-17 (20-23) cm or (4") 4 ¾"-6 ¼"-6 ¼"-6 ¾" (8"-9") – adjust so that the next row is worked from the right side, decrease 1 stitch for the neck inside the 1 band stitch in each side of the piece (= 2 stitches decreased) – read DECREASE TIP. Decrease like this every 2nd row a total of (18) 18-22-24-26 (28-32) times, then every 4th row a total of 2 times. THE PIECE IS NOW DIVIDED AND STITCHES ARE CAST ON FOR THE SLEEVES AS FOLLOWS: RIGHT FRONT PIECE: When the piece measures (12) 15-19-20-21 (24-27) cm or (4 ¾") 6"-7 ½"-8"-8 ¼" (9 ½"-10 ⅝"), divide the piece at the 2 markers and the front and back pieces are finished separately. Adjust so that the next row is from the right side. Now work over all the stitches as far as the first marker (= right front piece). Place the remaining stitches on a thread. Cast on new stitches at the end of each row from the right side (= towards the side) for the sleeve as follows: Cast on (3) 4-6-6-6 (6-6) stitches a total of (4) 4-4-5-6 (7-8) times and then (16) 19-19-18-19 (23-26) stitches 1 time. When all the stitches are cast on for the sleeve and the decreases to neck are finished, there are (42) 52-63-70-79 (90-102) stitches on the needle for shoulder/sleeve. Work garter stitch until the piece measures (20) 24-28-30-32 (36-40) cm or (8") 9 ½"-11"-11 ¾"-10 ½" (14 ¼"-15 ¾"). Cast off. LEFT FRONT PIECE: Work over the last stitches which were placed on the thread, as far as the marker in the side. Work as for the right front piece, but in reverse. In other words, cast on stitches for the shoulder/sleeve at the end of each row from the wrong side. Continue to decrease inside the 1 band stitch at the end of each row from the right side as before (towards neck). BACK PIECE: = (44) 50-58-62-68 (72-80) stitches. Cast on new stitches at the end of each row in each side of the piece for the sleeves as follows: Cast on (3) 4-6-6-6 (6-6) stitches a total of (4) 4-4-5-6 (7-8) times and then (16) 19-19-18-19 (23-26) stitches 1 time = (100) 120-144-158-178 (202-228) stitches. When the piece measures (19) 23-27-29-31 (35-39) cm or (7 ½") 9"-10 ⅝"-11 ⅜"-12 ¼" (13 ¾"-15 ¼") cast off the middle (16) 16-18-18-20 (22-24) stitches for neck and each shoulder/sleeve is finished separately = (42) 52-63-70-79 (90-102) stitches left on each shoulder/sleeve. Work until the piece measures (20) 24-28-30-32 (36-40) cm or (8") 9 ½"-11"-11 ¾"-10 ½" (14 ¼"-15 ¾"), adjust to match the front pieces. Cast off. Work the other shoulder/sleeve in the same way. ASSEMBLY: Sew the seams on top of sleeve with grafting stitches from the right side. Sew the seams under the sleeves edge to edge in the outermost loop of the outermost stitch. CROCHET EDGE: Crochet with hook size 2.5 mm/ US c/2 and BabyMerino around the whole jacket opening (i.e. work from the right front piece, up along the jacket opening, around the neck and down the opening to the cast on edge on the left front piece) as follows: ROW 1: Work 1 slip stitch in the cast on edge on the right front piece, * 1 chain stitch, skip approx. 2 stitches/rows, 1 single crochet in the next stitch/row *, work from *-* to the corner where the decreases for neck started. Work the cord as follows: 1 single crochet in the tip, then work chain stitches for approx. 20-25 cm (8"-9¾"), turn and work back with 1 slip stitch in each chain stitch, then work 1 single crochet in the tip of the front piece again, continue the crochet edge around the jacket and neck to the tip on the left front piece, work cord as on the right front piece, continue working down the left front piece and finish with 1 slip stitch in the cast on edge. ROW 2: Work 1 chain stitch, 1 single crochet around the first chain stitch on the previous row, * 4 chain stitches, 1 double crochet in the 4th chain stitch from the hook, skip 1 single crochet + 1 chain stitch + 1 single crochet, work 1 single crochet around the next chain stitch *, work from *-* (make sure you work over the cords so the cords lie underneath), finish with 1 slip stitch in the last stitch. Work rows 1 and 2 in the same way around the bottom of both sleeves (the rounds start with 1 chain stitch and finish with 1 slip stitch in the first chain stitch). Work 2 loose cords: Work chain stitches for approx. 20-25 cm or (8"-9 ¾"), turn and work back with 1 slip stitch in each chain stitch. Cut the strand and work 1 more cord in the same way. Sew 1 cord to the inside of the right side in the side and 1 cord on the outside of the left side in the side. Make sure the two cords are at the same height on each side. ---------------------------------------------------------- SLIPPER: The slipper is worked back and forth with circular needle from mid back, top down; i.e. you first work the leg then the foot. Cast on (36) 38-40-44-48 (52-56) stitches with circular needle size 2.5 mm and BabyMerino. Work 1 stitch in GARTER STITCH – see above, A.3 (= 2 stitches) until 1 stitch remains, work 1 stitch in garter stitch. When A.3 has been worked 1 time in height, work the next row from the right side as follows: Work (2) 3-0-2-0 (2-0) stitches stocking stitch, A.4 (= 8 stitches) a total of (4) 4-5-5-6 (6-7) times in width and finish with (2) 3-0-2-0 (2-0) stitches stocking stitch. REMEMBER THE KNITTING TENSION! When A.4 has been completed 1 time in height continue with A.3 as follows: work 1 stitch in garter stitch, A.3 until 1 stitch remains, and work 1 stitch in garter stitch (the cord is later thread through this row of holes). When A.3 has been completed in height, work 2 RIDGES – see description above and decrease (6) 8-6-6-6- (10-14) stitches evenly on the last row from the right side = (30) 30-34-38-38 (42-42) stitches. Cut the strand. Now place the first (11) 11-12-13-13 (15-15) stitches and the last (11) 11-12-13-13 (15-15) stitches on two separate threads. The piece is now worked in garter stitch to finished length. Work (3) 3½-4-4½-5½ (6½-8) cm or (1 ⅛")1 ¼"-1 ½"-1 ¾"-2 ⅛" (2 ¼"-3 ⅛"), over the middle (8) 8-10-12-12 (12-12) stitches (= mid top of slipper), cut the strand. The next row is worked as follows from the right side: Work the stitches from the one thread in the one side back onto the double pointed needles, knit up (7) 9-10-11-13 (16-21) stitches in the outermost loop of the outermost stitch along the side of the middle piece, work the (8) 8-10-12-12 (12-12) stitches on the needle (= front), knit up (7) 9-10-11-13 (16-21) stitches in the outermost loop of the outermost stitch along the other side of the middle piece and work the stitches from the other thread back onto the double pointed needles = (44) 48-54-60-64 (74-84) stitches on the needles. THE PIECE IS NOW MEASURED FROM HERE! Work a total of (2½) 3-3-4-5 (5-5) cm or (1") 1 ⅛"-1 ⅛"- 1 ½"-2" (2"-2") garter stitch over all stitches AT THE SAME TIME when you have worked approx. (1) 1½-1½-2-3 (3-3) cm or (⅜") ½"-½"-¾"-1 ⅛" (1 ⅛"-1 ⅛"), insert 1 marker (22) 24-27-30-32 (37-42) stitches in (= middle of slipper). Now decrease every 2nd row to finished length as follows: Knit 1 stitch, knit the next 2 stitches together (= 1 stitch decreased), knit until there are 2 stitches left before the marker, knit together the next 4 stitches, 2 and 2 (= 2 stitches decreased), knit until there are 3 stitches left, knit the next 2 stitches together (= 1 stitch decreased), knit 1 stitch (= 4 stitches decreased every 2nd row) = approx. (32) 36-42-48-52 (62-72) stitches. Cast off and sew the seam under the foot and up mid back in the outermost loop of the outermost stitch so the seam is flat. Work 1 more slipper in the same way. CORD: Work a cord as follows: Work chain stitches with hook size 2.5 mm and BabyMerino for approx. 30-40 cm (11 ¾"-15 ¾"), turn and work back with 1 slip stitch in each chain stitch. Cut and fasten the strand. Thread the cord in and out of the row of holes on the slipper (start and finish mid front of slipper). ---------------------------------------------------------- For shorts see DROPS number 31-4. ---------------------------------------------------------- |
|||||||||||||||||||
Diagram explanations |
|||||||||||||||||||
|
|||||||||||||||||||
 |
|||||||||||||||||||
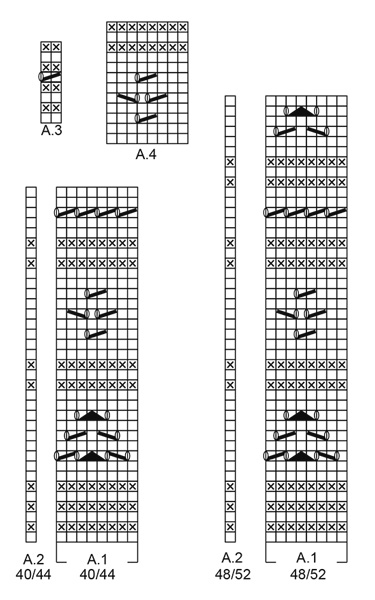 |
|||||||||||||||||||
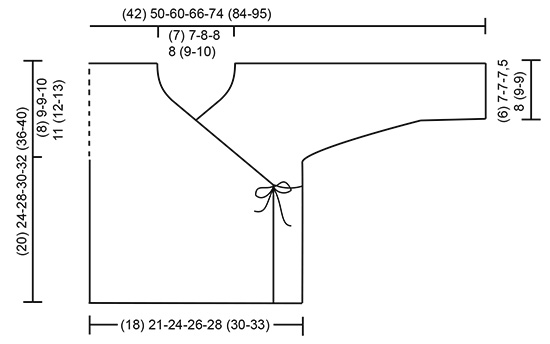 |
|||||||||||||||||||
Have you finished this pattern?Tag your pictures with #dropspattern #odetajacket or submit them to the #dropsfan gallery. Do you need help with this pattern?You'll find 22 tutorial videos, a Comments/Questions area and more by visiting the pattern on garnstudio.com. © 1982-2026 DROPS Design A/S. We reserve all rights. This document, including all its sub-sections, has copyrights. Read more about what you can do with our patterns at the bottom of each pattern on our site. |
|||||||||||||||||||






With over 40 years in knitting and crochet design, DROPS Design offers one of the most extensive collections of free patterns on the internet - translated to 17 languages. As of today we count 333 catalogs and 12532 patterns - 12522 of which are translated into English (US/in).
We work hard to bring you the best knitting and crochet have to offer, inspiration and advice as well as great quality yarns at incredible prices! Would you like to use our patterns for other than personal use? You can read what you are allowed to do in the Copyright text at the bottom of all our patterns. Happy crafting!
Post a comment to pattern DROPS Baby 31-3
We would love to hear what you have to say about this pattern!
If you want to leave a question, please make sure you select the correct category in the form below, to speed up the answering process. Required fields are marked *.