
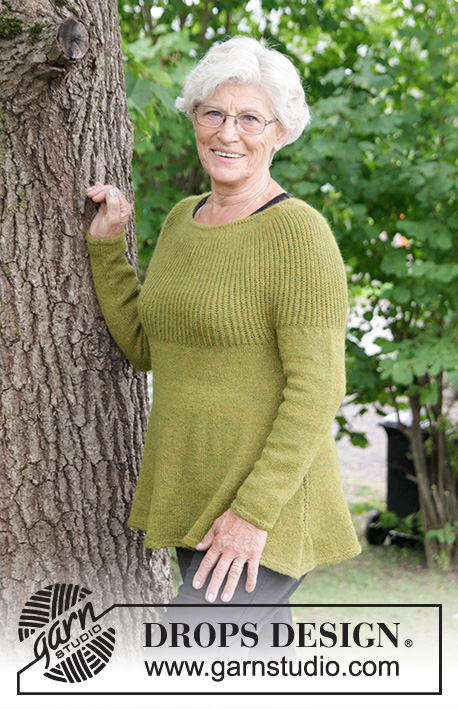
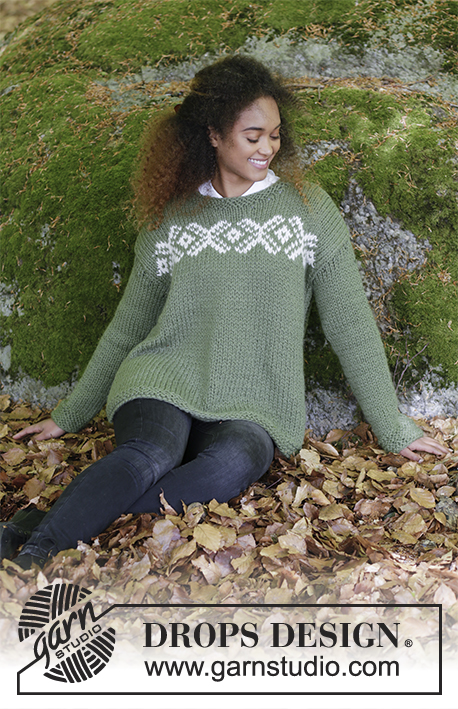
Popular categories
Looking for a yarn?


Comments / Questions (57)
![]() Soffía Reynisdóttri wrote:
Soffía Reynisdóttri wrote:
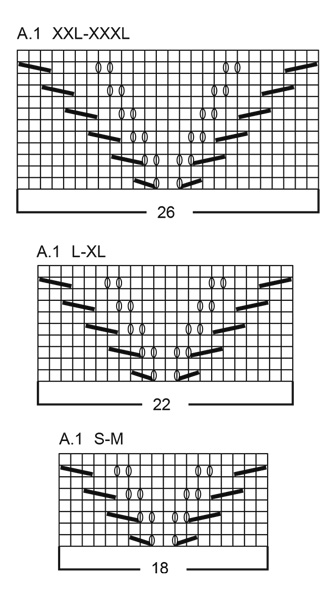
Hvað þyðir A,3,3 lykkjur 42 lykkjur slétt. Er í kafla fram og afturstykki.
15.03.2021 - 11:26DROPS Design answered:
Blessuð Soffía, takk fyrir ábendinguna. Þetta á að vera A.1, 3 lykkjur brugðið, 34-42-40-50-50-62 lykkjur slétt, 3 lykkjur brugðið, Búið er að lagfæra þetta. Gangi þér vel.
17.03.2021 - 10:26
![]() Quinn wrote:
Quinn wrote:
I found out how the pattern has to be knitted, so no need for help anymore.
20.02.2021 - 12:24
![]() Jet wrote:
Jet wrote:
Inmiddels ben ik zelf uitgekomen. Ik had vooral moeite met de omslagen en hoeveel de steken ertussen moeten, dus hoe je die moet tellen, maar dat weet ik nu. Mooi bladmotief!
20.02.2021 - 12:23
![]() Quinn wrote:
Quinn wrote:
If I try to knit the pattern, it looks quite different from the pattern on the pictures of Lemon Parfait. My question is if the explanation of the stitches is correct. I would like to thank you in advance for your answer.
19.02.2021 - 16:02DROPS Design answered:
Dear Mrs Quinn, diagram text is correct - remember to read diagram from the bottom corner on the right side towards the left on every round - read more about diagrams here. Hope this helps. Happy knitting!
22.02.2021 - 07:08
![]() Jet wrote:
Jet wrote:
Graag hoor ik een reactie.
19.02.2021 - 10:09
![]() Jet wrote:
Jet wrote:
Ter verduidelijking: Ik brei nu de steken samen zoals in de beschrijving staat, maar ik denk nu dat je een kabelsteek moet breien. Mijn vraag is of dit klopt. Alvast bedankt voor het reageren.
18.02.2021 - 14:49DROPS Design answered:
Dag Jet,
Aan je andere opmerking zie ik dat je er al uit gekomen bent. Bedankt voor de terugkoppeling en veel breiplezier!
24.02.2021 - 17:52
![]() Jet wrote:
Jet wrote:
Moet je dan van boven naar beneden lezen?
18.02.2021 - 09:17
![]() Jet wrote:
Jet wrote:
Ik probeer het ajourpatroon te breien, maar het ziet er bij mij heel anders uit. Als ik het telpatroon vergelijk met wat ik heb gebreid moet het kloppen, maar op de foto zie ik iets heel anders. Ik ben inmiddels vrij veel ervaring met breipatronen, dus ik snap er helemaal niets van.
18.02.2021 - 09:07DROPS Design answered:
Dag Jet,
Jammer dat ik niet mee kan kijken hoe het er bij jou uitziet. Lees je het telpatroon van onder naar boven? Zie ook bij veel gestelde vragen; Hoe brei ik volgens een telpatroon.
18.02.2021 - 09:15
![]() Barrie wrote:
Barrie wrote:
I am only 4’11” and petite. Can this pattern be scaled to my size?
27.01.2021 - 12:38DROPS Design answered:
Dear Barrie, probably but we are unfortunately not able to adjust every pattern to every single request. Please contact your yarn store or any knitting forum for any individual assistance; thanks for your comprehension. Happy knitting!
27.01.2021 - 13:19
![]() Lesley Kruijt wrote:
Lesley Kruijt wrote:
Klopt het dat bij het minderen van de pas, de maat small ontbreekt bij bet minderen om de andere naald? Want 18+5 is geen 19, maar dan hou ik ook geen 136 steken over..?
17.01.2021 - 16:15DROPS Design answered:
Dag Lesley,
Je hebt gelijk, er ontbrak een getal in maat S. Ik heb hem nu toegevoegd.
17.01.2021 - 19:28
|
|||||||||||||||||||
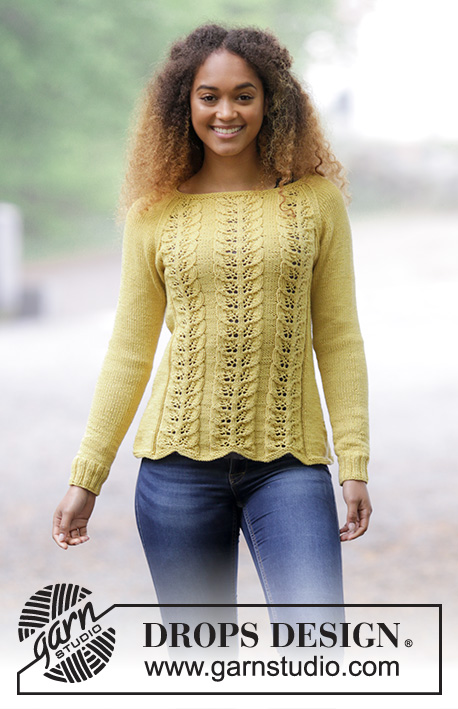
Lemon Parfait#lemonparfaitsweater |
|||||||||||||||||||
 |
 |
||||||||||||||||||
Knitted jumper with leaf pattern and raglan decrease. Sizes S - XXXL. The piece is worked in DROPS Cotton Merino.
DROPS 180-1 |
|||||||||||||||||||
|
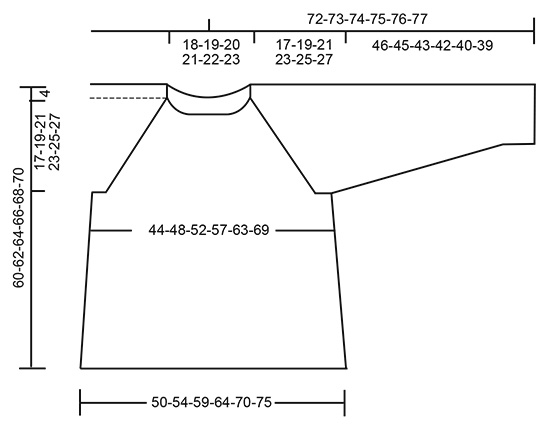
INFORMATION FOR THE PATTERN: RIDGE/GARTER STITCH (worked in the round): 1 ridge = 2 rounds. Knit 1 round and purl 1 round. PATTERN: See diagram A.1. Choose the diagram for your size. DECREASE TIP (for the side): Start 3 stitches before the marker thread in the side: Knit 2 stitches together, knit 2 stitches (the marker thread sits between these 2 stitches), slip 1 stitch, knit 1 stitch, pass the slipped stitch over the knitted stitch. INCREASE TIP: Increase as follows mid under sleeve – start 1 stitch before the marker thread: Make 1 yarn over, knit 2 stitches (the marker thread sits between these 2 stitches), 1 yarn over. On the next round, knit the yarn overs twisted to prevent holes. RAGLAN: You will decrease 2 stitches in each transition between the body and sleeves. Start 3 stitches before the marker thread: Knit 2 together, knit 2 (the marker thread sits between these 2 stitches), slip 1 stitch as if to knit, knit 1, pass the slipped stitch over the knitted stitch. KNITTING TIP: If the knitting gauge is not right in height and your work is too tight, the yoke will be too short and the armhole too small. This can be adjusted by working an extra round without decreases regularly between the decreases. ---------------------------------------------------------- BODY: The piece is worked in the round with circular needle, bottom up. Cast on 212-228-248-268-292-316 stitches with circular needle size 4 mm / US 6 and Cotton Merino. Work 2 RIDGES – see description above. Continue by working as follows: Knit 17-21-20-25-25-31, purl 3, *A.1 (= 18-18-22-22-26-26 stitches), purl 6 *, work from *-* 2 times in total, A.1, purl 3, knit 34-42-40-50-50-62, purl 3, *A.1, purl 6 *, work from *-* 2 times in total, A.1, purl 3, knit 17-21-20-25-25-31. Insert 1 marker thread at the beginning of the round and 1 after 106-114-124-134-146-158 stitches = in the sides. Continue this pattern upwards. REMEMBER THE GAUGE! When the piece measures 8 cm / 3⅛" decrease 1 stitch on each side of the marker threads in the sides (= 4 stitches decreased) – READ DECREASE TIP! Decrease every 4½ cm / 1¾" a total of 7 times in all sizes = 184-200-220-240-264-288 stitches. When the piece measures 39-39-39-39-39-39 cm / 15¼" all sizes bind off 8-8-10-10-12-14 stitches in each side (= 4-4-5-5-6-7 stitches on each side of the marker threads). There are now 84-92-100-110-120-130 stitches on the back piece and front piece. Lay the piece to one side and work the sleeves. SLEEVE: The piece is worked in the round with double pointed needles, change to short circular needle when you have increased enough stitches. Cast on 48-52-56-56-60-64 stitches with double pointed needles size 3.5 mm / US 4 and Cotton Merino. Knit 1 round, then work rib, knit 2/ purl 2. When the piece measures 6 cm / 2⅜" change to double pointed needles size 4 mm / US 6. Knit 1 round where you decrease 4-6-8-6-8-10 stitches evenly on round = 44-46-48-50-52-54 stitches. Insert 1 marker at the beginning of the round (= mid under the sleeve). Continue with stockinette stitch. When the piece measures 10-7-7-10-7-7 cm / 4"-2¾"-2¾"-4"-2¾"-2¾" increase 2 stitches mid under the sleeve – READ INCREASE TIP. Increase every 3-2½-2-1½-1½-1½ cm / 1⅛"-⅞"-¾"-½"-½"-½" a total of 12-15-18-19-20-21 times = 68-76-84-88-92-96 stitches. When the piece measures 46-45-43-42-40-39 cm / 18"-17¾"-17"-16½"-15¾"-15¾" (shorter measurements in larger sizes because of longer yoke) bind off the middle 8-8-10-10-12-14 stitches under the sleeve = 60-68-74-78-80-82 stitches. Lay the piece to one side and work 1 more sleeve. YOKE: Place the sleeves on the same circular needle as the body where you have bind off stitches for the armholes = 288-320-348-376-400-424 stitches. Insert a marker thread in each transition between the body and the sleeves (= 4 marker threads). Continue with pattern as before and decrease to RAGLAN – see description above. Decrease every 4th round 5-5-6-6-6-7 times, then every 2nd round 14-16-18-21-23-24 times = a total of 19-21-24-27-29-31 times - the stitches in A.1 that does not fit in diagram while decreasing should be worked in stockinette. After all the decreases, there are 136-152-156-160-168-176 stitches on the round. Work 2 ridges over all stitches, but on the first round, knit the 22-26-26-24-22-20 stitches over each sleeve together 2 and 2, in addition decrease 18-28-26-28-34-40 stitches evenly on round = 96-98-104-108-112-116 stitches. Bind off with knit. ASSEMBLY: Sew the openings under the sleeves. |
|||||||||||||||||||
Diagram explanations |
|||||||||||||||||||
|
|||||||||||||||||||
 |
|||||||||||||||||||
 |
|||||||||||||||||||
Have you finished this pattern?Tag your pictures with #dropspattern #lemonparfaitsweater or submit them to the #dropsfan gallery. Do you need help with this pattern?You'll find 26 tutorial videos, a Comments/Questions area and more by visiting the pattern on garnstudio.com. © 1982-2026 DROPS Design A/S. We reserve all rights. This document, including all its sub-sections, has copyrights. Read more about what you can do with our patterns at the bottom of each pattern on our site. |
|||||||||||||||||||


With over 40 years in knitting and crochet design, DROPS Design offers one of the most extensive collections of free patterns on the internet - translated to 17 languages. As of today we count 324 catalogs and 12290 patterns - 12280 of which are translated into English (US/in).
We work hard to bring you the best knitting and crochet have to offer, inspiration and advice as well as great quality yarns at incredible prices! Would you like to use our patterns for other than personal use? You can read what you are allowed to do in the Copyright text at the bottom of all our patterns. Happy crafting!
Post a comment to pattern DROPS 180-1
We would love to hear what you have to say about this pattern!
If you want to leave a question, please make sure you select the correct category in the form below, to speed up the answering process. Required fields are marked *.