
Popular categories
Looking for a yarn?


Comments / Questions (63)
![]() Mary wrote:
Mary wrote:
I am confused about "Increase for RAGLAN by increasing 1 stitch before/afterA.1/A.2". Is that increase before A1 then after A2? Or before and after A1 and before and after A2? Or something different?
14.08.2022 - 18:28DROPS Design answered:
Dear Mary, you increase before and after A.1 and before and after A.2. Take into account that you work A.2 over A.1 and not in the same round at the same time. Happy knitting!
14.08.2022 - 22:01
![]() Gunnel Bäckman wrote:
Gunnel Bäckman wrote:
Svar betr. ökningen: Wave Romance Cardigan Förvirrande med ökningen i oket på raglan. Ärmen börjar och slutar med omslag. Hur gör jag med ökningen? Börjar och slutar med 2 omslag verkar inte rätt. Jag skall börja på 3:e varvet OK/RAGLAN och har 135 m på stickorna. Kan inte se vad storleken har för betydelse, men jag stickar XL. Oavsett vilken storlek du stickar så ökar man väl på samma sätt? Det är bara antalet gånger som är olika.
10.08.2022 - 12:28DROPS Design answered:
Hej Gunnes, Ärmen börjar och slutar inte med omslag (omslagen från tidigare varv har du redan stickat in i oket), du ökar först till raglan på 3:e varvet i A.1, du ökar 1 maska på varje sida av A.1 på vartannat varv. (du vill inte få 2 omslag efter varandra). Lycka till :)
10.08.2022 - 14:43
![]() Gunnel Bäckman wrote:
Gunnel Bäckman wrote:
Wave Romance Cardigan Förvirrande med ökningen i oket på raglan. Ärmen börjar och slutar med omslag. Hur gör jag med ökningen? Börjar och slutar med 2 omslag verkar inte rätt.
08.08.2022 - 21:56DROPS Design answered:
Hej Gunnel, hvor er du i opskriften? Hvor mange masker har du? Hvilken størrelse strikker du, så skal vi forklare første omgang :)
10.08.2022 - 08:08
![]() Anja wrote:
Anja wrote:
Dank voor de kraag Maar ik snap de meerderingen niet Na A1/A2 en op de mouw kunt u me helpen
28.07.2022 - 10:59DROPS Design answered:
Dag Anja,
Voor en na A1/A2 meerder je door een omslag te maken. De omslag brei je op de volgende naald gedraaid, zodat er geen gaatje ontstaat.
In de beschrijving staat per maat hoeveel meerderingen je moet maken en om de hoeveel naalden. Dit kan verschillend zijn voor de mouw en voor het lijf.
01.08.2022 - 19:51
![]() Torhild Fjordheim Sunde wrote:
Torhild Fjordheim Sunde wrote:
Hvor mye garn må jeg bestille når jeg velger DROPS Alpakka Silk (gruppe C) i str XL?
29.06.2022 - 12:43DROPS Design answered:
Hei Torhild, Du trenger samme garnmengde som beskrevet for Kid-Silk, men legger opp og strikker med 1 tråd istedenfor 2. God fornøyelse!
04.07.2022 - 07:12
![]() Corinne Feuillet wrote:
Corinne Feuillet wrote:
Bonjour , est ce que le motif se fait aussi dans le dos on ne voit pas sur la photo . Vous devriez mettre une photo du dos
06.06.2022 - 16:09DROPS Design answered:
Bonjour Mme Feuillet, tout à fait, ce motif dénommé A.1 puis A.2 correspond aux lignes des raglans et se fait donc à chaque transition devant/manche/dos/manche/devant; et vous augmenterez de chaque côté des diagrammes - cf RAGLAN. Bon tricot!
07.06.2022 - 10:12
![]() Karin Wallenbert wrote:
Karin Wallenbert wrote:
Blir lite förvirrad över alla ökningar. Jag ökar ju redan för ärmarna i A1 o med raglan ökningarna blir det ju två omslag efter varandra både efter A1 o innan nästa A1. Är det korrekt?
06.06.2022 - 09:58DROPS Design answered:
Hej Karin, Du ökar på första varvet enligt beskrivningen, samtidigt som du ökar med 4 omslag på första varvet i varje A.1. Du börjar först med ökningen till raglan på varv 3 och det gör du på varje sida om A.1/A.2. Lycka till :)
08.06.2022 - 14:33
![]() Frankie wrote:
Frankie wrote:
Many thanks for your speedy help I look for ward to staying my next project! Best wishes
14.04.2022 - 18:42
![]() Frankie McKenna wrote:
Frankie McKenna wrote:
I would like to buy Drops Kid Silk for this pattern, I am XXXL size If I am using 2 strands will 10 balls be enough? Thank you for your time! Frankie McKenna
13.04.2022 - 14:58DROPS Design answered:
Dear Frankie, as stated in the materials, for size XXXL and 2 strands of Kid Silk, you will need 275gr, which is 11 DROPS Kid Silk balls. Happy knitting!
14.04.2022 - 17:36
![]() Turi Borgersen wrote:
Turi Borgersen wrote:
Sendte nettopp spørsmål for å skjønne mønsteret til 233-4. Har fått det til nå, men synes nok det er er en kjempedum mønsterforklaring. Bør nok endres noe og forklare at økningen på A1 fra 21m til 25m er pga kast på pinne 1. Trodde jeg måtte ta det fra ermemaskene🥴
08.03.2022 - 18:25
|
|||||||||||||||||||||||||
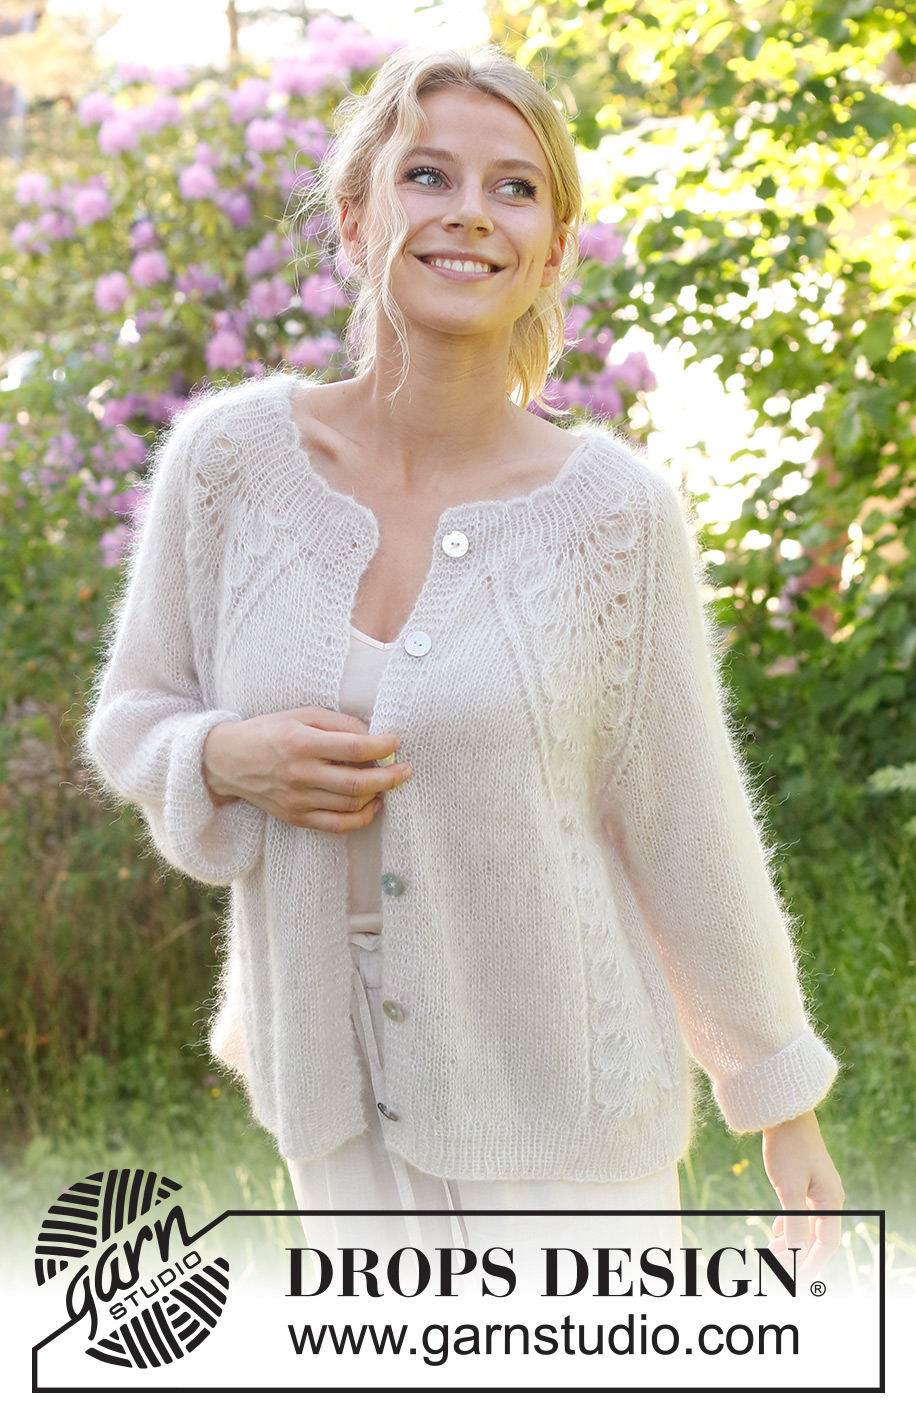
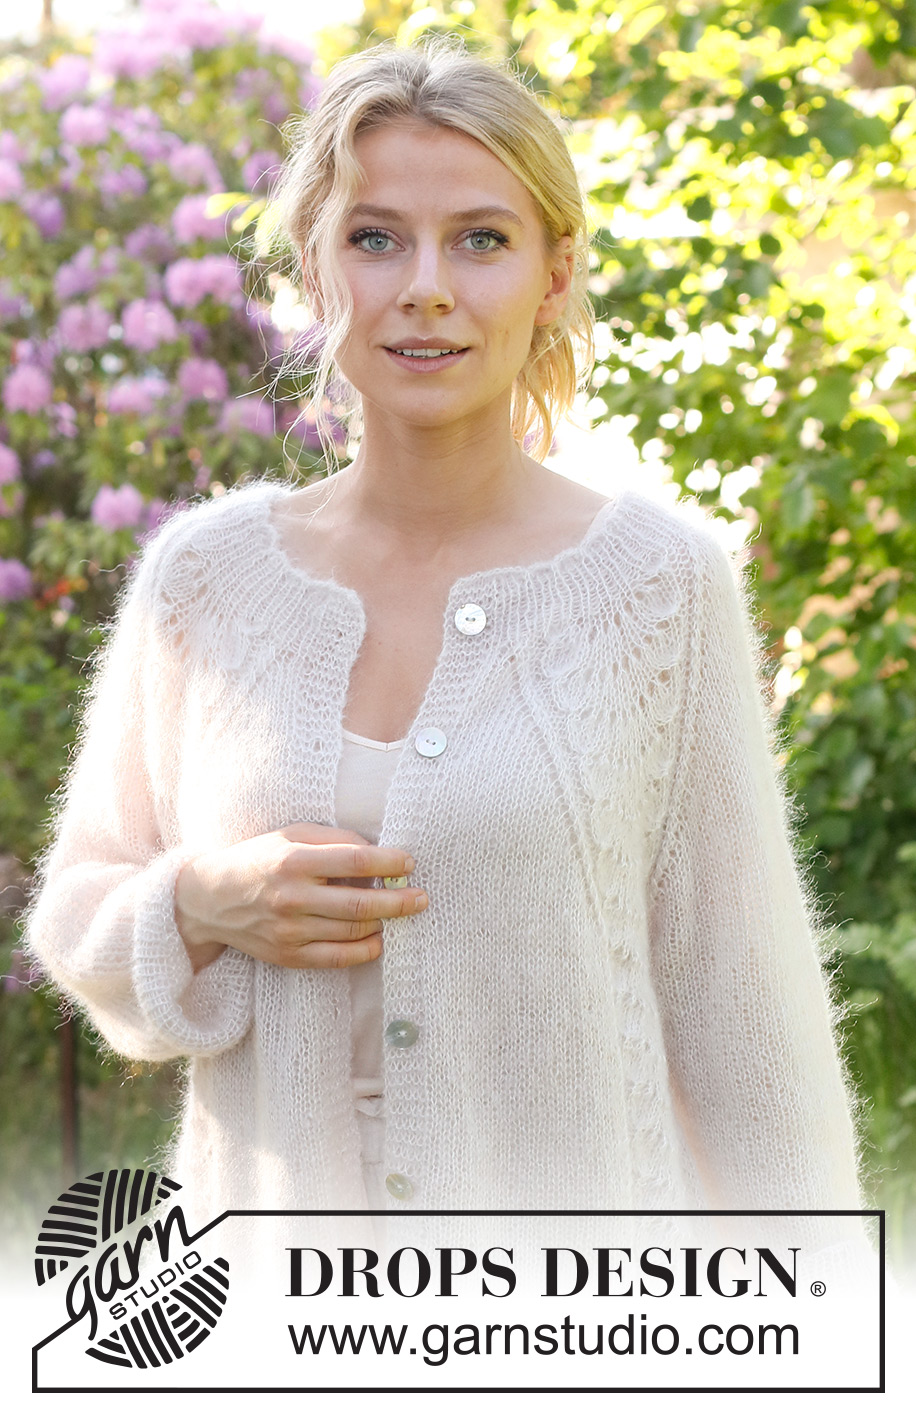
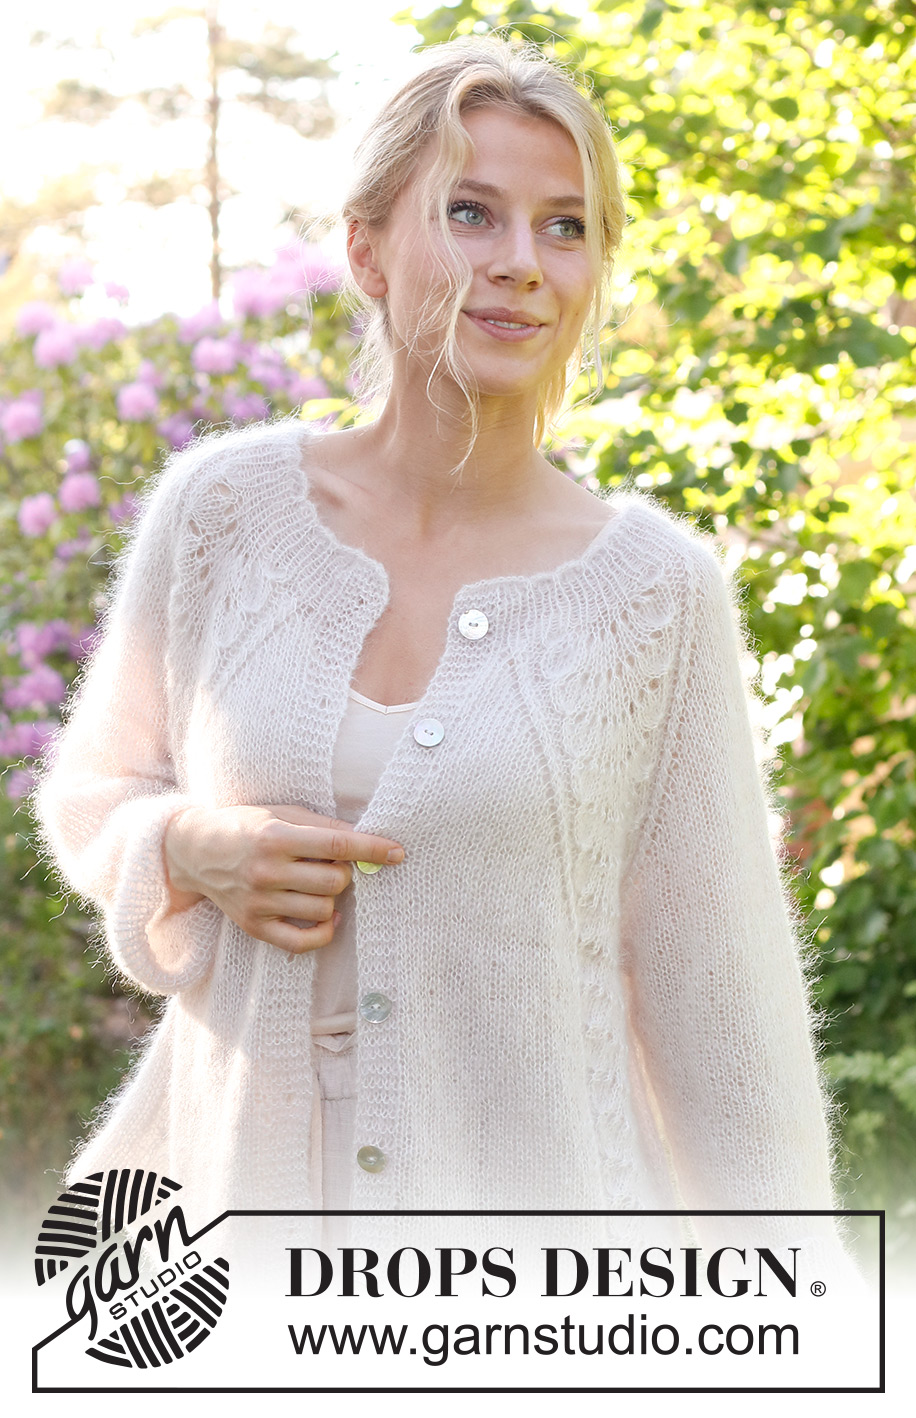
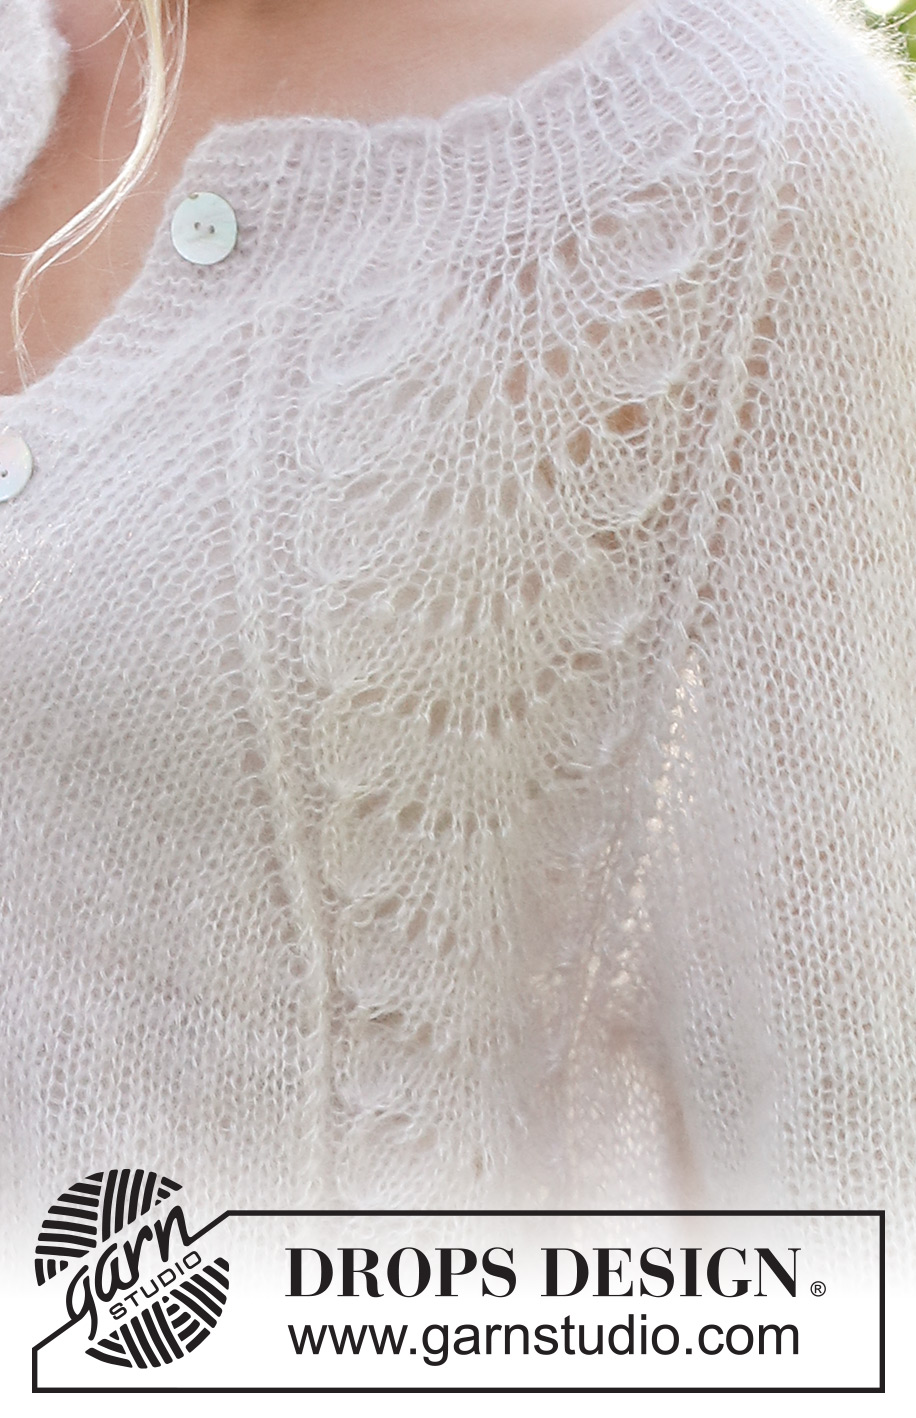
Wave Romance Cardigan#waveromancecardigan |
|||||||||||||||||||||||||
 |
 |
||||||||||||||||||||||||
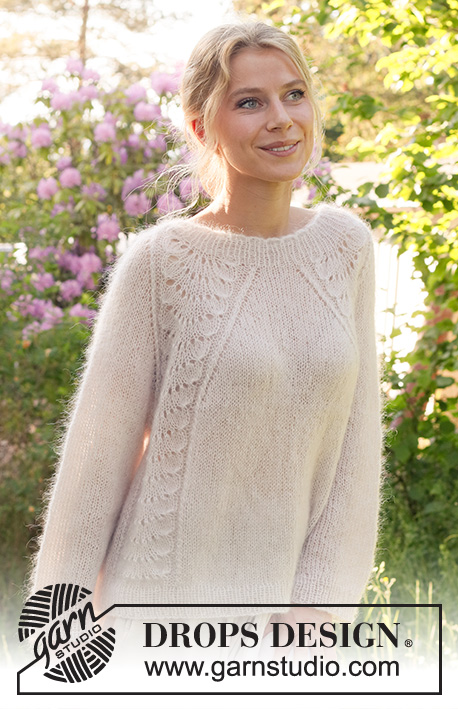
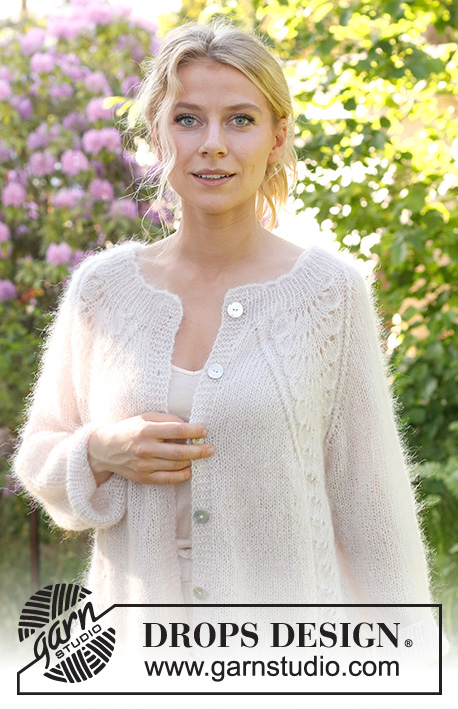
Knitted jacket in 2 strands DROPS Kid-Silk. The piece is worked top down with raglan and wave-pattern. Sizes S - XXXL.
DROPS 232-4 |
|||||||||||||||||||||||||
|
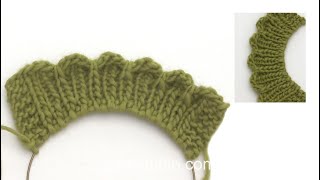
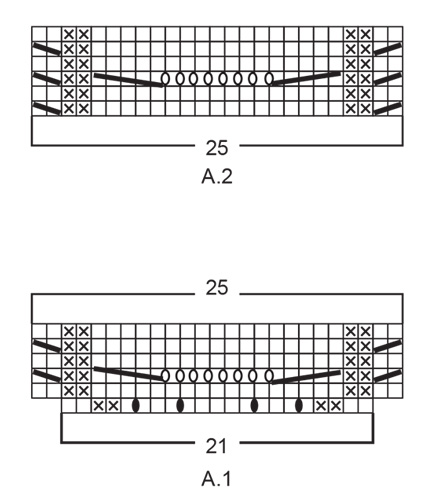
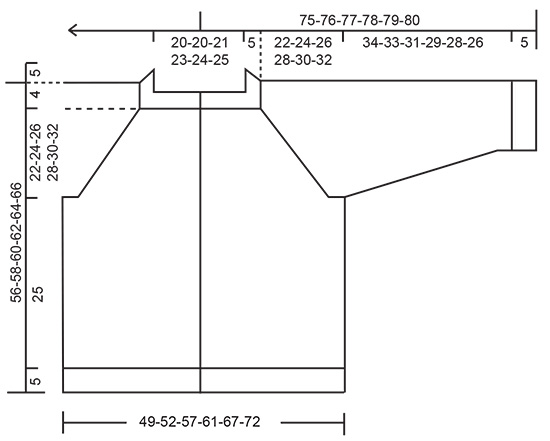
------------------------------------------------------- EXPLANATIONS FOR THE PATTERN: ------------------------------------------------------- RIDGE/GARTER STITCH (worked back and forth): Knit all rows. 1 ridge = knit 2 rows. PATTERN: See diagrams A.1 and A.2. The diagrams show all rows in the pattern from the right side. RAGLAN: All increases are worked from the right side! Increase in each transition between the body and sleeves by increasing before/after A.1/A.2. Increases are different on the body and sleeves, so sometimes you increase 8 stitches other times 4 stitches on the increase-row. Increase 1 stitch by making 1 yarn over. On the next row (wrong side) purl the yarns over twisted to avoid holes. Then work the new stitches in stockinette stitch. DECREASE TIP (for sleeves): Work until there are 3 stitches left before the marker, knit 2 together, knit 2 (marker sits between these 2 stitches), slip 1 stitch as if to knit, knit 1 and pass the slipped stitch over the knitted stitch. BUTTONHOLES: Work buttonholes on the right band (when the garment is worn). 1 buttonhole = When there are 3 stitches left on a row from the right side, make 1 yarn over. On the next row (wrong side), knit the yarn over to leave a hole and then knit 2 together. The first buttonhole is worked when the rib on the neck measures 3 cm = 1⅛". Then work the other 5-5-6-6-7-7 buttonholes with approx. 9-10-8½-9-8-8½ cm = 3½"-4"-3¼"-3½"-3⅛"-3¼" between each one. ------------------------------------------------------- START THE PIECE HERE: ------------------------------------------------------- JACKET – SHORT OVERVIEW OF THE PIECE: The neck and yoke are worked back and forth with circular needle, from mid-front and top down. The yoke is divided for body and sleeves and the body is continued back and forth. The sleeves are worked in the round with double pointed needles, top down. NECK WITH WAVY EDGE: Cast on 101-101-105-109-113-117 stitches with circular needle size 4 MM = US 6 and 2 strands DROPS Kid-Silk. Purl 1 row from the wrong side, then work as follows from the right side: 6 band stitches in GARTER STITCH – read description above, * knit 1 purl 1 *, work from *-* until there are 7 stitches left, knit 1 and 6 band stitches in garter stitch. Continue this rib for 3 more rows. Work the next row as follows from the right side: 6 band stitches in garter stitch, knit 1, * purl 1, knit 1, purl 1, take the right needle from the front of work and under the cast on edge, use right needle to lift the outermost stitch from left needle to the right needle, then take the right needle back around under the cast on edge (only the outermost stitch on the right needle is wrapped around the cast on edge), place this stitch back on left needle and knit the stitch (make sure the stitch is not twisted) *, work from *-* until there are 6 stitches left and work 6 band stitches in garter stitch. The neck now has small waves along the cast-on edge. Continue the rib as before with knit 1, purl 1 until the rib measures 5 cm = 2" after the waves – remember the BUTTONHOLES on the right band – read description above. AT THE SAME TIME on the last row, increase 6-6-2-2-2-2 stitches evenly spaced = 107-107-107-111-115-119 stitches. When the rib is finished insert a marker after the band at the beginning of the row – the yoke is measured from this marker! YOKE: Change to circular needle size 5 MM = US 8. Work as follows from the right side: 6 band stitches in garter stitch, 1-1-1-2-3-4 stitches in stockinette stitch, A.1 (front piece), * 1 yarn over, knit 1 *, work from *-* 2 more times, 1 yarn over (sleeve), A.1, 3-3-3-5-7-9 stitches in stockinette stitch, A.1 (back piece), * 1 yarn over, knit 1 *, work from *-* 2 more times, 1 yarn over (sleeve), A.1, 1-1-1-2-3-4 stitches in stockinette stitch and 6 band stitches in garter stitch (front piece). There are 131-131-131-135-139-143 stitches on the needle. Work this pattern back from the wrong side, but without increasing on the sleeves; the 4 yarn overs from the previous row are purled twisted to avoid holes. REMEMBER THE KNITTING GAUGE! OVERVIEW OF THE NEXT SECTION – read the whole section before continuing. Continue the pattern with 6 band stitches in garter stitch on each side. When A.1 has been worked 1 time in height, work A.2 over the 25 stitches in A.1. Then repeat A.2 in height. AT THE SAME TIME on row 3 in A.1 start to increase to RAGLAN as explained below. RAGLAN: Increase for RAGLAN by increasing 1 stitch before/afterA.1/A.2 – read description above. The increases on the front/back pieces and sleeves differ as follows: FRONT/BACK PIECES: Increase every 2nd row (each row from the right side) a total of 10-15-19-22-25-30 times, then every 4th row 6-4-3-3-3-1 times. SLEEVES: Increase every 2nd row (each row from the right side) a total of 21-23-25-29-30-31 times. When all the increases are finished there are 279-299-319-351-371-391 stitches. Continue working without further increases until the piece measures 22-24-26-28-30-32 cm = 8¾"-9½"-10¼"-11"-11¾"-12½" from the marker. Now divide for the body and sleeves: Work the first 48-51-54-58-62-66 stitches (front piece), place the next 49-53-57-65-67-69 stitches on a thread for the sleeve, cast on 6-6-8-8-10-10 stitches (in side under the sleeve), work 85-91-97-105-113-121 stitches (back piece), place the next 49-53-57-65-67-69 stitches on a thread for the sleeve, cast on 6-6-8-8-10-10 stitches (in side under the sleeve), work the last 48-51-54-58-62-66 stitches (front piece). The body and sleeves are finished separately. The piece is now measured from here! BODY: = 193-205-221-237-257-273 stitches. Work A.2, stockinette stitch and 6 band stitches in garter stitch on each side as before – the 6-6-8-8-10-10 stitches cast on under each sleeve are worked in stockinette stitch. Work until the body measures 25 cm = 9¾" from the division – make sure you have 3 or 5 rows of stockinette stitch after a row of yarn overs/decreases in A.2. Knit 1 row from the right side where you increase 18-20-22-24-26-26 stitches evenly spaced (do not increase over the bands) = 211-225-243-261-283-299 stitches. Change to circular needle size 4 MM = US 6 and work as follows from the wrong side: 6 band stitches in garter stitch, * purl 1, knit 1 *, work from *-* until there are 7 stitches left, purl 1 and 6 band stitches in garter stitch. Continue this rib for 5 cm = 2". Bind off a little loosely. The jacket measures approx. 56-58-60-62-64-66 cm = 22"-22¾"-23⅝"-24⅜"-25¼"-26" from the shoulder down. SLEEVES: Place the 49-53-57-65-67-69 stitches from the thread on the one side of the piece on short circular needle/double pointed needles size 5 MM = US 8 and knit up 1 stitch in each of the 6-6-8-8-10-10 stitches cast on under the sleeve = 55-59-65-73-77-79 stitches. Insert a marker in the middle of the 6-6-8-8-10-10 stitches under the sleeve. Allow the marker to follow your work onwards; it will be used when decreasing under the sleeve. Start at the marker and work stockinette stitch in the round for 4-4-3-3-2-2 cm = 1½"-1½"-1⅛"-1⅛"-¾"-¾". Now decrease 1 stitch on each side of the marker – read DECREASE TIP. Decrease like this every 5-4-3-2-2-1½ cm = 2"-1½"-1⅛"-¾"-¾"-½" a total of 6-7-9-12-13-13 times = 43-45-47-49-51-53 stitches. Continue working until the sleeve measures 34-33-31-30-28-26 cm = 13⅜"-13"-12¼"-11¾"-11"-10¼" from the division. Knit 1 round where you increase 3 stitches evenly spaced = 46-48-50-52-54-56 stitches. Change to double pointed needles size 4 MM = US 6. Work rib (knit 1, purl 1) for 5 cm = 2". Bind off a little loosely. The sleeve measures approx. 39-38-36-35-33-31 cm = 15¼"-15"-14¼"-13¾"-13"-12¼". Work the other sleeve in the same way. ASSEMBLY: Sew the buttons onto the left band. |
|||||||||||||||||||||||||
Diagram explanations |
|||||||||||||||||||||||||
|
|||||||||||||||||||||||||
 |
|||||||||||||||||||||||||
 |
|||||||||||||||||||||||||
Have you finished this pattern?Tag your pictures with #dropspattern #waveromancecardigan or submit them to the #dropsfan gallery. Do you need help with this pattern?You'll find 33 tutorial videos, a Comments/Questions area and more by visiting the pattern on garnstudio.com. © 1982-2026 DROPS Design A/S. We reserve all rights. This document, including all its sub-sections, has copyrights. Read more about what you can do with our patterns at the bottom of each pattern on our site. |
|||||||||||||||||||||||||


With over 40 years in knitting and crochet design, DROPS Design offers one of the most extensive collections of free patterns on the internet - translated to 17 languages. As of today we count 324 catalogs and 12290 patterns - 12280 of which are translated into English (US/in).
We work hard to bring you the best knitting and crochet have to offer, inspiration and advice as well as great quality yarns at incredible prices! Would you like to use our patterns for other than personal use? You can read what you are allowed to do in the Copyright text at the bottom of all our patterns. Happy crafting!
Post a comment to pattern DROPS 232-4
We would love to hear what you have to say about this pattern!
If you want to leave a question, please make sure you select the correct category in the form below, to speed up the answering process. Required fields are marked *.