
Popular categories
Looking for a yarn?


Comments / Questions (63)
![]() Anja wrote:
Anja wrote:
Als ik de pas brei kom ik uit op 115 steken wat doe ik fout? Ik heb al tig keer de pas opnieuw geteld.
03.04.2023 - 01:05DROPS Design answered:
Dag Anja,
Welke maat brei je? Is dit voordat je de pas breit of nadat je de naalden met meerderingen/omslagen breit? Heb je de omslagen als extra steken geteld? En heb je herhaald wat tussen de sterretjes staat?
05.04.2023 - 07:55
![]() Radhika wrote:
Radhika wrote:
How would this cardigan be different if I made it with Drops Alpaca Silk? The yarn substitution calculator tells me I can use 1 strand of Drops Alpaca Silk instead of 2 strands of kid silk, is this correct and would it give the same effect? Thank you Radhika
27.03.2023 - 11:51DROPS Design answered:
Dear Radhika, the effect might be relatively similar - do not hesitate to talk to your DROPS store, it will be easier for them to explain you. They would even be able to answer you by telephone as well as by mail. Happy knitting!
27.03.2023 - 13:27
![]() Carina Degner Steffen wrote:
Carina Degner Steffen wrote:
Hjælp til Wave Romance Cardigan Jeg strikker str. medium Hvad hulen skal jeg gøre med de masker der blir ærmer? på de efterfølgende pinde. Jeg har strikket de første 2 rækker i A1, forstår jeg det rigtigt, at udtagningerne til raglan blir en del af ærmeudtagningen, så jeg skal strikke maskerne ret og ikke gøre andet? 🤯🥴 I beskrivelsen står der slå om, 1 ret 3 gange slå om (ærme) herefter starter A1 bagstykket. Hvordan strikkes det lille stykke ærmemasker?
15.02.2023 - 08:49DROPS Design answered:
Hej Carina, de 21 masker som bliver til 25 masker ifølge A.1 skal kun strikkes i de 4 raglan-overgange mellem ærmer og ryg & forstykker. Når du tager ud til raglan, så tager du ud på hver side af A.1 og de masker skal strikkes i glatstrik :)
16.02.2023 - 14:02
![]() Hege wrote:
Hege wrote:
Har et spørsmål vedrørende raglandsøkning. Skal jeg øke før og etter alle A1? Strikker str xl. Altså. Skal jeg strikke 6 stolpemasker, så 2 masker rett, øk, A1, øk, ermemasker. Øk A1, øk. 5 masker rett øk A1, øk ermemasker øk, A1 øk 2 masker rett så 6 stolpemasker?
07.02.2023 - 11:55DROPS Design answered:
Hej Hege, ja det stemmer, så du har 8 udtagninger til raglan på hver udtagningsomgang :)
08.02.2023 - 07:50
![]() Jane Thude wrote:
Jane Thude wrote:
Raglan udtagning, skal man slå om 2 gange efter hinanden, fra forstykke til ærme, så bliver der et hul?
25.10.2022 - 21:25DROPS Design answered:
Hej Jane, du skal ikke lave 2 omslag efter hinanden, hvor skriver vi det?
26.10.2022 - 09:11
![]() Elisabet Berengue wrote:
Elisabet Berengue wrote:
Buenos días. Podría hacer este patrón con doble aguja? La parte del dibujo se trabaja a parte de la espalda y de los delanteros? Muchas gracias. Es un patrón precioso. Saludos
04.10.2022 - 09:22DROPS Design answered:
Hola Elisabet, en este modelo recomendamos usar una aguja circular debido al elevado número de puntos en la fila. Con agujas de doble punta no es cómodo trabajar el canesú entero (los delanteros, la espalda y las mangas). Tampoco puedes trabajar el canesú por partes debido al dibujo en el raglán en los delanteros y en la espalda.
04.10.2022 - 15:27
![]() Bea wrote:
Bea wrote:
Hallo. Ich verstehe die Reglanzunahme nicht. Ich will die XXL Größe stricken. Ich soll ab A1 ab 3 Reihe jeder 2 Reihe 25 x 8 Maschen zunehmen. Dann in jeder 4. Reihe 3x 4 Maschen und jeder 4. Reihe 3x 8 Maschen. Wie komme ich dann auf 371 Maschen nach allen zunahmen? Bei meine Berechnung komme ich auf 375 Maschen . Bitte helfen Sie mir. 🙏DANKE.🙂LG
08.09.2022 - 14:03DROPS Design answered:
Liebe Bea, die Raglanzunahmen werden beim Rumpfteil und bei den Ärmeln unterschiedlich, dh bei den Vorderteile + Rückenteil nehmen Sie 25 x in jeder 2. Reihe + 3 x in jeder 4. Reihe (25x 4 + 3 x 4 = 112); gleichzeitig nehmen Sie bei den Ärmeln 30 x in jeder 2. Reihe (= 30x 4 = 120)- dh es wird manchmal 8 Maschen und manchmal nuch 4 Maschen (wenn die Zunahmen für die Ärmel fertig sind, aber nicht die für den Rumpfteil) = 139+112+120=371 M. Viel Spaß beim stricken!
08.09.2022 - 15:34
![]() Em wrote:
Em wrote:
Sorry, that previous response did not answer my question. Is the yoke A1/A2/A2?
22.08.2022 - 15:58DROPS Design answered:
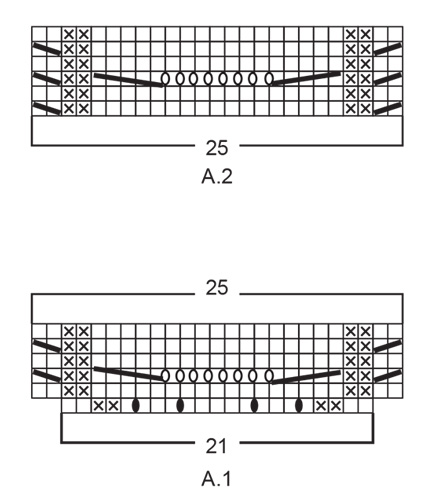
Dear Em, on the yoke you first work A.1 (increasing 4 sts on first row as shown in diagram), then after the 6 rows in A.1 are done, work A.2 over A.1 and repeat A.2 to the end. Hope I didn't misunderstand your question. Happy knitting!
22.08.2022 - 16:27
![]() Em wrote:
Em wrote:
Is it correct that the yoke is one set of A1/A2/A2 without increases then the raglan begins similarly but with increases? Then the A1/A2/A2 are continued until the garment reaches the length indicated for the size. After which the garment is divided into body and sleeves. Please enlighten me.
22.08.2022 - 01:44DROPS Design answered:
Hi Em, You follow the diagrams as they are drawn and increase for raglan at the same time. The increases in the diagram are evened out by the decreases (for example, knitting 5 stitches together x 2 with 8 yarn overs means you keep the same number of stitches on the row). Happy knitting!
22.08.2022 - 07:03
![]() Mary wrote:
Mary wrote:
Am I reading this correctly? In the yoke, the first row of A1 contains increases and none of the other rows contain increases. Then when beginning the next section and raglan, the increases begin again?
18.08.2022 - 15:56DROPS Design answered:
Dear Mary, you work A.1 one time, than you work A.2 instead and repeat A.2. So you increase just once, only in the first row of A.1. Happy knitting!
18.08.2022 - 18:27
|
|||||||||||||||||||||||||
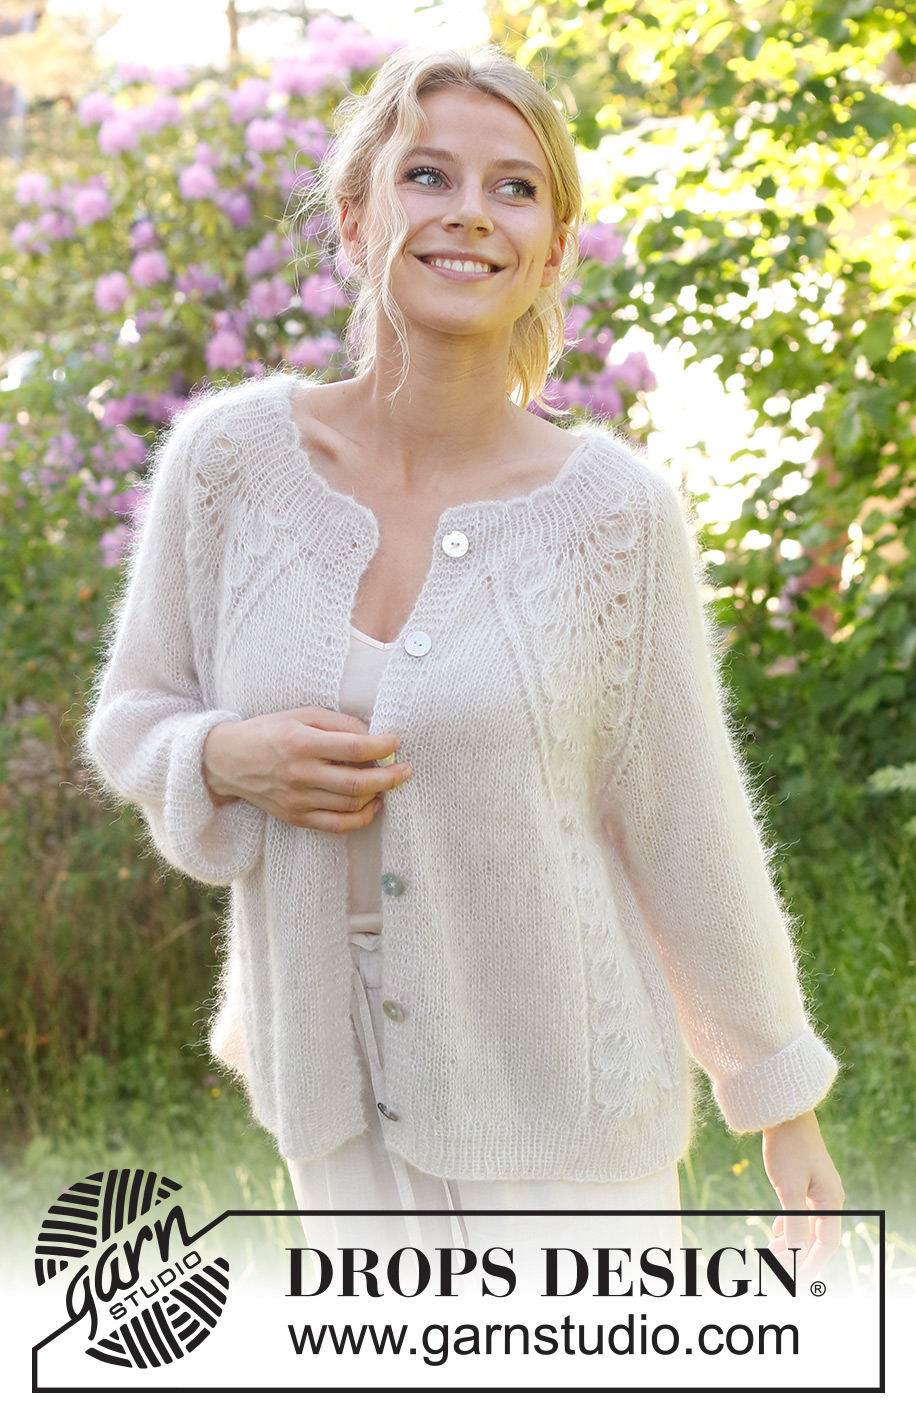
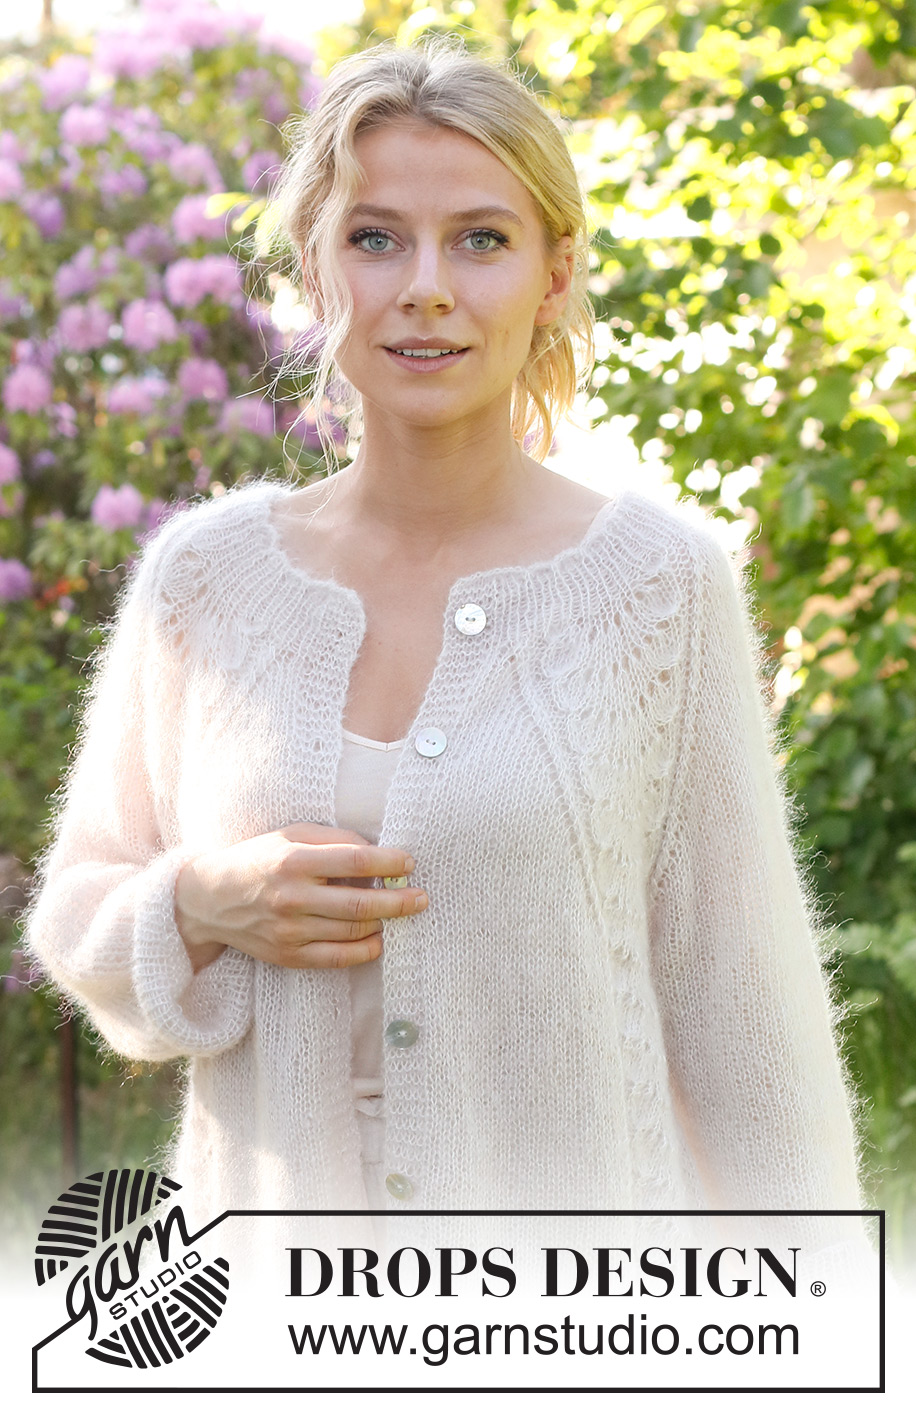
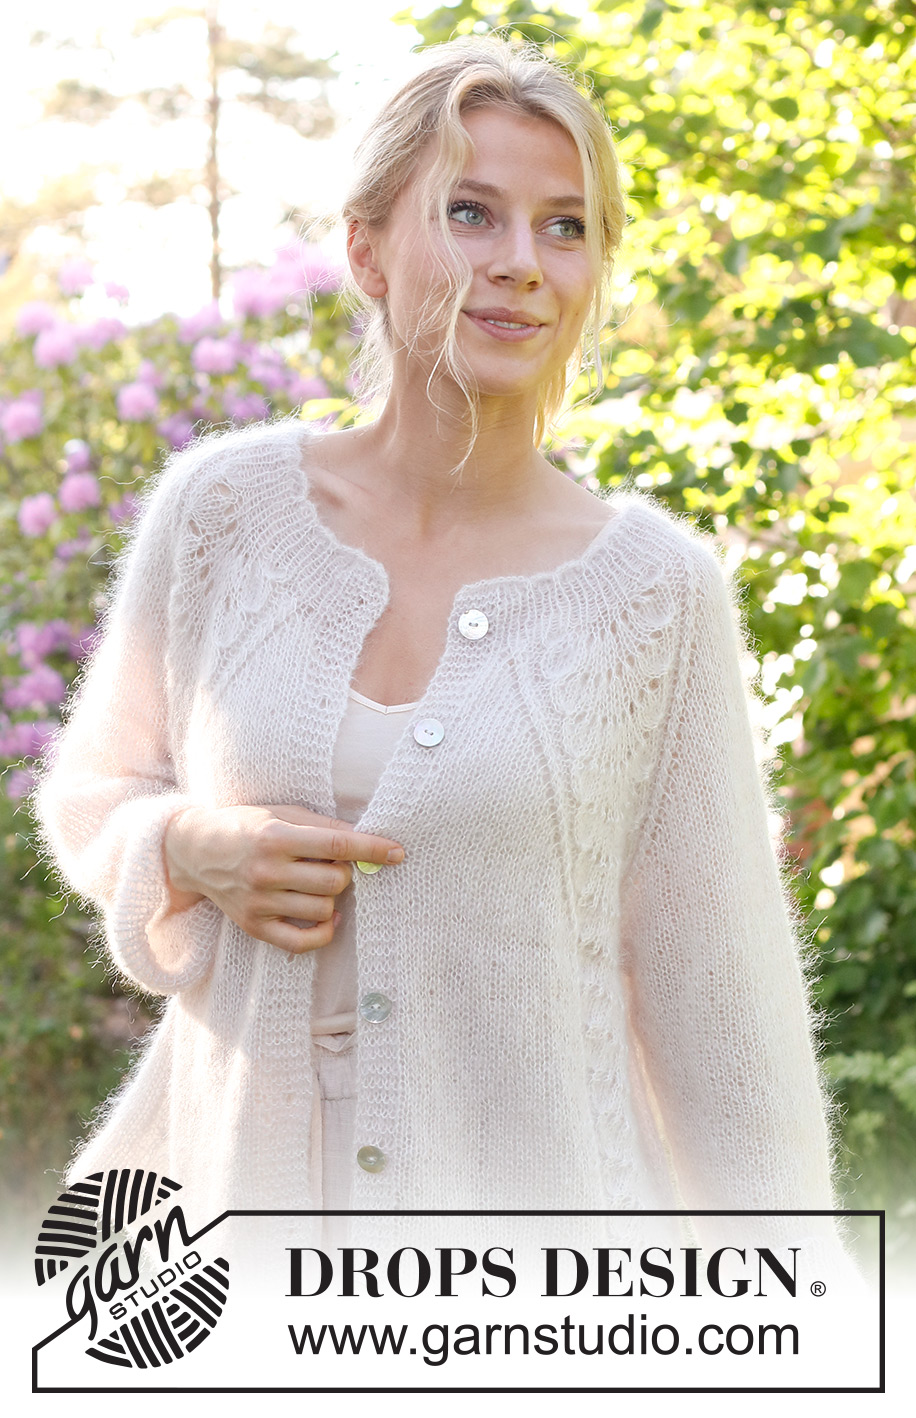
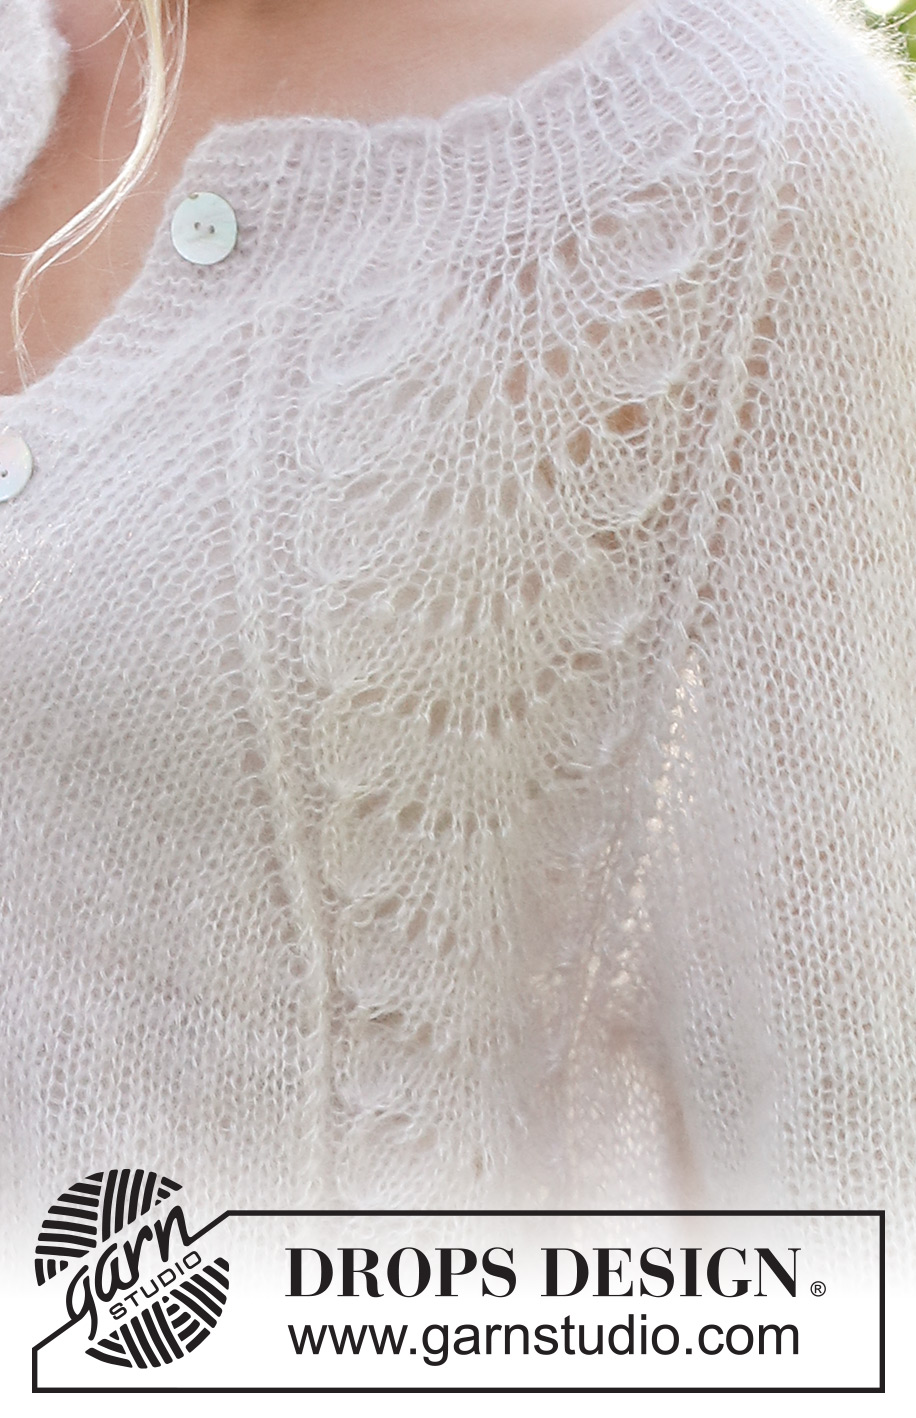
Wave Romance Cardigan#waveromancecardigan |
|||||||||||||||||||||||||
 |
 |
||||||||||||||||||||||||
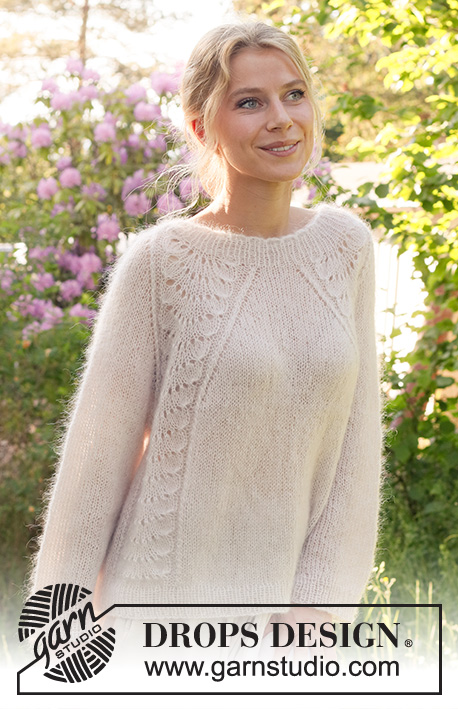
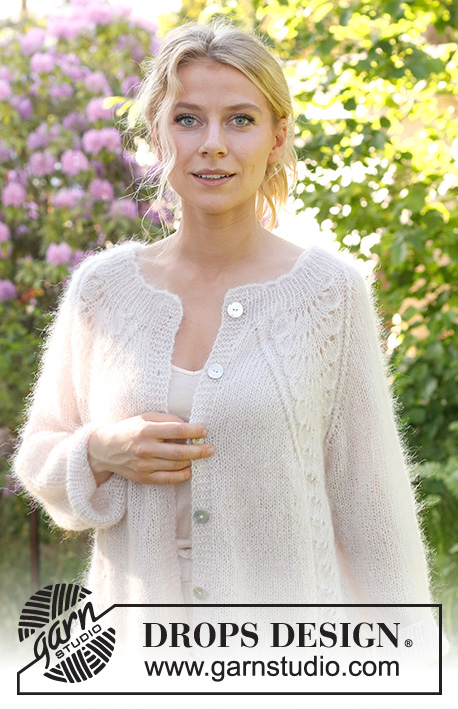
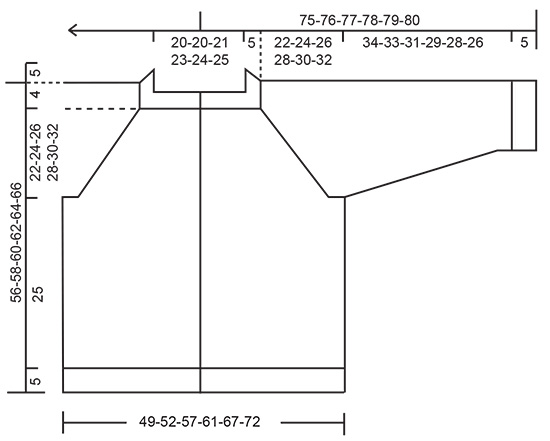
Knitted jacket in 2 strands DROPS Kid-Silk. The piece is worked top down with raglan and wave-pattern. Sizes S - XXXL.
DROPS 232-4 |
|||||||||||||||||||||||||
|
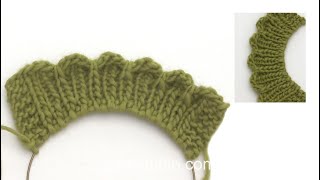
------------------------------------------------------- EXPLANATIONS FOR THE PATTERN: ------------------------------------------------------- RIDGE/GARTER STITCH (worked back and forth): Knit all rows. 1 ridge = knit 2 rows. PATTERN: See diagrams A.1 and A.2. The diagrams show all rows in the pattern from the right side. RAGLAN: All increases are worked from the right side! Increase in each transition between the body and sleeves by increasing before/after A.1/A.2. Increases are different on the body and sleeves, so sometimes you increase 8 stitches other times 4 stitches on the increase-row. Increase 1 stitch by making 1 yarn over. On the next row (wrong side) purl the yarns over twisted to avoid holes. Then work the new stitches in stockinette stitch. DECREASE TIP (for sleeves): Work until there are 3 stitches left before the marker, knit 2 together, knit 2 (marker sits between these 2 stitches), slip 1 stitch as if to knit, knit 1 and pass the slipped stitch over the knitted stitch. BUTTONHOLES: Work buttonholes on the right band (when the garment is worn). 1 buttonhole = When there are 3 stitches left on a row from the right side, make 1 yarn over. On the next row (wrong side), knit the yarn over to leave a hole and then knit 2 together. The first buttonhole is worked when the rib on the neck measures 3 cm = 1⅛". Then work the other 5-5-6-6-7-7 buttonholes with approx. 9-10-8½-9-8-8½ cm = 3½"-4"-3¼"-3½"-3⅛"-3¼" between each one. ------------------------------------------------------- START THE PIECE HERE: ------------------------------------------------------- JACKET – SHORT OVERVIEW OF THE PIECE: The neck and yoke are worked back and forth with circular needle, from mid-front and top down. The yoke is divided for body and sleeves and the body is continued back and forth. The sleeves are worked in the round with double pointed needles, top down. NECK WITH WAVY EDGE: Cast on 101-101-105-109-113-117 stitches with circular needle size 4 MM = US 6 and 2 strands DROPS Kid-Silk. Purl 1 row from the wrong side, then work as follows from the right side: 6 band stitches in GARTER STITCH – read description above, * knit 1 purl 1 *, work from *-* until there are 7 stitches left, knit 1 and 6 band stitches in garter stitch. Continue this rib for 3 more rows. Work the next row as follows from the right side: 6 band stitches in garter stitch, knit 1, * purl 1, knit 1, purl 1, take the right needle from the front of work and under the cast on edge, use right needle to lift the outermost stitch from left needle to the right needle, then take the right needle back around under the cast on edge (only the outermost stitch on the right needle is wrapped around the cast on edge), place this stitch back on left needle and knit the stitch (make sure the stitch is not twisted) *, work from *-* until there are 6 stitches left and work 6 band stitches in garter stitch. The neck now has small waves along the cast-on edge. Continue the rib as before with knit 1, purl 1 until the rib measures 5 cm = 2" after the waves – remember the BUTTONHOLES on the right band – read description above. AT THE SAME TIME on the last row, increase 6-6-2-2-2-2 stitches evenly spaced = 107-107-107-111-115-119 stitches. When the rib is finished insert a marker after the band at the beginning of the row – the yoke is measured from this marker! YOKE: Change to circular needle size 5 MM = US 8. Work as follows from the right side: 6 band stitches in garter stitch, 1-1-1-2-3-4 stitches in stockinette stitch, A.1 (front piece), * 1 yarn over, knit 1 *, work from *-* 2 more times, 1 yarn over (sleeve), A.1, 3-3-3-5-7-9 stitches in stockinette stitch, A.1 (back piece), * 1 yarn over, knit 1 *, work from *-* 2 more times, 1 yarn over (sleeve), A.1, 1-1-1-2-3-4 stitches in stockinette stitch and 6 band stitches in garter stitch (front piece). There are 131-131-131-135-139-143 stitches on the needle. Work this pattern back from the wrong side, but without increasing on the sleeves; the 4 yarn overs from the previous row are purled twisted to avoid holes. REMEMBER THE KNITTING GAUGE! OVERVIEW OF THE NEXT SECTION – read the whole section before continuing. Continue the pattern with 6 band stitches in garter stitch on each side. When A.1 has been worked 1 time in height, work A.2 over the 25 stitches in A.1. Then repeat A.2 in height. AT THE SAME TIME on row 3 in A.1 start to increase to RAGLAN as explained below. RAGLAN: Increase for RAGLAN by increasing 1 stitch before/afterA.1/A.2 – read description above. The increases on the front/back pieces and sleeves differ as follows: FRONT/BACK PIECES: Increase every 2nd row (each row from the right side) a total of 10-15-19-22-25-30 times, then every 4th row 6-4-3-3-3-1 times. SLEEVES: Increase every 2nd row (each row from the right side) a total of 21-23-25-29-30-31 times. When all the increases are finished there are 279-299-319-351-371-391 stitches. Continue working without further increases until the piece measures 22-24-26-28-30-32 cm = 8¾"-9½"-10¼"-11"-11¾"-12½" from the marker. Now divide for the body and sleeves: Work the first 48-51-54-58-62-66 stitches (front piece), place the next 49-53-57-65-67-69 stitches on a thread for the sleeve, cast on 6-6-8-8-10-10 stitches (in side under the sleeve), work 85-91-97-105-113-121 stitches (back piece), place the next 49-53-57-65-67-69 stitches on a thread for the sleeve, cast on 6-6-8-8-10-10 stitches (in side under the sleeve), work the last 48-51-54-58-62-66 stitches (front piece). The body and sleeves are finished separately. The piece is now measured from here! BODY: = 193-205-221-237-257-273 stitches. Work A.2, stockinette stitch and 6 band stitches in garter stitch on each side as before – the 6-6-8-8-10-10 stitches cast on under each sleeve are worked in stockinette stitch. Work until the body measures 25 cm = 9¾" from the division – make sure you have 3 or 5 rows of stockinette stitch after a row of yarn overs/decreases in A.2. Knit 1 row from the right side where you increase 18-20-22-24-26-26 stitches evenly spaced (do not increase over the bands) = 211-225-243-261-283-299 stitches. Change to circular needle size 4 MM = US 6 and work as follows from the wrong side: 6 band stitches in garter stitch, * purl 1, knit 1 *, work from *-* until there are 7 stitches left, purl 1 and 6 band stitches in garter stitch. Continue this rib for 5 cm = 2". Bind off a little loosely. The jacket measures approx. 56-58-60-62-64-66 cm = 22"-22¾"-23⅝"-24⅜"-25¼"-26" from the shoulder down. SLEEVES: Place the 49-53-57-65-67-69 stitches from the thread on the one side of the piece on short circular needle/double pointed needles size 5 MM = US 8 and knit up 1 stitch in each of the 6-6-8-8-10-10 stitches cast on under the sleeve = 55-59-65-73-77-79 stitches. Insert a marker in the middle of the 6-6-8-8-10-10 stitches under the sleeve. Allow the marker to follow your work onwards; it will be used when decreasing under the sleeve. Start at the marker and work stockinette stitch in the round for 4-4-3-3-2-2 cm = 1½"-1½"-1⅛"-1⅛"-¾"-¾". Now decrease 1 stitch on each side of the marker – read DECREASE TIP. Decrease like this every 5-4-3-2-2-1½ cm = 2"-1½"-1⅛"-¾"-¾"-½" a total of 6-7-9-12-13-13 times = 43-45-47-49-51-53 stitches. Continue working until the sleeve measures 34-33-31-30-28-26 cm = 13⅜"-13"-12¼"-11¾"-11"-10¼" from the division. Knit 1 round where you increase 3 stitches evenly spaced = 46-48-50-52-54-56 stitches. Change to double pointed needles size 4 MM = US 6. Work rib (knit 1, purl 1) for 5 cm = 2". Bind off a little loosely. The sleeve measures approx. 39-38-36-35-33-31 cm = 15¼"-15"-14¼"-13¾"-13"-12¼". Work the other sleeve in the same way. ASSEMBLY: Sew the buttons onto the left band. |
|||||||||||||||||||||||||
Diagram explanations |
|||||||||||||||||||||||||
|
|||||||||||||||||||||||||
 |
|||||||||||||||||||||||||
 |
|||||||||||||||||||||||||
Have you finished this pattern?Tag your pictures with #dropspattern #waveromancecardigan or submit them to the #dropsfan gallery. Do you need help with this pattern?You'll find 33 tutorial videos, a Comments/Questions area and more by visiting the pattern on garnstudio.com. © 1982-2026 DROPS Design A/S. We reserve all rights. This document, including all its sub-sections, has copyrights. Read more about what you can do with our patterns at the bottom of each pattern on our site. |
|||||||||||||||||||||||||


With over 40 years in knitting and crochet design, DROPS Design offers one of the most extensive collections of free patterns on the internet - translated to 17 languages. As of today we count 324 catalogs and 12290 patterns - 12280 of which are translated into English (US/in).
We work hard to bring you the best knitting and crochet have to offer, inspiration and advice as well as great quality yarns at incredible prices! Would you like to use our patterns for other than personal use? You can read what you are allowed to do in the Copyright text at the bottom of all our patterns. Happy crafting!
Post a comment to pattern DROPS 232-4
We would love to hear what you have to say about this pattern!
If you want to leave a question, please make sure you select the correct category in the form below, to speed up the answering process. Required fields are marked *.