
Popular categories
Looking for a yarn?


Comments / Questions (61)
![]() Demange wrote:
Demange wrote:
Je vous remercie pour votre réponse rapide. J\'ai bien compris maintenant. Mon autre question est : peut-on faire ce modèle avec des aiguilles droites et non des circulaires car je n\'avais pas vu (ce n\'est pas spécifié dans les aiguilles demandées) et je n\'en ai pas, je n\'ai que des aiguilles droites ?
26.06.2024 - 13:59DROPS Design answered:
Bonjour Mme Demange, dans la mesure où on tricote le dos et les devants en une seule pièce et en allers et retours, vous pouvez tout à fait utiliser des aiguilles droites (retrouvez ici plus d'infos sur les aiguilles circulaires). Bon tricot!
26.06.2024 - 16:02
![]() DEMANGE wrote:
DEMANGE wrote:
Bonjour, je ne comprends pas le point fantaisie : lorsque l\\\'on passe la maille glissée sur la maille tricotée, cela fait une maille en moins et la maille se trouve sur l\\\'aiguille droite. En la tricotant à nouveau, à la fin du rang, on a la moitié des mailles. Si je la reprends et que je la retricote en faisant une augmentation, le rang est très lâche et cela fait des trous... Merci de votre aide.
25.06.2024 - 18:19DROPS Design answered:
Bonjour Mme Demange, la maille glissée sera ensuite tricotée à l'endroit, dans cette vidéo, nous montrons comment tricoter ce point, ceci devrait pouvoir vous aider. Pensez à bien conserver la même tension que pour votre échantillon, ajustez la taille des aiguilles si besoin. Bon tricot!
26.06.2024 - 07:39
![]() Jo wrote:
Jo wrote:
Hi! when in the pattern says " After 1 cm [3/8"], inc 2 sts at each marker 5 times every 7-8-10 rows - inc 2 sts beside each other and knit them into the pattern = 240-264-292 sts. " what do the 5 times mean?? from what i understand, i have 2 stich markers and you increase 2 stiches in each side of the marker, but i got lost with the 5 times every 8 (size M) times.......
05.12.2023 - 19:38DROPS Design answered:
Dear Jo, work (1 row increasing 4 sts, then work 7 rows), and repeat these 8 rows 4 more times = you will have increased 20 sts (4 sts 5 times every 8th row), so that you get 220 + 20 = 240 sts. Happy knitting!
06.12.2023 - 08:15
![]() Jo wrote:
Jo wrote:
Hi! Im just starting knitting and i am already a crocheter, so i thought this would be a good transitioning projet to work with some leftover yarn. Do you think i can make this top using a more simple knit stich instead of the garter stich? maybe like stockinette, wich i have no difficults with? and if so would there be any changes on the decreases ond increases? thanks!
14.11.2023 - 22:53DROPS Design answered:
Dear Jo, you should have then the correct tension as given (28 sts x 36 rows = 10 x10cm) but you might have to make some more adjustements, but we are unfortunately not able to adjust every pattern to every single request, thanks for your comprehension. Your DROPS store or any knitting forum might be able to help you. Happy knitting!
15.11.2023 - 08:14
![]() Ditte Luise wrote:
Ditte Luise wrote:
Har meget svært ved at lure hvordan det skal gøres og forståes Samtidig efter 1 cm tages der 2 m ud ved mærketrådene i hver side 5 gange på hver 7.-8.-10. p - tag 2 m ud ved siden af hinanden og strik dem ind i mønsteret således at mønsteret fortsat går op = 240-264-292 m.
21.07.2023 - 09:00DROPS Design answered:
Hei Ditte. Når du kommer frem til merketråden, bruk venstre pinne og løft opp tråden (forfra) som er mellom pinnene. Bruk nå høyre pinne og strikk 1 maske i bakre maskebue, ikke slipp masken av venstre pinne, men strikk nå 1 maske i fremfre maskebue, slipp masken av venstre pinne. Du har nå 2 nye masker på høyre pinne. På neste rad (fra vrangen strikkes disse maskene vrang og på neste pinne fra retten, strikkes disse 2 nye maskene inn i mønstret. Gjør det samme ved den andre merketråden. mvh DROPS Design
27.07.2023 - 08:57
![]() Sandrine wrote:
Sandrine wrote:
J'aurais une autre question. La réalisation dit de commencer par les fleurs au crochet. Est-il possible de commencer par le tricot et ensuite d'y accrocher les fleurs ?
21.02.2023 - 20:35DROPS Design answered:
Bonjour Sandrine, fort probablement, dans ce modèle, on relève les mailles le long des carrés, mais si vous préférez tricoter d'abord et coudre les carrés ensuite, pourquoi pas, attention toutefois à bien avoir les bonnes mesures qui correspondront - la largeur tricot des mailles montées au lieu d'être relevées et celle des carrés (l'avantage de relever les mailles est de pouvoir ajuster plus facilement, à vous de voir comment vous préférez procéder pour votre taille). Bon tricot!
22.02.2023 - 08:38
![]() Sandrine wrote:
Sandrine wrote:
Bonjour, Je vois que vous indiquez le même nombre de pelote pour toutes les tailles est -ce normal ? Aussi j'aurais voulu savoir, si on augmente le nombre de mailles pour une taille plus grande est-ce qu'on a besoin d'une fleur au crochet supplémentaire ? Merci
21.02.2023 - 11:26DROPS Design answered:
Bonjour Sandrine, oui la quantité est juste, pensez juste à bien vérifier votre échantillon - si vous voulez faire une taille en plus, il vous faudra alors probablement plus de fils - et il vous faudra adapter également le nombre de mailles du dos/des devants en conséquence. Bon tricot!
21.02.2023 - 17:41
![]() Ulrike wrote:
Ulrike wrote:
Hallo, wenn ich die 1. Masche wie beim links abheben, die 2. Masche rechts stricken, dann die abgehobene Maschen über die 1. Masche ziehen, und diese Masche wieder auf linken Nadeln um diese Masche "normal" rechts zu Stricken, dann habe ich doch eine Masche zu wenig gestrickt. Ich stricke doch die abgehobene Masche mit der rechten Masche auf der linken Nadel zusammen - oder wann stricke ich die beiden Maschen?
08.07.2022 - 09:09DROPS Design answered:
Liebe Ulrike, die 1. Masche (= die abgehobene Masche) sollen Sie dann nach der 2. Masche stricken. Dieses Video zeigt, wie man das Muster strickt und wird Ihnen damit helfen. Viel Spaß beim stricken!
08.07.2022 - 10:11
![]() Marie-Andrée Gratton wrote:
Marie-Andrée Gratton wrote:
Bonjour, Boutonnières au crochet. Avez-vous un tutoriel pour cette étape? Je pense qu'il serait bien utile. De plus, dans les explications on dit de continuer tout autour de l'encolure mais on est rendu en bas avec la dernière boutonnière. Merci
26.06.2022 - 15:39DROPS Design answered:
Bonjour Mme Gratton, on crochète d'abord un rang sur l'envers le long du devant droit, avec des mailles serrées en répartissant les boutonnières (= faites juste 5 mailles en l'air et sautez 1 cm avant de continuer en mailles serrées), puis au 2ème rang (= sur l'endroit), crochetez en commençant en bas du devant droit, le long de l'encolure en descendant le long du devant gauche. Bon crochet!
27.06.2022 - 08:38
![]() Sima wrote:
Sima wrote:
Bonjour; sur ce modèle vous avez écris, comme je fais la taille S, mettre un marqueur après 55 m et 1 autre après 165 le total des m étant 220 le compte y est; mais le marqueur est entre les 2 mailles à tricoter en point fantaisie du cou j'ai pas compris comment faire . Est ce qu'il faut que je déplace le marqueur pour travailler mes 2 m. De même après 165m le marqueur comment se feront les augmentations. Merci beaucoup.
31.05.2022 - 14:07DROPS Design answered:
Bonjour Sima, vous devez augmenter de chaque côté du marqueur, autrement dit, augmentez (avec cette technique par exemple) avant le marqueur puis après le marqueur, et répétez au 2ème marqueur, laissez le marqueur en place pour ne pas le décaler. Bon tricot!
31.05.2022 - 17:04
|
|
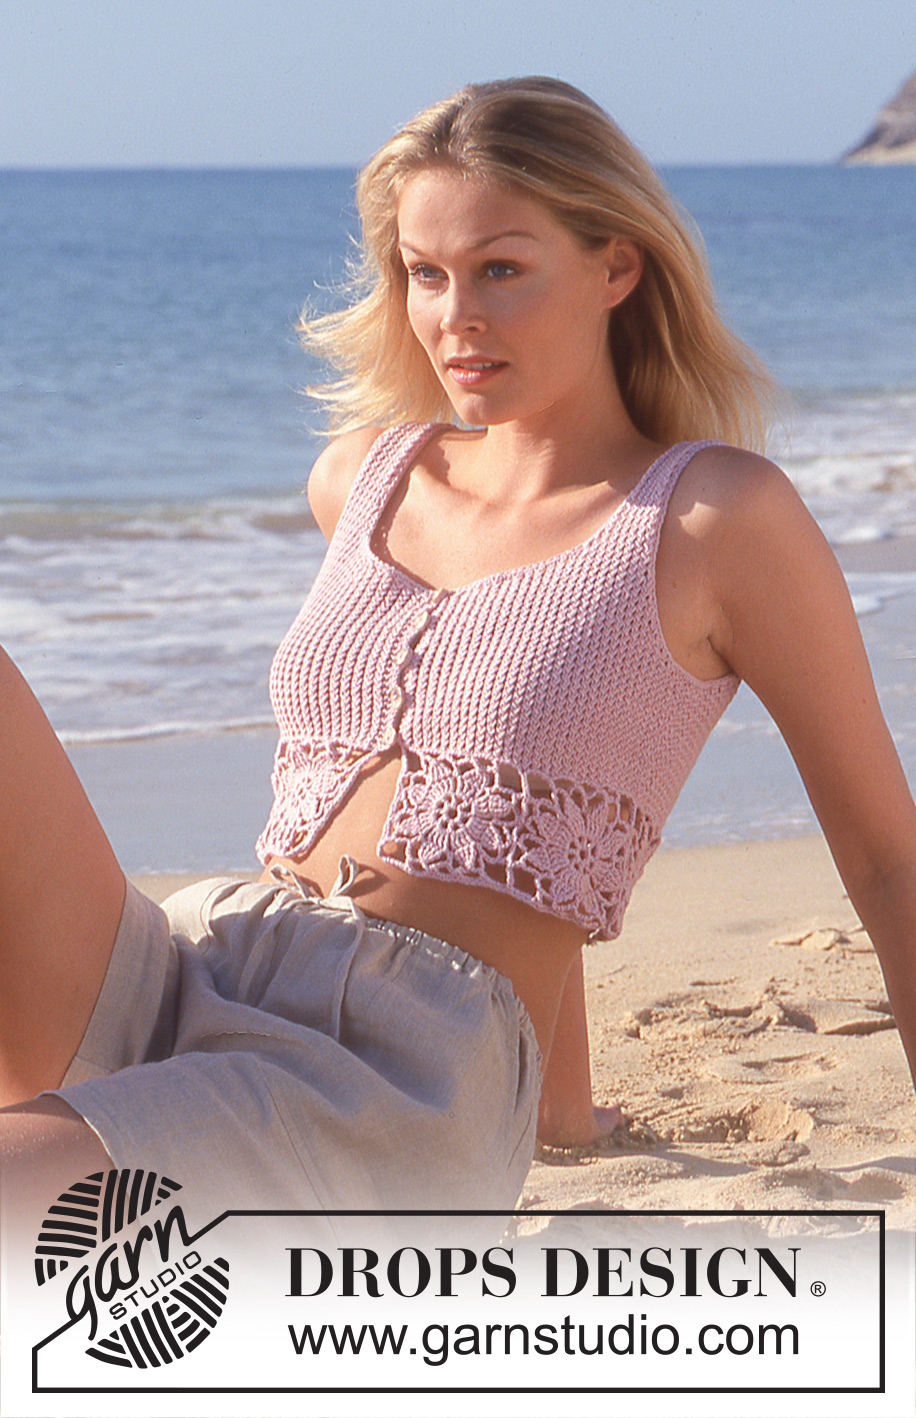
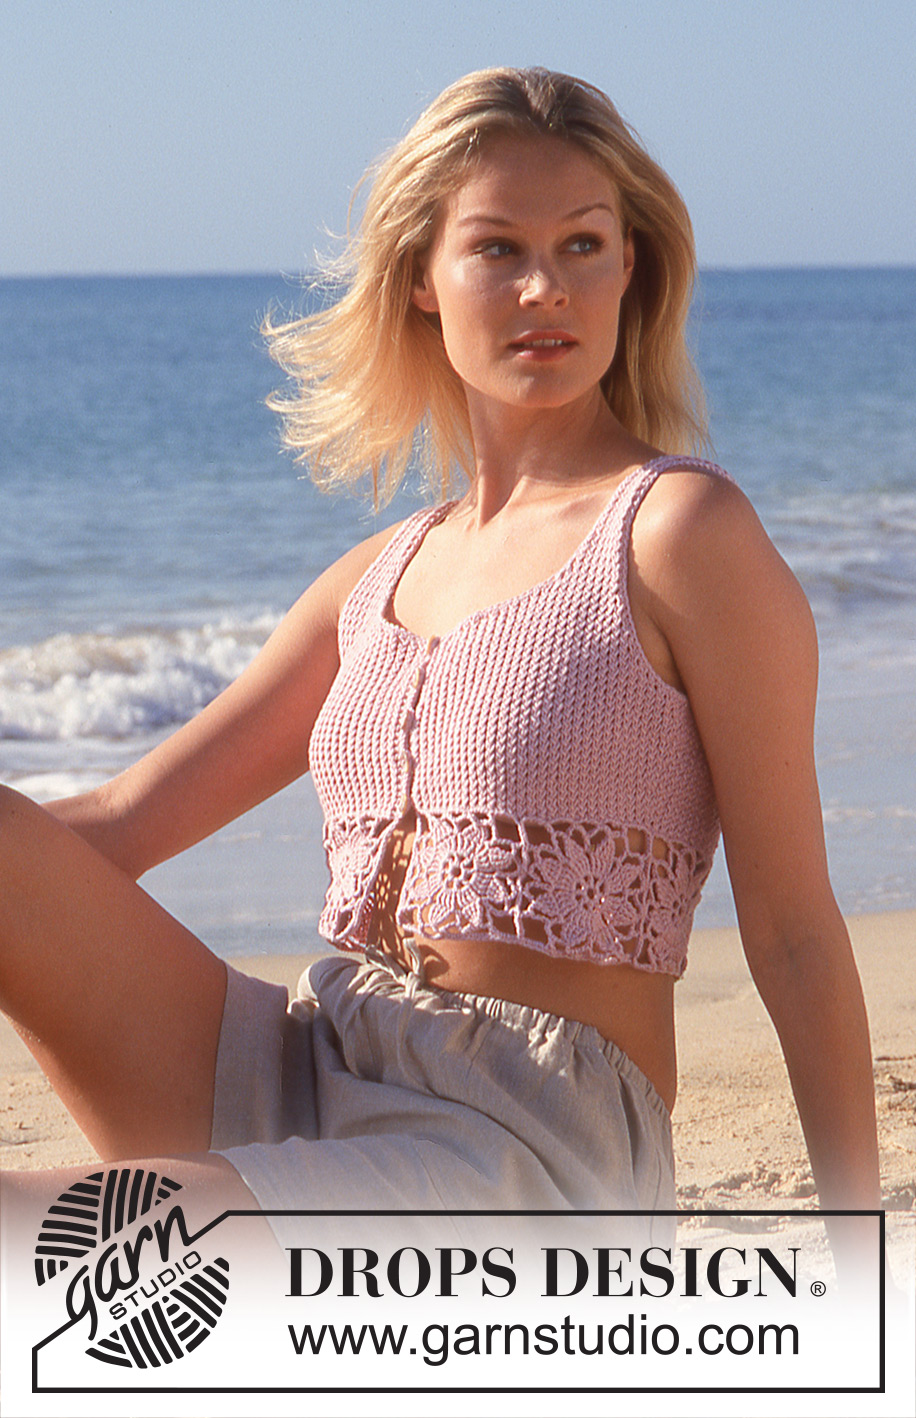
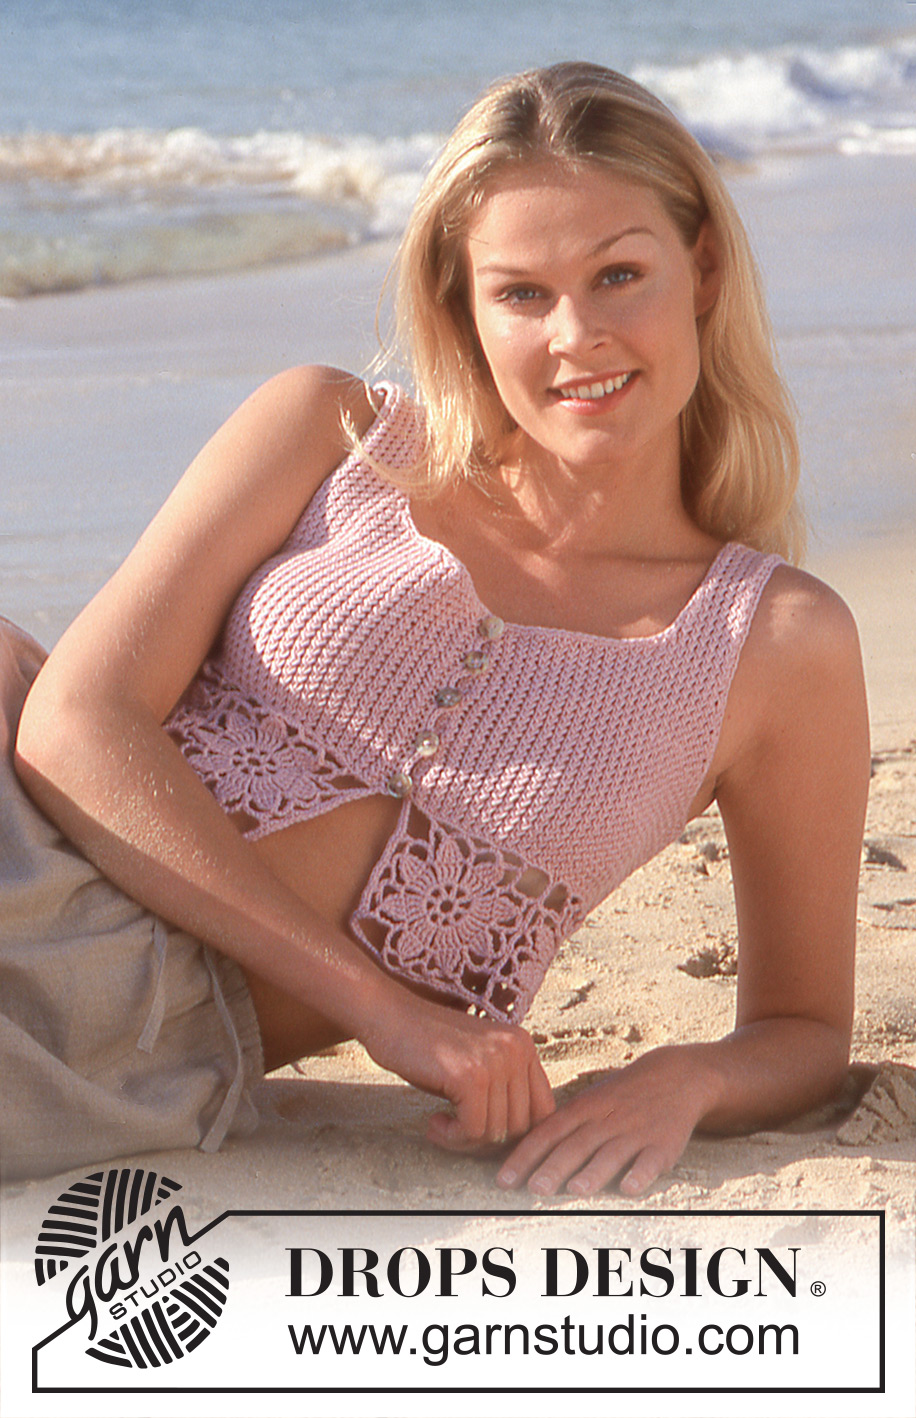
Beachside Garden#beachsidegardentop |
|
 |
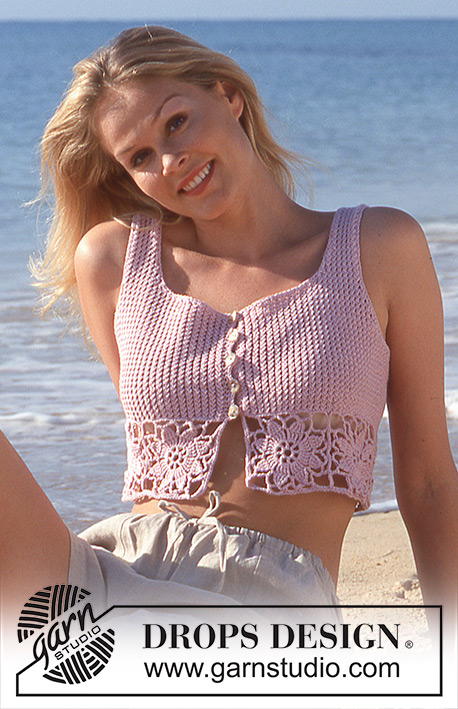 |
DROPS Short top in Safran with crocheted flower squares.
DROPS 64-8 |
|
|
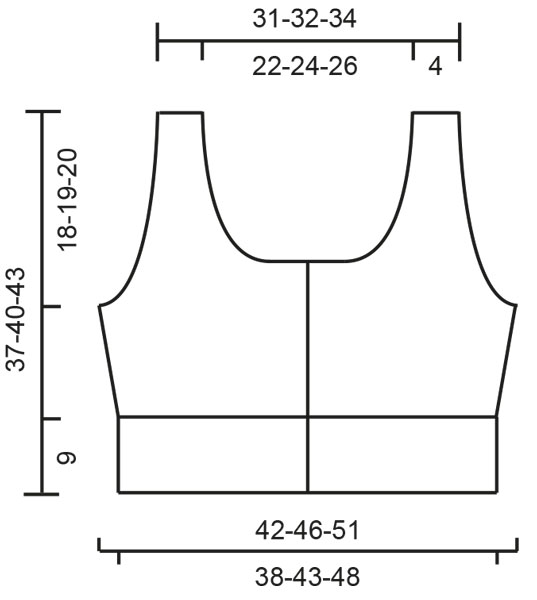
KNITTING GAUGE: 26 stitches in width and 34 rows in height in stocking stitch = 10 x 10 cm [4" x 4"] 28 stitches in width x 36 rows in height in pattern = 10 x 10 cm. [4" x 4"] NOTE: Needle size is only a guide. If you get too many stitches on 10 cm [4"], change to a larger needle size. If you get too few stitches on 10 cm [4"], change to a smaller needle size. Crochet gauge: One flower square measures approx. 9.5 x 9.5 cm [3.75" x 3.75"] PATTERN: Pattern is divisible by 2. Row 1: * slip one st as if to K, K 1, pass the slipped st over 1 K and leave the slipped st on left needle, K the slipped st *, repeat from *-*. Row 2: K2, purl all stitches and finish with K2. Repeat 1st and 2nd row Garter st, when knitting flat: Knit all sts, all rows. Knitting tip: All decs are made on right side rows, inside 1 edge st which is knit in garter st throughout. Dec 2 sts as follows: After 1 edge st: Slip 1, K 2 tog, pass the slipped st over (psso). Before 1 edge st: K 3 tog. Dec 1 st as follows: After 1 edge st: Slip 1, K 1, psso. Before 1 edge st: K 2 tog. Crocheted flower square: Chain 8 and join them into a ring with 1 slip st. Row 1: * 1 double crochet (dc) (the first dc is replaced by ch 3), ch 2 *, repeat from * - * 8 times, join with a slip st into the first dc. Row 2: * 4 trebles (the first treble is replaced by ch 4 around the ch st bow, ch 2 *, repeat from * - * 8 times, join with a slip st in the first treble. Row 3: * 4 trebles in the 4 trebles from the previous row (the first treble is replaced by ch 4) -- but keep the last loop of each on the hook until all trebles have been crocheted, then pull the yarn through all sts on the crochet hook (4 sts become 1), ch 6, 1 treble around the ch 2 from the preceding row, ch 6 *, repeat from * - * 8 times, join with a slip st in the first treble group. Row 4: Slip st to the center of the ch st bow, ch 1, 1 single crochet (sc) around the ch st bow, * ch 5, 1 sc around the next ch st bow, ch 5, 1 dc around the next ch st bow, ch 10, 1 dc around the next ch st bow (= corner), ch 5, 1 sc around the next ch st bow *, repeat from * - * a total of 3 times, then ch 5, 1 sc around the next ch st bow, ch 5, 1 dc around the next ch st bow, ch 10, 1 dc around the next ch st bow (= corner), ch 5, join with a slip st in the first sc. Top: Crochet 8-9-10 flower squares - see instructions above. Join together into a long strip - sew in the edge sts. Pick up and knit 220-244-272 sts in the upper ch st round on the crocheted strip. Attach 1 marker in the work after 55-61-68 sts and 1 marker after 165-183-204 sts. Knit Pattern - see instructions above, but keep the 2 edge sts at each side (center front) in garter st throughout. After 1 cm [⅜"], inc 2 sts at each marker 5 times every 7-8-10 rows - inc 2 sts beside each other and knit them into the pattern = 240-264-292 sts. When the work measures 19-21-23 cm [7.5"-8.25"-9"], knit the next row as follows: 57-62-68 sts for the front, bind off 8-10-12 sts for armhole, 110-120-132 sts for the back, bind off 8-10-12 sts for armhole, 57-62-68 sts for the front. Knit the rest of each part separately. Right Front: = 57-62-68 sts. Keeping the armhole edge st in garter st, dec for armholes every other row - see Knitting tip - 2 sts 3-5-6 times, 1 st 6-5-6 times = 45-47-50 sts. When the work measures 23-24-26 cm [9"-9.5"-10.25"], bind off 24-26-29 sts at the center front for neck opening. Keeping the center front edge st in garter st, dec at the neck edge every other row - see Knitting tip - 2 sts 3 times, 1 st 3 times = 12-12-12 sts remain on each shoulder. Continue by knitting Pattern, but keep 1 st at each side in garter st. Bind off when the work measures 37-40-43 cm [14.5"-15.75"-16⅞"]. Left Front: Knit like the right front, but reverse all shaping. Back: 110-120-132 sts. Keeping the armhole edge st in garter st, dec at each side for armholes as on the front = 86-90-96 sts. When the work measures 23-24-26 cm [9"-9.5"-10.25"], bind off the center 44-48-54 sts for neck opening. Keeping each neck edge st in garter st, dec at each neck edge every other row - see Knitting tip: 2 sts 3 times, 1 st 3 times = 12-12-12 sts remain on each shoulder. Continue knitting Pattern, but keep 1 st at each side in garter st throughout. Bind off when the work measures 37-40-43 cm [14.5"-15.75"-16⅞"]. Assembly: Sew the loops on the shoulders together. Crochet around the armhole: 1 row of single crochet (sc) inside 1 edge st. Make 5 buttonholes evenly distributed along the right front edge - the top buttonhole at the very top, the lowest just before the flower squares begin. Crochet inside the 2 edge sts -- begin at the very top as follows: Row 1: ch 5, skip over 1 cm [⅜"] (= 1 buttonhole), sc until the next buttonhole. Row 2: 4 sc around the ch st loop (buttonhole) and slip st between the buttonholes. After row 2: Continue to work sc around the neck opening, down along the left front and around the entire crocheted flower border. Sew on the buttons. |
|
 |
|
Have you finished this pattern?Tag your pictures with #dropspattern #beachsidegardentop or submit them to the #dropsfan gallery. Do you need help with this pattern?You'll find 27 tutorial videos, a Comments/Questions area and more by visiting the pattern on garnstudio.com. © 1982-2026 DROPS Design A/S. We reserve all rights. This document, including all its sub-sections, has copyrights. Read more about what you can do with our patterns at the bottom of each pattern on our site. |
|


With over 40 years in knitting and crochet design, DROPS Design offers one of the most extensive collections of free patterns on the internet - translated to 17 languages. As of today we count 325 catalogs and 12298 patterns - 12288 of which are translated into English (US/in).
We work hard to bring you the best knitting and crochet have to offer, inspiration and advice as well as great quality yarns at incredible prices! Would you like to use our patterns for other than personal use? You can read what you are allowed to do in the Copyright text at the bottom of all our patterns. Happy crafting!
Post a comment to pattern DROPS 64-8
We would love to hear what you have to say about this pattern!
If you want to leave a question, please make sure you select the correct category in the form below, to speed up the answering process. Required fields are marked *.