
Popular categories
Looking for a yarn?


Comments / Questions (12)
![]() Antje Knopf wrote:
Antje Knopf wrote:
In dieser Anleitung ist ein Fehler. Es werden vor dem Verkreuzen 2 Maschen zugenommen. Dann aber nur 1 Masche wieder abgenommen. Das passt nicht mit dem Vollpatent-Muster.
27.10.2024 - 14:19DROPS Design answered:
Liebe Frau Knopf, es wird nur 1 Masche am Ende der 1. REIHE zugenommen, dh vor stilllegen; dann 1 Masche abgenommen. Viel Spaß beim Stricken!
28.10.2024 - 10:17
![]() Eline wrote:
Eline wrote:
Voor de hoofdband: je moet 10 steken opzetten maar de Engelse patentsteek heeft steeds drie stappen, dus op het einde heb ik een steek over waarmee ik niks weet te doen. Klopt dit? of lees ik het patroon fout?
23.04.2024 - 20:24DROPS Design answered:
Dag Eline,
Met de Engelse patentsteek maak je op de eerste naald eerst 1 omslag dan haal je 1 steek averecht af en brei je 1 recht. Voor deze herhaling heb je 2 steken nodig. Hetzelfde geldt voor de andere 2 naalden; je breit over een herhaling van 2 steken.
24.04.2024 - 11:18
![]() Paulina wrote:
Paulina wrote:
Dokładnie tak. Podzieliłam robótkę na dwie części i nie wiem co dalej. Nie rozumiem opisu.
05.05.2021 - 18:48DROPS Design answered:
Witaj Paulino, przerobiłaś 1-szą część robótki i nabrałaś 1 oczko. Pozostałe 5 oczek (narzuty nie są liczone jako oczka; czyli masz 5 oczek i 2 narzuty) zdejmujesz na drut pomocniczy. Obracasz robótkę i przerabiasz to nabrane oczko na prawo (jak trzeba to przekręć je, aby nie było dziurki) i dalej przerabiasz zgodnie z opisem w rzędzie 2. Pozdrawiamy!
06.05.2021 - 15:49
![]() Paulina wrote:
Paulina wrote:
Przy opisie opaski, nie rozumiem I rzędu. Gdy przerabiam po kolei jak w opisie, 1o. francuskie, potem narzut i oczko razem i potem narzut i nabranie oczka bez przerabiania zostają mi kolejne 3 oczka. Co mam z nimi zrobić. Oraz " jeszcze 1 raz, nabrać 1 oczko z nitki poprzecznej między 2 następnymi oczkami (= zostaje dodane 1 oczko). " Czy może zrobić właśnie to z tymi kolejnymi 3 oczkami ? I co to jest nitka poprzeczna ?
04.05.2021 - 20:51DROPS Design answered:
Witaj Paulino, jak nabrać oczko z nitki poprzecznej zobaczysz na początku filmu TUTAJ (najpierw przeczytaj krótki opis do filmu). Czy teraz jesteś w miejscu gdzie robótka została podzielona na 2 części i przerabiasz tylko 1-szą część (rząd 1)?
05.05.2021 - 17:48
![]() Gunn Elin wrote:
Gunn Elin wrote:
Greier ikke å forstå hvordan de to delene skal snurres slik at du får de sammen igjen. Hvordan skal jeg gå fram?
21.01.2021 - 19:35DROPS Design answered:
Hej Gunn, se gerne vores video: hvordan strikkes et pannebånd med flette midt foran
27.01.2021 - 14:55
![]() Zelina wrote:
Zelina wrote:
Je vous remercie pour vos explications.
23.12.2020 - 08:29
![]() Zelina wrote:
Zelina wrote:
Bonjour! Au moment de partager le tricot (bandeau) je dois bien avoir 14 mailles? Si oui, le motif est répété plus de 2 fois avant de mettre les 5 dernières mailles sur un arrêt de mailles.
22.12.2020 - 22:28DROPS Design answered:
Bonjour Zelina, avant de diviser l'ouvrage vous avez 10 mailles (les jetés ne comptent pas comme des mailles car ils sont faits au-dessus de la maille glissée), quand vous divisez l'ouvrage vous tricotez les 5 premières mailles et augmentez 1 m = 6 mailles, les 5 dernières mailles sont placées en attente. Vous tricotez ces 6 mailles en côtes anglaises comme avant, avec 1 maille lisière au point mousse de chaque côté pendant 5 rangs. Bon tricot!
23.12.2020 - 07:08
![]() Helene wrote:
Helene wrote:
Bonjour, je rencontre une difficulté pour le bandeau. Lorsque je termine les côtes anglaises, je fais le rang 1 indiqué. Après avoir reproduit deux fois *-*, je dois relever une maille entre les deux mailles. Pour cela, dois-je tricoter une maille end, faire une augmentation intercalaire puis de nouveau tricoter une maille end et enfin mettre les 5 mailles restantes sur mon arrêt de maille ? J'ai l'impression que cela ne coïncide pas avec le début du rang 2. Merci d'avance
22.12.2020 - 20:32DROPS Design answered:
Bonjour Hélène, relever le fil entre les 2 mailles suivantes et tricotez le torse à l'endroit, glissez les 5 dernières mailles en attente, tournez et tricotez maintenant les mailles de la première moitié en côtes anglaises en répétant 5 fois le 2ème rang, À la fin du 1er rang, vous avez terminé par (1 jeté, glissez 1 m à l'env) et 1 augmentation, tournez t tricotez l'augmentation à l'endroit, et *le jeté et la m glissée ensemble à l'endroit, faites 1 jeté et glissez la m suivante*, répétez encore 1 fois de *-* et terminez par 1 m end. Bon tricot!
23.12.2020 - 06:54
![]() Anna wrote:
Anna wrote:
Liebes Garnstudioteam, ich stricke gerade an dem Stirnband, habe 23cm gestrickt, aufgeteilt und den ersten Teil gestrickt. Jetzt möchte ich den zweiten Teil stricken, mein Faden ist aber ja oben an dem anderen Teil. Wie hole ich den wieder nach unten? Und wie gehe ich damit später um? Hat das etwas mit der Anweisung später, den Faden abzuschneiden und die Masche ziehen? Wo soll ich das noch festbinden? Danke im Voraus für die Antworten, Viele Grüße Anna
21.11.2020 - 22:45DROPS Design answered:
Liebe Anna, nach 23 cm stricken Sie die Maschen über das 1. Teil (die ubrigen Maschen sind stillgelegt) - nach 1. Teil fertig ist, wird der Faden abgeschnitten und jetzt stricken Sie das 2. Teil und dann die beiden Teile zusammen. Viel Spaß beim stricken!
23.11.2020 - 09:15
![]() Lone wrote:
Lone wrote:
Beskrivelsen af, hvordan skal forholde sig med snoningen er utrolig dårlig. Det ville have været rart med en instruktionsvideo vedr. dette.
11.02.2020 - 11:38
|
|
Wrap Around#wraparoundset |
|
 |
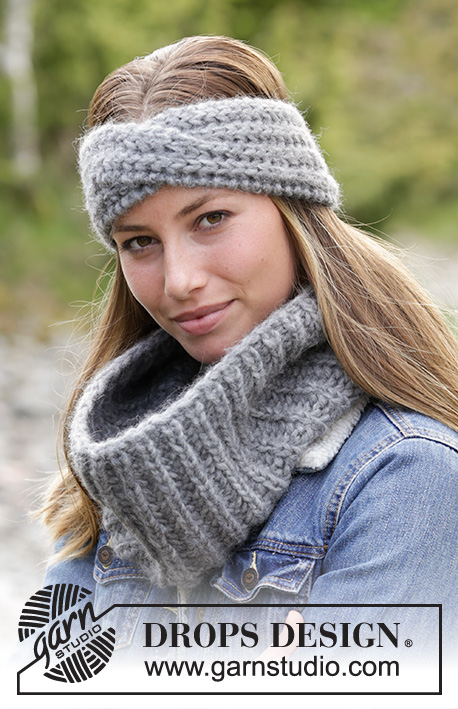 |
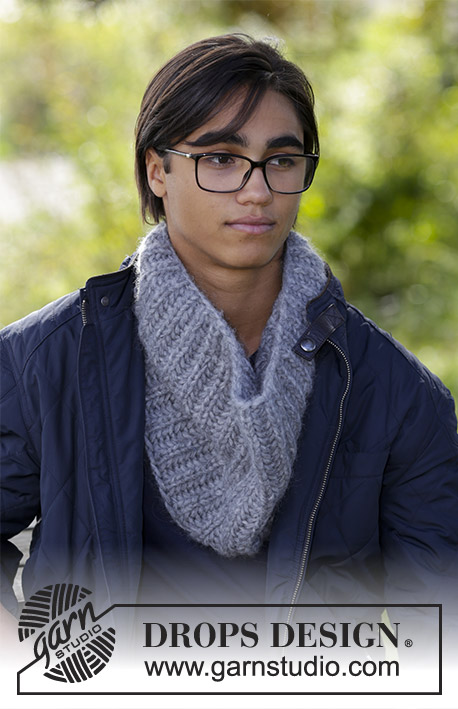
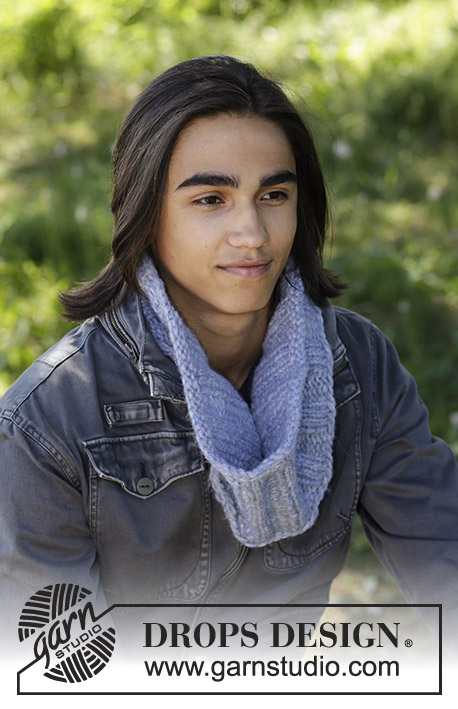
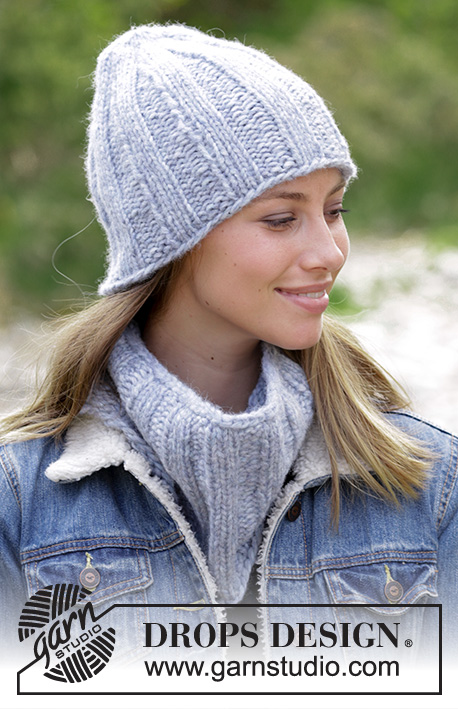
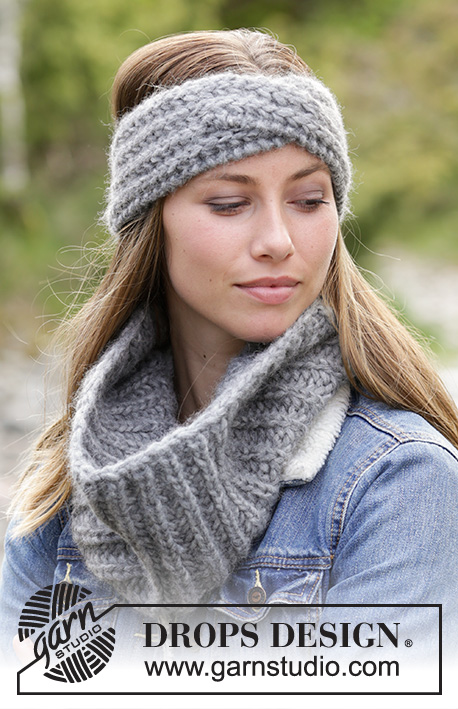
Set consists of: Knitted head band and neck warmer with English rib. Size S/M – L/XL. Piece is knitted in 2 strands DROPS Air.
DROPS 182-26 |
|
|
INFORMATION FOR PATTERN: DOUBLE YARN TIP: Use yarn from both inside and outside of the ball. When switching to a new ball, try to avoid switching both strands at the same time - to avoid a thick yarn when fastening. ENGLISH RIB (back and forth on needle - applies to head band): ROW 1 (= right side): Work 1 edge stitch in garter stitch, * knit 1, 1 yarn over, slip 1 stitch purlwise *, repeat from *-* until 1 stitch remains, finish with 1 edge stitch in garter stitch. ROW 2 (= wrong side/right side): Work 1 edge stitch in garter stitch, * knit yarn over and slipped stitch together, 1 yarn over, slip 1 stitch purlwise *, repeat from *-* until 1 stitch remains, finish with 1 edge stitch in garter stitch. Repeat 2nd row upwards. ENGLISH RIB (in the round on circular needle - applies to neck warmer): ROUND 1: * Make 1 yarn over, slip 1 stitch purlwise, knit 1 *, work from *-* the entire round. ROUND 2: * Purl together yarn over and slipped stitch, 1 yarn over, slip 1 stitch purlwise *, repeat from *-* the entire round. ROUND 3: * Make 1 yarn over, slip 1 stitch purlwise, knit together yarn over and slipped stitch *, repeat from *-* the entire round. Repeat rounds 2 and 3. ---------------------------------------------------------- HEAD BAND: Work piece back and forth on needle. Read DOUBLE YARN TIP! Cast on 10 stitches on needle size 10 mm / US 15 with 2 strands Air. Work ENGLISH RIB (back and forth) - see explanation above! REMEMBER THE GAUGE! When piece measures 21-23 cm / 8¼"-9", divide the piece in 2 and work back and forth over the first part as follows (1st row = right side): ROW 1: Work 1 edge stitch in garter stitch, * knit yarn over and slipped stitch together, 1 yarn over, slip 1 stitch purlwise *, repeat from *-* 1 more time, pick up 1 stitch in loop between the next 2 stitches (= 1 stitch increased). Slip the remaining 5 stitches on needle on a stitch holder. Turn piece. ROW 2 (= wrong side/right side): Work 1 edge stitch in garter stitch, * knit yarn over and slipped stitch together, 1 yarn over, slip 1 stitch purlwise *, work from *-* 1 more time, 1 edge stitch in garter stitch. Repeat 2nd row 4 more times. Work last row from wrong side. Slip stitches on another stitch holder. Slip stitches from first stitch holder back on needle. Work as follows from right side: ROW 1: * Knit yarn over and slipped stitch together, 1 yarn over, slip 1 stitch purlwise *, work from *-* 1 more time, 1 edge stitch in garter stitch. ROW 2: Work 1 edge stitch in garter stitch, * knit yarn over and slipped stitch together, 1 yarn over, slip one stitch purlwise *, work from *-* 1 more time, cast on 1 new stitch at the end for row = 6 stitches. Work the new edge stitch in garter stitch. Continue back and forth with English rib and 1 edge stitch in garter stitch in each side for 4 more rows. Slip stitches from stitch holder back on needle and place this part behind the other so that they cross. Work the first 5 stitches on needle, knit the next 2 stitches together (= last edge stitch on first part and first edge stitch on second part). Cut the yarn and pull it through the last stitch worked so that it does not unravel. Continue with English rib and finish with 1 edge stitch in garter stitch. Turn and repeat 2nd row in ENGLISH RIB - see explanation above, until piece measures 49-53 cm / 19¼"-21". Loosely bind off. ASSEMBLY: Sew head band tog mid back. Sew a couple of stitches mid front where the 2 parts cross. Fasten off. ---------------------------------------------------------- NECK WARMER: Worked in the round on circular needle. Read DOUBLE YARN TIP Loosely cast on 62-68 stitches on circular needle size 10 mm / US 15 with 2 strands Air. Work ENGLISH RIB (in the round on circular needle) - see explanation above. REMEMBER THE GAUGE! When piece measures 25-29 cm / 9¾"-11½", bind off with knit over knit and purl over purl. |
|
Have you finished this pattern?Tag your pictures with #dropspattern #wraparoundset or submit them to the #dropsfan gallery. Do you need help with this pattern?You'll find 13 tutorial videos, a Comments/Questions area and more by visiting the pattern on garnstudio.com. © 1982-2026 DROPS Design A/S. We reserve all rights. This document, including all its sub-sections, has copyrights. Read more about what you can do with our patterns at the bottom of each pattern on our site. |
|


With over 40 years in knitting and crochet design, DROPS Design offers one of the most extensive collections of free patterns on the internet - translated to 17 languages. As of today we count 324 catalogs and 12290 patterns - 12280 of which are translated into English (US/in).
We work hard to bring you the best knitting and crochet have to offer, inspiration and advice as well as great quality yarns at incredible prices! Would you like to use our patterns for other than personal use? You can read what you are allowed to do in the Copyright text at the bottom of all our patterns. Happy crafting!
Post a comment to pattern DROPS 182-26
We would love to hear what you have to say about this pattern!
If you want to leave a question, please make sure you select the correct category in the form below, to speed up the answering process. Required fields are marked *.