
Popular categories
Looking for a yarn?


Comments / Questions (47)
![]() Anja wrote:
Anja wrote:
Das Tuch soll "dünner" werden - das Wort fehlt in meiner Frage irgendwie...
05.12.2017 - 10:37
![]() Anja wrote:
Anja wrote:
Ich würde dieses Tuch gern mit einem Faden Drops Nepal stricken, sodass es wird, aber an sich dieselben Maße hat. Mein Plan ist, die Maschenzunahmen so lange zu wiederholen, bis, wie in der Anleitung geschrieben, das Tuch 81 cm lang ist und dann ebenso viele Abnahmen zu machen, um wieder auf die angegebenen 15 Maschen zu kommen. Müsste ich dann im Mittelteil mehr verkürzte Reihen stricken, damit sich der Zopf nicht spannt?
05.12.2017 - 10:35DROPS Design answered:
Liebe Anja, leider können wir nicht jeder unserer Anleitung nach jeder persönnlichen Anfrage anpassen. Gerne kann Ihnen Ihr DROPS Laden damit helfen. Viel Spaß beim stricken!
05.12.2017 - 11:22
![]() IOLANDA wrote:
IOLANDA wrote:
Continuare a lavorare e ad aumentare in questo modo FERRO 1 (= diritto del lavoro): Lavorare il diagramma A.1 sulle prime 12 m, lavorare 2 volte la prima m dopo il segno e lavorare le restanti m a dir (= 1 m aumentata). mi sono persa....scusate potete aiutarmi? esempio il ferro 15/16/17,...ecc grazie
22.11.2017 - 11:56DROPS Design answered:
Buongiorno Iolanda. Ferro 15: Ci sono 15 maglie. Sulle prime 12 maglie lavora il diag. A1, passa il segno, lavora poi la maglia successiva sia nel filo davanti che in quello dietro (1 maglia aumentata) e poi lavora le altre maglie a diritto = 16 maglie. Ferro 16: lavora 4 m a diritto, passa il segno, A.1 sulle ultime 12 m (lavora queste 12 m a rovescio). Ferro 17: A1 sulle prime 12 m, passa il segno, a diritto le altre 4 m. Ferro 18: come il 16. E così via. Buon lavoro!
22.11.2017 - 14:41
![]() IOLANDA wrote:
IOLANDA wrote:
Buongiorno, scusate la domanda non dsono molto brava con gli schemi. quando nella spiegazione dite lavorate il diagramma A1 si intende il motivo treccia giusto?in brave scusate ancor aogni quanti ferri bisogna lavorare il diagramma ?grazie
20.11.2017 - 18:53DROPS Design answered:
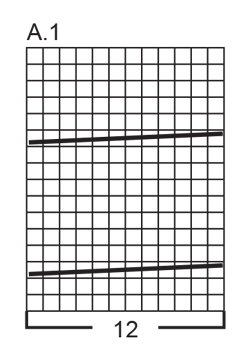
Buongiorno Iolanda, il diagramma A.1 è lavorato sulle prime 12 maglie sul diritto del lavoro e sulle ultime 12 maglie dal rovescio del lavoro. I diagrammi si leggono da destra verso sinistra e dal basso verso l'alto. Gli intrecci sono sul 3° e 11° ferro del diagramma. Buon lavoro!
21.11.2017 - 09:41
![]() Véronique wrote:
Véronique wrote:
Bonjour j'aimerai savoir par quelle qualité remplacer la Cloud puisqu'il s'agit d'une qualité supprimée merci d'avance
18.11.2017 - 14:38DROPS Design answered:
Bonjour Véronique, vous pouvez utiliser 2 fils Air pour conserver les mêmes caractéristiques de la laine ou bien une autre laine du groupe E (comme Cloud) ou 2 fils du groupe C (comme Air) - vous trouverez ici plus d'infos sur les alternatives . Bon tricot!
20.11.2017 - 08:57
![]() Paquerette Gagnon wrote:
Paquerette Gagnon wrote:
Je ne suis pas certaine de bien comprendre les rangs raccourcis, est que je dois tricoter: 8 rangs sur toutes les mailles, sans augmentation mais en continuant la torsade. Merci de me le confirmer rapidement car je suis rendu à ce point sur mon tricot.
08.05.2017 - 18:29DROPS Design answered:
Chere Parquerette! Il faut * Tricoter 2 rangs sur les 12 premières m de A.1, 2 rangs sur toutes les mailles comme avant mais ne pas augmenter*, répéter de *-* 3 fois au total, puis tricoter de nouveau 2 rangs sur les 12 m de A.1. En meme temps que vous travaillez sur toutes les mailles (sans augmentation), vous continuez la torsade. Bon tricot!
08.05.2017 - 19:51
![]() Paquerette Gagnon wrote:
Paquerette Gagnon wrote:
Je ne comprends pas comment faire le rang raccourci dans le modèle 172-10....SVP, j'aimerais avoir d'autres explications. Merci!
08.05.2017 - 16:27
![]() Helene wrote:
Helene wrote:
Bonjour! A la section des rgs raccourcis, vous indiquez de tricoter 2rgs sur les 12premières mailles de A1, 2rgs sur toutes les mailles comme avant mais ne pas augmenter. Je ne comprends pas est-ce que je dois reprendre les rgs de 1à 16. Je ne sais pas quoi faire. Pouvez-vous m'aider? Merci,
28.09.2016 - 13:53DROPS Design answered:
Bonjour Hélène, quand l'ouvrage mesure 81 cm, on ne répète plus les rangs 1-4 mais on tricote maintenant des rangs raccourcis: *2 rangs sur les 12 m de A1, 2 rangs sur toutes les mailles*, répétez de *-* 3 fois au total (= 12 rangs au total mais seulement 6 sur toutes les mailles) et terminez par 2 rangs sur les 12 m de A.1 - pendant ces 14 rangs, continuez A.1 comme avant (avec la torsade quand il faut), mais quand vous tricotez toutes les mailles, n'augmentez pas comme vous faisiez au rang 1 de la série des rangs 1-4. Bon tricot!
28.09.2016 - 14:38
![]() Helene wrote:
Helene wrote:
Bonjour, je voudrais vérifier avec vous à la section augmentation: le rang 2 (envers) tricoter à l'endroit jusqu'au marqueur et A1 sur toutes les 12 dernière mailles, ces 12 dernière mailles sont à l'envers si je comprends bien? Merci!
23.09.2016 - 02:08DROPS Design answered:
Bonjour Hélène, tout à fait, au rang 2, vous tricotez à l'end jusqu'au marqueur (la 1ère fois que vous tricotez le rang 2, vous avez 4 m end), puis les 12 m de A.1 à l'envers, comme indiqué dans le diagramme. Bon tricot!
23.09.2016 - 08:58
![]() Helene wrote:
Helene wrote:
Bonjour, j'ai tricoté la 1ère séquence d'augmentation(4rangs), on mentionne de répéter les rangs 1-4rangs jusqu'à ce qu'on ait 56 mailles donc je tricoterai la torsade sur le rang 3? Je ne m'occupe pas de la deuxième torsade qui est sur le 11ième rang? Merci de votre aide !
23.09.2016 - 01:10DROPS Design answered:
Bonjour Hélène, quand vous répétez ces 4 rangs, vous tricotez A.1 à chacun de ces rangs, la 1ère torsade se fera au 3ème rang tricoté sur les mailles de A.1, la 2ème au 11ème rang, la suivante au 8ème rang suivant et ainsi de suite. Les augmentations se font à chaque fois que vous tricotez le rang 1 de ces 4 rangs mais le diagramme se tricote parallèlement. Bon tricot!
23.09.2016 - 08:53
|
|||||||
Winter Cozy#wintercozyset |
|||||||
 |
 |
||||||
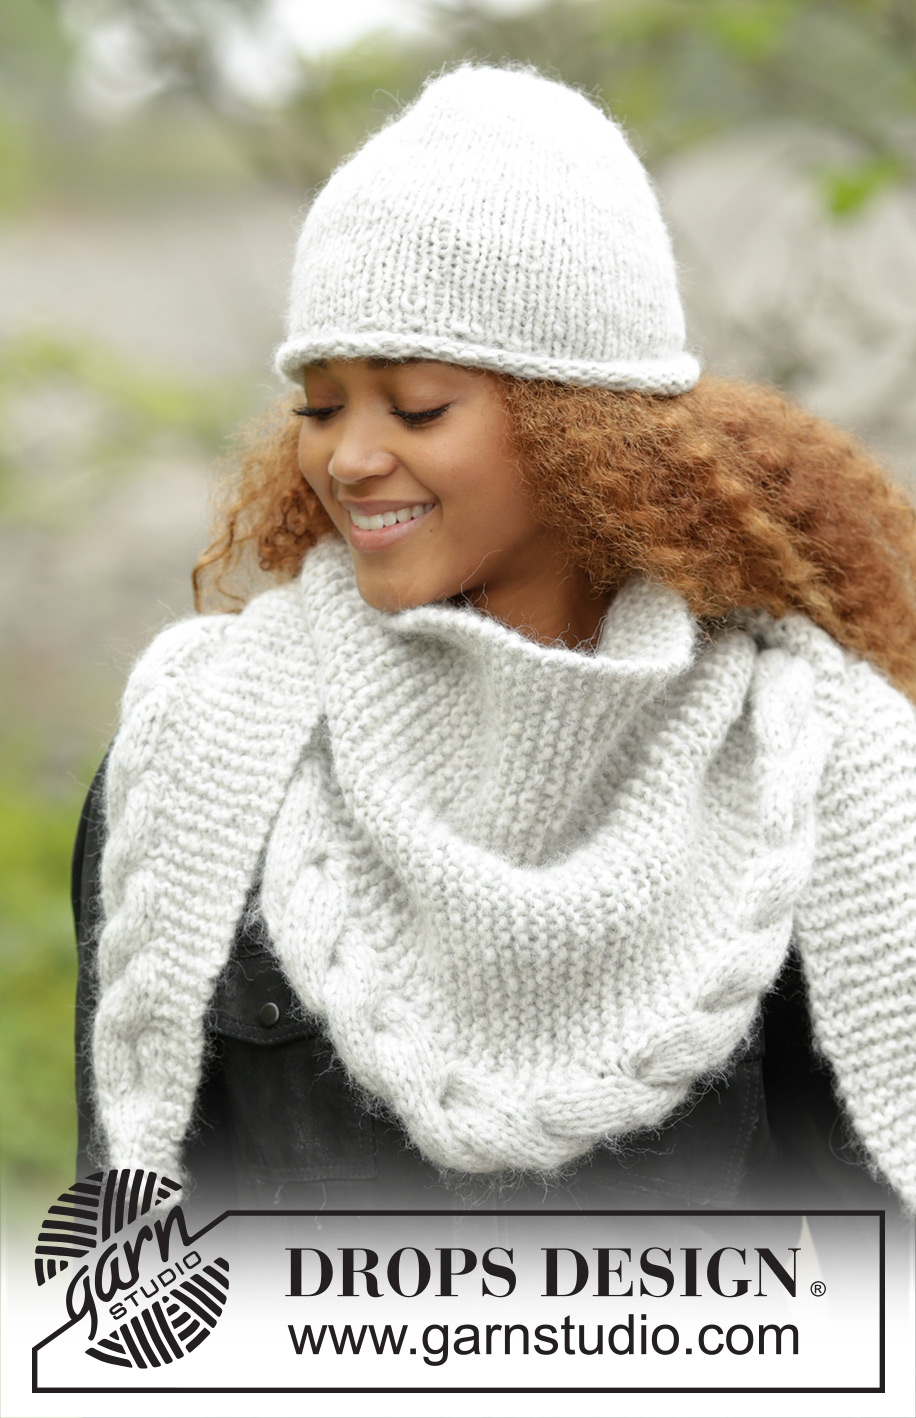
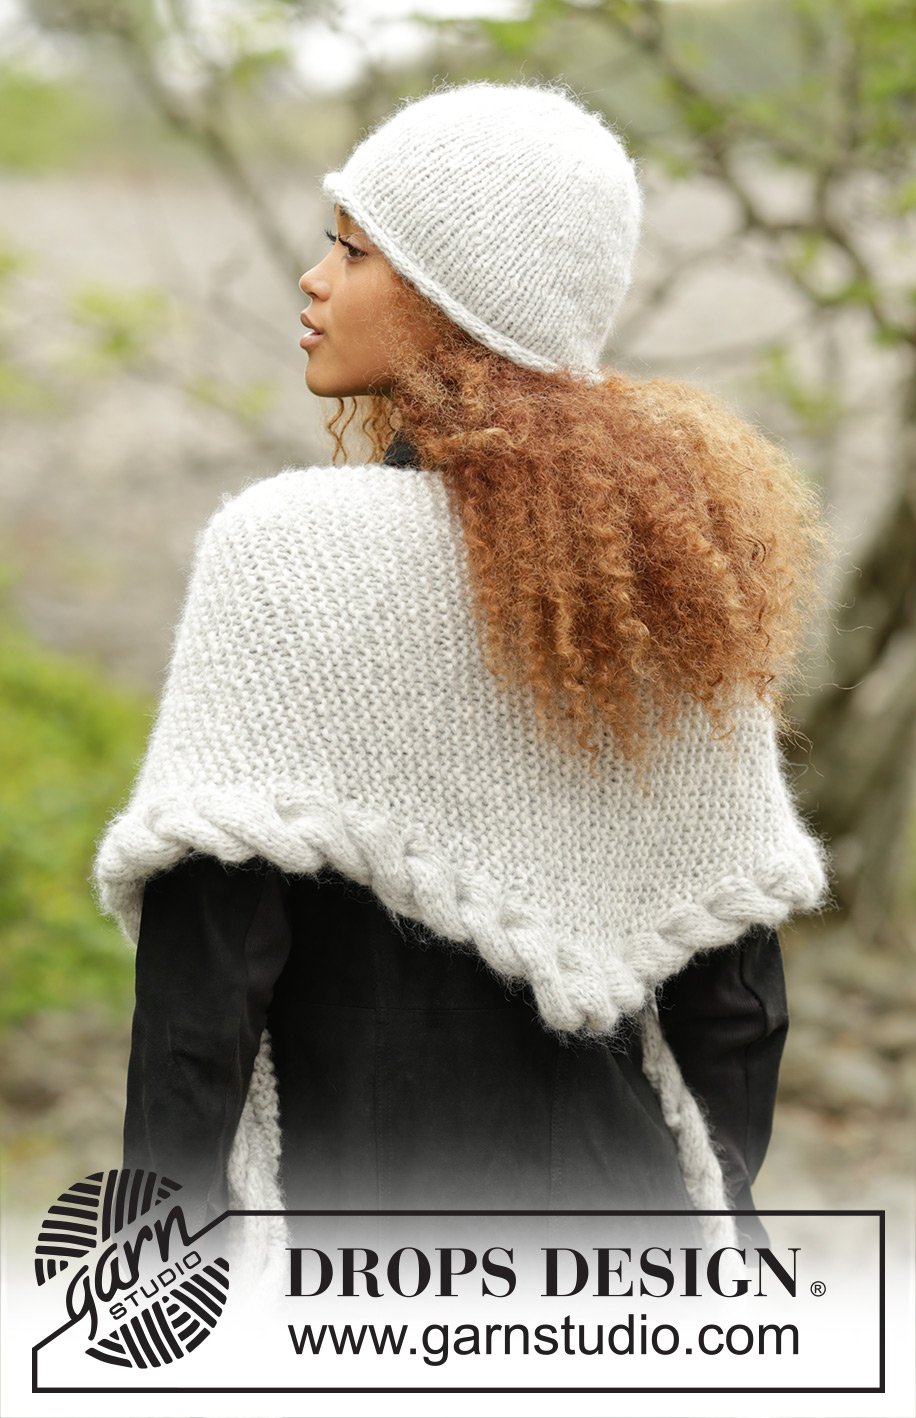
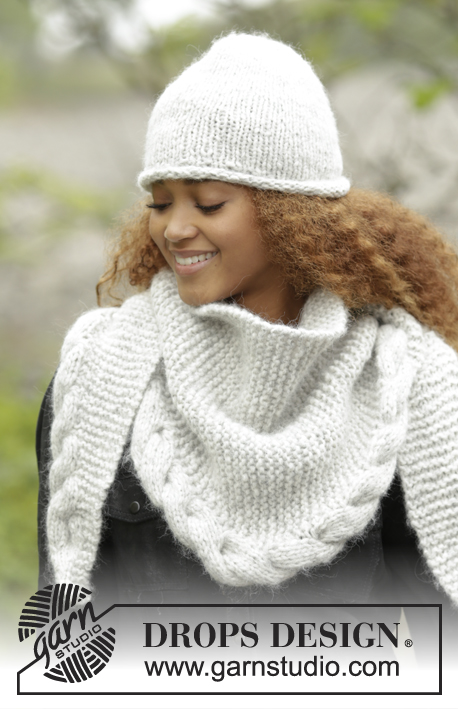
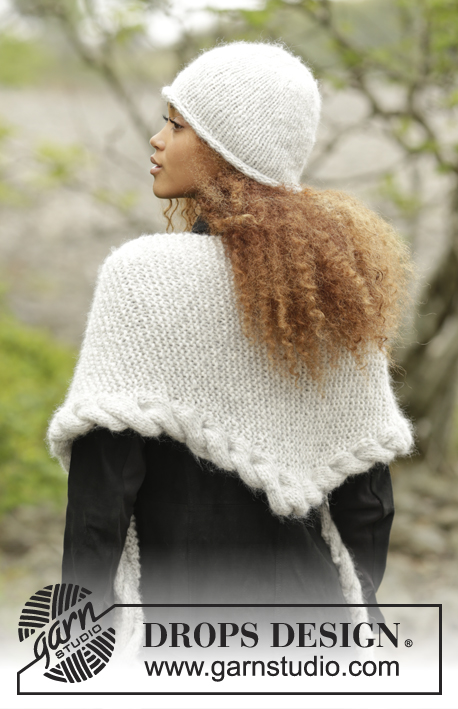
Set consists of: Knitted DROPS hat in “Cloud” or "Air" and shawl worked from side to side in garter st with cable edge in “Cloud” or "Air".
DROPS 172-10 |
|||||||
|
HAT: DECREASE TIP: Slip 1 st as if to K, K 1, psso. ---------------------------------------------------------- HAT: Cast on 56-60 sts on circular needle size 7 mm / US 10.75 with with Cloud or 2 threads Air. Work 4 rounds in stockinette st (= rolling edge). Work next round as follows: * K 1, P 1 *, repeat from *-* the entire round. Work 1 more round with K over K and P over P. Then continue in stockinette st until finished measurements. REMEMBER THE KNITTING GAUGE When piece measures 21-22 cm / 8¼"-8¾", insert 8-10 markers in the piece, 7-6 sts apart. On next round dec 1 st after every marker - SEE DECREASE TIP (= 8-10 sts dec). Dec like this every other round a total of 3 times, then every round a total of 2 times. On next round K all sts twisted tog two by two = 8-5 sts on needle. Cut the yarn and pull it through the remaining sts, tighten tog and fasten. Piece measures approx. 26-27 cm / 10¼"-10½" from top and down (includes rolling edge). ---------------------------------------------------------- SHAWL: KNITTING TIP: Work shawl in garter st with a cable edge along bottom edge. Work this cable edge of the outermost 12 sts. Do not work any edge st on the cable (i.e. work outermost st in A.1 as a normal st in stockinette st from both RS and WS), otherwise the cable will not roll and get the correct bounce. PATTERN: See diagram A.1. The diagrams show all rows in pattern seen from RS. MEASURING TIP: Measure shawl along the straight edge without inc/dec. ---------------------------------------------------------- SHAWL: Worked from side to side. Cast on 3 sts on circular needle size 8 mm / US 11 with with Cloud or 2 threads Air and work as follows: ROW 1 (= RS): K all sts. ROW 2 (= WS): K 2, K 1 in front and behind in next st = 4 sts on row. ROW 3 (= RS): K 1, 1 YO, K 3 = 5 sts. ROW 4 (= WS): K 3, P YO twisted, P 1. ROW 5 (= RS):K 2, 1 YO, K 3 = 6 sts. ROW 6 (= WS): K 3, P YO twisted, P 2. ROW 7 (= RS):K 3, 1 YO, K 3 = 7 sts. ROW 8 (= WS):K 3, P YO twisted, P 3. ROW 9 (= RS): K 4, 1 YO, K 3 = 8 sts. ROW 10 (= WS): K 3, P YO twisted, P 4. ROW 11 (= RS): K 5, 1 YO, K 3 = 9 sts. ROW 12 (= WS): K 3, P YO twisted, P 5. ROW 13 (= RS): K 1 in front and behind in each of the first 6 sts, insert 1 marker, K 3 = 15 sts. ROW 14 (= WS): K 3, marker, P 12. Continue to work and inc as follows - READ KNITTING TIP AND REMEMBER THE KNITTING GAUGE. ROW 1 (= RS): Work pattern according to diagram A.1 over the first 12 sts, work 2 sts in first st after marker and K the rest of row (= 1 st inc). ROW 2 (= WS): K until marker and A.1 over the last 12 sts. ROW 3 (= RS): A.1 over the first 12 sts, marker, K the rest of row. ROW 4 (= WS): K until marker and A.1 over the last 12 sts. Repeat 1st- 4th row (i.e. inc 1 st every 4th row) until there are 56 sts on row. Piece now measures approx. 81 cm / 32" - READ MEASURING TIP. Now work short rows to avoid a tight cable over the tip as follows: * Work 2 rows back and forth over the 12 sts in A.1, work 2 rows back and forth over all sts on row as before but do not inc *, repeat from *-* 3 times in total, then work 2 rows back and forth over the 12 sts A.1 again. Then work and dec as follows: ROW 1 (= RS): Work pattern according to diagram A.1 over the first 12 sts, K the 2 first sts after marker tog and K the rest of row (= 1 st dec). ROW 2 (= WS): K until marker and A.1 over the last 12 sts. ROW 3 (= RS): A.1 over the first 12 sts, marker, K the rest of row. ROW 4 (= WS): K until marker and A.1 over the last 12 sts. Repeat 1st- 4th row (i.e. dec 1 st every 4th row) until 15 sts remain on row (piece now measures approx. 159 cm / 62½"). Then work as follows: ROW 1 (= RS): K all sts in A.1 tog tog 2 by 2, marker, K 3 = 9 sts remain on needle. ROW 2 (= WS): K 3, P 6. ROW 3 (= RS): K 4, K 2 tog, K 3 = 8 sts. ROW 4 (= WS): K 3, P 5. ROW 5 (= RS):K 3, K 2 tog, K 3 = 7 sts. ROW 6 (= WS): K 3, P 4. ROW 7 (= RS):K 2, K 2 tog, K 3 = 6 sts. ROW 8 (= WS):K 3, P 3. ROW 9 (= RS): K 1, K 2 tog, K 3 = 5 sts. ROW 10 (= WS): K 3, P 2. ROW 11 (= RS): K 2 tog, K 3 = 4 sts. ROW 12 (= WS): K 4. ROW 13 (= RS): K 2 tog, K 2. ROW 14 (= WS): bind off with K. |
|||||||
Diagram explanations |
|||||||
|
|||||||
 |
|||||||
Have you finished this pattern?Tag your pictures with #dropspattern #wintercozyset or submit them to the #dropsfan gallery. Do you need help with this pattern?You'll find 24 tutorial videos, a Comments/Questions area and more by visiting the pattern on garnstudio.com. © 1982-2026 DROPS Design A/S. We reserve all rights. This document, including all its sub-sections, has copyrights. Read more about what you can do with our patterns at the bottom of each pattern on our site. |
|||||||


With over 40 years in knitting and crochet design, DROPS Design offers one of the most extensive collections of free patterns on the internet - translated to 17 languages. As of today we count 324 catalogs and 12290 patterns - 12280 of which are translated into English (US/in).
We work hard to bring you the best knitting and crochet have to offer, inspiration and advice as well as great quality yarns at incredible prices! Would you like to use our patterns for other than personal use? You can read what you are allowed to do in the Copyright text at the bottom of all our patterns. Happy crafting!
Post a comment to pattern DROPS 172-10
We would love to hear what you have to say about this pattern!
If you want to leave a question, please make sure you select the correct category in the form below, to speed up the answering process. Required fields are marked *.