
Popular categories
Looking for a yarn?


Comments / Questions (221)
![]() Andrea Offermanns wrote:
Andrea Offermanns wrote:
Hallo und guten Tag, Ich stricke die Weste in der Größe 80/86. Leider komme ich mit der Beschreibung nach gestrickten 18 cm nicht weiter. Welche Maschen werden nicht gestrickt und wie geht es dann weiter? Freundliche Grüße Andrea
20.06.2021 - 17:50DROPS Design answered:
Liebe Frau Offermanns, nach 18 cm stricken Sie verkürzten Reihe über die Blendemaschen wie folgt: 2 Reihen über die ersten 5 Maschen (Blendemaschen), 1 Reihe über alle Maschen, 2 Reihen über die ersten 5 Masche (Blenedemaschen), 1 Reihe über alle Maschen. Jetzt nehmen Sie für den Halsausschnitt ab und gleichzeitig stricken Sie das Armloch. Viel Spaß beim stricken!
21.06.2021 - 07:58
![]() Abenalino wrote:
Abenalino wrote:
Es geht um die 20 M für die Ärmel.. Wo genau sollen die Krausrippen bzw. die Ärmelausschnitte platziert werden? 10 Maschen vor oder hinter der Makierungen, 10 Maschen oder 20 Maschen pro Ärmel? Danke schon mal für die Antwort :)
19.06.2021 - 23:18DROPS Design answered:
Liebe Frau Abenalino, die 2 Krausrippen unter jede Ärmel werden je 10 Maschen vor + 10 M nach jeder Markierungen (= an beide Seite) gestrickt, dh es sind 20 Maschen kraus rechts gestrickt für jede Armausschnitt - dann die mittleren 10 Maschen für jedes Armloch abgekettet = 5 Maschen Kraus rechts sind noch am Rückenteil/jedem Vorderteil übrig. Viel Spaß beim stricken!
21.06.2021 - 07:33
![]() Gabi wrote:
Gabi wrote:
Hallo, Ik snap het niet. Een vest bestaat toch uit 2 voor panden en een achterpand? En 116 steken voor maat 56 lijkt me heel erg veel? Kunt u mij dat uitleggen? Alvast bedankt! Groetjes Gabi
08.04.2021 - 22:38DROPS Design answered:
Dag Gabi,
Het vest wordt heen en weer gebreid van midden voor naar midden voor. Dus de voorpanden en het achterpand worden in een keer gebreid. Op die manier heb je geen zijnaad.
11.04.2021 - 13:35
![]() Hanna wrote:
Hanna wrote:
Witam, jestem początkująca. Proszę o wyjaśnienie tego fragmentu opisu, jest dla mnie mało czytelny. ”Na wys. 15-17-18 (20-21) cm od dołu robótki przer. 2 rz. ściegiem francuskim ponad 5 pierwszymi o. (nie przer. pozostałych o.). Dalej przer. 1 rz. przez wszystkie o., dalej 2 rz. ściegiem francuskim tylko ponad 5 o. obszycia z drugiej strony (aby dekolt był bardziej estetyczny).”
15.03.2021 - 18:39DROPS Design answered:
Witaj Haniu, wykonujesz tutaj tzw. rzędy skrócone, tą technikę znajdziesz TUTAJ. Musisz zrobić dokładnie co jest napisane, tj. przerabiasz 5 pierwszych o., obracasz robótkę i przerabiasz 5 o. do końca rzędu, obracasz i przerabiasz cały rząd, a następnie przerabiasz 5 pierwszych o. z drugiej strony sweterka, obracasz robótkę i przerabiasz 5 o. do końca rzędu. To jest po to, aby brzegi robótki wykonane ściegiem francuskim nie ściągały robótki na wysokość. Powodzenia!
16.03.2021 - 18:38
![]() Tonje Karlsen wrote:
Tonje Karlsen wrote:
Nederste avsnitt før bakstykket står det: Videre felles det til V-hals – se forkl over: Fell 1 m på hver 2.p (dvs på hver p fra retten) totalt 12-13-16 (16-16) ganger. Hvor skal denne ene masken felles? Ved halsen? Skal det felles en maske på Høyre og en på Venstre før rillene? Er dette i tillegg til felling til armhule? Forvirrende når det står fell 1m.
07.03.2021 - 12:31DROPS Design answered:
HEi Tonje. Husk å les det som står under FELLING TIL V-HALS OG ERMHULL I DOBBELT PERLESTRIKK lengre opp i oppskriften. mvh DROPS design
10.03.2021 - 14:09
![]() Martine wrote:
Martine wrote:
Bonjour, je souhaite tricoter le modèle mais avec des aiguilles non circulaires. Étant débutante je n'arrive pas à modifier vos explications ...merci de votre réponse
31.12.2020 - 11:40DROPS Design answered:
Bonjour Martine, comment adapter un modèle sur aiguille circulaire pour des aiguilles droites vous trouverez ICI. Pour toute assistance complémentaire, vous pouvez vous adresser à votre magasin DROPS qui saura vous conseiller et vous renseigner. Bon tricot!
31.12.2020 - 11:59
![]() Anita Olsson wrote:
Anita Olsson wrote:
Hur många maskor ska man maska av för ärmhålet Anita Olsson
16.03.2020 - 22:39DROPS Design answered:
Hej Anita De mittersta 8 m i minsta storleken och de mittersta 10 m i övriga storlekar i varje sida maskas av till ärmhål. Mvh DROPS Design
20.03.2020 - 10:57
![]() Salla wrote:
Salla wrote:
Hei! Miten takakappaleen kavennukset voi tehdä nätisti niin, ettei helmineule mene sekaisin?
27.12.2019 - 15:44DROPS Design answered:
Hei, ohjeen yläosasta löydäyt vinkin siitä, miten kädentien kavennukset tehdään: ENNEN KÄDENTIEN REUNAA: Kun viimeisen s:n tulee olla oikea s: 2 s oikein yhteen. Kun viimeisen s:n tulee olla nurja s: 2 s nurin yhteen. KÄDENTIEN REUNAN JÄLKEEN: Kun ensimmäisen s:n tulee olla oikea s: Nosta 1 s oikein neulomatta, 1 o, vedä nostettu s neulotun yli. Kun ensimmäisen s:n tulee olla nurja s: 2 s kiertäen nurin yhteen (eli neulo s:t takakautta yhteen).
20.01.2020 - 17:53
![]() Ann-Christine Månsson wrote:
Ann-Christine Månsson wrote:
Hej! I mönstret står det att man ska göra knapphålen på höger sida men på bilden är knapphålen på vänster sida. Spelar det någon roll på vilken sida man gör dem? Mvh Ann-Christine
13.12.2019 - 09:03DROPS Design answered:
Hej Ann-Christine, nej det spelar ingen roll var du gör knapphålen :)
16.12.2019 - 15:37
![]() Jacqueline Baylis wrote:
Jacqueline Baylis wrote:
Can you tell me what size the finished item is please, I am knitting the 2 year size. Is it 62 cm ?
04.07.2019 - 23:14DROPS Design answered:
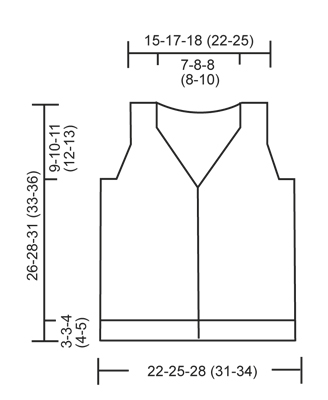
Dear Jacqueline, the sie suitable for two years old chidren, should be fitting kids who are about 92 cm tall- Otherwise for measurements, please refer to the shcematics drawing which has all the relevant dimension. Happy Knitting!
05.07.2019 - 01:44
|
|
Junior#juniorvest |
|
 |
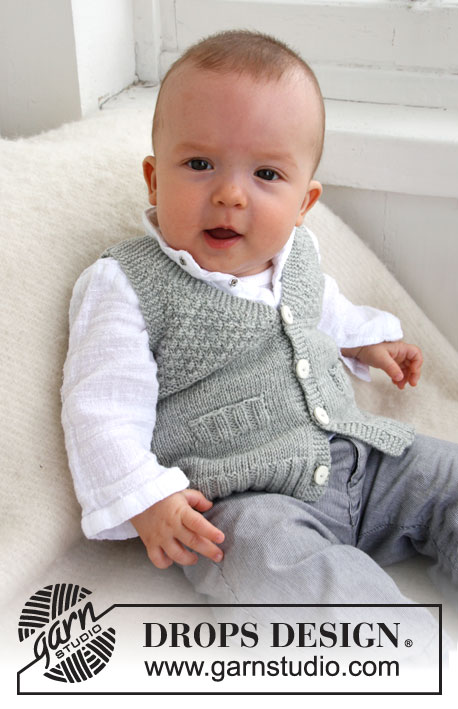 |
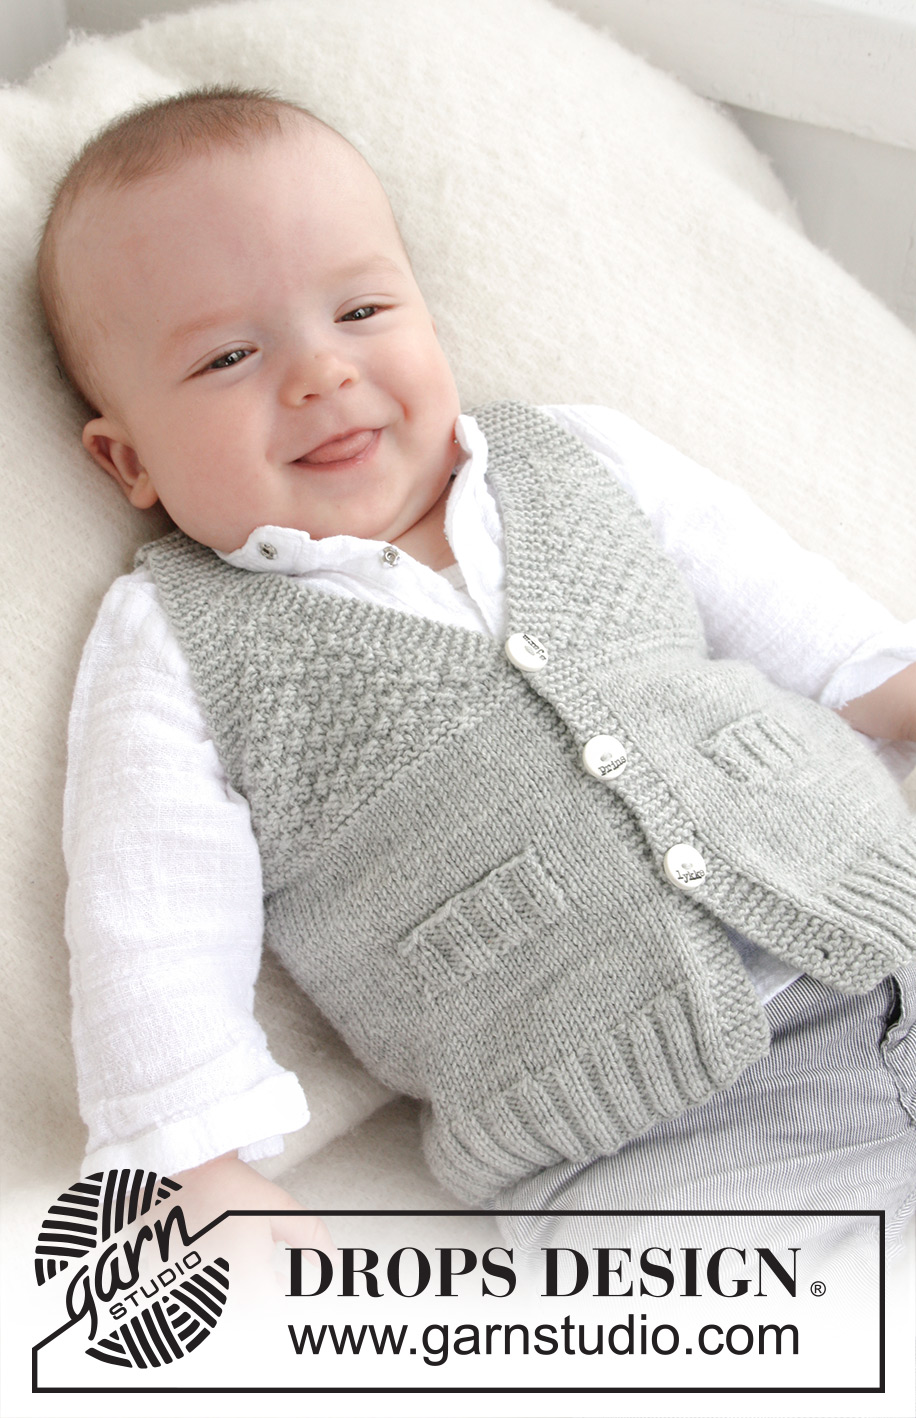
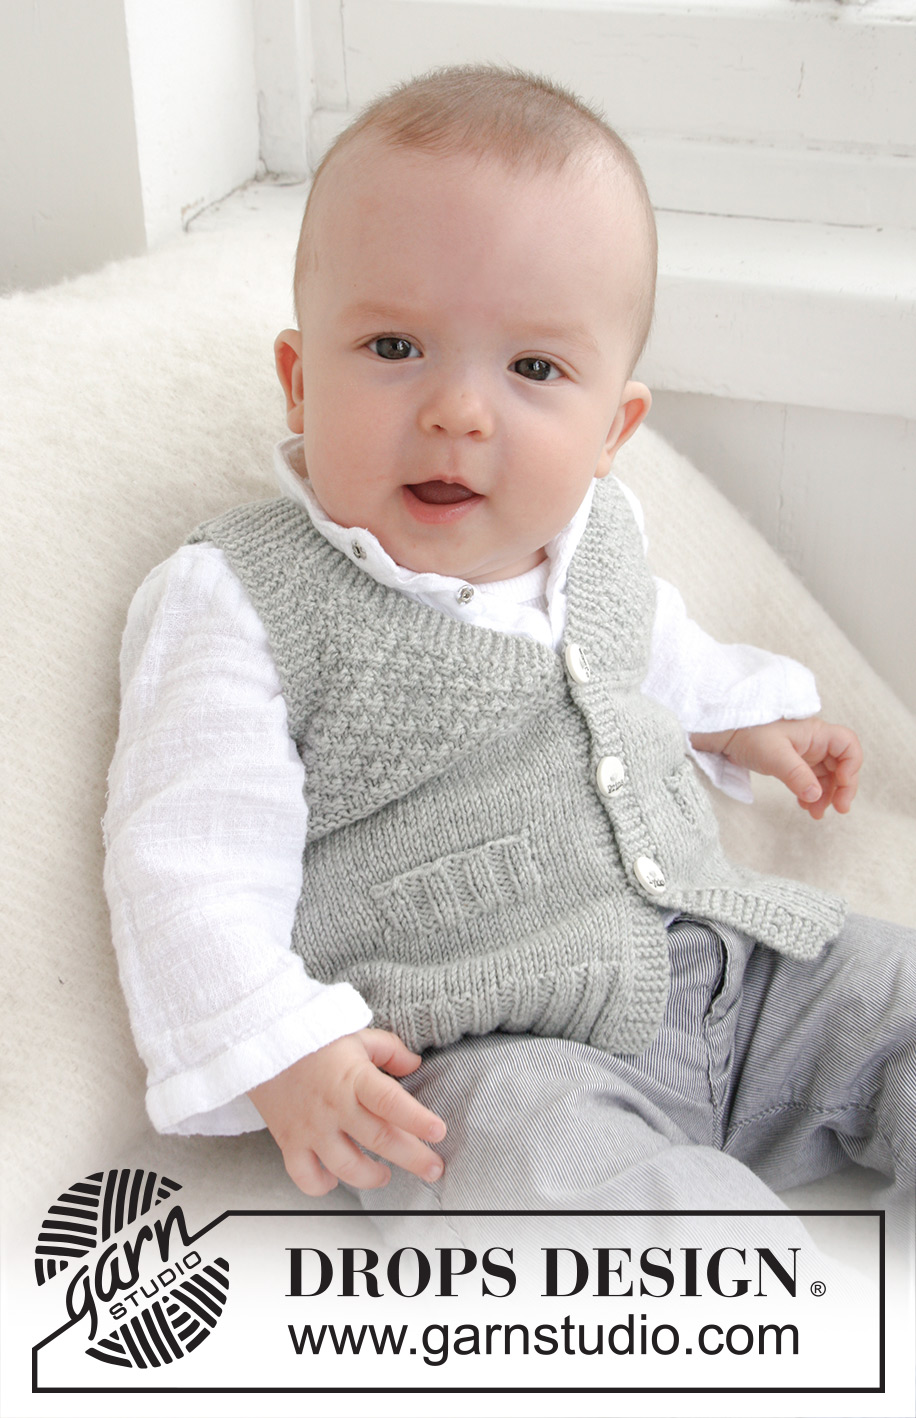
Knitted vest with V-neck and textured pattern for baby and children in DROPS BabyMerino or DROPS BabyAlpaca Silk
DROPS Baby 21-8 |
|
|
GARTER ST (back and forth on needle): K all rows. DOUBLE SEED ST: Row 1: * K 2, P 2 *, repeat from *-*. Row 2: K over K and P over P. Row 3: P over K and K over P. Row 4: As row 2. Repeat row 1 to 4. BUTTON HOLES: Bind off for button holes on right band. 1 button hole = K tog 2nd and 3rd st from edge and make 1 YO. Bind off for button holes when piece measures: SIZE 1/3 MONTHS: 2, 6, 10 and 14 cm / ¾", 2⅜", 4" and 5½". SIZE 6/9 MONTHS: 2, 7, 11 and 16 cm / ¾", 2¾", 4⅜" and 6¼". SIZE 12/18 MONTHS: 2, 7, 12 and 17 cm / ¾", 2¾", 4¾" and 6¾". SIZE 2 YEARS: 2, 8, 13 and 19 cm / ¾", 3⅛", 5⅛" and 7½". SIZE 3/4 YEARS: 2, 8, 14 and 20 cm / ¾", 3⅛", 5½" and 8". DEC FOR V-NECK AND ARMHOLES IN DOUBLE SEED ST: All dec are done from RS! DEC AS FOLLOWS BEFORE BAND/SLEEVE EDGE: When last st should be K: K 2 tog. When last st should be P: P 2 tog. DEC AS FOLLOWS AFTER BAND/SLEEVE EDGE: When first st should be K: Slip 1 st as if to K, K 1, psso. When first st should be P: P 2 twisted tog (i.e. work in back loop of st instead of front). -------------------------------------------------------- -------------------------------------------------------- BODY: Worked back and forth on circular needle from mid front. Cast on 148-168-184 (204-224) sts on circular needle size 2.5 mm / US 1 with Baby Merino. Work first row as follows from RS: 5 sts in GARTER ST (= band) - see explanation above, * K 2, P 2 *, repeat from *-* until 7 sts remain, finish with K 2 and 5 sts in GARTER ST (= band). Continue rib like this with 5 sts in garter st in each side until piece measures 3-3-4 (4-5) cm / 1⅛"-1⅛"-1½" (1½"-2") - REMEMBER BUTTON HOLES on band - see explanation above. Switch to circular needle size 3 mm / US 2or3 and work in stockinette st but continue bands in garter st as before. AT THE SAME TIME on first row after rib, dec 32-36-40 (44-52) sts evenly (do not dec over bands) = 116-132-144 (160-172) sts. Insert a marker 31-35-39 (43-45) sts in from each side (= 54-62-66 (74-82) sts between markers on back piece). REMEMBER THE GAUGE! When piece measures 7-7½-8 (9-10) cm / 2¾"-2⅞"-3⅛" (3½"-4"), work next row as follows from RS: 5 sts in garter st, 21-21-27 (27-31) sts in stockinette st, slip the last 16-16-20 (20-24) sts that were worked on a stitch holder for pocket slit, work until 10-10-12 (12-12) sts remain on needle, slip the last 16-16-20 (20-24) sts that were worked on a stitch holder for pocket slit, work 5-5-7 (7-7) sts in stockinette st and finish with 5 sts in garter st. On next row cast on 16-16-20 (20-24) new sts over each of the 2 stitch holders with sts = 116-132-144 (160-172) sts. Continue in stockinette st and in garter st until piece measures 13-14-16 (16-18) cm / 5⅛"-5½"-6¼" (6¼"-7"). Now K 4 rows over all sts (= 2 ridges). Then work DOUBLE SEED ST - see explanation above (continue bands in garter st as before). READ ALL OF THE FOLLOWING SECTION BEFORE CONTINUING! When piece measures 15-17-18 (20-21) cm / 6"-6¾"-7" (8"-8¼"), work 2 rows in garter st over the first 5 sts on needle (do not work the other sts on needle), then work 1 row over all sts before working 2 rows in garter st over the first 5 sts on needle in the other side of piece (this is done so that the V-neck looks nice). Then dec for V-neck - see explanation above: Dec 1 st every other row (i.e. every row from RS) a total of 12-13-16 (16-16) times. AT THE SAME TIME when piece measures 16-17-19 (20-22) cm / 6¼"-6¾"-7½" (8"-8¾"), work 4 rows in garter st over the middle 18-20-20 (20-20) sts in each side (i.e. over 9-10-10 (10-10) sts on each side of both markers) – work the other sts as before. On next row, bind off the middle 8-10-10 (10-10) sts in each side for armhole and finish front and back piece separately. BACK PIECE: = 46-52-56 (64-72) sts. Work double seed st with 5 sts in garter st in each side (= sleeve edges). AT THE SAME TIME dec for armholes - see explanation above: Dec 1 st every other row (i.e. on every row from RS) a total of 5-6-6 (6-6) times = 36-40-44 (52-60) sts. Continue in double seed st and in garter st until piece measures 24-26-29 (31-34) cm / 9½"-10¼"-11⅜" (12¼"-13⅜"). Now work in garter st over all sts until finished measurements. AT THE SAME TIME when piece measures 25-27-30 (32-35) cm / 9¾"-10⅝"-11¾" (12½"-13¾"), bind off the middle 16-18-20 (20-24) sts for neck = 10-11-12 (16-18) sts remain on each shoulder. Now finish each shoulder separately. Continue with garter st until piece measures 26-28-31 (33-36) cm / 10¼"-11"-12¼" (13"-14¼"), bind off. LEFT FRONT PIECE: Continue with double seed st and in garter st while AT THE SAME TIME dec for armhole in the side as on back piece and continue dec for V-neck as before. After last dec, 10-11-12 (16-18) sts remain on needle. Work garter st over all sts until piece measures 26-28-31 (33-36) cm / 10¼"-11"-12¼" (13"-14¼") and bind off. RIGHT FRONT PIECE: Work as left front piece but reversed. POCKET FLAP: Slip the 16-16-20 (20-24) sts from stitch holder on one front piece back on needle size 2.5 mm / US 1or2. Work rib K2/P2 with 1 st in garter st and K 2 in each side (seen from RS). When pocket flap measures 2½-2½-3 (3-3) cm / ⅞"-⅞"-1⅛" (1⅛"-1⅛"), loosely bind off with K over K and P over P. Sew pocket flap to front piece with duplicate sts in each side. Sew pocket opening to bottom of pocket flap (where sts were put on a stitch holder) on the back of piece. Work another pocket flap the same way on the other front piece. ASSEMBLY: Sew the shoulder seams. Sew on buttons. |
|
 |
|
Have you finished this pattern?Tag your pictures with #dropspattern #juniorvest or submit them to the #dropsfan gallery. Do you need help with this pattern?You'll find 13 tutorial videos, a Comments/Questions area and more by visiting the pattern on garnstudio.com. © 1982-2026 DROPS Design A/S. We reserve all rights. This document, including all its sub-sections, has copyrights. Read more about what you can do with our patterns at the bottom of each pattern on our site. |
|


With over 40 years in knitting and crochet design, DROPS Design offers one of the most extensive collections of free patterns on the internet - translated to 17 languages. As of today we count 325 catalogs and 12298 patterns - 12288 of which are translated into English (US/in).
We work hard to bring you the best knitting and crochet have to offer, inspiration and advice as well as great quality yarns at incredible prices! Would you like to use our patterns for other than personal use? You can read what you are allowed to do in the Copyright text at the bottom of all our patterns. Happy crafting!
Post a comment to pattern DROPS Baby 21-8
We would love to hear what you have to say about this pattern!
If you want to leave a question, please make sure you select the correct category in the form below, to speed up the answering process. Required fields are marked *.