
Popular categories
Looking for a yarn?


Comments / Questions (53)
![]() Jessica wrote:
Jessica wrote:
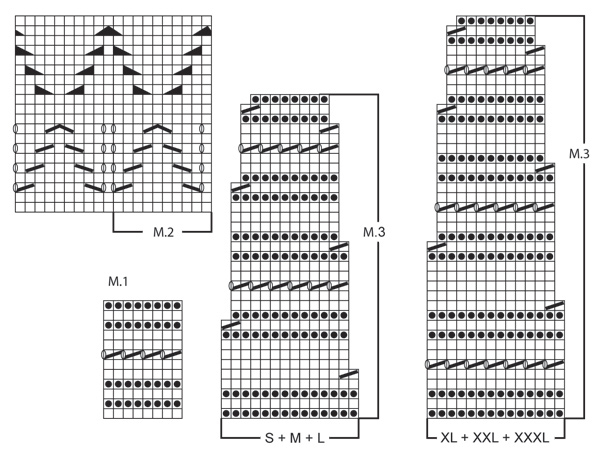
Liebes Dropsteam, bei M2 beginnt die 2. Reihe mit einer rechten Masche von einer Zopfnadel obwohl ich ja noch gar keine Maschen auf der Zopfnadel habe. Muss ich dann die letzte Masche der Vorreihe auf die Zopfnadel nehmen? Was macht das für einen Sinn?
22.02.2017 - 15:04DROPS Design answered:
Liebe Jessica, Diagramme sollen Sie von unten nach oben lesen - (bitte hier lesen. Bei der vorletzten Reihe in M.2 sollen Sie die letzte Masche der vorrigen Runde auf der Zopfnadel vor die Arbeit legen, dann 2 re, und 1 re von der Zopfnadel. bei der nächsten Reihe beachten Sie die Reihe nicht zu verschieben. Viel Spaß beim stricken!
22.02.2017 - 17:34
![]() Susan Platt wrote:
Susan Platt wrote:
I have bought loads of Drops Cotton and downloaded the patterns but I can't work from a chart............can now work in the round but my head just can't get around a chart after 50 years of written patterns :(
21.06.2016 - 23:38DROPS Design answered:
Dear Mrs Platt, in the diagrams 1 square = 1 st x 1 row, start reading diagrams from the bottom corner on the right side towards the left on every round and see text to each symbol above diagram - Read more about diagrams here. Happy knitting!
22.06.2016 - 09:42
![]() Bodil Engen Lund wrote:
Bodil Engen Lund wrote:
Holder på å strikke denne flotte toppen. Skal strikke den nest siste omgangen i diagrammet på M2. Skjønner ikke helt hvordan det skal strikkes. M2 består jo av 10 masker som skal repeteres. Kan dere forklare meg maske for maske hvordan dette skal gjøres. Ivrig etter å komme videre snarest mulig 😉 Gleder meg til å fortsette 😃
24.04.2016 - 20:37DROPS Design answered:
Hei Bodil. Du starter 1 m för starten af denne pind, strik da "sett 1 m på hj.p foran arb, strikk 2 rett, 1 rett fra hj.p" osv, denne "trekant" kommer i overgangen mellem gentagelserne, men strik som der staar og saa afslutter du pinden 1 m för (den som du strikkede först). Haaber du kan fölge mig :-)
25.04.2016 - 13:53
![]() Patricia wrote:
Patricia wrote:
Bonjour, Je fais la taille XL. Je ne comprend pas le diagramme M2, rang 19 : par quoi je commence et je termine le rang ? étant donné que le symbole est coupé. Faut il faire un surjet double au début ou pas ? Je suis bloquée. Merci pour votre réponse.
08.02.2016 - 11:36DROPS Design answered:
Bonjour Patricia, commencez M.2 par la dernière m au début du tour pour faire le surjet double (la m glissée est la dernière m du tour, les 2 m ens à l'end sont les 2 premières m du tour), puis répétez le diagramme tout le tour, vous terminerez par 7 m end, juste avant le surjet double fait au début du tour. Bon tricot!
08.02.2016 - 13:56Leticia Rios wrote:
El grafico es incorrecto, trabaje como dice y no es como en la foto, se tejer , pero siguiendo sus instrucciones no queda, busqué el original, y no lo encuentro, solo perdí tiempo. ya he tejido otros y si quedan bien. pueden enviarme el grafico correcto? Me gusta mucho Gracias,
16.06.2015 - 15:03DROPS Design answered:
Hola Leticia, ¿podrías especificar en que parte del diagrama M.1, M.2, M.3 crees que hay un fallo? La traducción de español se corresponde con el diagrama y el diagrama es el original del patrón noruego.
17.06.2015 - 09:30Leticia Rios wrote:
El grafico es incorrecto, trabaje como dice y no es como en la foto, se tejer , pero siguiendo sus instrucciones no queda, busqué el original, y no lo encuentro, solo perdí tiempo. ya he tejido otros y si quedan bien. pueden enviarme el grafico correcto? Me gusta mucho Gracias,
16.06.2015 - 15:02
![]() Stefania wrote:
Stefania wrote:
Grazie a voi per l'attenzione e i modelli così carini. Buongiorno
22.07.2013 - 10:28
![]() Stefania wrote:
Stefania wrote:
Buongiorno, se il top deve essere lavorato avanti e dietro sui ferri circolari come va cucito alla fine? Grazie
21.07.2013 - 09:36DROPS Design answered:
Buongiorno Stefania, grazie per la segnalazione, abbiamo controllato e corretto: il modello si lavora in tondo con i ferri circolari, si lavora avanti e indietro solo su una parte della scollatura. Buon lavoro! Se ha altri problemi non esiti a ricontattarci!
21.07.2013 - 15:36
![]() Nicole wrote:
Nicole wrote:
Ich verstehe den allerletzten Satz der Anleitung nicht so ganz. Soll ich nach beenden von M1 noch 2 Runden Re und 2 Runden li stricken? Bedeutet "locker", dass ich eine grössere Nadel nehmen soll?
19.06.2013 - 21:20DROPS Design answered:
Liebe Nicole, Sie können entweder eine grössere Nadel nehmen, oder mit der anderen einfach etwas locker stricken.
21.06.2013 - 09:10
![]() Nicole wrote:
Nicole wrote:
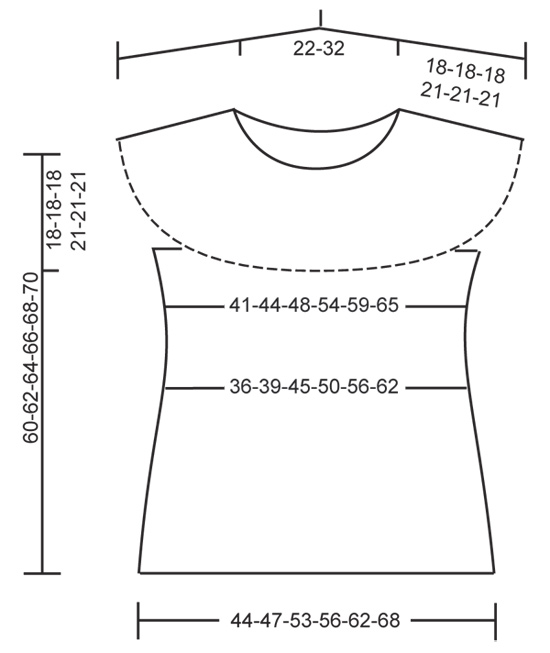
Sehe ich das richtig, dass die Abnahmen, die ich nach 16 cm beginne (ist damit eigentlich die Gesamtlänge gemeint?), nach 37 cm beendet sein müssen? Sprich, dass ich gleich danach mit den Zunahmen anfange?
13.06.2013 - 09:01DROPS Design answered:
Liebe Nicole, ja es ist die Gesamthöhe gemeint und ebenfalls ja, die Abn müssen dann beendet sein. Auf der Schnittzeichnung sehen Sie die Taillierung, die sich daraus ergibt.
14.06.2013 - 09:32
|
||||||||||||||||||||||||||||
Montecarlo#montecarlotop |
||||||||||||||||||||||||||||
 |
 |
|||||||||||||||||||||||||||
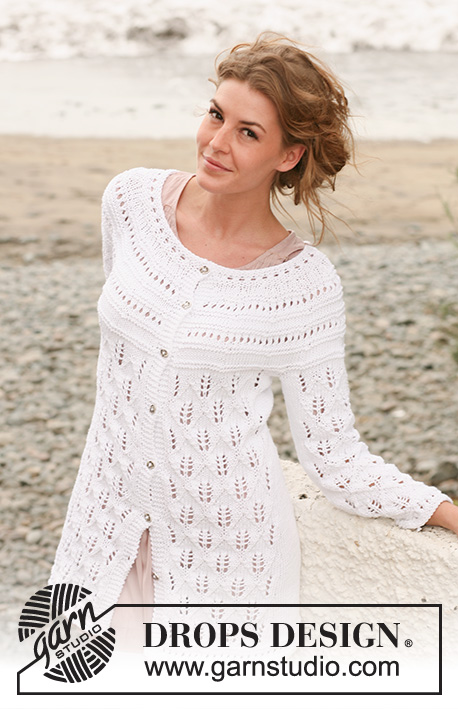
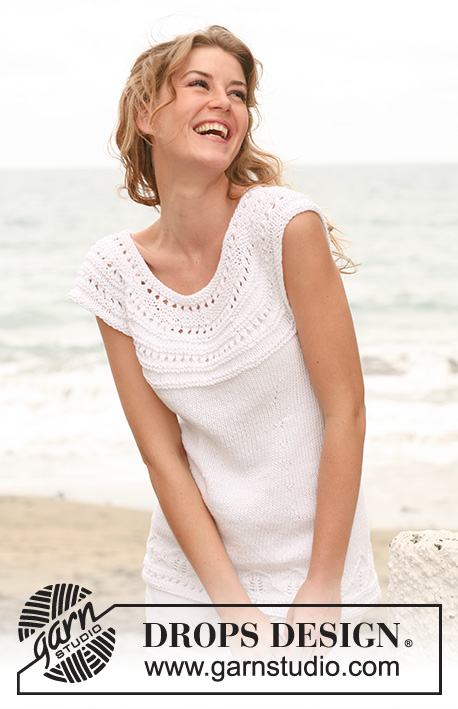
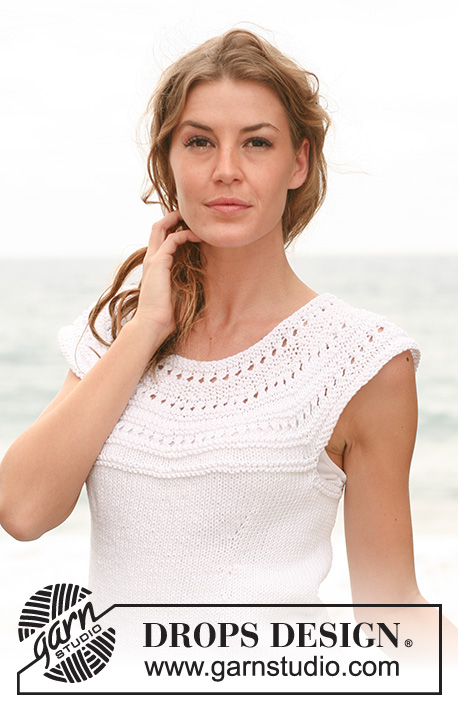
Knitted DROPS top with lace pattern and round yoke in "Paris". Size: S - XXXL.
DROPS 128-27 |
||||||||||||||||||||||||||||
|
GARTER ST (back and forth on needle): K all rows. PATTERN: See diagram M.1 to M.3. The diagram shows the pattern from RS. DECREASE TIP (applies to waist on body): Dec as follows 2 sts before marker: K 2 tog. Dec as follows after marker: Slip 1 st as if to K, K 1, psso. INCREASE TIP: Inc 1 st by picking up a st from previous row, K this st. -------------------------------------------------------- TOP: Worked in the round on circular needle. Cast on 150-160-180-190-210-230 sts on circular needle size 4 mm / US 6 with Paris. Work diagram M.1. After M.1, work M.2 (1 repetition = 10 sts). After M.2 change to circular needle size 5 mm / US 8 and continue in stockinette st and on 1st round insert 4 markers in the piece as follows: Work 17-19-23-25-30-34 sts, insert marker 1, work 41-42-44-45-45-47 sts, insert marker 2, work 34-38-46-50-60-68 sts, insert marker 3, work 41-42-44-45-45-47 sts, insert marker 4 and work the remaining sts = 17-19-23-25-30-34 sts. Move the markers upwards when working. REMEMBER THE GAUGE! When piece measures 15-16-16-17-17-17 cm / 6"-6¼"-6¼"-6¾"-6¾"-6¾", dec 1 st after marker 1 and 3 and before marker 2 and 4 - READ DECREASE TIP- (= 4 sts dec). Repeat dec every 3-3-3½-5-5½-6 cm / 1⅛"-1⅛"-1¼"-2"-2¼"-2⅜" a total of 7-7-7-5-5-5 times = 122-132-152-170-190-210 sts. When piece measures 36-37-40-41-43-45 cm / 14¼"-14½"-15¾"-16⅛"-17"-17¾", inc 1 st after marker 1 and 3 and before marker 2 and 4 - READ INCREASE TIP - (= 4 sts inc). Repeat inc every other round a total of 4-4-3-3-3-3 times = 138-148-164-182-202-222 sts. Now remove the 4 markers and insert 2 new markers as follows: Insert a marker at beg of round and a marker after 69-74-82-91-101-111 sts (= mid of each side). When piece measures 40-42-44-43-45-47 cm / 15¾"-16½"-17¼"-17"-17¾"-18½", P 1 round, K 1 round and P 1 round over the middle 14-14-16-18-22-22 sts in each side (i.e. over 7-7-8-9-11-11 sts on each side of both markers). NOTE! Work the remaining sts in stockinette st as before. Then bind off the middle 10-10-12-14-18-18 sts in each side for armholes (i.e. 5-5-6-7-9-9 sts on each side of both markers) = 59-64-70-77-83-93 sts remain on front and back piece. Cut the yarn. YOKE: Beg mid back of body (in Sizes S + XL + XXL + XXXL beg with the middle st and in sizes M + L beg with the 2nd of the 2 middle sts). Work on circular needle size 5 mm / US 8 as follows: K 30-32-35-39-42-47 sts, cast on 46-48-56-56-57-61 new sts (= over one sleeve), K the 59-64-70-77-83-93 sts on front piece, cast on 46-48-56-56-57-61 new sts (= over the other sleeve) and work the remaining 29-32-35-38-41-46 sts = 210-224-252-266-280-308 sts. Continue to work M.3 (1 repetition = 14 sts). NOTE! See diagram for size! When M.3 has been worked vertically, 120-128-144-152-160-176 sts remain on needle. NECKLINE: Switch to circular needle size 4 mm / US 6. Insert a marker after 60-64-72-76-80-88 sts (= mid front). K 1 round while AT THE SAME TIME dec 18-18-26-26-26-34 sts evenly = 102-110-118-126-134-142 sts (NOTE! Dec the same no of sts on each side of marker and mid back). P 1 round. Continue in GARTER ST - see explanation above - back and forth on needle from mid back while AT THE SAME TIME working an elevation in the back of neck as follows (start from RS): Work until 16-17-18-19-20-21 sts remain before marker mid front, turn piece, tighten thread and work back until 16-17-18-19-20-21 sts remain before marker in the other side. Turn piece, tighten yarn and work until 32-34-36-38-40-42 sts remain before marker, turn piece, tighten yarn and work back until 32-34-36-38-40-42 sts remain before marker in the other side. Turn piece, tighten yarn and work until 48-51-54-57-60-63 sts remain before marker, turn piece, tighten yarn and work back until 48-51-54-57-60-63 sts remain before marker in the other side. Turn piece, tighten yarn and K until beg of round (= mid back). Now work M.1 in the round but start on 3rd round in the diagram. When M.1 has been worked vertically, loosely bind off with K over all sts. |
||||||||||||||||||||||||||||
Diagram explanations |
||||||||||||||||||||||||||||
|
||||||||||||||||||||||||||||
 |
||||||||||||||||||||||||||||
 |
||||||||||||||||||||||||||||
Have you finished this pattern?Tag your pictures with #dropspattern #montecarlotop or submit them to the #dropsfan gallery. Do you need help with this pattern?You'll find 18 tutorial videos, a Comments/Questions area and more by visiting the pattern on garnstudio.com. © 1982-2026 DROPS Design A/S. We reserve all rights. This document, including all its sub-sections, has copyrights. Read more about what you can do with our patterns at the bottom of each pattern on our site. |
||||||||||||||||||||||||||||


With over 40 years in knitting and crochet design, DROPS Design offers one of the most extensive collections of free patterns on the internet - translated to 17 languages. As of today we count 324 catalogs and 12290 patterns - 12280 of which are translated into English (US/in).
We work hard to bring you the best knitting and crochet have to offer, inspiration and advice as well as great quality yarns at incredible prices! Would you like to use our patterns for other than personal use? You can read what you are allowed to do in the Copyright text at the bottom of all our patterns. Happy crafting!
Post a comment to pattern DROPS 128-27
We would love to hear what you have to say about this pattern!
If you want to leave a question, please make sure you select the correct category in the form below, to speed up the answering process. Required fields are marked *.