
Popular categories
Looking for a yarn?


Comments / Questions (93)
![]() Kathrin wrote:
Kathrin wrote:
Ich habe noch drops Baby Alpaka Silk Wolle übrig und würde daraus gerne diesen Schlafsack stricken. Wie kann ich die Strickanleitung am einfachsten anpassen?
07.04.2015 - 09:03DROPS Design answered:
Leider können wir keine Anpassung des Schlafsacks für eine andere Garnstärke anbieten. Die Garne sind sehr unterschiedlich dick. Es besteht die Möglichkeit, die Anleitung mit 4 Fäden BabyAlpaca Silk zu stricken, das entspricht 1 Faden Eskimo (unsere Garne sind in Garngruppen eingeteilt, 1 Faden Gruppe E = 4 Fäden Gruppe A), aber dann müssten Sie vorher ausrechnen, wie viel Garn Sie benötigen (Gesamtmeterzahl von Eskimo mit 4 multipliziert). Ansonsten stöbern Sie für andere Ideen einfach mal in der Datenbank mit den Filtern "Hauptkategorie: Baby" und "Garngruppe/Maschenprobe: Gruppe A".
07.04.2015 - 11:04
![]() Anna wrote:
Anna wrote:
I would like to know how would I make this pattern with using a zipper instead of button holes? I'm a very new knitter still learning. I love your pattern and am excited to try it.
01.04.2015 - 20:48DROPS Design answered:
Dear Anna, you can take inspiration from a pattern with a zipper. Remember you can get any individual assistance from your DROPS store. Happy knitting!
02.04.2015 - 09:50
![]() Anne W wrote:
Anne W wrote:
Hallo, ich bekomme ein enkelkind, dassehr gross wird. Also ist 56 cm bald zu klein, 62 -68 cm aber zu gross. Was kann ich machen? danke für deinen rat.
21.10.2014 - 16:15DROPS Design answered:
Ich würde vorschlagen, trotzdem 62-68 cm zu stricken - dann trägt das Enkelkind den Schlafsack einfach etwas später und die Vorfreude darauf hält noch etwas länger an. Und direkt zur Geburt könnten Sie vielleicht einfach eine schöne Babydecke stricken? Hierzu gibt es ja auch einige Anleitungen.
22.10.2014 - 11:53
![]() Marie wrote:
Marie wrote:
Jeg vil rigtig gerne strikke den med ben, så den også kan bruges i bæresele? Har nogen opskriften på det?
20.08.2014 - 16:52DROPS Design answered:
Nej, men man kan jo dele arb midt foran og midt bagpå, så bliver der stadigvæk godt om plads for benen :)
21.08.2014 - 11:47
![]() Stine wrote:
Stine wrote:
Jeg vil meget gerne strikke den i str. 3-6 mdr, men kan ikke lige regne ud, hvordan jeg skal justere antallet af maskerne??
14.06.2014 - 12:31DROPS Design answered:
Hej Stine. Hvis du ikke kan bruge en af de meldte störrelser, saa kan du udregne med hjaelp af strikkefastheden = antal masker per 10 cm.
17.06.2014 - 17:10
![]() Tora wrote:
Tora wrote:
Var står det "autostol"?
05.06.2014 - 20:47
![]() Stine wrote:
Stine wrote:
Det er da en kørepose til en barnevogn - ikke til en autostol ;-)
05.06.2014 - 17:27
![]() Jette Laustsen wrote:
Jette Laustsen wrote:
Jeg mangler en afslutning på forkanten?? Da Danske børn skal sidde i autostole bør der være plads til selen på bagstykket!!
05.06.2014 - 17:25
![]() Marie wrote:
Marie wrote:
Hei! Jeg har veldig mye polaris-garn, kan jeg strikke den posen i polaris? I såfall hvilket pinnenr og hvilke tilpasninger må jeg gjøre da?:)
29.05.2014 - 19:59DROPS Design answered:
Hej Marie. Strik en pröve og se hvor mange masker du har paa 10 x 10 cm. Tilpas efterfölgende mönstret med det antal masker du skal bruge for de rette maal (se maalskitsen nederst paa mönstret).
20.06.2014 - 12:03
![]() Emma wrote:
Emma wrote:
Hei igjen! Nå går jeg igang med den tredje posen og har veldig lyst til å lage denne uten hette og heller lage ei lita lue i samme garn. Har dere noen tips til hvordan jeg skal gjøre det pent i halskanten? Og har dere en lueoppskrift som kan passe til?
28.01.2014 - 20:59DROPS Design answered:
Hej Emma. Det kommer an paa hvad du selv synes er paen. Du kan lave en krage eller en ombukket kant - du kan eventuelt söge i jakke/genser mönstrer i Eskimo til baby og se hvad du kan bruge. Du kan ogsaa söge efter en lue i samme garntykkelse her paa siden - der er flere at vaelge imellem. God fornöjelse.
29.01.2014 - 10:28
|
|
Hazelnut#hazelnutbuntingbag |
|
 |
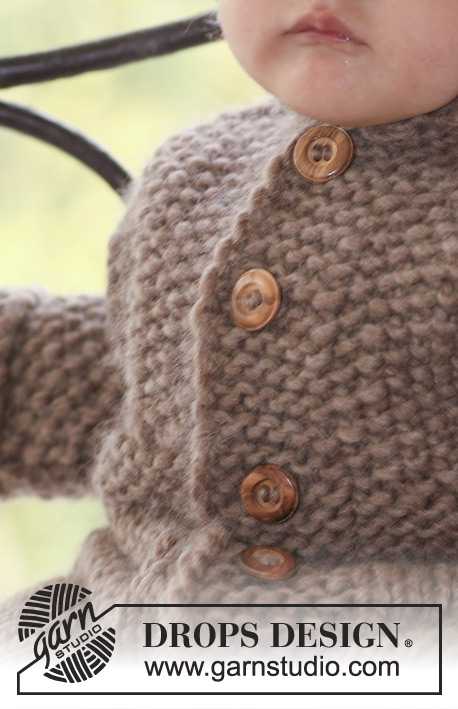 |
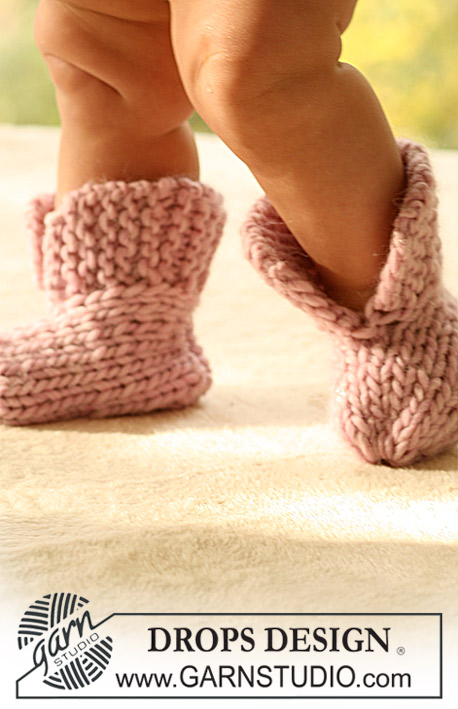
Knitted bunting bag in DROPS Snow, DROPS Wish or DROPS Andes
DROPS Baby 18-2 |
|
|
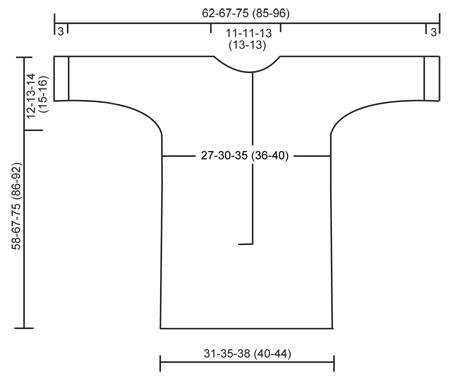
GARTER ST (back and forth on needle): K all rows. SEED ST: Row 1: * K1, P1 *, repeat from *-*. Row 2: K over P and P over K. Repeat row 2. INCREASING TIP: Inc by making 1 YO. Work YO into back of loop on return row to avoid a hole BUTTONHOLES: Make buttonholes on right front piece. 1 buttonhole = bind off 3rd st from mid front and cast on 1 new st on return row. Bind off for buttonholes when piece measures: SIZE 1/3 months: 1, 7, 13, 19 and 25 cm [½",2¾",5⅛",7½",9¾"] SIZE 6/9 months: 1, 8, 15, 22 and 29 cm [½",3⅛",6",8¾",11⅜"] SIZE 12/18 months: 1, 7, 14, 21, 28 and 35 cm [½",2¾",5½",8 ¼",11",13¾"] SIZE 2 years: 1, 8, 16, 24, 32 and 40 cm [⅜",3⅛",6 ¼",9½",12½",15 ¾"] SIZE 3/4 years: 1, 10, 19, 28, 37 and 46 cm [⅜",4",7½",11",14½",18"] -------------------------------------------------------- HOLE FOR SEAT BELT IN CAR SEAT: You can make a hole on front and back piece for car seat belt. Make the first hole when back piece measures approx 16-20-23 (28-33) cm / 6¼"-8"-9" (11"-13") (or required measurements) by binding off the middle 4 sts on needle. On next row cast on 4 new sts over bound off sts and continue as before. Repeat on front piece when piece measure from shoulder 42-47-52 (58-59) cm / 16½-18½-20½" (22¾"-23¼"). -------------------------------------------------------- KNITTING TIPS: For a nice edge along hood, front edges and sleeve edges, slip 1st st on every row starting from the edge instead of knitting it. -------------------------------------------------------- BUNTING BAG: Worked in one piece, beg at the bottom of back piece, cast on for sleeves, bind off for neck and finish at the bottom of front piece. To fit in all sts work piece back and forth on circular needle. BACK PIECE: Cast on 36-40-44 (46-50) sts (includes 1 edge st each side) on needle size 8 mm [US 11] with Snow, Wish or Andes. Work 6 rows garter st – SEE ABOVE! Continue in stockinette st until piece measures 37-45-52 (62-67) cm [14½"-17¾"-20½" (24⅜"-26⅜")] – AT THE SAME TIME dec 4 sts evenly on the last row = 32-36-40 (42-46) sts. REMEMBER THE KNITTING GAUGE! Work 6 rows garter st on all sts and now continue in moss st – SEE ABOVE. When piece measures 46-54-61 (71-76) cm [18"-21¼"-24" (28"-30")] cast on new sts each side for sleeves at the end of every row: 4 sts 1 time, 5 sts 1-1-1 (2-2) times and 9-10-12 (12-16) sts 1 time = 68-74-82 (94-106) sts. Incorporate inc sts in moss st as you go along. NOTE! After the last inc work 3 sts each side (= sleeve edges) in garter st. When piece measures 54-63-71 (82-88) cm [21¼"-24¾"-28" (32¼"-34⅝")] continue as follows: 3 garter sts, 19-22-25 (31-37) moss st, 24-24-26 (26-26) garter sts (= mid back), 19-22-25 (31-37) moss sts, 3 garter sts. After 6 rows garter st mid back bind off the middle 12-12-14 (14-14) sts for neck and complete each side separately. Slip sts on the right side on a stitch holder. LEFT FRONT PIECE: = 28-31-34 (40-46) sts. Continue in moss st with 6 garter sts towards neckline and 3 garter sts towards sleeve edge. When piece measures 58-67-75 (86-92) cm [22¾"-26⅜"-29½" (33⅞"-36¼")] insert a marker = mid shoulder – NOW MEASURE PIECE FROM HERE! Continue as before. When piece measures 1-1-2 (2-2) cm [⅜"-⅜"-¾" (¾"-¾")] inc 1 st towards neckline inside 6 garter sts on next row from RS – SEE INCREASING TIP. Work return row and repeat the inc on next row from RS. Work return row and now cast on 7-7-8 (8-8) new sts at the end of row towards mid front = 37-40-44 (50-56) sts. Work 2 rows garter st on the 6-7-8 (8-8) new sts, work remaining sts as before. Continue in moss st with 6 garter sts towards mid front (= front band) and 3 garter sts at sleeve edge as before. When piece measures 9-10-11 (11-12) cm [3½"-4"-4⅜" (4⅜"-4 ¾")] bind off sleeve sts at the side at beg of row as follows: 9-10-12 (12-16) sts 1 time, 5 sts 1-1-1 (2-2) times and 4 sts 1 time = 19-21-23 (24-26) sts. Continue in moss sts with 6 garter sts on front band until piece measures approx 18-19-20 (21-22) cm [7"-7½"-8" (8¼"-8¾")] (fold piece by marker on shoulder to make sure there is an equal amount of moss st rows on front and back piece). Work 6 rows garter st on all sts and continue in stockinette st with 6 garter sts on front band. AT THE SAME TIME on first row inc 2 sts evenly (do not inc on front band) = 21-23-25 (26-28) sts. When piece measures approx 35-41-46 (52-56) cm [13¾"-16⅛"-18" (20½"-22")] slip sts on a stitch holder – adjust so that next row is from RS. RIGHT FRONT PIECE: Slip sts from stitch holder on shoulder back on needle = 28-31-34 (40-46) sts, and work like left front piece, but mirrored. AT THE SAME TIME bind off for buttonholes on front band – SEE ABOVE. When piece measures 35-41-46 (52-56) cm [13¾"-16⅛"-18" (20½"-22")] – adjust to left front piece – slip sts from left front piece in on the same needle = 42-46-50 (52-56) sts. On next row (= RS) work front band sts tog as follows: Work stockinette st on the first 15-17-19 (20-22) sts, slip 6 front band sts from right front piece on cable needle in front of piece, * work tog 1 st from cable needle and 1 st from left front band *, repeat from *-* 6 times = 6 dec sts. Work remaining sts on row in stockinette st = 36-40-44 (46-50) sts. Continue in stockinette st on all sts. When piece measures approx 55-64-72 (83-89) cm [21⅝"-25¼"-28⅜" (32¾"-35")] (fold piece double by marker on shoulder to measure front piece to back piece) work 6 rows garter st on all sts and bind off loosely. ASSEMBLY: Fold piece double by shoulder and sew under arm and side seams inside 1 edge st. Sew cast on row to bind off row at bottom of bag, sew in outer loops of sts to avoid a chunky seam. HOOD: Pick up 37-39-41 (45-47) sts on needle size 8 mm [US 11] round neckline from RS (beg mid front). Work moss back and forth on needle. When hood measures 18-20-22 (24-26) cm [7"-8"-8¾" (9½"-10¼")] work 2 rows garter st on all sts and bind off loosely. Sew hood tog at the top. Sew on buttons. |
|
 |
|
Have you finished this pattern?Tag your pictures with #dropspattern #hazelnutbuntingbag or submit them to the #dropsfan gallery. Do you need help with this pattern?You'll find 12 tutorial videos, a Comments/Questions area and more by visiting the pattern on garnstudio.com. © 1982-2026 DROPS Design A/S. We reserve all rights. This document, including all its sub-sections, has copyrights. Read more about what you can do with our patterns at the bottom of each pattern on our site. |
|


With over 40 years in knitting and crochet design, DROPS Design offers one of the most extensive collections of free patterns on the internet - translated to 17 languages. As of today we count 325 catalogs and 12298 patterns - 12288 of which are translated into English (US/in).
We work hard to bring you the best knitting and crochet have to offer, inspiration and advice as well as great quality yarns at incredible prices! Would you like to use our patterns for other than personal use? You can read what you are allowed to do in the Copyright text at the bottom of all our patterns. Happy crafting!
Post a comment to pattern DROPS Baby 18-2
We would love to hear what you have to say about this pattern!
If you want to leave a question, please make sure you select the correct category in the form below, to speed up the answering process. Required fields are marked *.