
Popular categories
Looking for a yarn?


Comments / Questions (17)
![]() Laura wrote:
Laura wrote:
Is there an advantage of working the first rows of the sleeve flat and sewing the gap closed versus picking up all of the arm stitches and working all rows in the round? Are the two methods interchangeable? Thank you!
06.01.2026 - 20:18DROPS Design answered:
Hi Laura, Working back and forth to begin with shapes the sleeve cap so the sleeve fits into the armhole better and has a nicer shape. Regards, Drops Team.
07.01.2026 - 06:47
![]() Anouk wrote:
Anouk wrote:
Hi, bij het oppakken van de schouder staat dat ik 34 steken moet opnemen, dit is even veel als de meerderingen die gedaan zijn aan het achterpand. Alleen er zijn nu nog twee steken extra die aan het begin zijn opgezet, namelijk de beginrand + de eerste naald averechts. In totaal kan ik dus 36 steken oppakken langs de schouderkant. Wat is precies de bedoeling? Waar moet ik twee steken laten gaan? Hoor het graag, bedankt, Anouk
05.01.2026 - 15:54DROPS Design answered:
Dag Anouk,
Je houdt in het midden 39 steken voor de hals en je neemt 34 steken op voor de schouder.
07.01.2026 - 11:27
![]() Marjolijn wrote:
Marjolijn wrote:
Ik begrijp niet wat jullie bedoelen met de zin: tot de armsgaten 5 cm meten( gemeten iver het armsgat). Zouden jullie me dit uit kunnen leggen. Het staat bij het achterpand van de trui sailor stripes
20.07.2025 - 17:32
![]() Chelsea wrote:
Chelsea wrote:
Hi When joining the front two pieces it says “ When the piece measures 14-15-17-18-19-20 cm (measured along the armhole), work A.1 ” However the armhole hasn’t been made yet? Are we measuring from the shoulder?
20.04.2025 - 10:24DROPS Design answered:
Dear Chelsea, you don't work an armhole. Since you are working the piece back and forth, you are already leaving a hole for the armhole. So, measuring along the side edge of the front piece, from the top of the shoulder, would be the same as measuring along the armhole. Happy knitting!
21.04.2025 - 00:48
![]() Maria wrote:
Maria wrote:
Hei. Kun etukappaletta neulotaan kohdassa: ”Jatka neulomista tähän tapaan, kunnes työn pituus on n. 25-26-28-29-30-31 cm ja työssä on yhteensä 3 raitaa (kuten takana).” Onko tuo n.25 cm mitattuna ulkoreunasta olkapäästä vaiko puseron keskeltä pääaukon reunasta?
20.02.2025 - 09:55DROPS Design answered:
Hei, myös tämä mitta otetaan kädentien ulkoreunasta.
20.02.2025 - 18:26
![]() Malene R wrote:
Malene R wrote:
Hei. Jeg skal starte på forstykket, men forstår ikke hvor jeg skal plukke opp masker. Skal man plukke opp langs den første oppleggskanten? Eller starte ytterst langs første oppleggskant og nedover mot ermehullet?
16.02.2025 - 20:43DROPS Design answered:
Hei Malene, På høyre skulder, plukker du opp masker fra skulderen mot halsen (fra retten og langs hele skulderen på bakstykket). På venstre skulder, plukker du opp fra halsen og langs hele skulderen (fra retten). God fornøyelse!
17.02.2025 - 07:05
![]() Tawni wrote:
Tawni wrote:
What size is displayed in the photos? The measurements on the pattern seem very small and I’m unsure what size to knit.
08.01.2025 - 03:58DROPS Design answered:
Dear Tawny, most of the time our models are wearing either a size S or a size M; note that the measurements in the chart are in cm - convert into inches here. Measure a similar garment you have and like the size to find out the matching size. Read more here. Happy knitting!
08.01.2025 - 07:35
![]() Andrea wrote:
Andrea wrote:
Liebes Team, bei der Maschenzunahme für das Ärmelbündchen Gr. S habe ich 61M und soll 8M zunehmen. Ist dann aber ne ungrade Zahl. Also lieber 9M zunehmen oder 7M um auf die 68M zu kommen? Liebe Grüße, Andrea
04.09.2024 - 11:38DROPS Design answered:
Liebe Andrea, man muss hier nur 7 Maschen zunehmen - deutsche Anleitung wird angepasst, danke für den Hinweis. Viel Spaß beim Stricken!
05.09.2024 - 08:41
![]() SandraM wrote:
SandraM wrote:
Hello, what does the pattern mean by 'Insert 1 marker inside the first 3 stitches on each side. ' Do I knit or purl 3 then place the marker or K or purl 2 and place the marker, I don't under stand what inside the first three stitches means, I am used to Knit 3 place a marker, for example. Thank you SandraM
09.04.2024 - 23:55DROPS Design answered:
Dear Sandra, it means, you start knitting your row, after the 3d stitch you place a marker, then continue with th erow, until the last three stitch, place the second marker and finish your row. Happy Knitting!
10.04.2024 - 06:05
![]() Babett Krüger wrote:
Babett Krüger wrote:
Können Sie mir bitte erklären was Sie mit auffassen meinen? Meinen Sie eine Masche aufnehmen? (Dazu nehmen) Vielen Dank
05.11.2023 - 19:15DROPS Design answered:
Liebe Frau Krüger, also ja, bei beiden ZUNAHMETIPP wird es wie in diesem Video aufgefassen/zugenommen; die Maschen von den beiden Schulter, Vorderteil, werden wie in diesem Video aufgefassen. Viel Spaß beim stricken!
06.11.2023 - 08:51
|
|||||||||||||
Sailor Stripes#sailorstripessweater |
|||||||||||||
 |
 |
||||||||||||
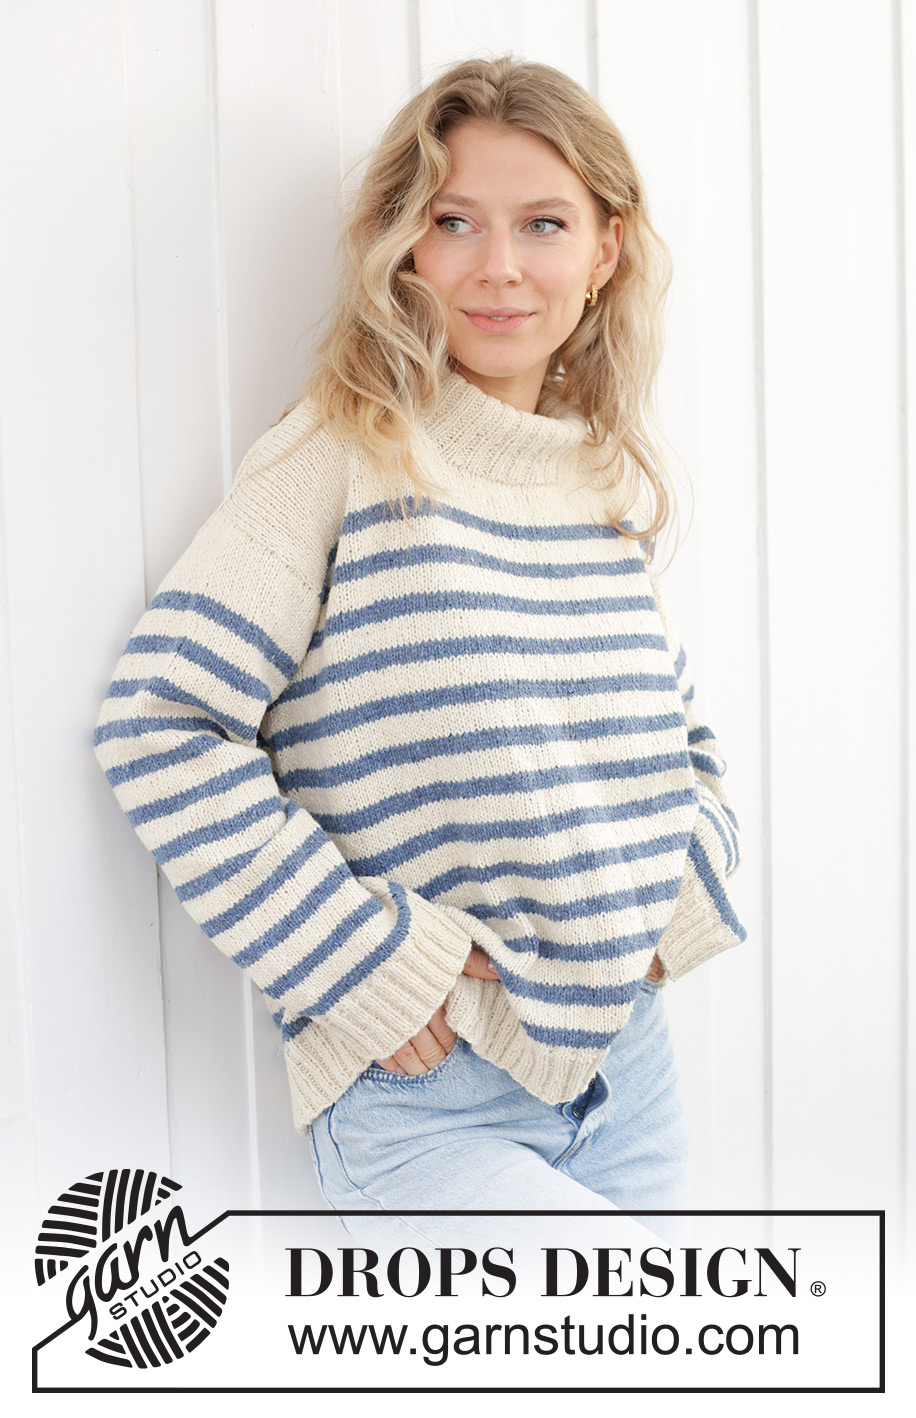
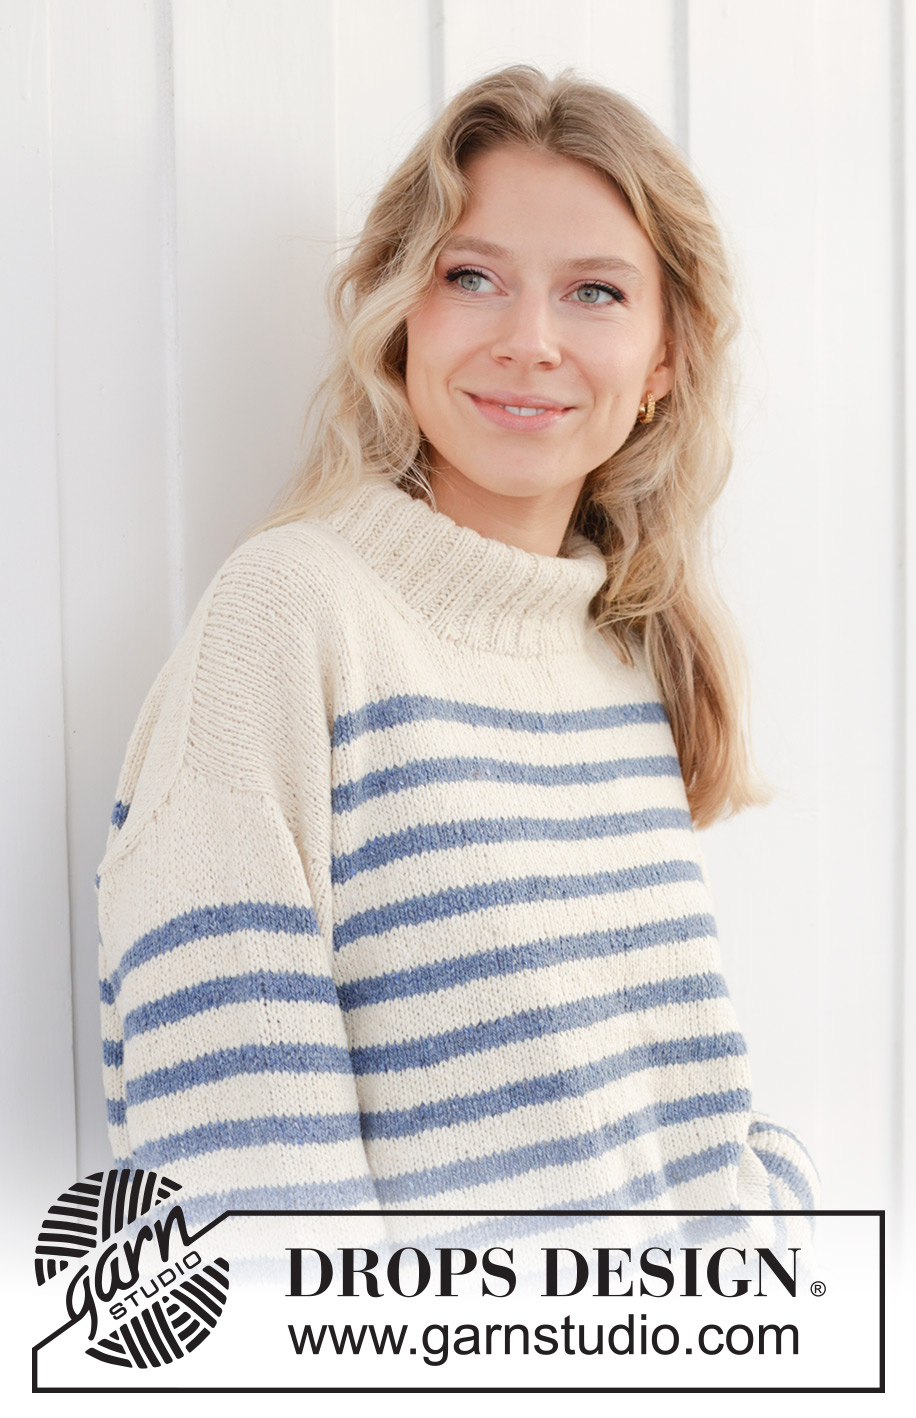
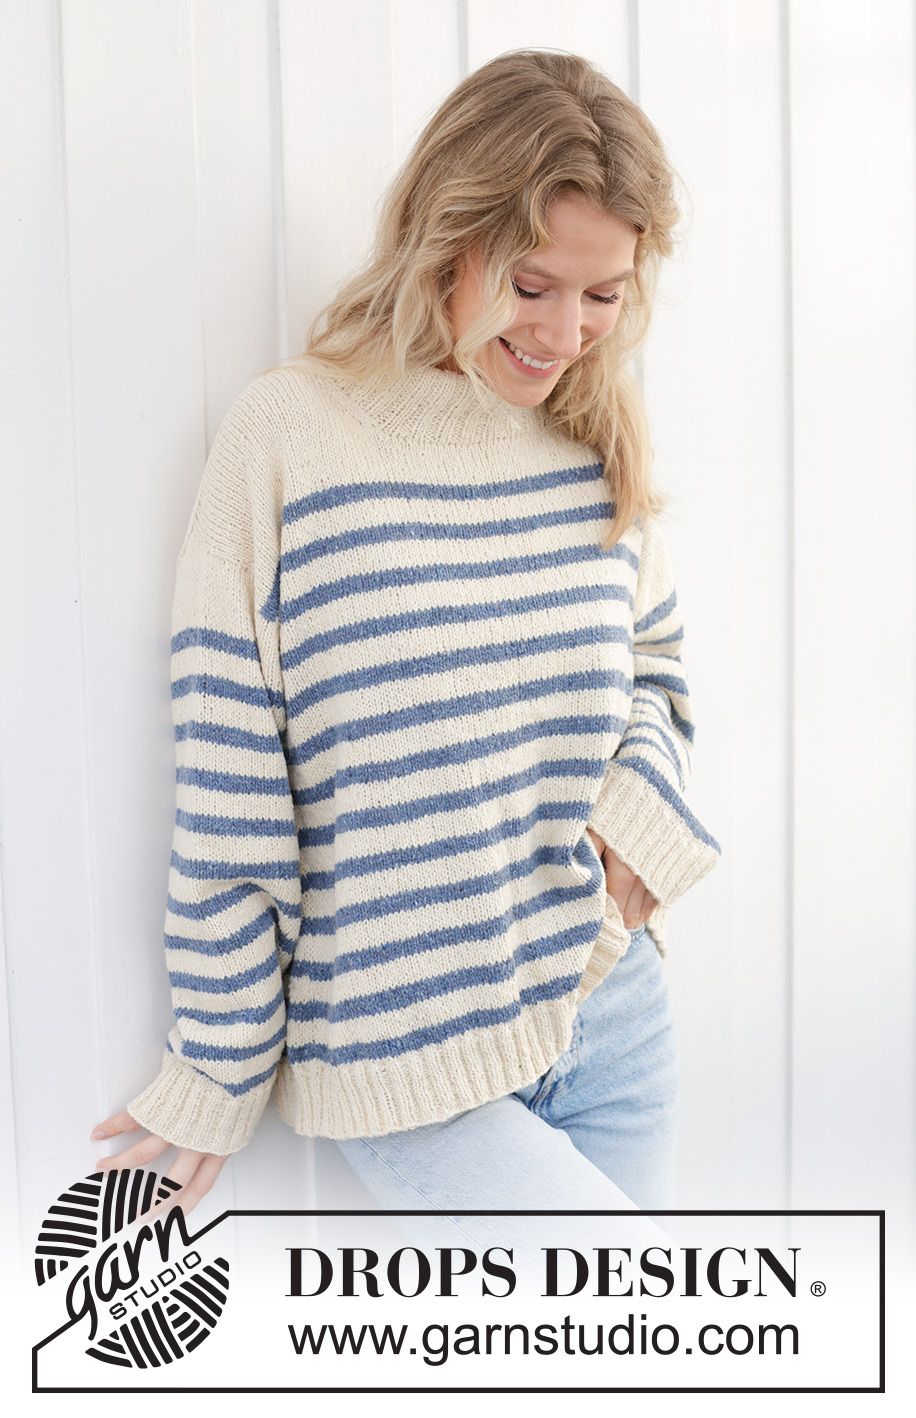
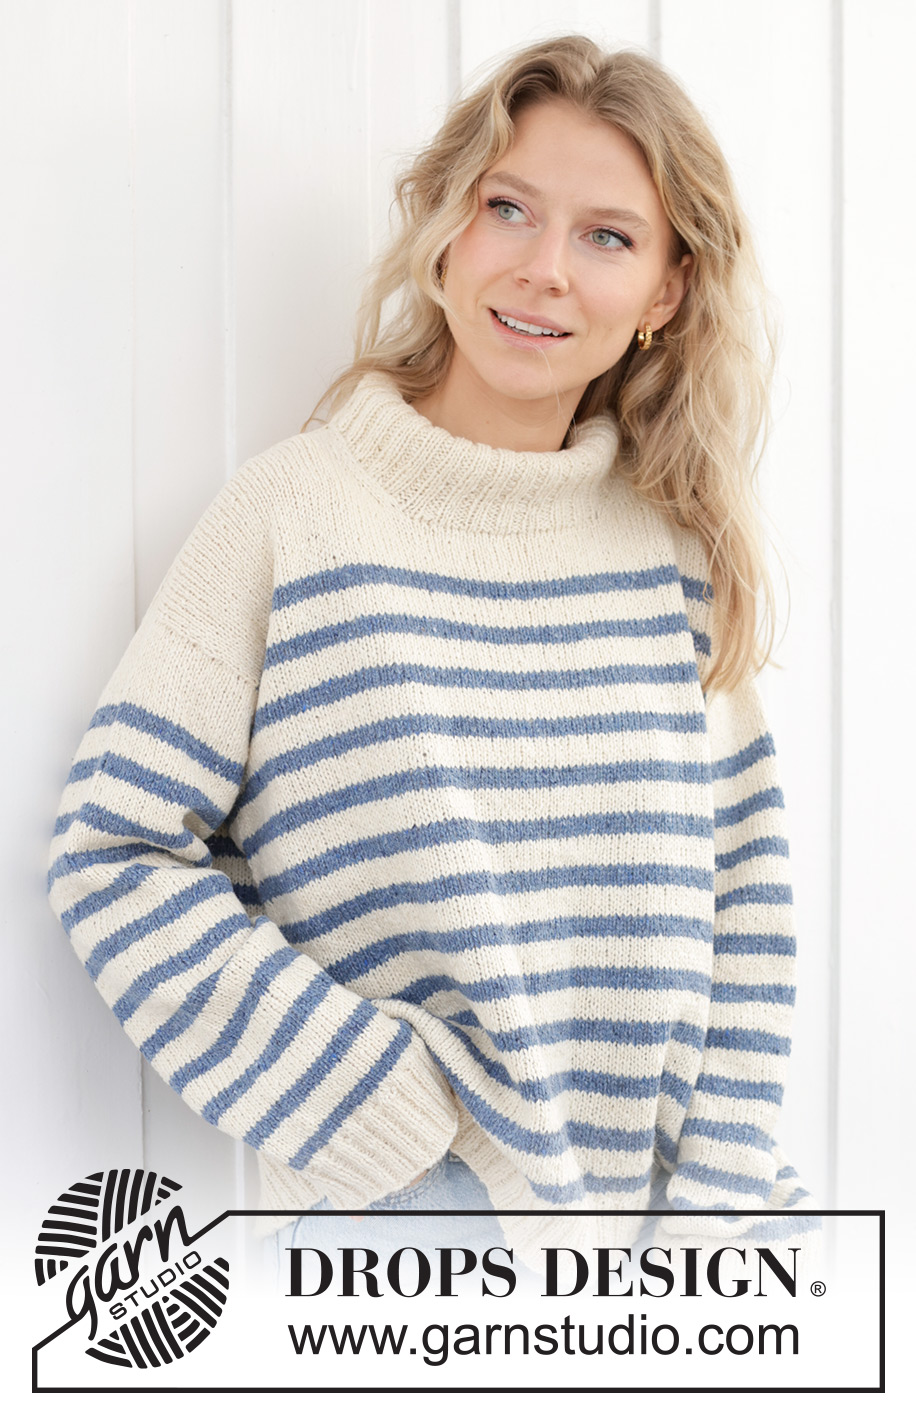
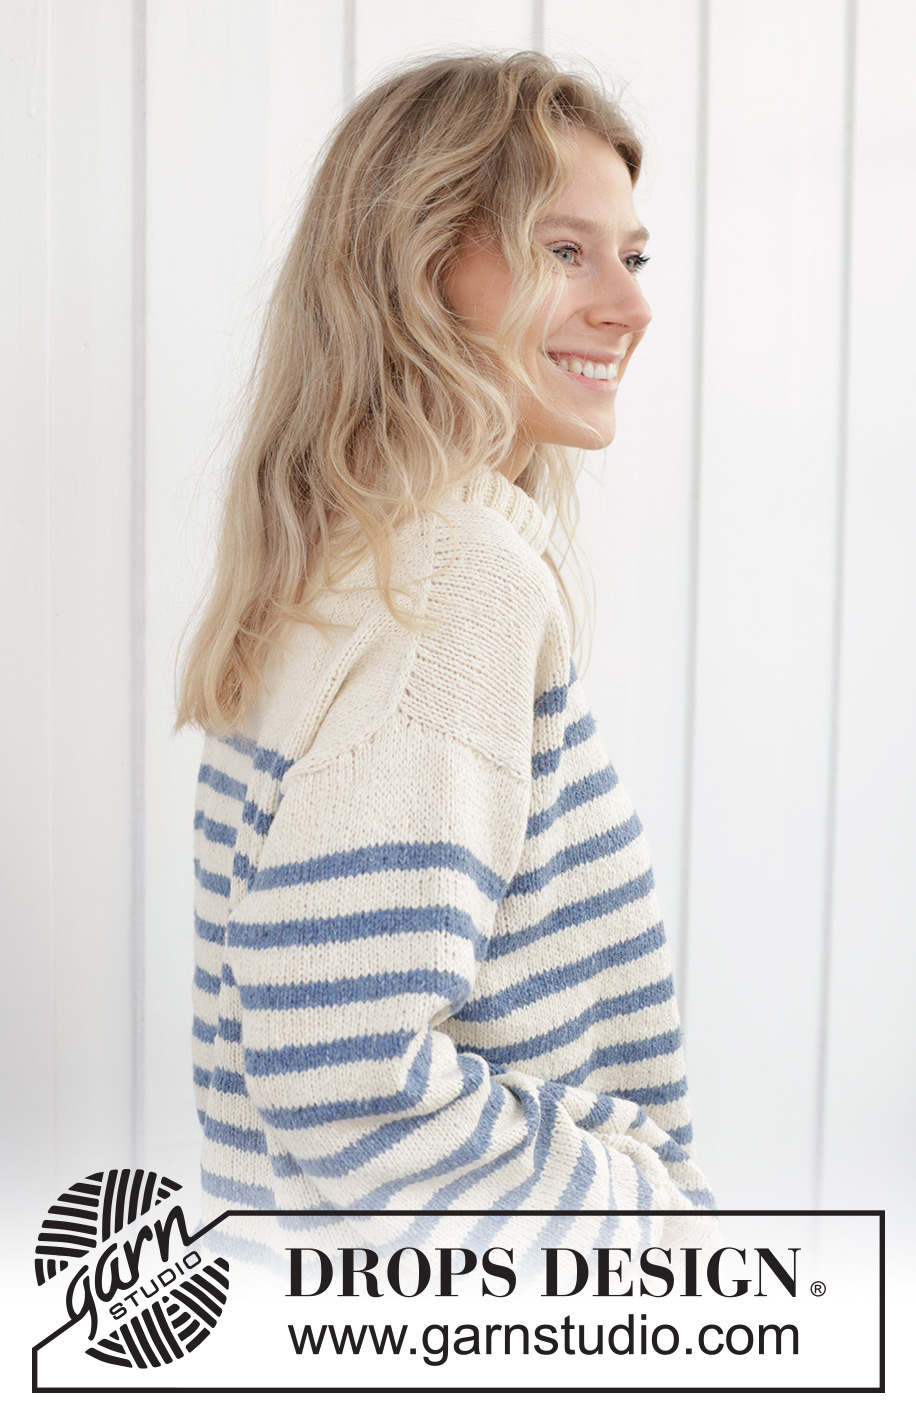
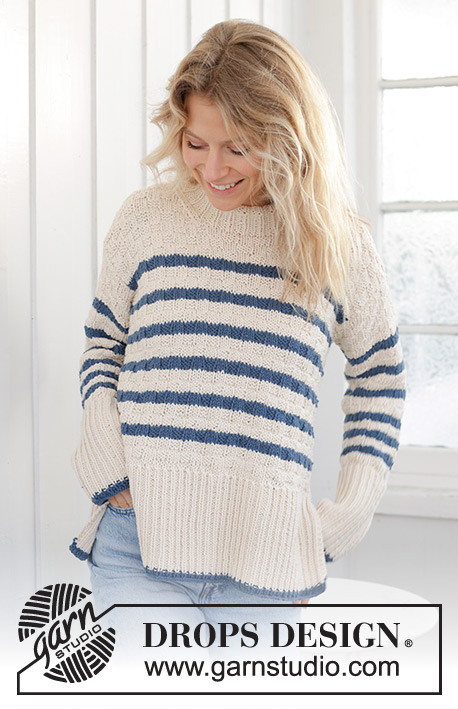
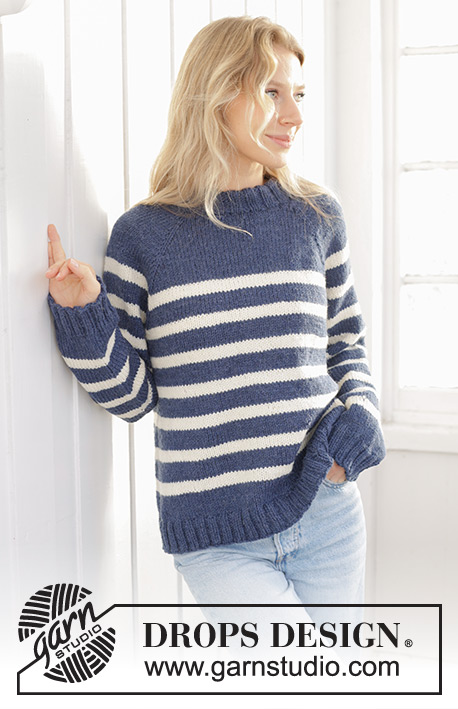
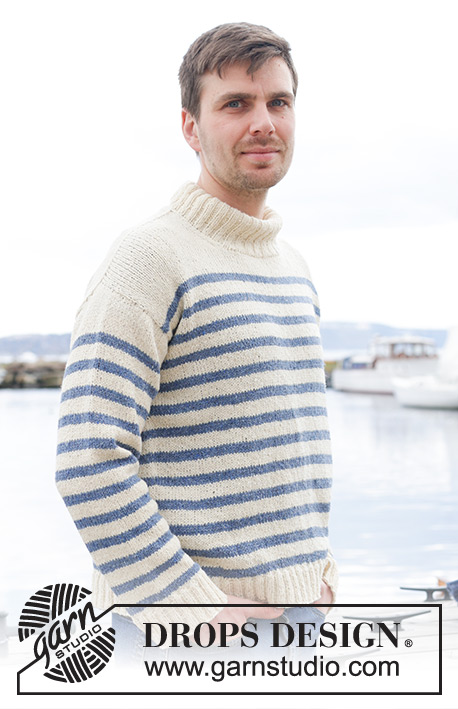
Knitted sweater in DROPS Soft Tweed or DROPS Daisy. The piece is worked top down with diagonal/European shoulders, stripes and high neck. Sizes S - XXXL.
DROPS 239-39 |
|||||||||||||
|
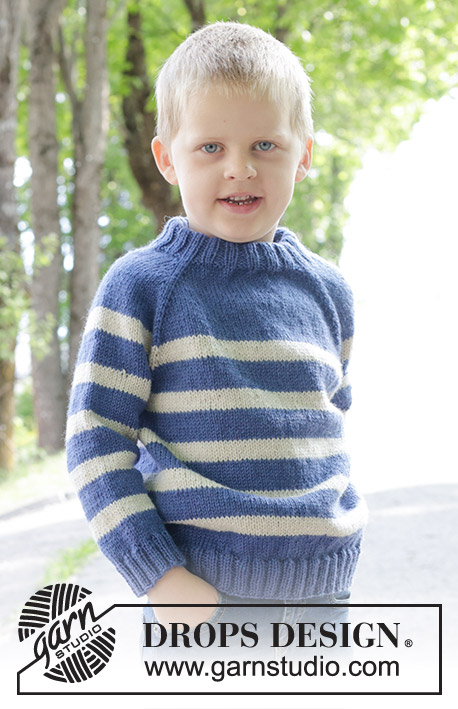
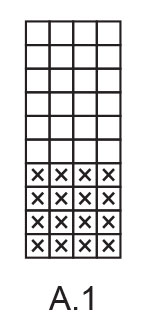
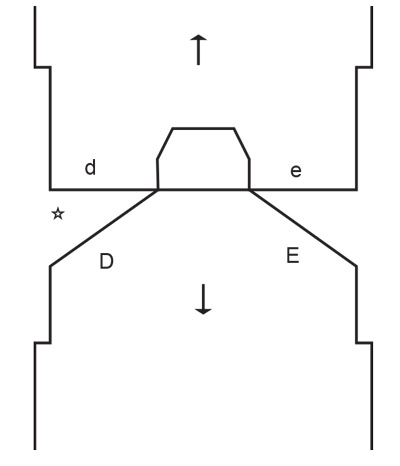
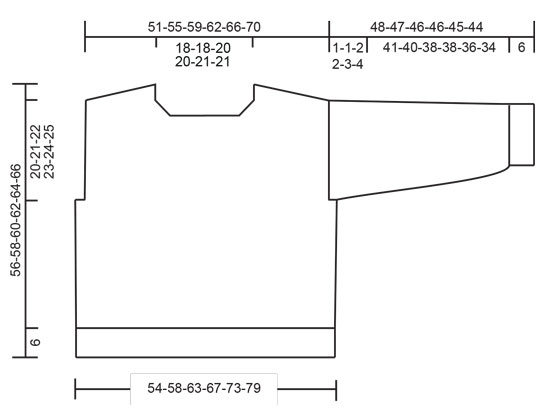
------------------------------------------------------- EXPLANATIONS FOR THE PATTERN: ------------------------------------------------------- STRIPES: See diagram A.1. STRIPE TIP (applies when working in the round): For a neater finish at the beginning and end of the round, when working stripes, work as follows: Change to the new color and work 1 round. Work the first stitch on the next round as follows: Lift up the back loop of the stitch below the first stitch on the left needle and place it on the left needle. Knit this stitch together with the next stitch. The transition will then be less visible. INCREASE TIP FROM THE RIGHT SIDE: Increase towards the left AFTER MARKER: Use left needle to pick up yarn between 2 stitches from row below, pick up yarn from the front and knit in the stitch loop that is on the back of the needle. Increase towards the right BEFORE MARKER: Use left needle to pick up yarn between 2 stitches from row below, pick up yarn from the back and knit in the stitch loop that is on the front side of the needle. INCREASE TIP FROM THE WRONG SIDE: Increase towards the right AFTER MARKER: Use left needle to pick up yarn between 2 stitches from row below, pick up yarn from the back and purl in the stitch loop that is on the front side of the needle. Increase towards the left BEFORE MARKER: Use left needle to pick up yarn between 2 stitches from row below, pick up yarn from the front and purl in the stitch loop that is on the back side of the needle. DECREASE TIP (for sleeves): Decrease 1 stitch on either side of the marker-thread as follows: Work until there are 3 stitches left before the marker-thread, knit 2 together, knit 2 (marker-thread sits between these 2 stitches), slip 1 stitch as if to knit, knit 1 and pass the slipped stitch over the knitted stitch. ------------------------------------------------------- START THE PIECE HERE: ------------------------------------------------------- SWEATER – SHORT OVERVIEW OF THE PIECE: The back piece is worked back and forth with circular needle, top down until the armholes are finished. Stitches are knitted up along each shoulder and increased for the neck, then the front piece is worked back and forth with circular needle until the armholes are finished. The body is joined and finished in the round with circular needle. Stitches are knitted up for the sleeve, the sleeve cap is worked back and forth with circular needle, then the rest of the sleeve in the round, with short circular needle/double pointed needles. The neck is worked to finish. BACK PIECE: Cast on 39-39-43-43-47-47 stitches with circular needle size 4 MM = US 6 and color off white DROPS Soft Tweed or DROPS Daisy. Purl 1 row from the wrong side. Insert 1 marker inside the first 3 stitches on each side. Keep the markers inside the 3 stitches as you work onwards. Work stockinette stitch back and forth, AT THE SAME TIME increase AFTER the marker at the beginning of the row (right side) and BEFORE the marker at the end of the row – read INCREASE TIP FROM RIGHT SIDE. On the next row increase in the same way - read INCREASE TIP FROM WRONG SIDE. Increase like this from both the right and wrong side a total of 34-38-40-44-46-50 times. REMEMBER THE KNITTING GAUGE! After the last increase there are 107-115-123-131-139-147 stitches and the piece measures approx.12-14-14-16-16-18 cm = 4¾"-5½"-5½"-6¼"-6¼"-7" from the cast-on edge. Continue with color off white until the armholes measure 4-5-5-6-7-8 cm = 1½"-2"-2"-2⅜"-2¾"-3⅛" (measured along armhole). Work now A.1 back and forth over all stitches, repeating the pattern in height - read STRIPES. Continue until the piece measures 15-16-16-17-18-19 cm = 6"-6¼"-6¼"-6¾"-7"-7½" (measured along the armhole) and A.1 has been worked a total of 3 times in height. Put stitches on a thread and put aside. Work now front piece as explained below. FRONT PIECE: Start on the right shoulder (when the garment is worn). Knit up from the right side 34-38-40-44-46-50 stitches inside 1 stitch along the shoulder on the back piece (i.e. 1 stitch in each row) with color off white. Purl 1 row from the wrong side. Work stockinette stitch for 6 cm = 2⅜". Now increase 1 stitch (as before) for the neck, inside the 3 stitches at the end of each row from the right side, a total of 6-6-7-7-8-8 times. After the last increase there are 40-44-47-51-54-58 stitches. Put stitches on a thread after the last increase from right side and put piece aside. Now work the left shoulder as described below. Knit up from the right side 34-38-40-44-46-50 stitches inside 1 stitch along the left back shoulder with color off white. Purl 1 row from the wrong side. Work stockinette stitch for 6 cm = 2⅜". Now increase 1 stitch (as before) for the neck, inside the 3 stitches at the beginning of each row from the right side, a total of 6-6-7-7-8-8 times. After the last increase there are 40-44-47-51-54-58 stitches. Work the next row from the wrong side as follows: Work over the 40-44-47-51-54-58 stitches on the left front piece, cast on 27-27-29-29-31-31 stitches for the neck at the end of the row, work the 40-44-47-51-54-58 stitches from the right front piece = 107-115-123-131-139-147 stitches. Continue with stockinette stitch. When the piece measures 14-15-17-18-19-20 cm = 5½"-6"-6¾"-7"-7½"-8" (measured along the armhole), work A.1 until the piece measures 25-26-28-29-30-31 cm = 9¾"-10¼"-11"-11⅜"-11¾"-12¼" and there are 3 stripes matching the back piece. Now join the back and front pieces for the body. BODY: Continue the stripes and work the 107-115-123-131-139-147 stitches on the front piece, cast on 6-6-10-10-14-18 stitches at the end of the row (in side under sleeve), work the 107-115-123-131-139-147 stitches from the back piece and cast on 6-6-10-10-14-18 stitches (in side under sleeve) = 226-242-266-282-306-330 stitches. Continue A.1 in the round until the piece measures 50-52-54-56-58-60 cm = 19¾"-20½"-21¼"-22"-22¾"-23⅝", measured from the top of the shoulder on the front piece – finish after a couple of rounds of color off white. Knit 1 round and increase 22-26-26-26-30-30 stitches evenly spaced = 248-268-292-308-336-360 stitches. Change to circular needle size 3 MM = US 2.5. Work rib (knit 2, purl 2) for 6 cm = 2⅜" with color off white. Bind off a little loosely. The sweater measures approx. 56-58-60-62-64-66 cm = 22"-22¾"-23⅝"-24⅜"-25¼"-26", measured from the top of the shoulder on the front piece. RIGHT SLEEVE: Use circular needle size 4 MM = US 6 and color off white. Knit up from the right side 32-34-34-36-38-40 stitches from the bottom of the armhole and up the back piece to the shoulder, then 53-55-59-61-63-65 stitches from the shoulder, down the front piece to the bottom of the armhole = 85-89-93-97-101-105 stitches. Insert 1 marker in the middle of the row – used to measure from. Start from the wrong side and work stockinette stitch back and forth for 1-1-2-2-3-4 cm = ⅜"-⅜"-¾"-¾"-1⅛"-1½". Now join the sleeve and work in the round with short circular needle/double pointed needles. Insert 1 marker thread at the beginning of the round (mid under sleeve), let the marker thread follow upwards. When the sleeve measures 3-3-3-4-4-4 cm = 1⅛"-1⅛"-1⅛"-1½"-1½"-1½", work A.1 - remember STRIPE TIP. AT THE SAME TIME when the sleeve measures 4-4-5-5-6-7 cm = 1½"-1½"-2"-2"-2⅜"-2¾" from the marker-thread, decrease 2 stitches under the sleeve – read DECREASE TIP. Decrease like this every 3-3-2½-2½-2-1½ cm = 1⅛"-1⅛"-1"-1"-¾"-½" a total of 12-12-14-14-16-16 times = 12-12-14-14-16-16 stitches. Work until the sleeve measures 42-41-40-40-39-38 cm = 16½"-16⅛"-15¾"-15¾"-15¼"-15". There is 6 cm = 2⅜" left - finish after a couple of rounds of color off white. Knit 1 round and increase 7 stitches evenly spaced = 68-72-72-76-76-80 stitches. Change to double pointed needles size 3 MM = US 2.5. Work rib (knit 2, purl 2) for 6 cm = 2⅜". Bind off a little loosely, with knit over knit and purl over purl. The sleeve measures approx. 48-47-46-46-45-44 cm = 19"-18½"-18"-18"-17¾"-17¼". Sew the bottom of the armhole – see sketch. LEFT SLEEVE: Use circular needle size 4 MM = US 6 and color off white. Knit up from the right side 53-55-59-61-63-65 stitches from the bottom of the armhole and up the front piece to the shoulder, then 32-34-34-36-38-40 stitches from the shoulder, down the back piece to the bottom of the armhole = 84-88-93-97-101-105 stitches. Insert 1 marker in the middle of the row – used to measure from. Work in the same way as the right sleeve. NECK: Start on one shoulder and knit up from the right side, inside 1 edge stitch, 120-140 stitches with short circular needle size 3 MM = US 2.5 and color off white. Stitch-number must be divisible by 4. Work rib in the round (knit 2, purl 2) for 10 cm = 4". Bind off. If you want a double neck, fold it to the inside and sew a couple of stitches on each side to keep it in place. |
|||||||||||||
Diagram explanations |
|||||||||||||
|
|||||||||||||
 |
|||||||||||||
 |
|||||||||||||
 |
|||||||||||||
 |
|||||||||||||
Have you finished this pattern?Tag your pictures with #dropspattern #sailorstripessweater or submit them to the #dropsfan gallery. Do you need help with this pattern?You'll find 30 tutorial videos, a Comments/Questions area and more by visiting the pattern on garnstudio.com. © 1982-2026 DROPS Design A/S. We reserve all rights. This document, including all its sub-sections, has copyrights. Read more about what you can do with our patterns at the bottom of each pattern on our site. |
|||||||||||||


With over 40 years in knitting and crochet design, DROPS Design offers one of the most extensive collections of free patterns on the internet - translated to 17 languages. As of today we count 324 catalogs and 12290 patterns - 12280 of which are translated into English (US/in).
We work hard to bring you the best knitting and crochet have to offer, inspiration and advice as well as great quality yarns at incredible prices! Would you like to use our patterns for other than personal use? You can read what you are allowed to do in the Copyright text at the bottom of all our patterns. Happy crafting!
Post a comment to pattern DROPS 239-39
We would love to hear what you have to say about this pattern!
If you want to leave a question, please make sure you select the correct category in the form below, to speed up the answering process. Required fields are marked *.