
Popular categories
Looking for a yarn?


Comments / Questions (36)
![]() Alanah wrote:
Alanah wrote:
Hi there! For the right and left bands, I am unclear on the instruction "At the same time as you increase at the beginning of the V-neck". Does this refer to the top (near the shoulder) of the V neck (and if so, at the start of the 4 row decrease section or the start of the 2 row decrease section) or at the bottom of the V-neck (by where the botton and button hole go)? Clarification would be much appreciated!
10.11.2022 - 16:54DROPS Design answered:
Dear Alanah, this refers to the very first decrease for V-neck you worked on left/right front piece when piece measured 28-29-30-31-32-33 cm, that's the bottom of V-neck on front pieces. Happy knitting!
11.11.2022 - 08:34
![]() Niina wrote:
Niina wrote:
Oletan että vasemman etukappaleen ohjeessa tulee joustinneuleen jälkeen kaventaa myös 11 silmukkaa koska nyt siinä pitäisi kaventaa 12 ja silti siinä pitäisi olla 53 silmukkaa. Mikä ei ole fyysisesti mahdollista
30.10.2022 - 21:32
![]() Wolf Angelika wrote:
Wolf Angelika wrote:
Hallo, ich habe zur Zunahme bei der rechten Blende eine Frage. Was bedeutet die Rückreihe stricken, bis noch zwei Maschen auf der Nadel sind? Wenn ich direkt am Anfang des V-Ausschnitts zunehmen soll, sind doch noch viel mehr Maschen auf der Nadel? Was bedeutet „gleichzeitig“? Ich stricke dann vier rechte Maschen und nach jeder rechten Masche mache ich einen Umschlag? Vielen Dank für Unterstützung.
14.08.2022 - 17:34DROPS Design answered:
Liebe Frau Wolf, die Rückreihe stricken Sie mit 1 Randmasche kraus rechts beidseitig, dazwischen werden die Maschen wie in A.1 gestrickt und die rechte Maschen direkt beim Beginn des V-Auschnittes stricken Sie 5 Mal (= 4 Maschen werden in dieser masche zugenommen, damit der V-Ausschnitt schöner wird), A.1 enden Sie mit der 1. Masche (= eine links verschränkte Masche bei der Rückreihe so ist das Bündchen symmetrisch). Viel Spaß beim stricken!
15.08.2022 - 08:48
![]() Veronica Ekengren wrote:
Veronica Ekengren wrote:
Kolla om antalet minskningar för vänster framstycke stämmer efter att resåren är gjord? Verkar som ni skrivit 1 m för mycket i alla storlekarna. För höger framstycke har ni en m mindre per storlek. Se kopierad text nedan 1 varv rätt där det minskas 10-11-11-12-14-14 maskor jämnt fördelat = 43-46-50-53-59-65 maskor.
08.07.2022 - 21:22
![]() Abbey wrote:
Abbey wrote:
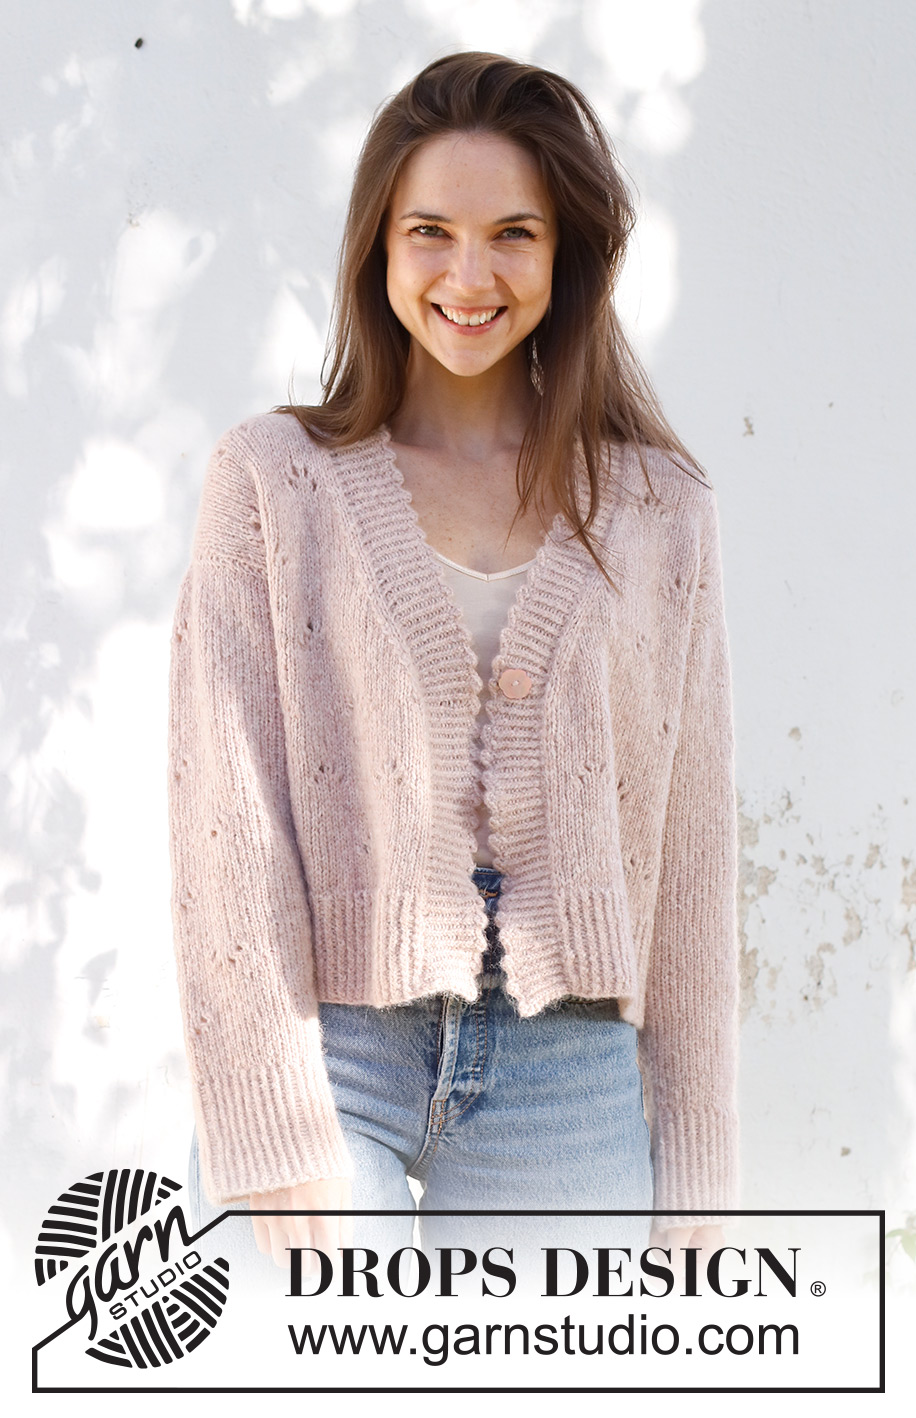
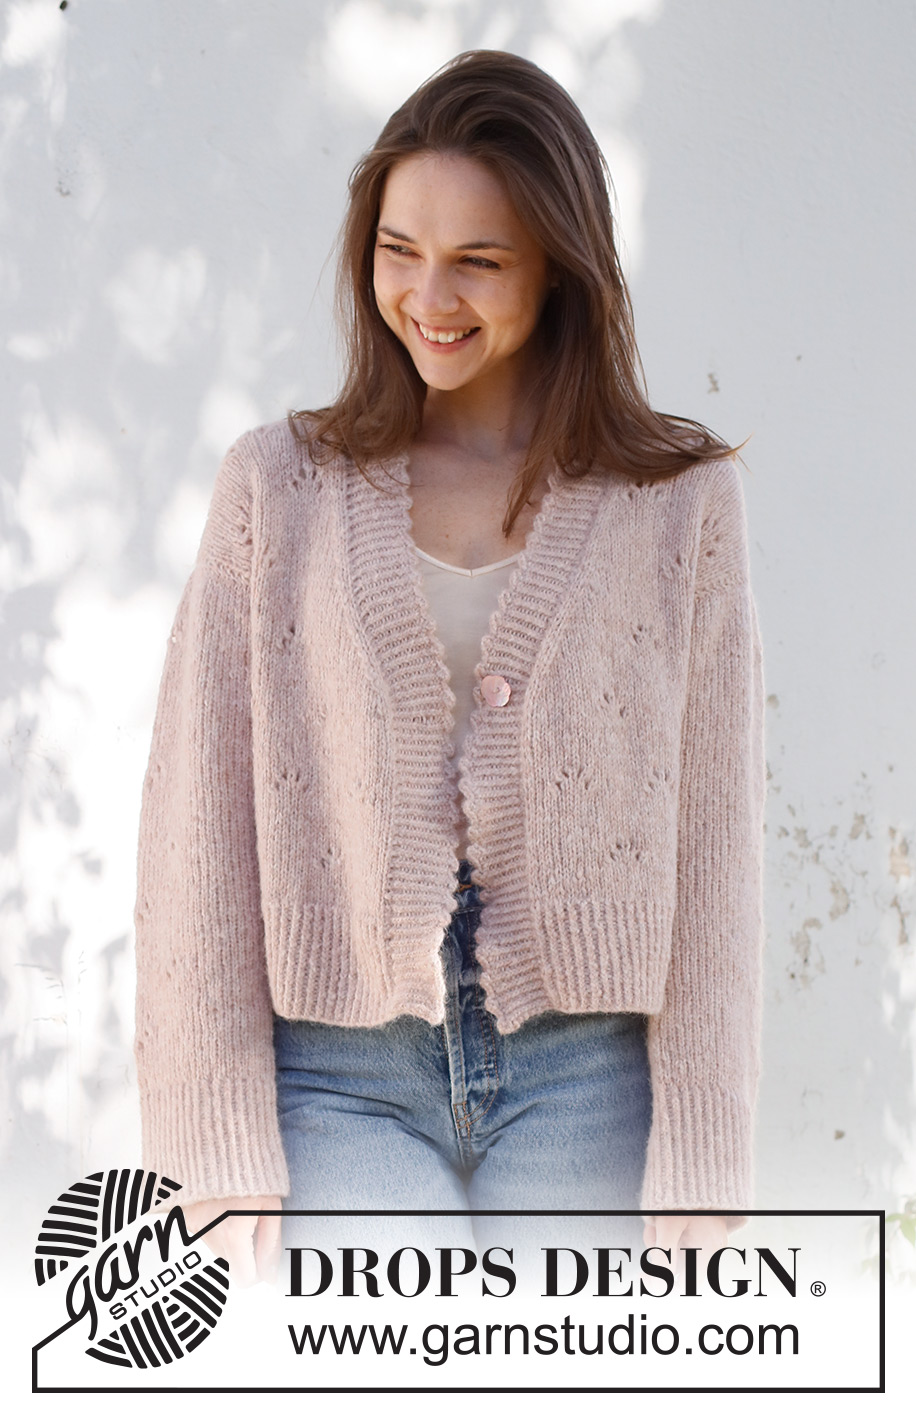
Hi, what size is the model wearing in the picture?
27.05.2022 - 16:49DROPS Design answered:
Dear Abbey, the model is wearing a M size. Happy knitting!
28.05.2022 - 21:25
![]() Angelika Huneke wrote:
Angelika Huneke wrote:
Hallo, ich habe eine Frage zur Maschenzunahme bei der Blende. Was genau ist mit Beginn des V-Ausschnitt gemeint? Da ich ja in einer Rückreihe bin beginnt die Zunahme oben, bei der letzten Maschenabnahme oder unten bei der ersten Maschenabnahme? Wo genau ist der Beginn des V-Ausschnitt?
17.05.2022 - 12:53DROPS Design answered:
Liebe Frau Hunecke, dies die Reihe bei jedem Vorderteil, wo Sie das erste Mal für den V-Halsausschnitt abgenommen haben, dh nach 28-29-30-31-32-33 cm (von unten gemessen). Hier können Sie diese Stelle bei der Hinreihe markieren, damit es einfacher bei der Rückreihe wird. Viel Spaß beim stricken!
17.05.2022 - 14:25
![]() Joy wrote:
Joy wrote:
Hi! i don’t understand this on the V neck right side. Decrease like this every 4th row 1 time (= the first decrease is explained above), every 2nd row 12-12-13-13-14-14 times, then every 4th row 3 times = 16-16-17-17-18-18 stitches decreased. You said to decrease 4th row 1 time.. then 3 times??
11.05.2022 - 14:53DROPS Design answered:
Dear Joy, you first decrease when piece measures 28-29-30-31-32-33 cm, then work 3 rows as before (without decreasing) and now work *1 row decreasing for neck, 1 row without decreasing for neck*, work these 2 rows a total of 12-12-13-13-14-14 times, then work: *1 row decreasing for neck, 3 rows without decreasing*, work these 4 rows a total of 3 times. Happy knitting!
11.05.2022 - 16:07
![]() Reuhl wrote:
Reuhl wrote:
Guten Tag, wie funktioniert es bei den Ärmeln nach 1cm Hin und zurück (Rundnadel) die Maschen auf ein Nadelspiel zu legen? Danke. :)
27.04.2022 - 13:58DROPS Design answered:
Liebe Frau Reuhl, Sie stricken zuerst 1 cm hin und zurück und dann legen Sie die Arbeit zusammen und stricken entwder mit Nadelspiel oder Magic loop. Viel Spaß beim stricken!
27.04.2022 - 15:25
![]() Glas wrote:
Glas wrote:
Hallo. Vielen Dank, jedoch meinte ich das nicht. Ich wollte wissen wie ich 3x abnehmen soll. Soll ich 3 Maschen abketten oder soll ich wie davor eine rand M, dann rechts, rechts abheben und das 3 mal oder wie? Also mir geht es darum wie ich 3 mal abnehmen soll und nicht wann. Danke im Voraus!
20.04.2022 - 13:53DROPS Design answered:
Liebe Frau Glas, sorry für das Misverständnis, Sie sollen jeweils nur 1 Masche abnehmen (nicht abketten), dh genau so wie erklärt: Rand-Masche kraus rechts, 1 Masche rechts, 1 Masche wie zum Rechtsstricken abheben, 1 Masche rechts, die abgehobene Masche über die gestrickte ziehen (= 1 Masche abgenommen), die Reihe wie zuvor zu Ende stricken. Habe ich dieses Mal richtig verstanden?
20.04.2022 - 17:08
![]() Glas wrote:
Glas wrote:
Hallo, ich habe eine Frage zu den Rechten V-AUSSCHNITT. Da steht man soll in jeder 2 Reihe abnehmen und dort wird es auch genau erklärt wie man vorgehen soll. Dann soll man jedoch in jeder 4. Reihe 3 x abnehmen. Wie soll ich dann bei 3x mal vorgehen? Soll ich eine rd M, dann rechts, rechts abheben, rechts und überheben und dann wieder abheben und rüber heben oder wie soll ich bei 3x abnehmen vorgehen?
20.04.2022 - 12:13DROPS Design answered:
Liebe Frau Glas, nach der letzen Abanhmen stricken Sie 3 Reihen (1 Rück- + 1 Hin- + 1 Rückreihe), dann nehmen Sie bei der nächsten Hinreihe ab. Diese 4 Reihen noch 2 mal stricken. Viel Spaß beim stricken!
20.04.2022 - 13:39
|
||||||||||||||||||||||
Sweetness Imprint#sweetnessimprintcardi |
||||||||||||||||||||||
 |
 |
|||||||||||||||||||||
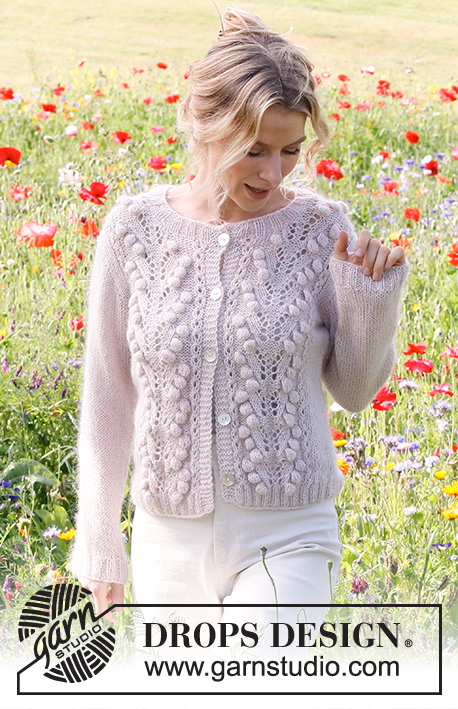
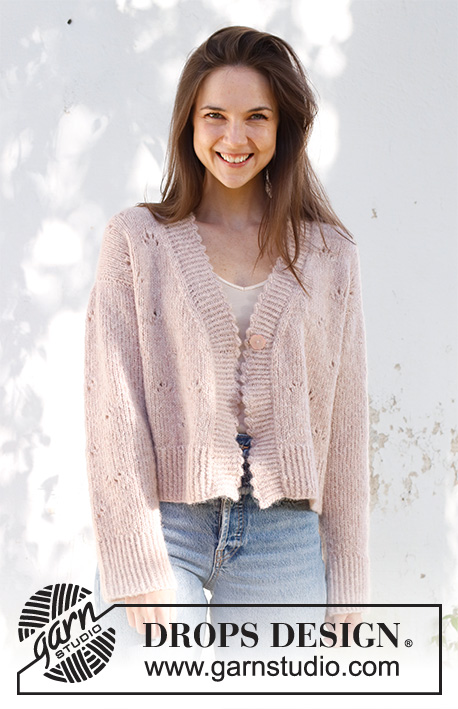
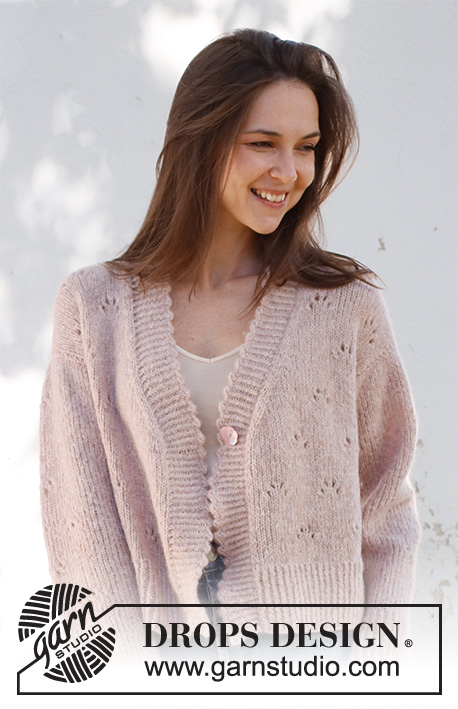
Knitted jacket in DROPS Air. The piece is worked bottom up, with lace pattern and picot-edges. Sizes S - XXXL.
DROPS 231-27 |
||||||||||||||||||||||
|
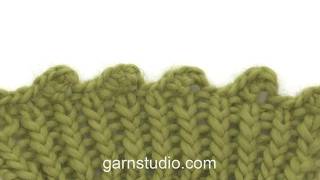
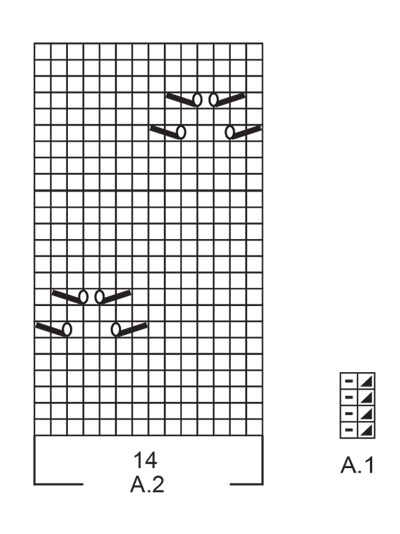
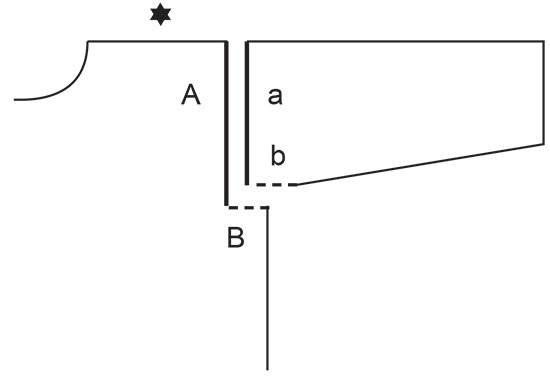
------------------------------------------------------- EXPLANATIONS FOR THE PATTERN: ------------------------------------------------------- RIDGE/GARTER STITCH (worked back and forth): Knit all rows. 1 ridge = knit 2 rows. PATTERN: See diagrams A.1 and A.2. The diagrams show all rows in the pattern from the right side. DECREASE/INCREASE TIP (evenly spaced): To work out how to decrease/increase evenly, count the total number of stitches on needle (e.g. 105 stitches), minus the edge stitches (e.g. 2 stitches) and divide the remaining 103 stitches by the number of decreases/increases to be made (e.g. 20) = 5.1. In this example, decrease by knitting together approx. each 4th and 5th stitch; do not decrease the edge stitches. When increasing, make 1 yarn over after approx. each 5th stitch. On the next row purl the yarn overs twisted to avoid holes. DECREASE TIP (for sleeves): Decrease 1 stitch on either side of the marker as follows: Work until there are 3 stitches left before the marker, knit 2 together, knit 2 (marker sits between these 2 stitches), slip 1 stitch as if to knit, knit 1 and pass the slipped stitch over the knitted stitch (2 stitches decreased). PICOT: Knit 1, * insert right needle between the next 2 stitches (not through the stitches), make 1 yarn over, pull the yarn over between the stitches and place on left needle *, work from *-* 2 more times (= 3 yarn overs on left needle), knit and bind off 7 stitches (= 1 stitch + 3 yarn overs + 3 stitches). Work from *-* and bind off 7 stitches in the same way along the whole edge. When there are not enough stitches to work another picot, bind off the remaining stitches as usual. Cut the strand and pull it through the last stitch. Fasten. BINDING-OFF TIP: To avoid the bind-off edge being tight you can bind off with a larger size needle. If the edge is still tight, make 1 yarn over after approx. each 4th stitch at the same time as binding off; the yarn overs are bind off as normal stitches. ------------------------------------------------------- START THE PIECE HERE: ------------------------------------------------------- JACKET – SHORT OVERVIEW OF THE PIECE: The back and front pieces are worked separately, back and forth on circular needle and bottom up. The sleeves are worked top down, first back and forth on circular needle then in the round with double pointed needles. The piece is sewn together and the bands worked with picot-edges. BACK PIECE: Cast on 104-112-120-126-140-154 stitches (including 1 edge stitch on each side) with circular needle size 4 MM = US 6 and DROPS Air. Work rib as follows: 1 edge stitch in GARTER STITCH – read description above, A.1 until there is 1 stitch left and 1 edge stitch in garter stitch. Continue this rib back and forth for 9 cm = 3½" – adjust so the next row is from the right side. Knit 1 row where you decrease 19-21-23-23-27-29 stitches evenly spaced – read DECREASE/INCREASE TIP = 85-91-97-103-113-125 stitches. Change to circular needle size 5 MM = US 8. Purl 1 row with 1 edge stitch in garter stitch on each side. Now work pattern as follows: 1 edge stitch in garter stitch, 3-6-9-5-10-16 stitches in stockinette stitch, A.2 over the next 70-70-70-84-84-84 stitches (= 5-5-5-6-6-6 repeats of 14 stitches), work the first 7 stitches in A.2, 3-6-9-5-10-16 stitches in stockinette stitch and 1 edge stitch in garter stitch. Continue this pattern until the piece measures 36-37-38-39-40-41 cm = 14¼"-14½"-15"-15¼"-15¾"-16⅛". REMEMBER THE KNITTING GAUGE! At the beginning of the next 2 rows bind off 2-4-4-4-7-11 stitches for the armholes = 81-83-89-95-99-103 stitches. Continue with pattern over the middle 77-77-77-91-91-91 stitches, 1 edge stitch in garter stitch on each side and stockinette stitch over the other 1-2-5-1-3-5 stitches until the piece measures 51-53-55-57-59-61 cm = 20"-21"-21⅝"-22½"-23¼"-24" – adjust so you have at least 2 rows of stockinette stitch after a lace pattern. Continue with stockinette stitch and 1 edge stitch in garter stitch on each side and bind off the middle 29-29-31-31-33-33 stitches for the neck. Each shoulder is finished separately. Bind off 1 stitch on the next row from the neck = 25-26-28-31-32-34 stitches on the shoulder. Continue working until the piece measures 54-56-58-60-62-64 cm = 21¼"-22"-22¾"-23⅝"-24⅜"-25¼". Bind off. Work the other shoulder in the same way. RIGHT FRONT PIECE: Cast on 52-56-60-64-72-78 stitches (including 1 edge stitch on each side) with circular needle size 4 MM = US 6 and DROPS Air. Work rib as follows: 1 edge stitch in garter stitch, A.1 until there is 1 stitch left and 1 edge stitch in garter stitch. Continue this rib back and forth for 9 cm = 3½" – adjust so the next row is from the right side. Knit 1 row where you decrease 9-10-10-11-13-13 stitches evenly spaced = 43-46-50-53-59-65 stitches. Change to circular needle size 5 MM = US 8. Purl 1 row with 1 edge stitch in garter stitch on each side. Now work pattern as follows: 1 edge stitch in garter stitch, 3-3-4-4-5-5 stitches in stockinette stitch, A.2 over the next 28-28-28-42-42-42 stitches (= 2-2-2-3-3-3 repeats of 14 stitches), work the first 7-7-7-0-0-0 stitches in A.2 (only applies to sizes S, M, and L; in the other sizes there are no more stitches in A.2), 3-6-9-5-10-16 stitches in stockinette stitch and 1 edge stitch in garter stitch. Continue this pattern. OVERVIEW OF THE NEXT SECTION: Now both the V-neck and armholes are worked at the same time – read the next section before continuing. V-NECK: When the piece measures 28-29-30-31-32-33 cm = 11"-11⅜"-11¾"-12¼"-12½"-13", start to decrease for the V-neck on the next row from the right side as follows: 1 edge stitch in garter stitch, knit 1, slip 1 stitch as if to knit, knit 1 and pass the slipped stitch over the knitted stitch (= 1 stitch decreased), work to end of row. Turn and purl back with 1 edge stitch in garter stitch on each side. Decrease like this every 4th row 1 time (= the first decrease is explained above), every 2nd row 12-12-13-13-14-14 times, then every 4th row 3 times = 16-16-17-17-18-18 stitches decreased – if the decreases occur in the middle of a lace pattern, work stockinette stitch instead of pattern. ARMHOLE: When the piece measures 36-37-38-39-40-41 cm = 14¼"-14½"-15"-15¼"-15¾"-16⅛", bind off 2-4-4-4-7-11 stitches for the armhole on the next row from the wrong side. When the decreases for the neck and armhole are finished there are 25-26-28-31-32-34 stitches on the shoulder. Continue with stockinette stitch and 1 edge stitch on garter stitch on each side until the piece measures 54-56-58-60-62-64 cm = 21¼"-22"-22¾"-23⅝"-24⅜"-25¼". Bind off. LEFT FRONT PIECE: Cast on 52-56-60-64-72-78 stitches (including 1 edge stitch on each side) with circular needle size 4 MM = US 6 and DROPS Air. Work rib as follows: 1 edge stitch in garter stitch, A.1 until there is 1 stitch left (adjust so you begin and end with 1 purl (from the right side) so the rib matches when the piece is sewn together, and 1 edge stitch in garter stitch. Continue this rib back and forth for 9 cm = 3½" – adjust so the next row is from the right side. Knit 1 row where you decrease 9-10-10-11-13-13 stitches evenly spaced = 43-46-50-53-59-65 stitches. Change to circular needle size 5 MM = US 8. Purl 1 row with 1 edge stitch in garter stitch on each side. Now work pattern as follows: 1 edge stitch in garter stitch, 3-6-9-5-10-16 stitches in stockinette stitch, start on stitch 1-1-1-7-7-7 in A.2 and continue A.2 over the next 28-28-28-35-35-35 stitches (= 2-2-2-2½-2½-2½ repeats of 14 stitches), work the first 7 stitches in A.2, 3-3-4-4-5-5 stitches in stockinette stitch and 1 edge stitch in garter stitch. Continue this pattern. OVERVIEW OF THE NEXT SECTION: Now both the V-neck and armholes are worked at the same time – read the whole section before continuing. V-NECK: When the piece measures 28-29-30-31-32-33 cm = 11"-11⅜"-11¾"-12¼"-12½"-13", start to decrease for the V-neck on the next row from the right side as follows: 1 edge stitch in garter stitch, pattern as before until there are 4 stitches left, knit 2 together (1 stitch decreased), knit 1 and 1 edge stitch in garter stitch. Purl 1 row with 1 edge stitch in garter stitch on each side. Decrease like this every 4th row 1 time (= the first decrease is explained above), every 2nd row 12-12-13-13-14-14 times, then every 4th row 3 times = 16-16-17-17-18-18 stitches decreased – if the decreases occur in the middle of a lace pattern, work stockinette stitch instead of pattern. ARMHOLE: When the piece measures 36-37-38-39-40-41 cm = 14¼"-14½"-15"-15¼"-15¾"-16⅛", bind off 2-4-4-4-7-11 stitches for the armhole on the next row from the right side. When the decreases for the neck and armhole are finished there are 25-26-28-31-32-34 stitches on the shoulder. Continue with stockinette stitch and 1 edge stitch on garter stitch on each side until the piece measures 54-56-58-60-62-64 cm = 21¼"-22"-22¾"-23⅝"-24⅜"-25¼". Bind off. SLEEVES: The sleeves are worked top down. Cast on 61-65-69-71-75-79 stitches with circular needle size 5 MM = US 8 and DROPS Air. Work stockinette stitch back and forth for 1-2-2-2-4-6 cm = ⅜"-¾"-¾"-¾"-1½"-2⅜". Then continue in the round as follows: Insert 1 marker at the beginning of the round; allow the marker to follow your work – it is used when decreasing under the sleeve. Change to double pointed needles size 5 MM = US 8. Work pattern in the round as follows: 20-22-24-25-27-29 stitches in stockinette stitch, A.2 over the next 14 stitches, work the first 7 stitches in A.2 (so the pattern is symmetrical) and 20-22-24-25-27-29 stitches in stockinette stitch. When the sleeve measures 3-4-4-4-6-8 cm = 1⅛"-1½"-1½"-1½"-2⅜"-3⅛" from the cast-on edge, decrease 1 stitch on each side of the marker – read DECREASE TIP. Decrease like this every 5½-4-3½-3½-3-2 cm = 2⅛"-1½"-1¼"-1¼"-1⅛"-¾" a total of 6-7-8-8-9-11 times = 49-51-53-55-57-57 stitches. Continue working until the sleeve measures 39-39-38-38-38-37 cm = 15¼"-15¼"-15"-15"-15"-14½" – adjust so you have worked at least 2 rows of stockinette stitch after a lace pattern. There is approx. 9 cm = 3½" left. Knit 1 round where you increase 11-13-13-13-13-13 stitches evenly spaced = 60-64-66-68-70-70 stitches. Change to double pointed needles size 4 MM = US 6 and work A.1 for 9 cm = 3½". Bind off with knit over twisted-knit and purl over purl – read BINDING-OFF TIP. The sleeve measures approx. 48-48-47-47-47-46 cm = 19"-19"-18½"-18½"-18½"-18". Work the other sleeve in the same way. ASSEMBLY: Sew the shoulder seams – start outermost and work in towards the neck. Sew the sleeve cap to the armhole and sew the split to the bottom of the armhole – see sketch. Sew the side seams from the armhole down, inside the 1 edge stitch. Insert 1 marker mid-back of neck; it is used when working the bands. RIGHT BAND: Start at the bottom of the right front piece, with circular needle size 4 MM = US 6 and DROPS Air. Knit up 139 to 163 stitches from the right side inside the 1 edge stitch as far as the marker at the back of the neck. The number of stitches should be divisible by 4 + 3. Turn and work rib (from the wrong side) as follows: 1 edge stitch in garter stitch, A.1 until there are 2 stitches left, AT THE SAME TIME as you increase at the beginning of the V-neck as follows (adjust so that the next stitch is a knitted stitch): * Knit 1, 1 yarn over *, work from *-* 4 times (= 4 stitches increased), work the first stitch in A.1 and 1 edge stitch in garter stitch = 143 to 167 stitches. On the next row work the yarn overs twisted to avoid holes, then work the new stitches into A.1. Continue this rib for 2 cm = ¾". Now work 1 buttonhole at the bottom of the V-neck. BUTTONHOLE: Make 1 yarn over (after 1 knit-twisted stitch), knit 2 together. On the next row knit the yarn over to leave a hole. Continue the rib until the band measures 4½ cm = 1⅝". Bind off with PICOT – read description above. LEFT BAND: Start at the marker on the neck and knit up the same number of stitches as on the right front piece with circular needle size 4 MM = US 6 and DROPS Air. Turn and work rib (from the wrong side) as follows: 1 edge stitch in garter stitch, A.1 until there are 2 stitches left, AT THE SAME TIME as you increase at the beginning of the V-neck as follows (adjust so that the next stitch a knitted stitch): * Knit 1, 1 yarn over *, work from *-* 4 times (= 4 stitches increased), work the first stitch in A.1 and 1 edge stitch in garter stitch = 143 to 167 stitches. On the next row work the yarn overs twisted to avoid holes, then work the new stitches into A.1. Continue this rib for 4½ cm = 1⅝". Bind off with picot. Sew the button onto the left band and sew the bands together at the back of the neck. |
||||||||||||||||||||||
Diagram explanations |
||||||||||||||||||||||
|
||||||||||||||||||||||
 |
||||||||||||||||||||||
 |
||||||||||||||||||||||
 |
||||||||||||||||||||||
Have you finished this pattern?Tag your pictures with #dropspattern #sweetnessimprintcardi or submit them to the #dropsfan gallery. Do you need help with this pattern?You'll find 33 tutorial videos, a Comments/Questions area and more by visiting the pattern on garnstudio.com. © 1982-2026 DROPS Design A/S. We reserve all rights. This document, including all its sub-sections, has copyrights. Read more about what you can do with our patterns at the bottom of each pattern on our site. |
||||||||||||||||||||||


With over 40 years in knitting and crochet design, DROPS Design offers one of the most extensive collections of free patterns on the internet - translated to 17 languages. As of today we count 324 catalogs and 12290 patterns - 12280 of which are translated into English (US/in).
We work hard to bring you the best knitting and crochet have to offer, inspiration and advice as well as great quality yarns at incredible prices! Would you like to use our patterns for other than personal use? You can read what you are allowed to do in the Copyright text at the bottom of all our patterns. Happy crafting!
Post a comment to pattern DROPS 231-27
We would love to hear what you have to say about this pattern!
If you want to leave a question, please make sure you select the correct category in the form below, to speed up the answering process. Required fields are marked *.