
Popular categories
Looking for a yarn?


Comments / Questions (16)
![]() Hanne wrote:
Hanne wrote:
"strikk 1 rett i masken under neste maske." har dere video på hvordan det gjøres?
23.06.2022 - 21:43DROPS Design answered:
Hei Hanne. Vi har hjelpevideo til alle våre oppskrifter. Se videoene som ligger nederst på oppskriften eller klikk her: Hvordan strikke 1 rett i masken fra forrige omgang mvh DROPS Design
27.06.2022 - 08:43
![]() Claudia Puckert wrote:
Claudia Puckert wrote:
Ich versuche die Zunahmen an der Passe zu stricken. Die Hinreihen sind kein Problem. Bei den Rückreihen komme ich mit der Zusahme an der 1 und 3 Markirung nicht zurecht. Und ich finde auch kein Video oä dazu.
27.01.2022 - 21:35DROPS Design answered:
Liebe Frau Puckert, die Zunahmen bei den Rückreihen werden ungefähr wie die bei den Hinreihen gestrickt, die Maschen werden nur links anstatt rechts gestrickt: Vor dem Markierer: den Faden von Vorne auffassen und die neue Masche verschränkt stricken und nach dem Markierer, den Faden von hinten auffassen und in das vordere Glied (= normal) links stricken. - könnte dieses Video helfen? (wie gesagt, links anstatt rechts stricken). Viel Spaß beim stricken!
28.01.2022 - 09:06
![]() Becky wrote:
Becky wrote:
First time knitting this type of pattern and I'm confused by this instruction in the 'Increases for Yoke': "Move the 4 markers so each marker sits in the outermost stitch on each side of the front and back pieces.". Do you just mean put the marker through the stitch instead of between two stitches ? I think the marker will already be in the right place (like for the sleeve I will have 33 stitches between the markers in the M size).
05.11.2021 - 05:30DROPS Design answered:
Dear Becky, correct, the markers were previously between 2 stitches, now you insert them in one stitch (= in the first and in the last stitch of each sleeve): there were 37 sts for the sleeves, you have now: 1 st with marker, 35 sts for sleeve, 1 st with marker. Happy knitting!
05.11.2021 - 07:10
![]() Mariati wrote:
Mariati wrote:
Nogmaals over telpatroon: ik bedenk opeens dat als je mouw van boven naar beneden breit (zoals in patroon ) dan onderste 4 regels van telpatroon gebruiken. Je patroon komt dan op de kop...
09.10.2021 - 15:16
![]() Mariati wrote:
Mariati wrote:
Telpatroon kabel klopt niet met foto. Ik denk dat rij het 5 -8 moet zijn (1-4 weglaten dus)
09.10.2021 - 15:06
![]() Sonja wrote:
Sonja wrote:
Heide Traum
13.08.2021 - 12:28
|
||||||||||||||||||||||||||||
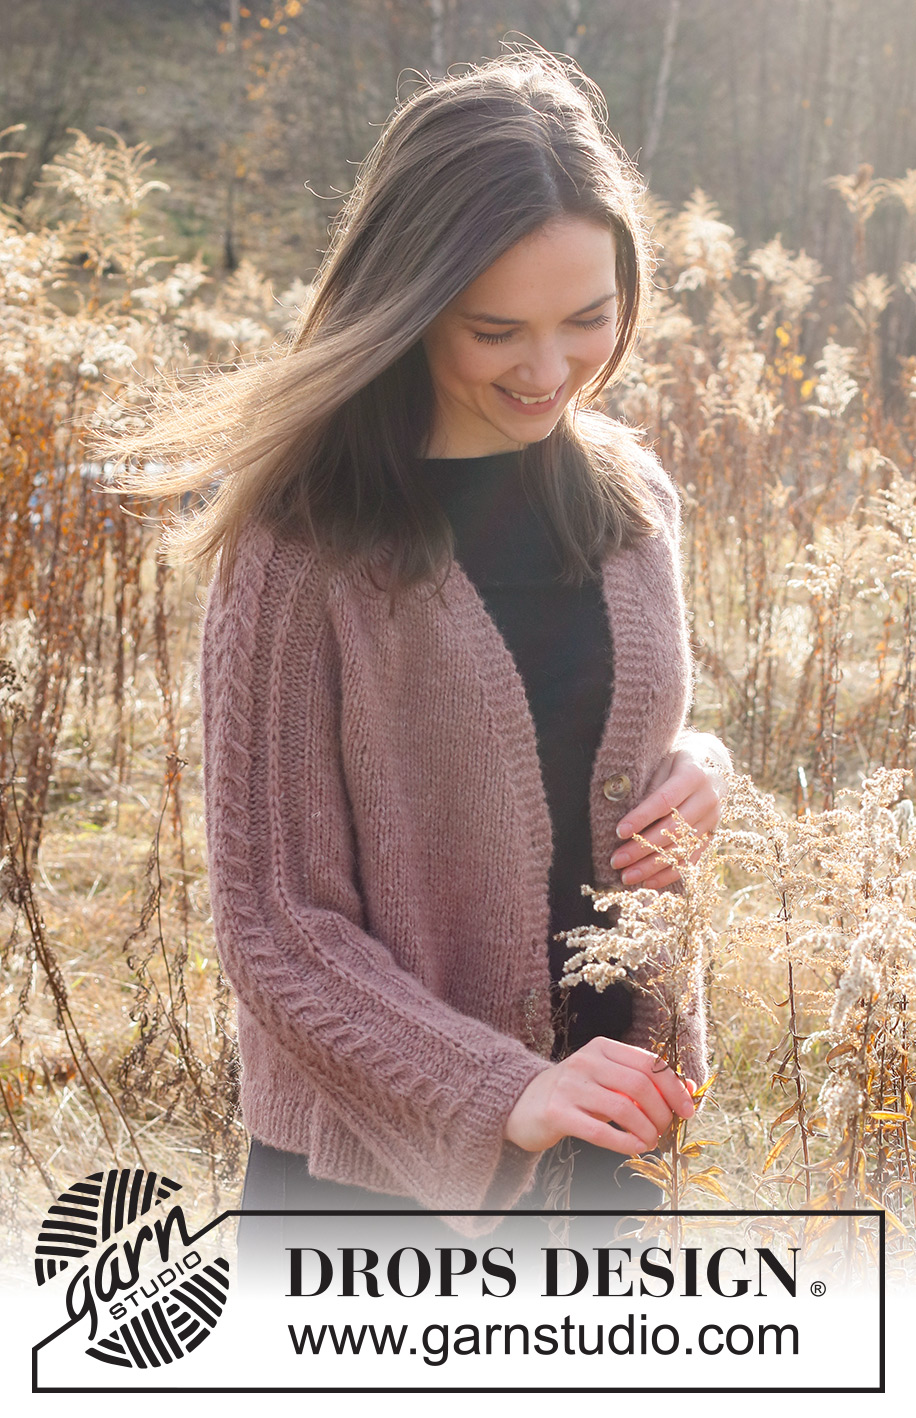
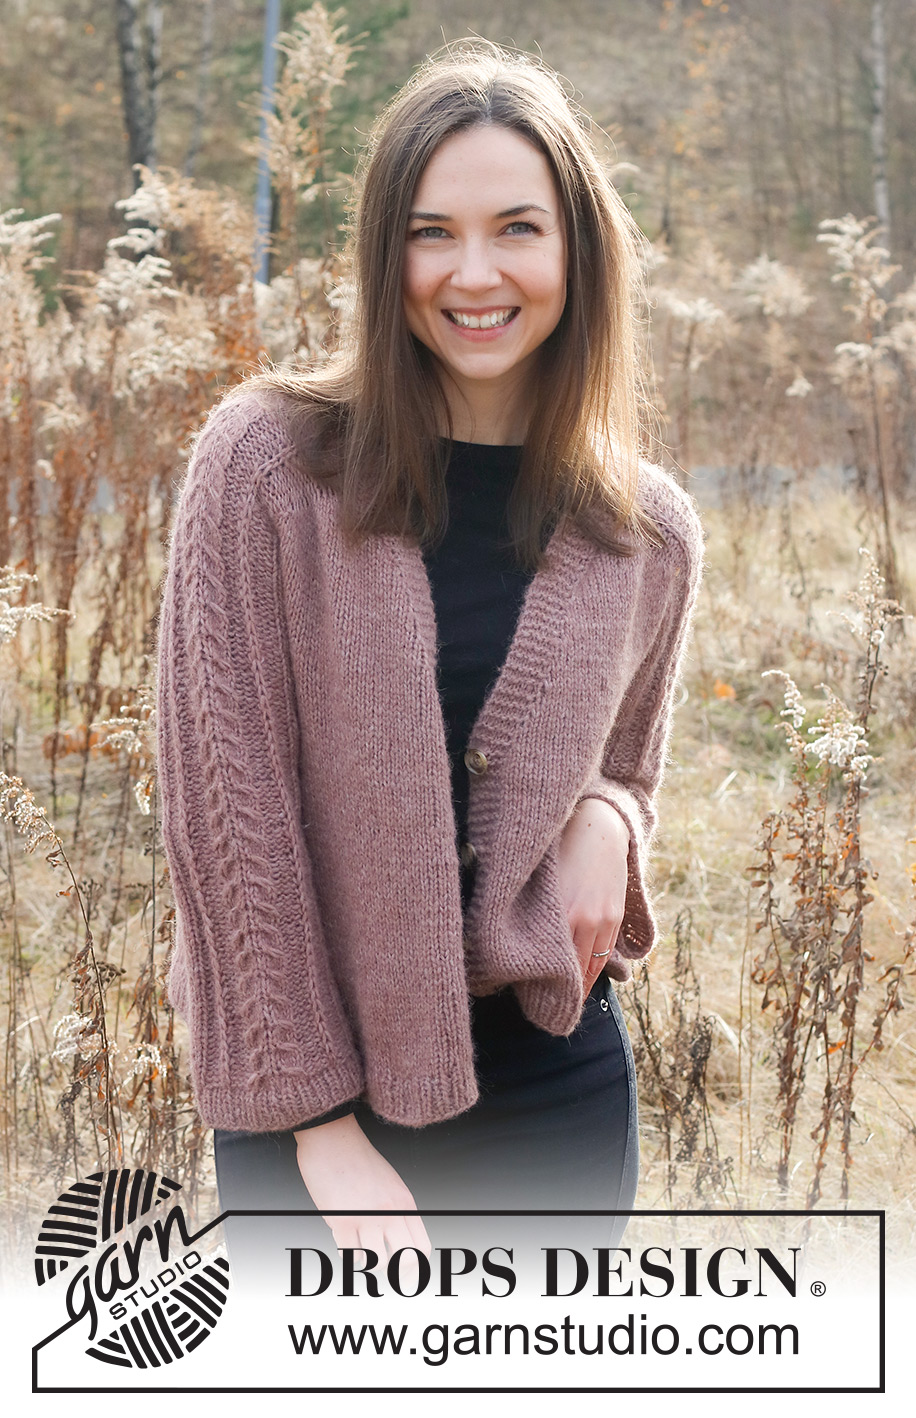
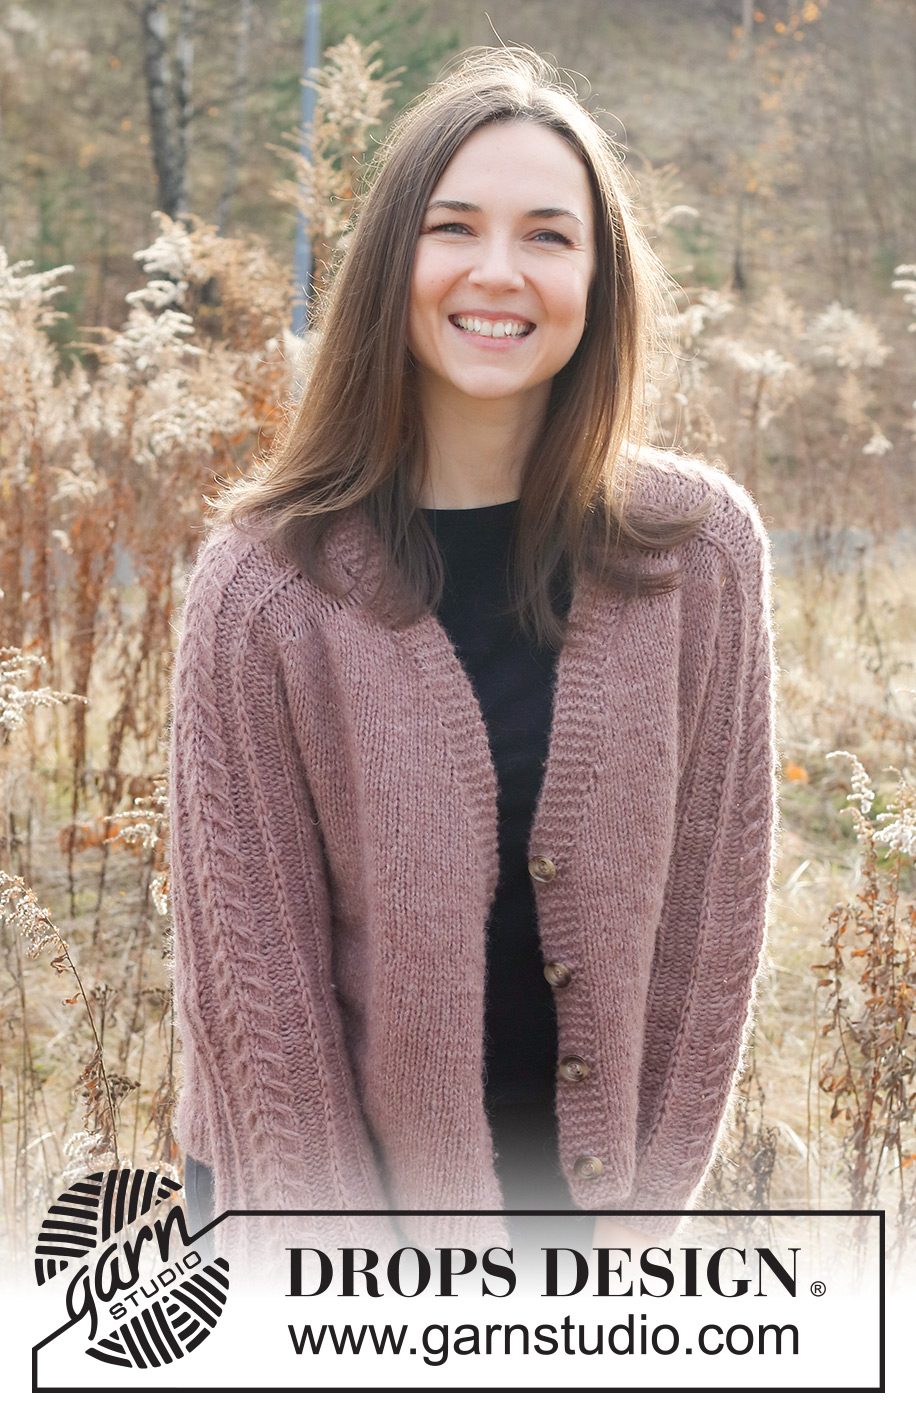
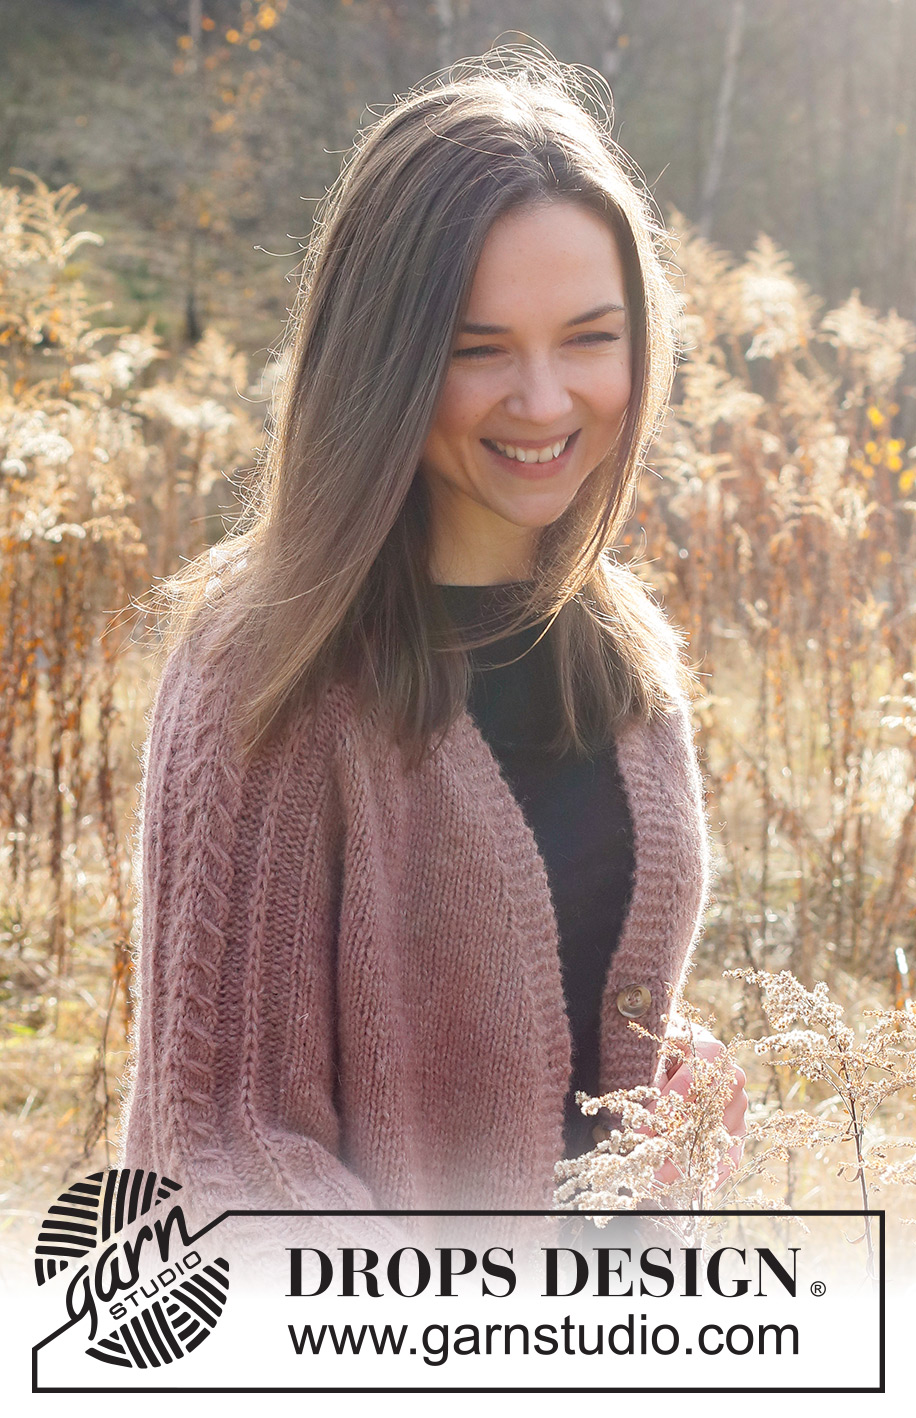
Dusk Rose Jacket#duskrosejacket |
||||||||||||||||||||||||||||
 |
 |
|||||||||||||||||||||||||||
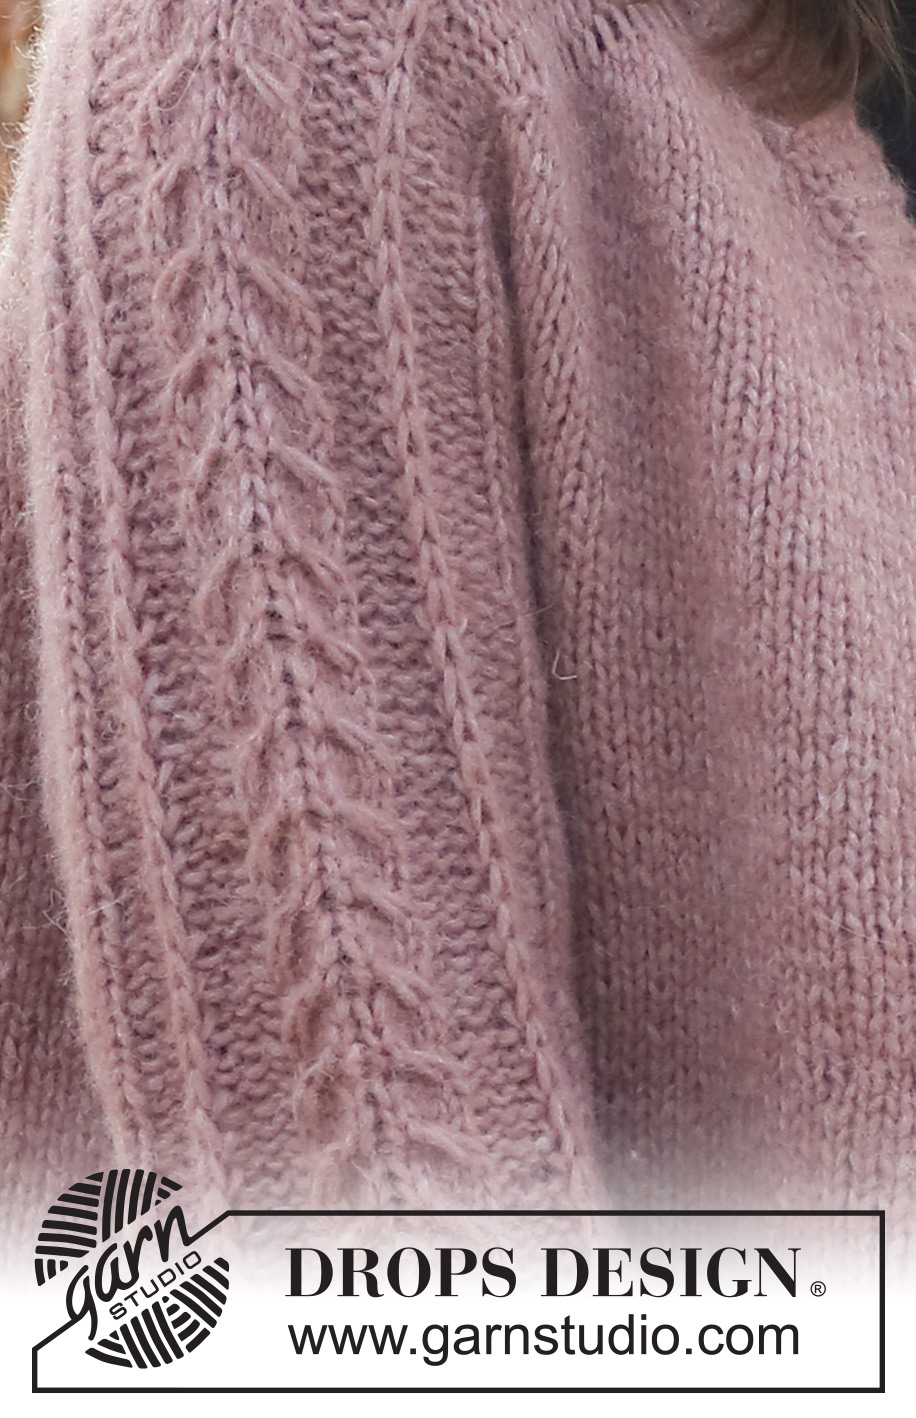
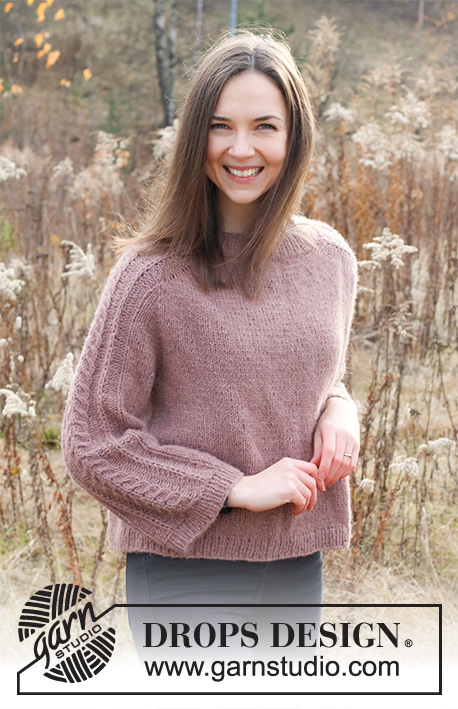
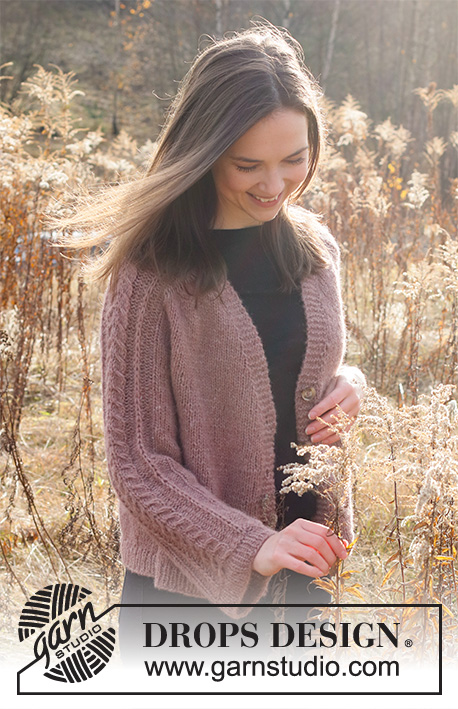
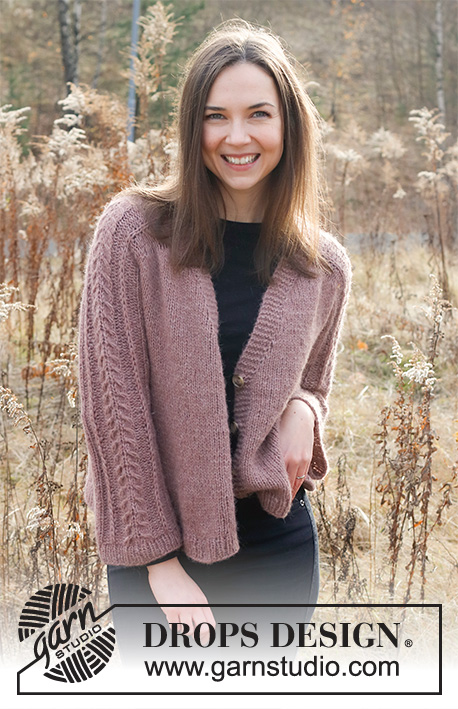
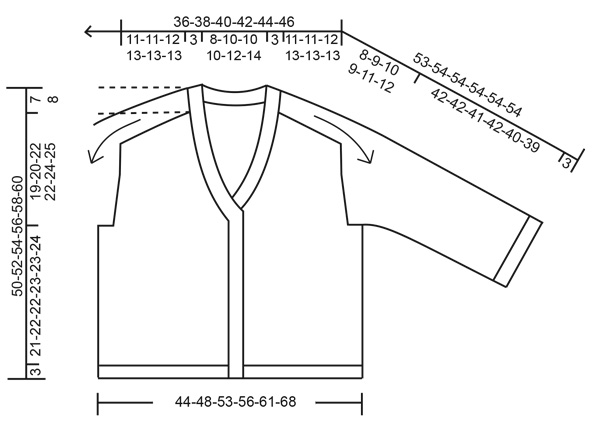
Knitted jacket in DROPS Air. The piece is worked top down with saddle shoulders, V-neck and cables on the sleeves. Sizes XS - XXL.
DROPS 226-13 |
||||||||||||||||||||||||||||
|
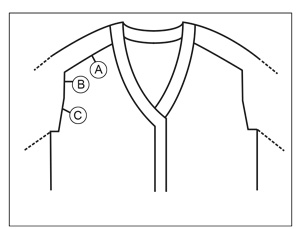
------------------------------------------------------- EXPLANATIONS FOR THE PATTERN: ------------------------------------------------------- RIDGE/GARTER STITCH (worked back and forth): Knit all rows. 1 ridge = knit 2 rows. PATTERN: See diagram A.1. Choose diagram for your size. The diagram shows all rows in the pattern from the right side. INCREASE TIP-1 (evenly spaced): To work out how to increase evenly, count the total number of stitches on the needle (e.g. 152 stitches) minus bands (e.g. 12 stitches) and divide the remaining stitches by the number of increases to be made (e.g. 23) = 6.1. In this example, increase by making 1 yarn over after approx. each 6th stitch. Do not increase on bands. On the next row work the yarn overs twisted to avoid holes. INCREASE TIP-2 (from the right side): BEFORE MARKER: The new stitch twists to the right. Use the left needle to pick up the strand between 2 stitches from the previous row, pick up the back strand and knit in the front loop. AFTER MARKER: The new stitch twists to the left. Use the left needle to pick up the strand between 2 stitches from the previous row, pick up the front strand and knit in the back loop. INCREASE TIP-3 (from the wrong side): BEFORE MARKER: The new stitch twists to the right. Use the left needle to pick up the strand between 2 stitches from the previous row, pick up the front strand and purl in the back loop. AFTER MARKER: The new stitch twists to the left. Use the left needle to pick up the strand between 2 stitches from the previous row, pick up the back strand and purl in the front loop. INCREASE TIP-4 (V-neck): All increases are worked from the right side! Increase 1 stitch inside the 6 band stitches by making 1 yarn over. On the next row (wrong side) purl the yarn overs twisted to avoid holes. The new stitches are worked in stockinette stitch. KNITTING TIP (V-neck): To avoid a ‘jump’ at the bottom of the V-neck when the increases are finished, work an extra ridge over the bands after the increases are finished. Do this on each band as follows: Start from the right side, knit the 6 stitches on the left band, turn, tighten the strand and knit the 6 stitches from the wrong side, turn and work the whole row as before, turn, knit the 6 stitches on the right band, turn, tighten the strand and knit the 6 stitches from the right side, turn and work a complete row as before from the wrong side. BUTTONHOLES: Work buttonholes on the right band (when the garment is worn). Work the buttonhole when there are 4 stitches left on the row as follows: Make 1 yarn over, knit 2 together and knit 2. On the next row (wrong side) knit the yarn over to leave a hole. The first buttonhole is worked approx. 1 cm = ⅜" after the increases to the V-neck are finished. The other 3 buttonholes are worked with approx. 7-7-7½-8-8½-8½ cm = 2¾"-2¾"-2⅞"-3⅛"-3¼"-3¼" between each one. DECREASE TIP (for sleeves): Decrease 1 stitch on either side of the marker thread as follows: Work until there are 3 stitches left before the marker thread, knit 2 together, knit 2 (marker thread sits between these 2 stitches), slip 1 stitch as if to knit, knit 1 and pass the slipped stitch over the knitted stitch (2 stitches decreased). BINDING-OFF TIP: To avoid the bind-off edge being tight you can bind off with a larger size needle. If the edge is still tight, make 1 yarn over after approx. each 6th stitch at the same time as binding off; the yarn overs are bind off as normal stitches. ------------------------------------------------------- START THE PIECE HERE: ------------------------------------------------------- JACKET – SHORT OVERVIEW OF THE PIECE: Start by working 2 loose neck pieces. These are then placed together on circular needle and stitches are cast on for the back of the neck as described in the text. Later, the neck is sewn together at the back and sewn to the neckline. The piece is worked top down. The yoke is worked back and forth with circular needle, from mid-front at the same time as stitches are increased for the V-neck, shoulders, sleeves and yoke. The yoke is divided for the body and sleeves and the body continued back and forth with circular needle. The sleeves are worked with double pointed needles/short circular needle. RIGHT NECK/BAND (on right front piece when jacket is worn): Cast on 6 stitches with double pointed needles size 5.5 MM = US 9 and DROPS Air (use 2 double pointed needles – the stitches are on one needle and worked with the other). Work GARTER STITCH – read description above, until the neck/band piece measures approx. 18-19-19-21-22-23 cm = 7"-7½"-7½"-8¼"-8¾"-9" – finish after a knitted row from the wrong side. Place these stitches on a thread or an extra needle and lay to one side. LEFT NECK/BAND (on left front piece when jacket is worn): Cast on 6 stitches with double pointed needles size 5.5 MM = US 9 and DROPS Air. Work garter stitch until the neck/band piece measures approx. 18-19-19-21-22-23 cm = 7"-7½"-7½"-8¼"-8¾"-9" – finish after a knitted row from the wrong side. Now place the 2 neck/band pieces together as described below. YOKE: Change to circular needle size 5.5 MM = US 9. Knit the 6 stitches from the left neck/band piece, cast on 68-72-72-80-82-86 new stitches and knit the 6 stitches from the right neck/band piece = 80-84-84-92-94-98 stitches. Purl 1 row from the wrong side (bands worked in garter stitch). Insert a marker thread after the band at the beginning of the row. This marker thread is used when measuring the yoke! In addition, insert 4 other markers without working the stitches and insert each marker between 2 stitches. These markers are used when increasing for the saddle shoulders. Marker 1: Start from the right side and count 6 stitches (= band), insert the marker before the next stitch. Marker 2: Count 23-23-23-27-27-27 stitches from marker 1 (= shoulder), insert the marker before the next stitch. Marker 3: Count 22-26-26-26-28-32 stitches from marker 2 (= back piece), insert the marker before the next stitch. Marker 4: Count 23-23-23-27-27-27 stitches from marker 3 (= shoulder), insert the marker before the next stitch. There are 6 stitches left on the front piece after marker 4. Allow these markers to follow your work onwards; you will increase by all these markers. OVERVIEW OF THE NEXT SECTION: Now you will work pattern, increase to the saddle shoulders, sleeves and yoke at the same time as you increase to the V-neck. Read PATTERN, INCREASES TO SADDLE SHOULDERS, V-NECK, INCREASES TO SLEEVES and INCREASES TO YOKE before continuing! PATTERN: The piece is continued in stockinette stitch with 6 band stitches in garter stitch on each side towards mid-front and A.1 over the 23-23-23-27-27-27 shoulder stitches on each side (between markers 1 and 2 and between markers 3 and 4). INCREASES TO SADDLE SHOULDERS (increase on every row): AT THE SAME TIME on the first row from the right side increase 4 stitches for the shoulders as follows: Increase BEFORE markers 1 and 3 and AFTER markers 2 and 4 – read INCREASE TIP-2. You are only increasing on the front and back pieces; the number of stitches on the shoulders remains the same. On the next row from the wrong side increase 4 stitches for the shoulders as follows: Increase BEFORE markers 2 and 4 and AFTER markers 1 and 3 – read INCREASE TIP-3. You increase on EVERY row and differently from the right and wrong side so the stitches lie neatly. The increased stitches are worked in stockinette stitch. Continue the pattern and increase on every row a total of 22-22-24-26-26-26 times. REMEMBER THE KNITTING GAUGE! After the last increase the piece measures approx. 11-11-12-13-13-13 cm = 4⅜"-4⅜"-4¾"-5⅛"-5⅛"-5⅛" from the marker thread. V-NECK: AT THE SAME TIME when you have worked 2 rows of increases to the saddle shoulders, and next row is from the right side, start to increase to the V-neck on each side towards mid-front – read INCREASE TIP-4. Increase to the V-neck every 4th row a total of 6 times in all sizes, then every 2nd row a total of 5-7-7-7-8-10 times on each side. INCREASES TO SLEEVES: When the increases to the saddle shoulders are finished, start to increase to the sleeves on the next row from the right side. Continue with stockinette stitch and 6 band stitches in garter stitch on each side and A.1 over the shoulder stitches as before (and continue to increase to the V-neck). Increase 4 stitches for the sleeves as follows: Increase AFTER markers 1 and 3 and BEFORE markers 2 and 4 – remember INCREASE TIP-2. You are only increasing on the sleeves; the number of stitches on the front and back pieces remains the same. Work the increased stitches in stockinette stitch (A.1 is continued over the middle 23-23-23-27-27-27 stitches on the sleeves as before). Increase like this every 2nd row (each row from the right side) a total of 5-6-5-3-3-2 times. The piece measures approx. 16-17-17-16-16-15 cm = 6¼"-6¾"-6¾"-6¼"-6¼"-6" from the marker thread. Now increase for the yoke as described below. INCREASES FOR YOKE: Move the 4 markers so each marker sits in the outermost stitch on each side of the front and back pieces. There are 33-35-33-33-33-31 stitches between the markers on each sleeve. On the next row from the right side increase 8 stitches for the yoke by increasing both before and after all 4 marker-stitches – remember INCREASE TIP-2. You are now increasing on the front and back pieces and on the sleeves. Work the increased stitches in stockinette stitch. Increase like this every 2nd row (each row from the right side) a total of 3-3-5-6-8-10 times. Read KNITTING TIP and REMEMBER THE BUTTONHOLES on the right band – read description above. DIVIDING FOR THE BODY AND SLEEVES: After all the increases to saddle shoulders, V-neck, sleeves and yoke there are 234-246-266-282-302-322 stitches on the needle and the piece measures approx. 19-20-22-22-24-25 cm = 7½"-8"-8¾"-8¾"-9½"-9¾" from the marker thread on the neck. If the piece is shorter than this, continue working without further increases to the correct length. Now divide the piece for the body and sleeves on the next row as follows: Work 38-40-44-46-49-53 stitches as before (= front piece), place the next 47-49-51-55-59-61 stitches on a thread for the sleeve, cast on 6-8-8-10-12-14 new stitches (= in side under sleeve), work 64-68-76-80-86-94 stitches as before (= back piece), place the next 47-49-51-55-59-61 stitches on a thread for the sleeve, cast on 6-8-8-10-12-14 new stitches (= in side under sleeve), work the last 38-40-44-46-49-53 stitches as before (= front piece). The body and sleeves are finished separately. THE PIECE IS NOW MEASURED FROM HERE! BODY: = 152-164-180-192-208-228 stitches. Continue with stockinette stitch and 6 band stitches in garter stitch on each side until the piece measures 21-22-22-23-23-24 cm = 8¼"-8¾"-8¾"-9"-9"-9½" from the division. There is approx. 3 cm = 1⅛" left to finished length; try the jacket on and work to desired length. To avoid the following rib being tight, you now increase stitches as follows: Knit 1 row from the right side where you increase 23-25-27-29-31-35 stitches evenly spaced – remember INCREASE TIP-1 = 175-189-207-221-239-263 stitches. Change to circular needle size 4.5 MM = US 7. The next row is worked as follows from the wrong side: 6 band stitches in garter stitch, * purl 1, knit 1 *, work from *-* until there are 7 stitches left on the row, purl 1 and 6 band stitches in garter stitch. Continue this rib for 3 cm = 1⅛". Bind off with garter stitch over garter stitch, knit over knit and purl over purl – read BINDING-OFF TIP! The jacket measures approx. 50-52-54-56-58-60 cm = 19¾"-20½"-21¼"-22"-22¾"-23⅝" from the shoulder down. SLEEVES: Place the 47-49-51-55-59-61 stitches from the thread on the one side of the piece on double pointed needles/short circular needle size 5.5 MM = US 9 and knit up 1 stitch in each of the 6-8-8-10-12-14 stitches cast on under the sleeve = 53-57-59-65-71-75 stitches. Insert a marker thread in the middle of the 6-8-8-10-12-14 new stitches under the sleeve. Start the round at the marker thread and work stockinette stitch in the round, with A.1 over the middle 23-23-23-27-27-27 stitches on top of the sleeve as before . When the sleeve measures 3 cm = 1⅛" from the division in all sizes, decrease 2 stitches under the sleeve – read DECREASE TIP. Decrease like this every 3-3-3-3-2½-2½ cm = 1⅛"-1⅛"-1⅛"-1⅛"-1"-1" a total of 3-3-3-4-5-6 times = 47-51-53-57-61-63 stitches. Continue working without further decreases until the sleeve measures 42-42-41-42-40-39 cm = 16½"-16½"-16⅛"-16½"-15¾"-15¼" from the division (shorter measurements in larger sizes due to wider shoulders). There is approx. 3 cm = 1⅛" left to finished length; try the jacket on and work to desired length. Knit 1 round where you increase 7-7-7-9-9-9 stitches evenly spaced = 54-58-60-66-70-72 stitches. Change to double pointed needles size 4.5 MM = US 7 and work rib (knit 1, purl 1) for 3 cm = 1⅛". Bind off with knit over knit and purl over purl – remember BINDING-OFF TIP! The sleeve measures approx. 45-45-44-45-43-42 cm = 17¾"-17¾"-17¼"-17¾"-17"-16½" from the division. Work the other sleeve in the same way. ASSEMBLY: Sew the neck together mid-back with the seam to the wrong side. Sew the neck to the neckline – stretch the neck slightly while sewing it down. Sew the buttons onto the left band. |
||||||||||||||||||||||||||||
Diagram explanations |
||||||||||||||||||||||||||||
|
||||||||||||||||||||||||||||
 |
||||||||||||||||||||||||||||
 |
||||||||||||||||||||||||||||
 |
||||||||||||||||||||||||||||
Have you finished this pattern?Tag your pictures with #dropspattern #duskrosejacket or submit them to the #dropsfan gallery. Do you need help with this pattern?You'll find 34 tutorial videos, a Comments/Questions area and more by visiting the pattern on garnstudio.com. © 1982-2026 DROPS Design A/S. We reserve all rights. This document, including all its sub-sections, has copyrights. Read more about what you can do with our patterns at the bottom of each pattern on our site. |
||||||||||||||||||||||||||||


With over 40 years in knitting and crochet design, DROPS Design offers one of the most extensive collections of free patterns on the internet - translated to 17 languages. As of today we count 324 catalogs and 12290 patterns - 12280 of which are translated into English (US/in).
We work hard to bring you the best knitting and crochet have to offer, inspiration and advice as well as great quality yarns at incredible prices! Would you like to use our patterns for other than personal use? You can read what you are allowed to do in the Copyright text at the bottom of all our patterns. Happy crafting!
Post a comment to pattern DROPS 226-13
We would love to hear what you have to say about this pattern!
If you want to leave a question, please make sure you select the correct category in the form below, to speed up the answering process. Required fields are marked *.