Comments / Questions (18)
![]() Maryse wrote:
Maryse wrote:
Je fais grandeur médium. Après avoir tricoter A2 j’ai 200 m, on mentionne de mettre 4 marqueurs à 31, 36, 62, 36, 31. Cela fait 196 m. Il reste 4 m [où j’ai déjà mon marqueur initial du début de tricot], vont-elle avec l’autre partie, soit avec les 31 m du début? Dois-je m’occuper de ces 4 m restantes? Gros merci pour votre explication.
03.11.2025 - 04:08DROPS Design answered:
Bonjour Maryse, notez que les marqueurs doivent être insérés dans une maille (et pas entre les mailles), ainsi vous aurez: 31+1+36+1+62+1+36+1+31=200. Bon tricot!
03.11.2025 - 08:48
![]() Diane wrote:
Diane wrote:
Bonjour, sur le diagramme A2, je ne comprends pas comment faire l'augmentation de 4 mailles : on doit tricoter sous la maille en laissant la maille à gauche puis lorsqu'on tricote la 5ème on lâche la maille ? Dans l'attente de vos précisions pour ce très joli modèle.
31.01.2025 - 18:21DROPS Design answered:
Bonjour Diane, dans cette vidéo, nous montrons comment tricoter ce type de motifs, attention, dans la vidéo, on n'augmente que 2 mailles contre 4 ici (répétez l'augmentation encore 1 fois pour avoir 2 m en plus - cf aussi cette vidéo pour l'augmentation seule) et tricotez 3 tours comme avant avec les 5 nouvelles mailles avant de les tricoter ensemble torse à l'endroit. Bon tricot!
03.02.2025 - 07:40
![]() Maja E wrote:
Maja E wrote:
Hello, this is a lovely sweater. Was the kid-silk used for the modeled sweater, or was it the brushed alpaca silk? Thank you.
19.11.2023 - 19:30DROPS Design answered:
Dear Maja, Kid-Silk was used for the pattern in photos. Happy knitting!
20.11.2023 - 11:14
![]() Robi wrote:
Robi wrote:
Buonasera,e se volessi usare 1 filo Kid Silk e 1 Flora,come potrei fare?
07.04.2022 - 00:36DROPS Design answered:
Buonasera Robi, deve dividere per 2 la quantità di filato di Kid-Silk e poi calcolare il metraggio che le serve per Flora. Buon lavoro!
07.04.2022 - 20:05
![]() Inmaculada wrote:
Inmaculada wrote:
Sí en el canesú de la talla S aumenta hasta 196 puntos y luego colocamos 4 marcadores 30+36+69+36+30 = 192, sobran puntos
03.02.2022 - 19:06DROPS Design answered:
Hola, marcapuntos estan insertados en los puntos, no entre los puntos. Saludos!
04.02.2022 - 14:26
![]() Lorena wrote:
Lorena wrote:
"Dopo l’ultimo aumento ci sono 236-256-276-304-328-352 maglie sul ferro. Lavorare a maglia rasata senza aumenti, con 5 maglie per il bordo a maglia legaccio a ogni lato verso il centro davanti fino a quando il lavoro misura 20-22-24-25-27-29 cm dal segnapunti sul collo." Non ho capito questo passaggio e nelle immagini non si vedono le maglie legaccio. A quale lato si riferisce? verso il centro cosa significa? Grazie
30.01.2022 - 20:06DROPS Design answered:
Buonasera Lorena, grazie per la segnalazione, abbiamo corretto il testo. Buon lavoro!
31.01.2022 - 23:36
![]() Myriam DEVAUCHELLE wrote:
Myriam DEVAUCHELLE wrote:
Merci beaucoup de votre réponse, j'ai bien compris cette fois
19.11.2021 - 09:32
![]() Myriam DEVAUCHELLE wrote:
Myriam DEVAUCHELLE wrote:
Je fais la taille L. pour les raglans, selon vos explications, je comprends que de chaque côté des marqueurs j'augmente au total de 8 mailles, (3 tous les 2 tours et 5 tous les 4 tours) soit 16 mailles 4 fois ( 16 par marqueur), puisque 4 marqueurs. mais faut il bouger les marqueurs de place à chaque fois qu'on augmente?
18.11.2021 - 11:39DROPS Design answered:
Bonjour Mme Devauchelle, vous augmentez 8 mailles à chaque fois (2 pour chaque manche, pour le devant et le dos) - cf RAGLAN soit: 3 x tous les 2 tours + 5 x tous les 4 tours soit 3x8 m + 5 x 8 m = 212 m (après le motif) + 24 + 40=276 m. Faites bien suivre le marqueur à chaque fois pour que les augmentations soient toujours faites de chaque côté de la maille avec un marqueur. Bon tricot!
18.11.2021 - 17:13
![]() GILLIOT wrote:
GILLIOT wrote:
Bonjour. pourriez vous me confirmer que pour le debut de l'empiecement je fais bien un tour de la premiere rangee ( je repete les 4 mailles)du diagramme A2 puis je continue le diagramme comme indique? merci de votre retour
16.11.2021 - 09:05DROPS Design answered:
Bonjour Mme Gilliot, effectivement, pour l'empiècement, vous tricotez A.2 en répétant ces 4 mailles et en augmentant surtout comme indiqué dans le diagramme (au 1er rang, on augmente 2 mailles dans chaque A.2 = on aura 6 mailles dans chaque A.2 à la fin de ce 1er rang) - je ne suis juste pas sûre de bien comprendre votre formulation, en espérant avoir pu vous aider, sinon ,n'hésitez pas à reformuler, merci d'avance. Bon tricot!
16.11.2021 - 09:17
![]() Fina wrote:
Fina wrote:
Zie eerdere opmerking/vraag
19.10.2021 - 10:46
Blackforest Memories#blackforestmemoriessweater |
|||||||||||||||||||
 |
 |
||||||||||||||||||
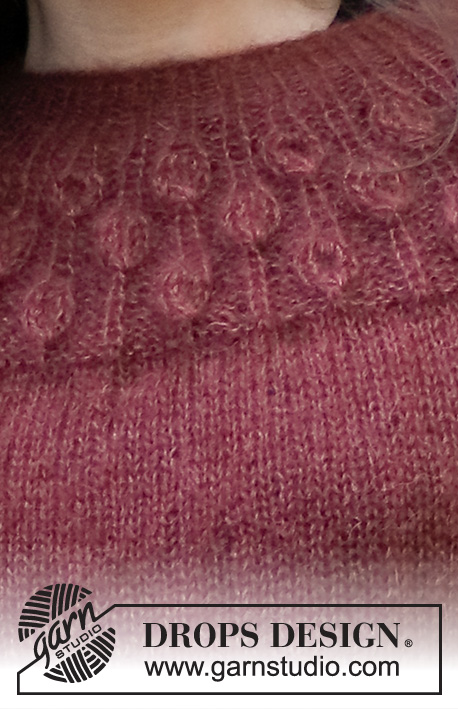
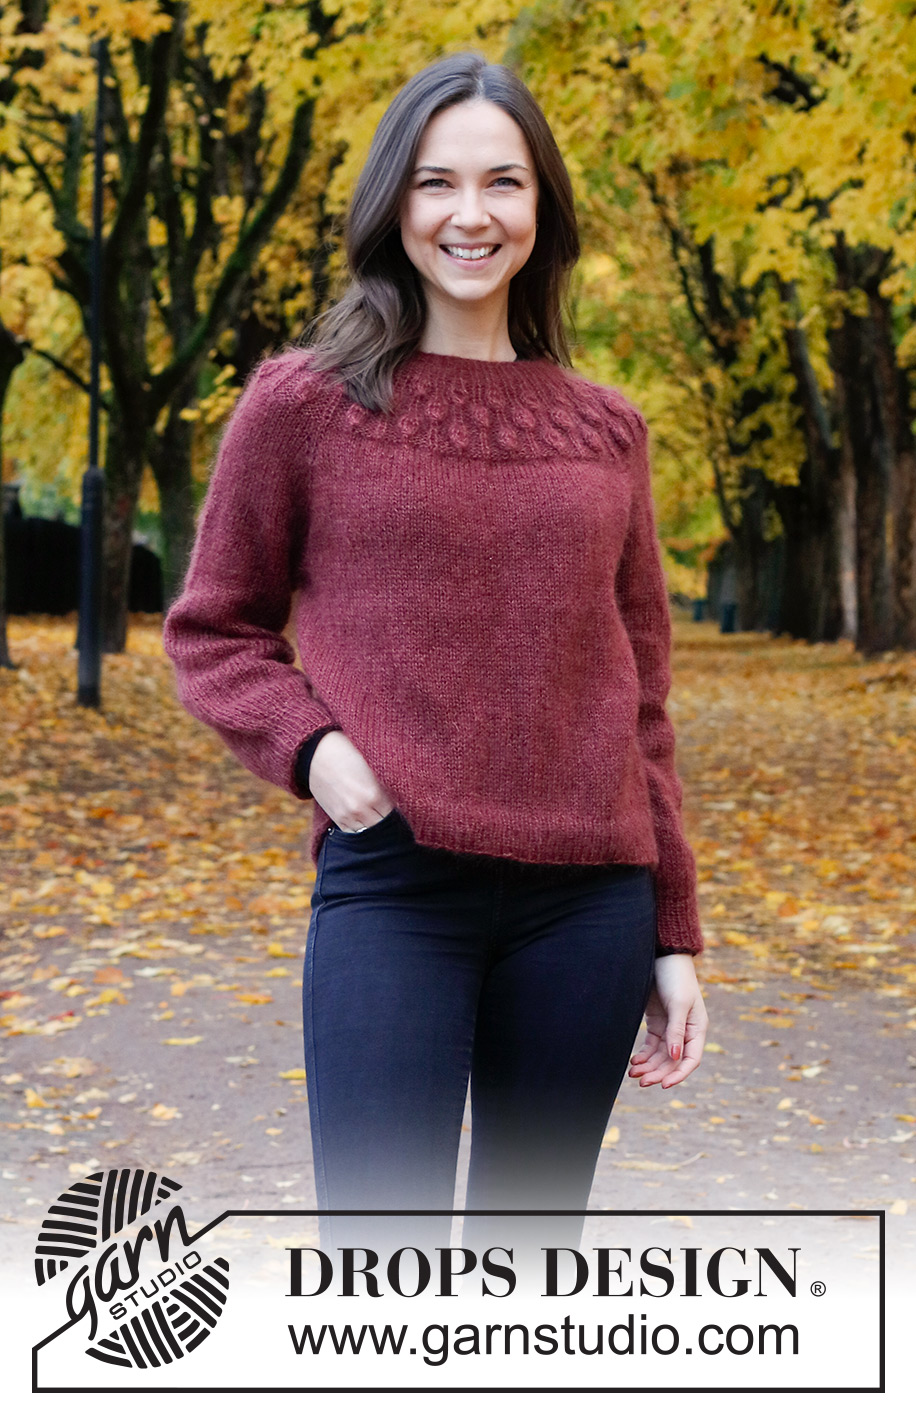
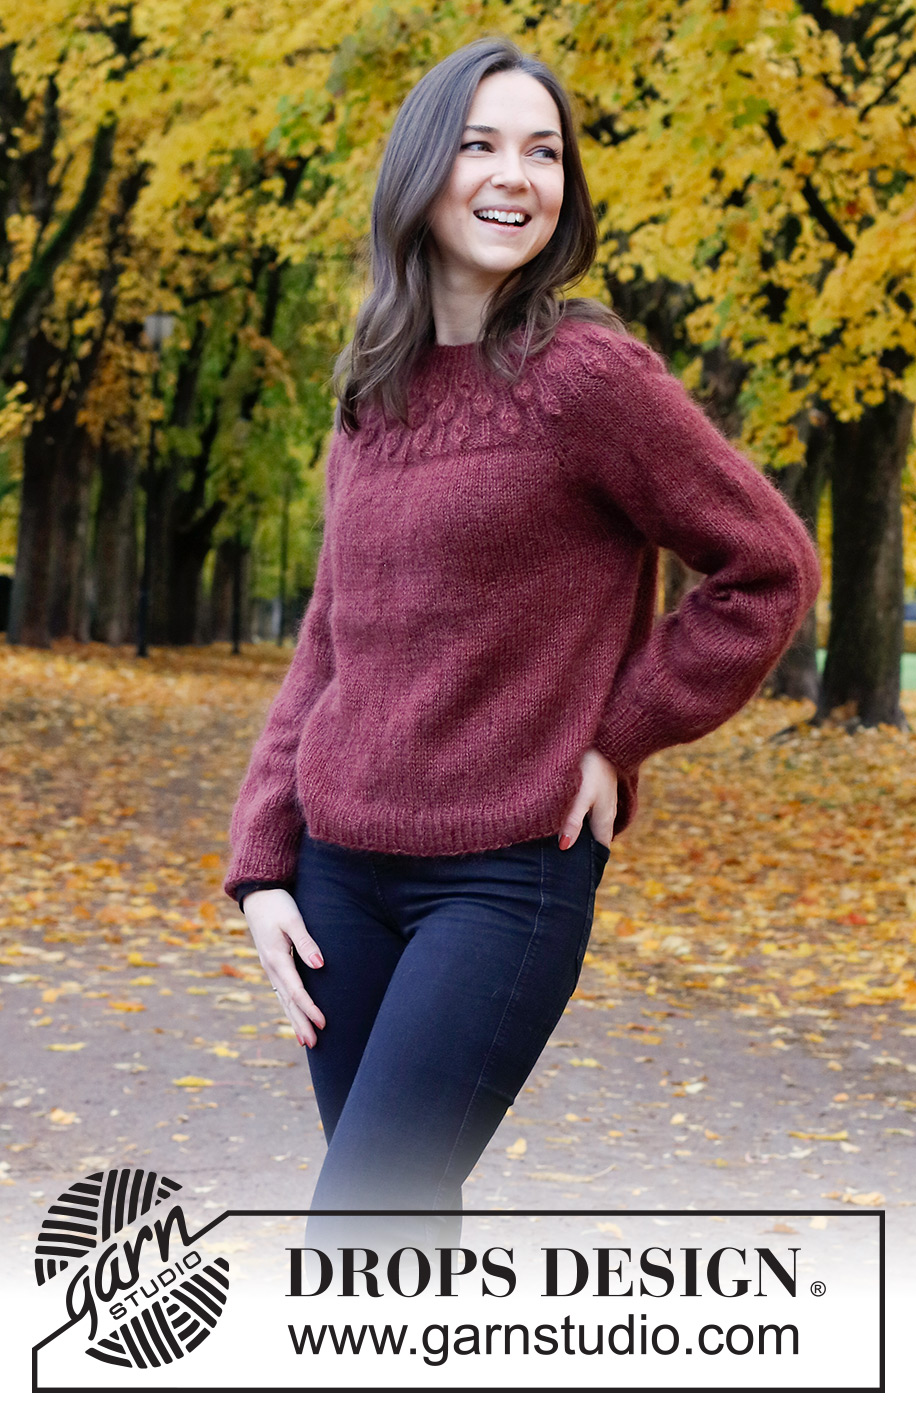
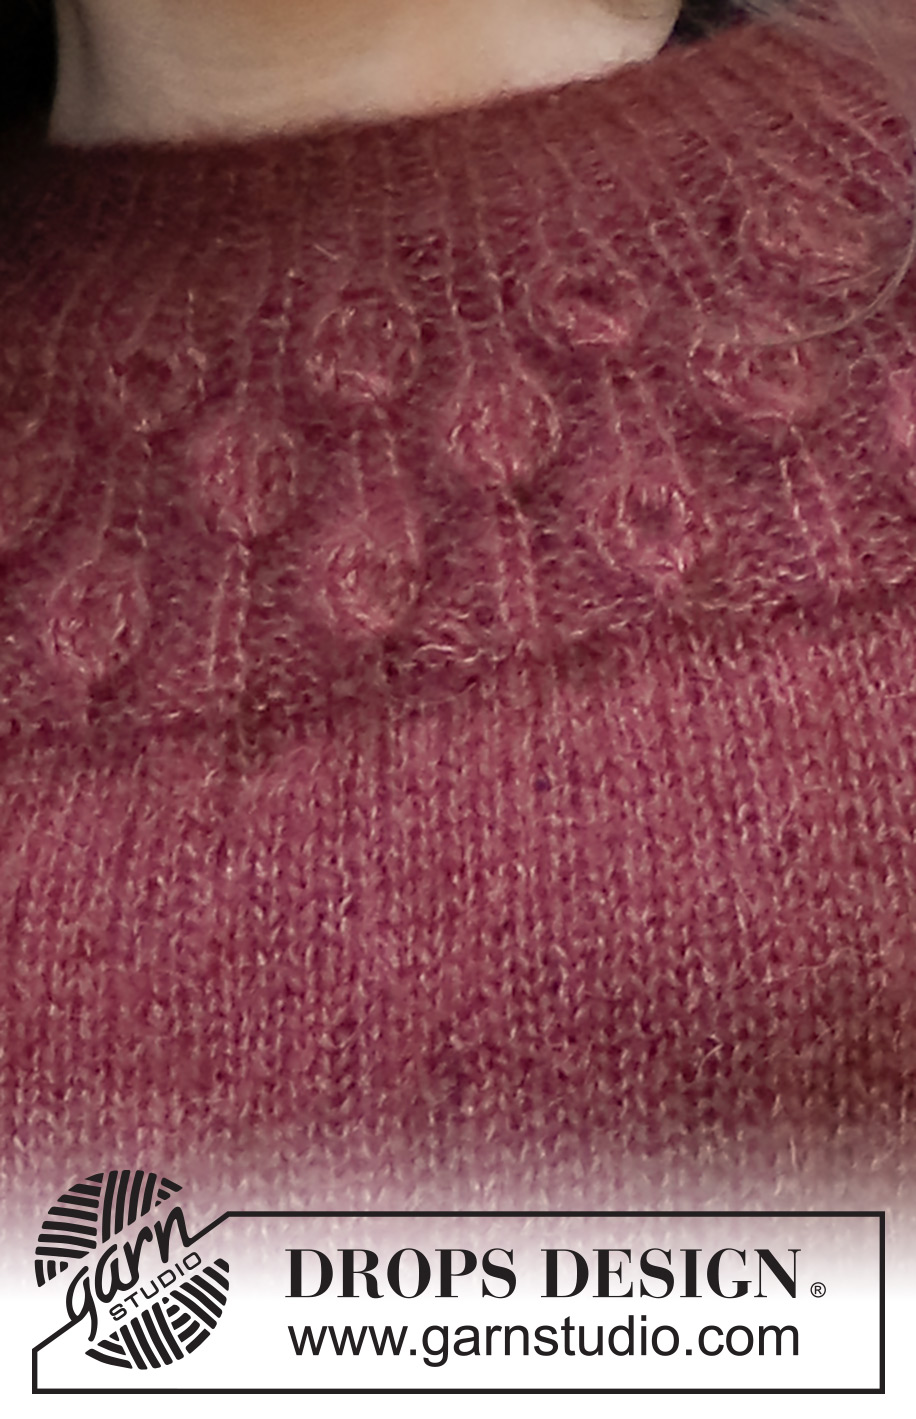
Knitted sweater in 2 strands DROPS Kid-Silk or 1 strand DROPS Brushed Alpaca Silk. Piece is knitted top down with round yoke, raglan and leaf pattern on yoke. Size: S - XXXL
DROPS 226-3 |
|||||||||||||||||||
|
---------------------------------------------------------- EXPLANATION FOR THE PATTERN: ---------------------------------------------------------- PATTERN: See diagrams A.1 and A.2. Choose diagram for your size (applies to A.2). INCREASE/DECREASE TIP (evenly): To calculate how to increase/decrease evenly, use the total number of stitches on row (e.g. 190 stitches) and divide stitches by number of increases to be done (e.g. 6) = 31.7. In this example increase by making 1 yarn over after alternately every 31st and 32nd stitch. On next round work yarn overs twisted to avoid holes. If decreasing knit in this example every 30th and 31st stitch and every 31st and 32nd stitch together. RAGLAN: Increase 1 stitch in each side of the 4 stitches with marker - in every transition between front/back piece and sleeves (= 8 stitches increased on round). Increase 1 stitch by making 1 yarn over. On next round knit yarns over twisted to avoid holes. Then work the new stitches in stockinette stitch. DECREASE TIP (applies to mid under sleeves): Decrease 1 stitch on each side of marker thread as follows: Work until 3 stitches remain before marker thread, knit 2 together, knit 2 stitches (marker thread is between these 2 stitches), slip 1 stitch knitwise, knit 1, pass slipped stitch over stitch worked (= 2 stitches decreased). BIND-OFF TIP: To avoid a tight bind-off edge when binding off, you may use a larger needle. If this still is too tight, make 1 yarn over after approx. every 6th stitch while binding off (bind off yarn overs as stitches). ---------------------------------------------------------- START THE PIECE HERE: ---------------------------------------------------------- SWEATER - SHORT OVERVIEW OF THE PIECE: Neck edge and yoke are worked in the round on circular needle, top down. Now divide yoke for body and sleeves. Work body in the round on needle, top down. Work sleeves in the round on double pointed needles/short circular needle, top down. NECK EDGE: Cast on 76-80-84-88-92-96 stitches on a short circular needle size 4 MM = US 6 with 2 strands DROPS Kid-Silk or 1 strand DROPS Brushed Alpaca Silk. Knit 1 round. Then work A.1 in the round (= 19-20-21-22-23-24 repetitions of 4 stitches) for 4 cm = 1½". Insert 1 marker middle on round (= mid front). Work yoke as explained below - measure yoke from this marker! YOKE: Switch to circular needle size 5 MM = US 8. Work A.2 in the round (= 19-20-21-22-23-24 repetitions of 4 stitches). Continue pattern like this and increase as shown in diagram. When A.2 has been worked vertically, there are 190-200-210-264-276-288 stitches on row and piece measures approx. 10-10-10-15-15-15 cm = 4"-4"-4"-6"-6"-6" from marker by the neck. Work 2 rounds in stockinette stitch and increase at the same time 6-0-2-0-4-0 stitches evenly on first round – read INCREASE/DECREASE TIP = 196-200-212-264-280-288 stitches. Now insert 4 new markers in the piece as explained below. Use these markers when increasing for raglan, and insert markers in piece without working: Count 30-31-33-40-44-46 stitches (= ½ back piece), insert 1 marker in next stitch, count 36-36-38-50-50-50 stitches (= sleeve), insert 1 marker in next stitch, count 60-62-66-80-88-92 stitches (= front piece), insert 1 marker in next stitch, count 36-36-38-50-50-50 stitches (= sleeve), insert 1 marker in next stitch. 30-31-33-40-44-46 stitches remain on round after last marker (= ½ back piece). Work in stockinette stitch in the round. AT THE SAME TIME on first round increase for RAGLAN – read explanation above (= 8 stitches increased). Increase for raglan every other round 0-2-3-0-2-3 times in total vertically and then every 4th round 5-5-5-5-4-5 times in total vertically. After last increase there are 236-256-276-304-328-352 stitches on needle. Work in stockinette stitch without increases until piece measures 20-22-24-25-27-29 cm = 8"-8¾"-9½"-9¾"-10⅝"-11⅜" from marker at the neck. Now divide yoke for body and sleeves and work last round as follows: Work 35-38-41-45-50-54 stitches in stockinette stitch (= ½ back piece), slip the next 48-52-56-62-64-68 stitches on a stitch holder for sleeve, cast on 8-8-10-10-12-12 new stitches on row (= in the side under sleeve), work 70-76-82-90-100-108 stitches in stockinette stitch (= front piece), slip the next 48-52-56-62-64-68 stitches on a stitch holder for sleeve, cast on 8-8-10-10-12-12 new stitches on row (= in the side under sleeve) and work the remaining 35-38-41-45-50-54 stitches in stockinette stitch (= ½ back piece). Finish body and sleeves separately. NOW MEASURE PIECE FROM HERE! BODY: = 156-168-184-200-224-240 stitches. Insert 1 marker in the side of piece – in the middle of the 8-8-10-10-12-12 stitches that were cast on under sleeves. Work in stockinette stitch over the stitches on back piece until marker in the side - round now begins at the marker. Work in stockinette stitch until piece measures 27 cm = 10⅝" from division in all sizes. 4 cm = 1½" remain until finished measurements. Try the sweater and work to desired length. Now increase stitches to stop the rib from contracting. Work 1 round in stockinette stitch while increasing 24-26-28-30-34-36 stitches evenly - remember INCREASE/DECREASE TIP = 180-194-212-230-258-276 stitches. Switch to circular needle size 4 MM = US 6. Work rib in the round = knit 1/purl 1 for 4 cm = 1½". Bind off with knit over knit and purl over purl - read BIND-OFF TIP. Sweater measures approx. 54-56-58-60-62-64 cm = 21¼"-22"-22¾"-23⅝"-24⅜"-25¼" from shoulder and down. SLEEVE: Slip the 48-52-56-62-64-68 stitches from stitch holder in one side of piece back on a short circular needle or double pointed needles size 5 MM = US 8 – pick in addition up 1 stitch in each of the 8-8-10-10-12-12 stitches cast on under sleeve = 56-60-66-72-76-80 stitches. Insert 1 marker thread mid under sleeve - i.e. In the middle of the 8-8-10-10-12-12 stitches that were cast on under sleeves. Move the marker thread upwards when working; it should be used for decrease mid under sleeve. Begin round at the marker thread, and work stockinette stitch in the round. When sleeve measures 3 cm = 1⅛" from division in all sizes, decrease 2 stitches mid under sleeve - read DECREASE TIP. Decrease like this every 3 cm = 1⅛" a total of 3-3-3-4-4-4 times vertically = 50-54-60-64-68-72 stitches. Continue until sleeve measures 37-36-34-35-33-32 cm = 14½"-14¼"-13⅜"-13¾"-13"-12½" from division (shorter measurements in the larger sizes because of wider neck and longer yoke). 6 cm = 2⅜" remain until finished measurements. Try the sweater and work to desired length. Knit 1 round while decreasing 12-14-18-20-22-24 stitches evenly - REMEMBER INCREASE/DECREASE TIP = 38-40-42-44-46-48 stitches. Switch to double pointed needles size 4 MM = US 6. Work rib in the round = knit 1/purl 1 for 6 cm = 2⅜". Bind off with knit over knit and purl over purl - remember BIND-OFF TIP. Sleeve measures approx. 43-42-40-40-39-38 cm = 17"-16½"-15¾"-15¾"-15¼"-15" from division. Work the other sleeve the same way. |
|||||||||||||||||||
Diagram explanations |
|||||||||||||||||||
|
|||||||||||||||||||
 |
|||||||||||||||||||
 |
|||||||||||||||||||
Have you finished this pattern?Tag your pictures with #dropspattern #blackforestmemoriessweater or submit them to the #dropsfan gallery. Do you need help with this pattern?You'll find 28 tutorial videos, a Comments/Questions area and more by visiting the pattern on garnstudio.com. © 1982-2026 DROPS Design A/S. We reserve all rights. This document, including all its sub-sections, has copyrights. Read more about what you can do with our patterns at the bottom of each pattern on our site. |
|||||||||||||||||||








Post a comment to pattern DROPS 226-3
We would love to hear what you have to say about this pattern!
If you want to leave a question, please make sure you select the correct category in the form below, to speed up the answering process. Required fields are marked *.