
Popular categories
Looking for a yarn?


Comments / Questions (47)
![]() Alejandra Estela Sotelo Sotelo wrote:
Alejandra Estela Sotelo Sotelo wrote:
A ver si entiendo bien, en el ancho maximo o pico del chal, para que la trenza no quede tirante, hay que hacer tres vueltas o hileras antes de empezar a disminuir? Desde ya muchas gracias y hermosos todos sus modelos. Una maravilla
21.07.2022 - 17:29DROPS Design answered:
Hola Alejandra, * Trabajar 2 filas de ida y vta sobre los 12 pts de A.1, trabajar 2 filas de ida y vta sobre todos los pts de la fila como antes pero sin aumentos *, repetir de *a* un total de 3 vcs, ahora trabajar 2 filas de ida y vta sobre los 12 pts de A.1 otra vez. Ahora trabajar y dism ... Buen trabajo!
22.07.2022 - 21:52
![]() Carol Maitland wrote:
Carol Maitland wrote:
Hi,another question if you don’t mind.besides the wool air and wish,what other yarn do you recommend with 1 strand.thks carol.
03.06.2022 - 15:10DROPS Design answered:
Dear Mrs Maitland, you can use any other yarn group E or 2 strands yarn group C - use our yarn converter to see some alternatives as well as the new amount of yarn. Happy knitting!
03.06.2022 - 16:07
![]() Carol Maitland wrote:
Carol Maitland wrote:
Hi,I have a question about this pattern,actually the chart.have never knitted from a chart before,any guidelines. Where the lines are in diagram a1 this is where you do the cables right.will hv more questions as I progress. Thks,hv a great day.carol
03.06.2022 - 15:02DROPS Design answered:
Dear Mrs Maitland, you will read more about diagrams here - and maybe this video will help you to understand even better how to read diagrams and how to work the cable. Happy knitting!
03.06.2022 - 16:06
![]() Carol Maitland wrote:
Carol Maitland wrote:
Hi thks for answering my question on this pattern.you have suggested drops air for this,would it be ok to use 1 strand of drops wish instead.thks
17.03.2022 - 09:23DROPS Design answered:
Dear Mrs Maitland, correct, you can use either 2 strands Air or then 1 strand Wish - use our yarn converter to let it calculate new amount of yarn. Happy knitting!
17.03.2022 - 11:18
![]() Carol Maitland wrote:
Carol Maitland wrote:
Hi I would like to knit this pattern Drops 172-10.It calls for Drops Clouds but that is discontinued.Could you give me an alternative for this pattern in 1 strand. Thks so much Carol Maitland.
16.03.2022 - 17:52DROPS Design answered:
Hi Carol, The alternative yarn recommended here is Air which is in yarn group C. 2 strands of a yarn from group C is equivalent to 1 strand of any yarn in group E. So you can choose a yarn from group E and work with 1 strand. Happy knitting!
17.03.2022 - 06:53
![]() Carol Maitland wrote:
Carol Maitland wrote:
Hi I wouldlike to knit the above pattern,but the yarn cloud is now discontinued,which yarns could I use for this project,would I be able to use the yarn wish. thks Carol.
25.10.2021 - 13:55DROPS Design answered:
Hi Carol, your question has been already answered. Please check the comment section in the pattern. Happy knitting!
25.10.2021 - 14:49
![]() Carol Maitland wrote:
Carol Maitland wrote:
Hi I would like to knit the above pattern but Cloud is now discontinued,could I use Wish as a replacement wool. and would that be 1 strand. Thks Carol.
24.10.2021 - 17:54DROPS Design answered:
Hi Carol, yes you can replace DROPS Cloud with DROPS Wish. You will be using only 1 strand. You will need from 350 g (size S/M) - 500 g (size L/XL) of yarn for the whole set. Happy knitting!
24.10.2021 - 18:20
![]() Angela wrote:
Angela wrote:
Buongiorno, mi piace moltissimo questo bordo e vorrei chiedere se, secondo voi, è possibile utilizzare lo schema come bordo per un lavoro in piano [coi ferri dritti] ossia un rettangolo che cucirò come coprispalle senza maniche. Mi piacerebbe davvero molto. grazie mille per una gentile risposta. Angela
25.01.2021 - 14:19DROPS Design answered:
Buonasera Angela, si può usarlo come bordo lavorato con i ferri dritti. Buon lavoro!
25.01.2021 - 18:25
![]() Kirsten wrote:
Kirsten wrote:
Hallo liebes Drops Team, bei den verkürzten Reihen verstehe ich das richtig 1 hinreihe über die Maschen von A1 stricken und 1Rückreihe und das zwei mal. In der nächsten Reihe das alle Maschen stricken. Und das insgesamt 3×wiederholen. Ist das richtig? LG Kirsten
10.01.2021 - 17:57DROPS Design answered:
Liebe Kirsten, für die verkürzten Reihen stricken Sie so: 1 Hinreihe über die Maschen von A.1, wenden und 1 Rückreihe über diese Maschen stricken, 1 Hinreihe über alle Maschen, wenden, die Rückreihe über alle Maschen stricken*, und von *-* wiederholen = 4 Reihen über die Maschen von A.1 und nur 2 Reihen über die anderen Maschen - 3 Mal = 12 Reihen über die Maschen von A.1 und 6 Reihen über die anderen und noch 2 Reihen wie zuvor nur über die Maschen von A.1 stricken (= 14 Reihen über A.1 insgesamt). Viel Spaß beim stricken!
11.01.2021 - 09:43
![]() Loretta wrote:
Loretta wrote:
Si può avere uno schema per vedere quando fare la treccia dopo le 56 maglie lavorando con i ferri accorciati ; per le 7 maglie tra una treccia e l'altra si contano anche i giri di andata e ritorno del diagramma a1
29.03.2020 - 16:23DROPS Design answered:
Buongiorno Loretta. Le maglie del diagramma con la treccia vengono sempre lavorate, anche durante i ferri accoricati. E' sufficiente che segua lo schema come fatto in precedenza intrecciando le maglie ogni 8 ferri. Buon lavoro!
30.03.2020 - 12:58
|
|||||||
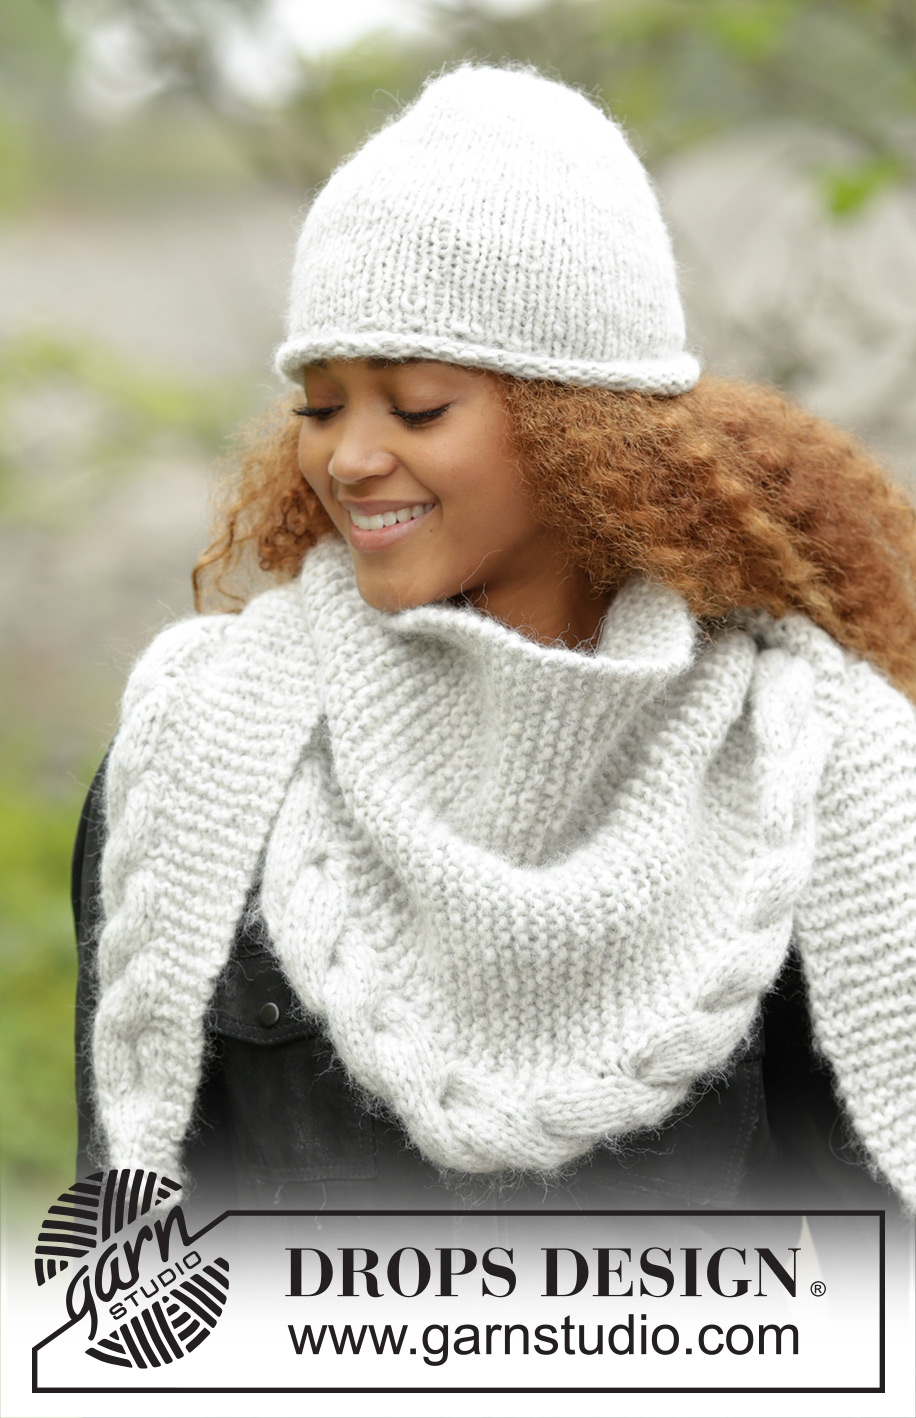
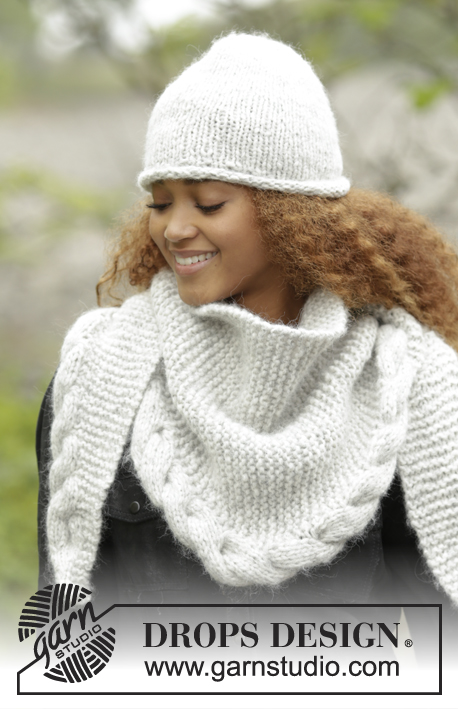
Winter Cozy#wintercozyset |
|||||||
 |
 |
||||||
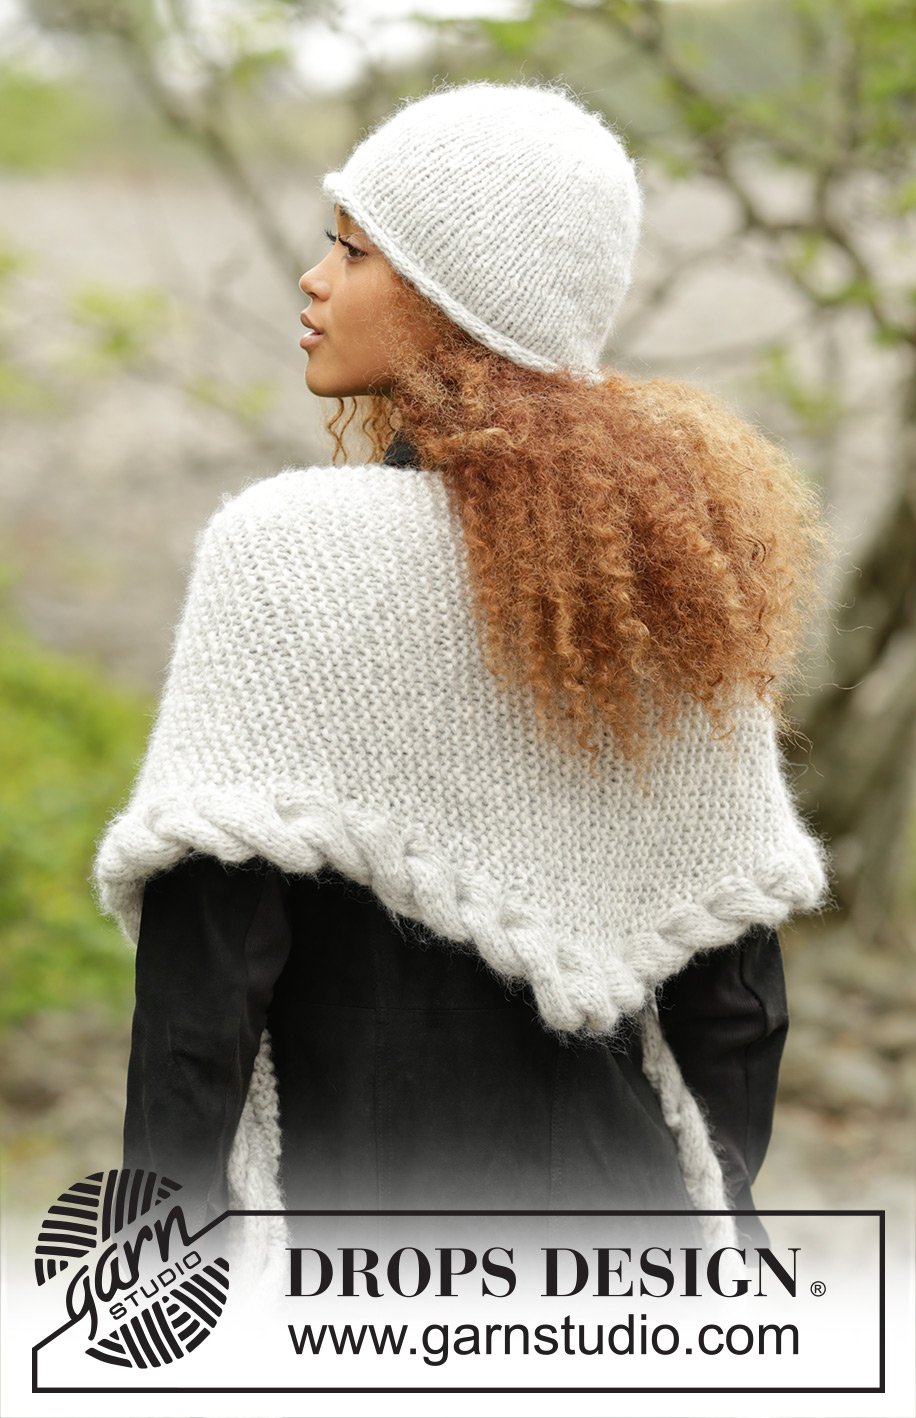
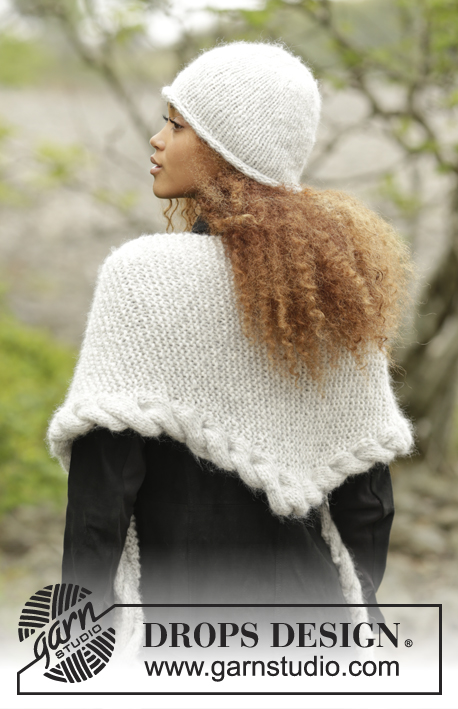
Set consists of: Knitted DROPS hat in “Cloud” or "Air" and shawl worked from side to side in garter st with cable edge in “Cloud” or "Air".
DROPS 172-10 |
|||||||
|
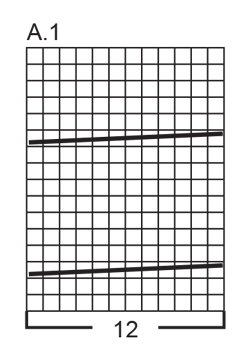
HAT: DECREASE TIP: Slip 1 st as if to K, K 1, psso. ---------------------------------------------------------- HAT: Cast on 56-60 sts on circular needle size 7 mm / US 10.75 with with Cloud or 2 threads Air. Work 4 rounds in stockinette st (= rolling edge). Work next round as follows: * K 1, P 1 *, repeat from *-* the entire round. Work 1 more round with K over K and P over P. Then continue in stockinette st until finished measurements. REMEMBER THE KNITTING GAUGE When piece measures 21-22 cm / 8¼"-8¾", insert 8-10 markers in the piece, 7-6 sts apart. On next round dec 1 st after every marker - SEE DECREASE TIP (= 8-10 sts dec). Dec like this every other round a total of 3 times, then every round a total of 2 times. On next round K all sts twisted tog two by two = 8-5 sts on needle. Cut the yarn and pull it through the remaining sts, tighten tog and fasten. Piece measures approx. 26-27 cm / 10¼"-10½" from top and down (includes rolling edge). ---------------------------------------------------------- SHAWL: KNITTING TIP: Work shawl in garter st with a cable edge along bottom edge. Work this cable edge of the outermost 12 sts. Do not work any edge st on the cable (i.e. work outermost st in A.1 as a normal st in stockinette st from both RS and WS), otherwise the cable will not roll and get the correct bounce. PATTERN: See diagram A.1. The diagrams show all rows in pattern seen from RS. MEASURING TIP: Measure shawl along the straight edge without inc/dec. ---------------------------------------------------------- SHAWL: Worked from side to side. Cast on 3 sts on circular needle size 8 mm / US 11 with with Cloud or 2 threads Air and work as follows: ROW 1 (= RS): K all sts. ROW 2 (= WS): K 2, K 1 in front and behind in next st = 4 sts on row. ROW 3 (= RS): K 1, 1 YO, K 3 = 5 sts. ROW 4 (= WS): K 3, P YO twisted, P 1. ROW 5 (= RS):K 2, 1 YO, K 3 = 6 sts. ROW 6 (= WS): K 3, P YO twisted, P 2. ROW 7 (= RS):K 3, 1 YO, K 3 = 7 sts. ROW 8 (= WS):K 3, P YO twisted, P 3. ROW 9 (= RS): K 4, 1 YO, K 3 = 8 sts. ROW 10 (= WS): K 3, P YO twisted, P 4. ROW 11 (= RS): K 5, 1 YO, K 3 = 9 sts. ROW 12 (= WS): K 3, P YO twisted, P 5. ROW 13 (= RS): K 1 in front and behind in each of the first 6 sts, insert 1 marker, K 3 = 15 sts. ROW 14 (= WS): K 3, marker, P 12. Continue to work and inc as follows - READ KNITTING TIP AND REMEMBER THE KNITTING GAUGE. ROW 1 (= RS): Work pattern according to diagram A.1 over the first 12 sts, work 2 sts in first st after marker and K the rest of row (= 1 st inc). ROW 2 (= WS): K until marker and A.1 over the last 12 sts. ROW 3 (= RS): A.1 over the first 12 sts, marker, K the rest of row. ROW 4 (= WS): K until marker and A.1 over the last 12 sts. Repeat 1st- 4th row (i.e. inc 1 st every 4th row) until there are 56 sts on row. Piece now measures approx. 81 cm / 32" - READ MEASURING TIP. Now work short rows to avoid a tight cable over the tip as follows: * Work 2 rows back and forth over the 12 sts in A.1, work 2 rows back and forth over all sts on row as before but do not inc *, repeat from *-* 3 times in total, then work 2 rows back and forth over the 12 sts A.1 again. Then work and dec as follows: ROW 1 (= RS): Work pattern according to diagram A.1 over the first 12 sts, K the 2 first sts after marker tog and K the rest of row (= 1 st dec). ROW 2 (= WS): K until marker and A.1 over the last 12 sts. ROW 3 (= RS): A.1 over the first 12 sts, marker, K the rest of row. ROW 4 (= WS): K until marker and A.1 over the last 12 sts. Repeat 1st- 4th row (i.e. dec 1 st every 4th row) until 15 sts remain on row (piece now measures approx. 159 cm / 62½"). Then work as follows: ROW 1 (= RS): K all sts in A.1 tog tog 2 by 2, marker, K 3 = 9 sts remain on needle. ROW 2 (= WS): K 3, P 6. ROW 3 (= RS): K 4, K 2 tog, K 3 = 8 sts. ROW 4 (= WS): K 3, P 5. ROW 5 (= RS):K 3, K 2 tog, K 3 = 7 sts. ROW 6 (= WS): K 3, P 4. ROW 7 (= RS):K 2, K 2 tog, K 3 = 6 sts. ROW 8 (= WS):K 3, P 3. ROW 9 (= RS): K 1, K 2 tog, K 3 = 5 sts. ROW 10 (= WS): K 3, P 2. ROW 11 (= RS): K 2 tog, K 3 = 4 sts. ROW 12 (= WS): K 4. ROW 13 (= RS): K 2 tog, K 2. ROW 14 (= WS): bind off with K. |
|||||||
Diagram explanations |
|||||||
|
|||||||
 |
|||||||
Have you finished this pattern?Tag your pictures with #dropspattern #wintercozyset or submit them to the #dropsfan gallery. Do you need help with this pattern?You'll find 24 tutorial videos, a Comments/Questions area and more by visiting the pattern on garnstudio.com. © 1982-2026 DROPS Design A/S. We reserve all rights. This document, including all its sub-sections, has copyrights. Read more about what you can do with our patterns at the bottom of each pattern on our site. |
|||||||


With over 40 years in knitting and crochet design, DROPS Design offers one of the most extensive collections of free patterns on the internet - translated to 17 languages. As of today we count 324 catalogs and 12290 patterns - 12280 of which are translated into English (US/in).
We work hard to bring you the best knitting and crochet have to offer, inspiration and advice as well as great quality yarns at incredible prices! Would you like to use our patterns for other than personal use? You can read what you are allowed to do in the Copyright text at the bottom of all our patterns. Happy crafting!
Post a comment to pattern DROPS 172-10
We would love to hear what you have to say about this pattern!
If you want to leave a question, please make sure you select the correct category in the form below, to speed up the answering process. Required fields are marked *.