
Popular categories
Looking for a yarn?


Comments / Questions (32)
![]() Drops Design wrote:
Drops Design wrote:
Gro: Maskeantalle stemmer. 194 masker - (5+5) stolpemasker = 184 masker/ 23 masker(maskeantall i diagrammet) = 8
03.06.2009 - 22:59
![]() Drops Design wrote:
Drops Design wrote:
Anita: Maskeantalle stemmer. Du feller fra 20 til 10 masker vedå strikke sammen, du øker 10 masker ved kast, i tilleg har du 9 masker rett mellom kastene = 10 + 10 + 9 = 29 masker
03.06.2009 - 22:56
![]() Gro Gjerde wrote:
Gro Gjerde wrote:
Jeg strikker xs/s,når jeg har satt ermene inn på får jeg heller ikke mønsteret til å stemme.Irriterende.Er det noen som kan hjelpe,,FORT,.Takk Takk
30.05.2009 - 12:05
![]() Anita Gjerde wrote:
Anita Gjerde wrote:
Hei, jeg strikker str. M/L av denne modellen, men får ikke mønsteret til å stemme med opplagt maskeantall (184). M.1 sier 29 m men det stemmer ikke når man totalt skal strikke sammen 2x5 m. Disse 10 må jo legges opp igjen (kast). Mønsteret/antall masker må være delelig med 5/10? Håper på en oppklaring snarest ! mvh. Anita Gjerde
01.08.2007 - 12:12TFL wrote:
Denne tror jeg bliver et hit. Enkel og god til en lun sommeraften
24.01.2006 - 15:15
![]() margaretha wrote:
margaretha wrote:
Toppen!Finaste sommarkoftan på länge.Rolig att sticka,vacker att bära
11.01.2006 - 19:26Torunn wrote:
Riktig lekker ! Men den er jo til sommerbruk så vivaldi blir litt varmt ?
10.01.2006 - 17:23
![]() rita wrote:
rita wrote:
Simpelthen superflot.Kan jeg købe mønsteret?
03.01.2006 - 13:59Ann Iren wrote:
Delikat. Ser for meg denne til festantrekket i bryllupet jeg er invitert til
03.01.2006 - 11:12Mailinglisten wrote:
Denne er kjemefin
14.12.2005 - 21:02
|
|||||||||||||
Espuma |
|||||||||||||
|
|
|||||||||||||
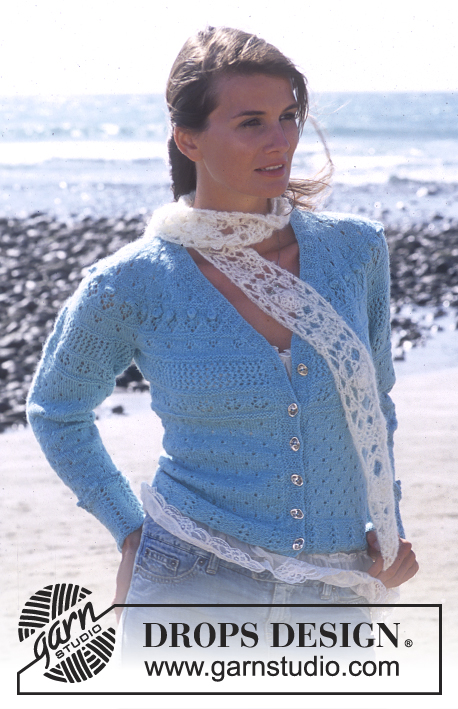
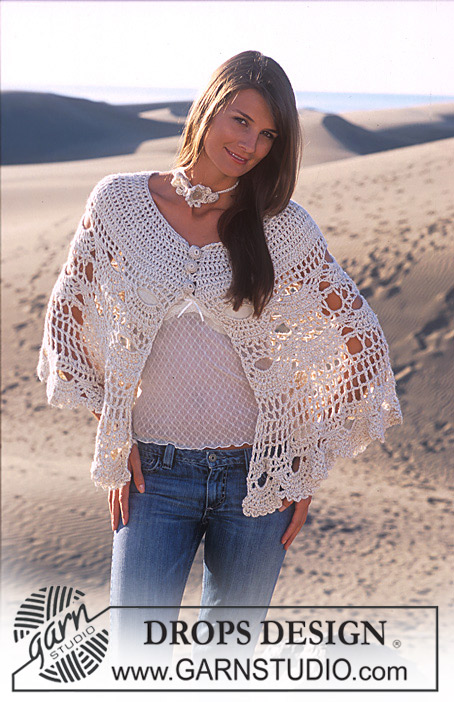
DROPS Small bolero cardigan with a wavy lace pattern in Vivaldi or Brushed Alpaca Silk.
DROPS 94-13 |
|||||||||||||
|
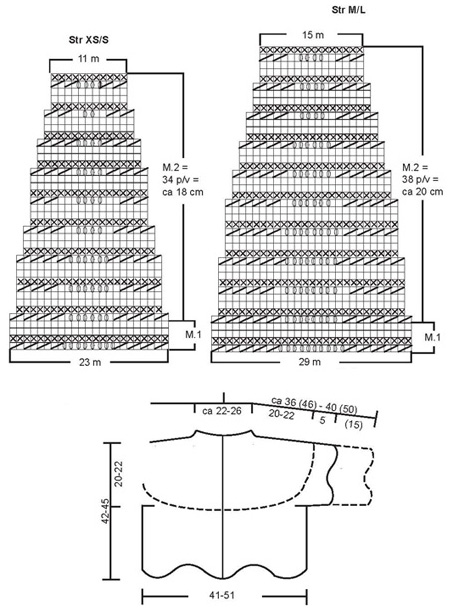
Knitting gauge: 17 sts x 19 rows on needles size 5.5 mm / US 9 with Vivaldi in wavy lace pattern = 10 x 10 cm / 4" x 4". Wavy lace pattern: See diagrams M.1 & M.2. The diagrams show every row in pattern seen from the right side. BODY Bend the circular needle in the middle and cast on 148-184 sts (including 5 edge sts each side, knitted in garter sts throughout) on 2 needles size 5.5 mm/US 9 with Vivaldi or Brushed Alpaca Silk (use 2 needles to make the edge more elastic). Pull out 1 needle and K2 rows (1st row = RS). Continue in diagram M.1 with 5 edge sts in garter st each side – see diagram for the relevant size. Insert a marker in the 40th-49th st from each side = 68-86 sts between the markers for the back piece – let the markers follow the piece as you go along. When the piece measures 22-23 cm / 8 ¾"-9" – the next row should be the last row in M.1 – bind off 11-15 sts each side for armhole (= the st with markers + 5-7 sts on each side) = 34-41 sts left for each front piece and 58-72 sts left for back piece. Put the work aside and work the sleeves. SLEEVES The sleeves can be made in 2 different lengths; see the measurement chart (the design in the photo is with the shorter version). Cast on 46-58 sts over 2 needles size 5.5 mm/US 9 with Vivaldi. Pull out 1 needle and distribute the sts on the double pointed needles and work in the round. Insert a marker at the beginning of round = mid underneath the sleeve. K 1 round and P 1 round. Continue in diagram M.1 – remember to follow diagram for the correct size. When the piece measures 5 cm / 2" (short sleeve) or 15 cm / 6" (longer sleeve) – next row should be the last row in M.1 – bind off 12-14 sts underneath the sleeve = 34-44 sts left. Put the sleeve aside and make another one. YOKE Put the sleeves in on the same circular needle as the front and back piece, where you bound off for the armholes = 194-242 sts on row. Now continue and dec according to diagram M.2, but continue to K5 edge sts each side in garter sts – 1st row = right side. After 1 repeat of M.2 in height there are 98-130 sts left on needle. Continue working the last 4 rows of M.2 until the piece measures 19-21 cm / 7½"-8" from the beginning of the yoke. Now K 1 row from the right side, at the same adjusting number of sts evenly on row to 84-100 (do not dec over sts on front bands). P 1 row from the wrong side and then bind off loosely with K sts from the right side – in order not to make the edge too tight, make a yo every 6 th st while binding off (knit and bind off the yo’s as sts). ASSEMBLY Sew the openings under arms. Crochet a border along the sleeves edges and all along the opening of the cardigan (this means around the neck, along the front edges and along the bottom edge) on hook size 3 mm/C with Cotton Viscose as follows: crochet 1 sc in the 1st st, *ch 3, skip a st, 1 sc in the next st*, repeat from *-* and finish with ch 3 and 1 sl st in the 1st sc from beginning of round. Hold the cardigan together with a brooch or similar. |
|||||||||||||
Diagram explanations |
|||||||||||||
|
|||||||||||||
 |
|||||||||||||
Have you finished this pattern?Tag your pictures with #dropspattern or submit them to the #dropsfan gallery. Do you need help with this pattern?You'll find 18 tutorial videos, a Comments/Questions area and more by visiting the pattern on garnstudio.com. © 1982-2026 DROPS Design A/S. We reserve all rights. This document, including all its sub-sections, has copyrights. Read more about what you can do with our patterns at the bottom of each pattern on our site. |
|||||||||||||


With over 40 years in knitting and crochet design, DROPS Design offers one of the most extensive collections of free patterns on the internet - translated to 17 languages. As of today we count 324 catalogs and 12290 patterns - 12280 of which are translated into English (US/in).
We work hard to bring you the best knitting and crochet have to offer, inspiration and advice as well as great quality yarns at incredible prices! Would you like to use our patterns for other than personal use? You can read what you are allowed to do in the Copyright text at the bottom of all our patterns. Happy crafting!
Post a comment to pattern DROPS 94-13
We would love to hear what you have to say about this pattern!
If you want to leave a question, please make sure you select the correct category in the form below, to speed up the answering process. Required fields are marked *.