
Popular categories
Looking for a yarn?


Comments / Questions (41)
![]() Birgit Lemcke wrote:
Birgit Lemcke wrote:
Ang udtag i nakke: Hvor mange masker forøges der med i nakken?\\r\\nSynes ikke opskrift er logisk her.\\r\\nBirgit Lemcke
28.07.2022 - 19:21
![]() Simone Kraaipoel wrote:
Simone Kraaipoel wrote:
Bij het achterpand staat voor maat M: brei A1 8x en A2 2x. Dit begrijp ik niet. Op het plaatje blijft het patroon toch netjes boven elkaar eruit zien. Of moet ik die A2 op dezelfde hoogte meebreien? En hoeveel steken moeten er dan tussen zitten?
05.07.2022 - 17:37DROPS Design answered:
Dag Simone,
Je breit 1 ribbesteek, dan 2 tricotsteken, dan herhaal je patroon A.1 8 keer in de breedte op de naald. A.1 heeft 10 steken dus met 8 herhalingen van A.1 zijn dat in totaal 80 steken, dan brei je A.2 (=4 steken) en tot slot 1 steek in ribbelsteek. Dit patroon zet je voort in de hoogte en op die manier blijft het patroon inderdaad mooi boven elkaar staan.
08.07.2022 - 09:03
![]() MARTIN wrote:
MARTIN wrote:
Bonjour, sur le patron dessiné, est-ce que la bande d'encolure est comprise dans les mesures ? Merci.
20.06.2022 - 21:34DROPS Design answered:
Bonjour Mme Martin, non ne figure que la largeur du dos et de l'encolure mesurée avant le col/ la bordure des devants qui mesure 8 à 9 cm de large selon la taille. Bon tricot!
21.06.2022 - 08:55
![]() Pia wrote:
Pia wrote:
Forkant strikkes i rib 1 ret 1 vrang. Når forkanten måler 3 cm, tages der 1 maske ud i hvert vrangparti (set fra retsiden) mellem skuldersømmene bag i nakken. Hvordan skal der strikkes rib efter udtagning (hvodan skal masken der tages ud strikkes på næste pind ?Skal det være 2 ret 1 vrang ? Og hvordan skal der strikkes efter udtagningen efter 6 cm?
30.05.2022 - 23:30DROPS Design answered:
Hej Pia, ja det stemmer, fra retsiden bliver det 1 ret og 2 vrang efter udtagningen (fra vrangen 1 vrang, 2 ret) God fornøjelse!
02.06.2022 - 10:37
![]() Nathalie wrote:
Nathalie wrote:
Bonjour, je suis bloquée au niveau de l\'encolure et du biais épaule. Avez vous une vidéo explicative ? Je ne comprends pas comment terminé cette étape.... Merci !
19.05.2022 - 19:54DROPS Design answered:
Bonjour Nathalie, le biais des épaules consiste à tricoter des rangs raccourcis: en commençant par le côté emmanchure de l'épaule (sur l'envers d'un côté, sur l'endroit de l'autre côté), tricotez 8 à 12 m (cf taille) et mettez-les en attente sur un fil, terminez le rang, tournez et tricotez le rang suivant, tricotez ces 2 rangs encore 2 fois (3 fois 8 à 12 m en attente), puis glissez les 6-13 dernières mailles en attente. Reprenez toutes les mailles mises sur le fil (= 30 à 49 m) et tricotez 1 rang sur l'envers (en évitant les trous comme indiqué), et rabattez et rabattez au rang suivant sur l'endroit. Bon tricot!
20.05.2022 - 08:04
![]() Rebecca Woods wrote:
Rebecca Woods wrote:
Hello, I'm printing this pattern off for my mum, do you have a printable version that's more accessible - ie bigger print and in black text please? thanks Rebecca
13.05.2022 - 15:35DROPS Design answered:
Dear Mrs Woods, sorry we only have this version, ie text should be printed in black - maybe your printer's settings can help?
13.05.2022 - 16:21
![]() Trudy wrote:
Trudy wrote:
Please clarify the instructions for the diagonal shoulder. The pattern says "Slip the 30-34-... stitches from the thread back on circular needle size 4mm. Knit 1 row from wrong side... Then loosely cast off all stitches... How are the shoulder stitches gradually decreased? How does one get from a 43cm back length (for example) to 46cm?
29.04.2022 - 21:15DROPS Design answered:
Dear Trudy, the diagonal shoulder is started when the total length of the garment is 43 cm (for size S). The explanations on how to work the diagonal shoulders are found when working the back, but they are worked in the same way in the front. You work the first 8 stitches, which are slipped into a thread. You then work until the end of the row and back. You repeat this way until you have slipped 8 stitches 3 times in total. Now, you slip the next 6 stitches. So now, all of the stitches should be either cast off (in the neck) or slipped (in the shoulder). Now you slip back the stitches from the thread back to the needle (see in pattern), you knit 1 row and cast off. Happy knitting!
30.04.2022 - 22:09
![]() Pia wrote:
Pia wrote:
Bagstykke skrå skulder: Når jeg har sat masker på tråd ender jeg ved halskanten med den tråd jeg strikker med. (Venstre skulder). Skal jeg der bryde tråden jeg strikker med for at strikke maskerne fra tråden ret fra vrangen ? Eller skal jeg strikke en pind ret fra retten først?
25.04.2022 - 23:14DROPS Design answered:
Hej Pia, Du har lukket de midterste masker af til hals. Hvis du starter med venstre skulder, så vender du når du kommer til halsen igen og strikker tilbage igen over venstre skulder. God fornøjelse!
27.04.2022 - 14:23
![]() Nathalie wrote:
Nathalie wrote:
Bonjour, je comme ce juste le dos en L. Je rencontre un problème pour repartir le point fantaisie sur 100 mailles. Il est demande de le reproduire 9 fois. Mais si je suis le diagramme, les motifs en croix ne sont pas du tout réguliers , je ne comprends pas . Pouvez vous m'aider ? Merci
23.04.2022 - 21:44DROPS Design answered:
Bonjour Nathalie, tricotez ainsi: 1 m point mousse, 2 m jersey, répétez 9 fois les 10 mailles de A.1 (= 9x10=90), tricotez A.2 (= 4 m) et terminez par 2 m jersey, 1 m point mousse, soit: 1+2+90+4+2+1=100 m. Bon tricot!
25.04.2022 - 07:41
![]() Anna Ferri wrote:
Anna Ferri wrote:
Se nel davanti destro(taglia L)mi ritrovo con 37 maglie,come mai leggo di aumentare 1 maglia da entrambi i lati per 4 volte(quindi 8 maglie in totale)e poi leggo 41 maglie in totale?alla fine non mi trovo con il numero di maglie per la diagonale della spalla.grazie per l'attenzione, buona giornata
07.04.2022 - 12:23DROPS Design answered:
Buonasera Anna, grazie per la segnalazione: abbiamo corretto il testo, deve aumentare solo a lato. Buon lavoro!
07.04.2022 - 21:18
|
|||||||||||||
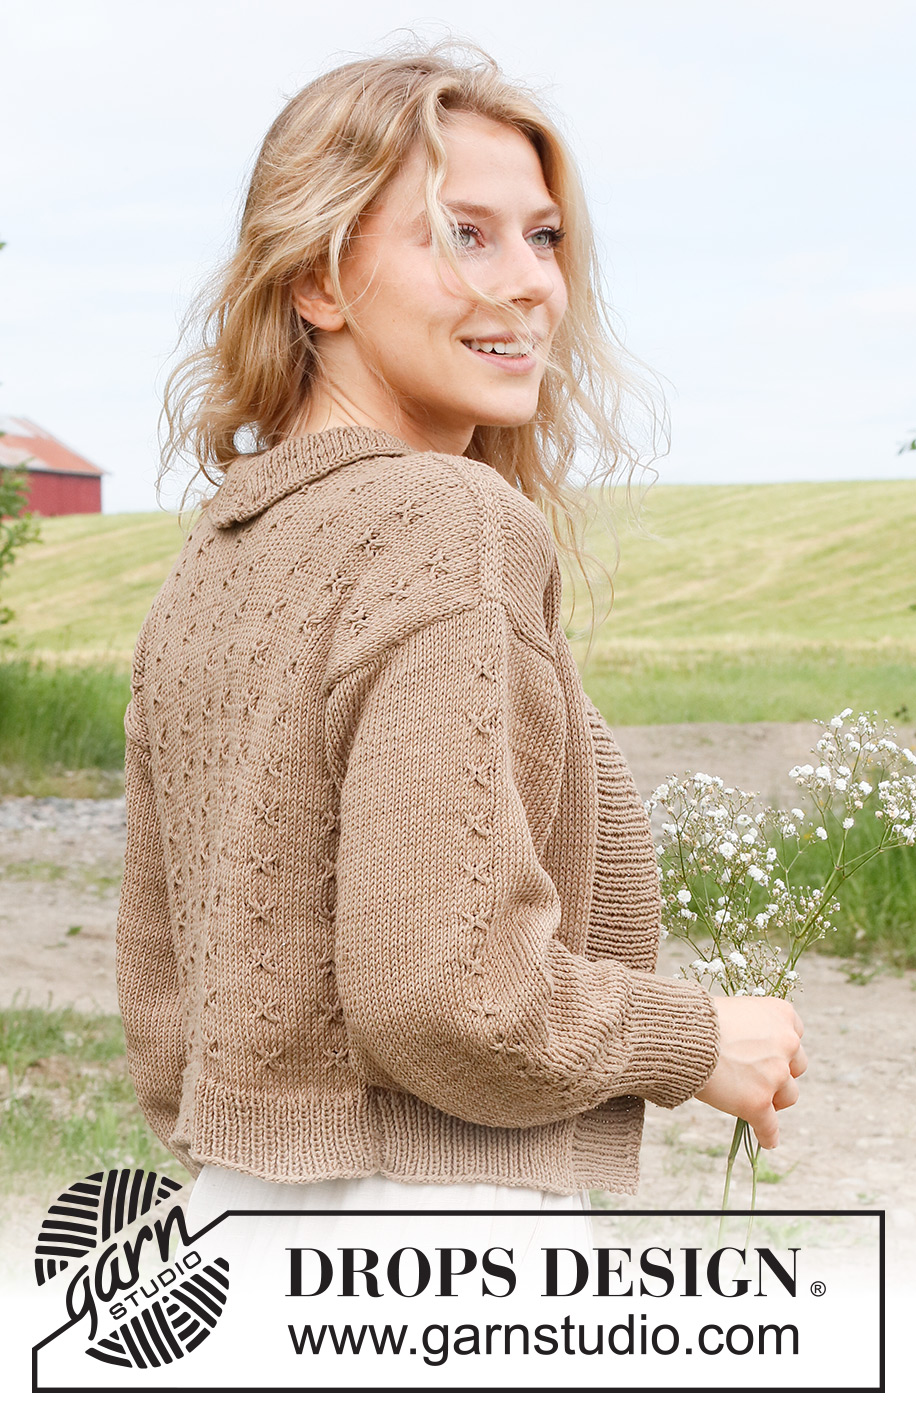
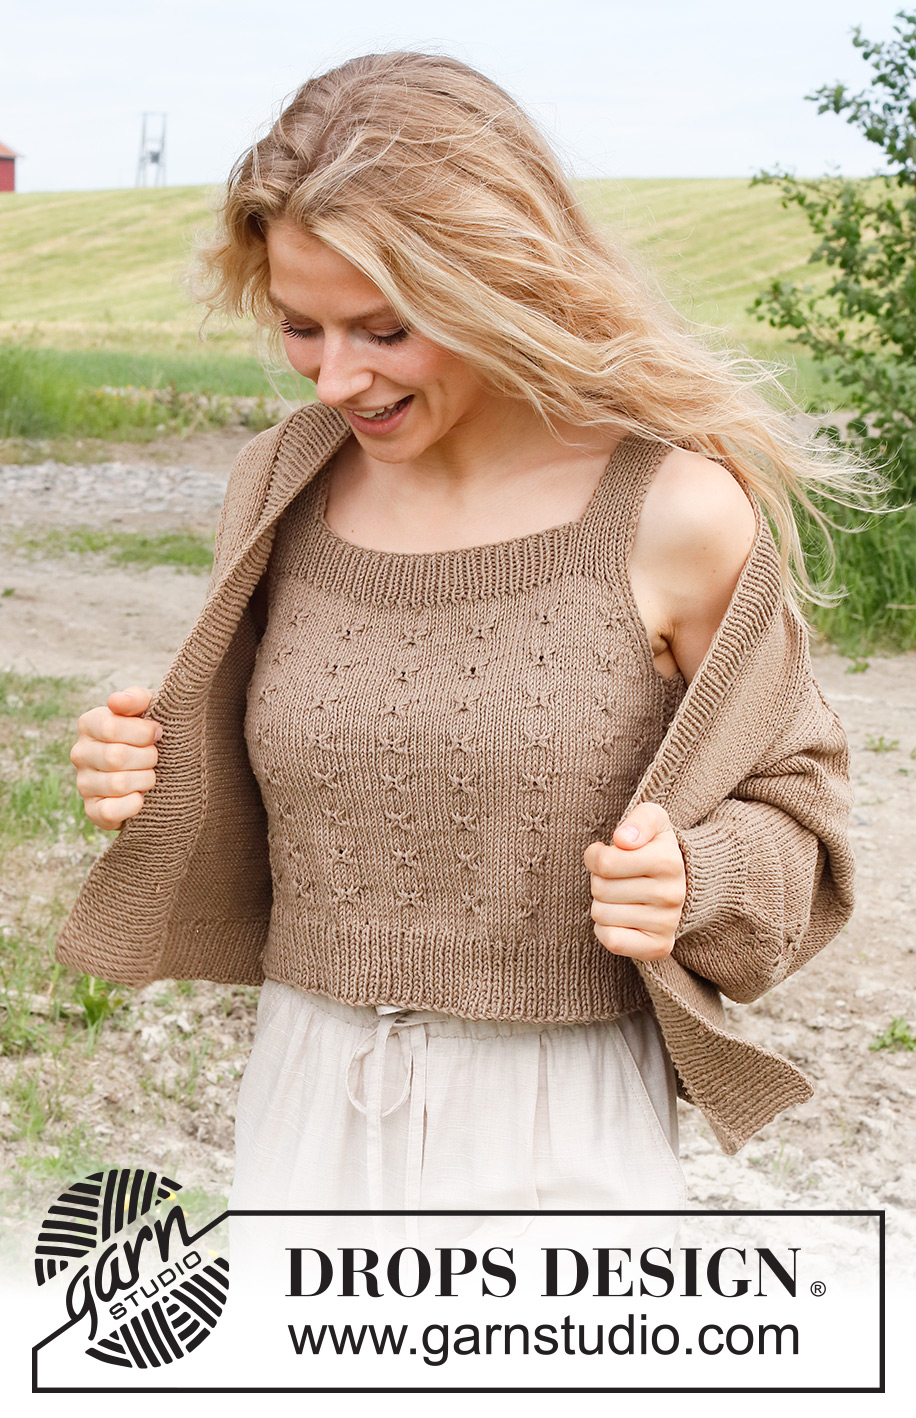
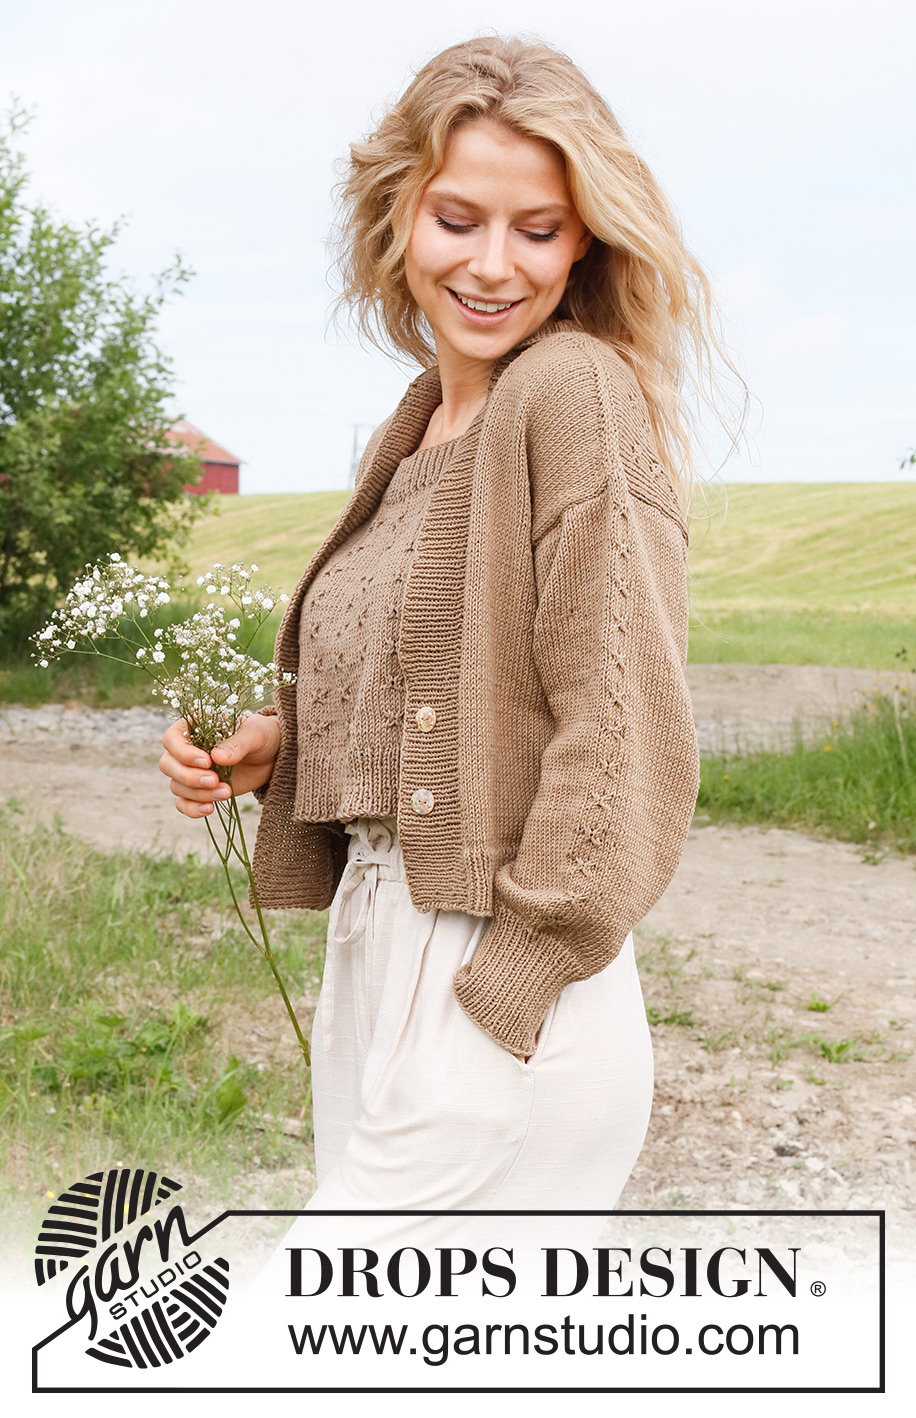
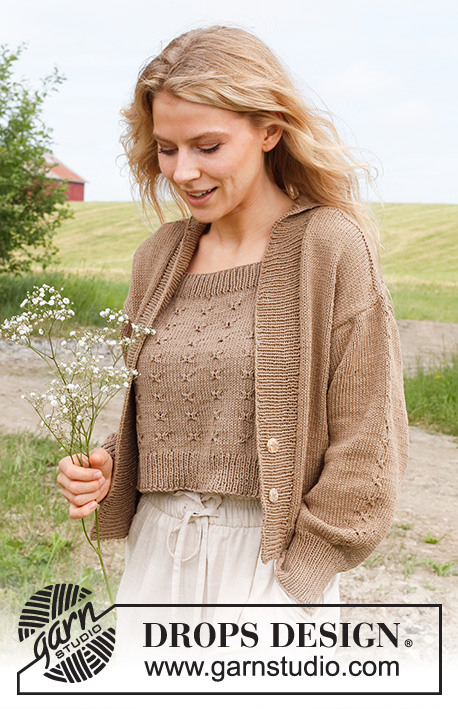
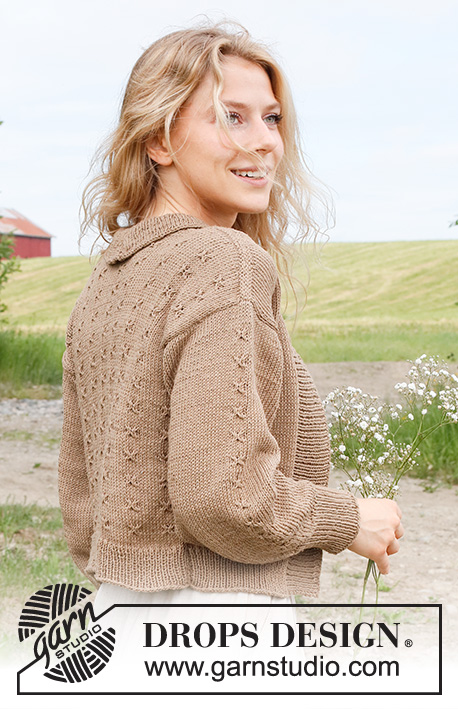
Midsummer's Night#midsummersnightcardigan |
|||||||||||||
 |
 |
||||||||||||
Knitted jacket in DROPS Cotton Light. Piece is knitted bottom up with relief pattern. Size: S - XXXL
DROPS 232-23 |
|||||||||||||
|
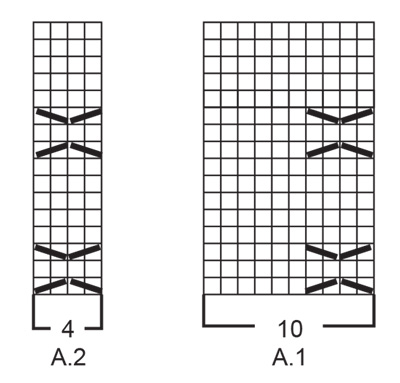
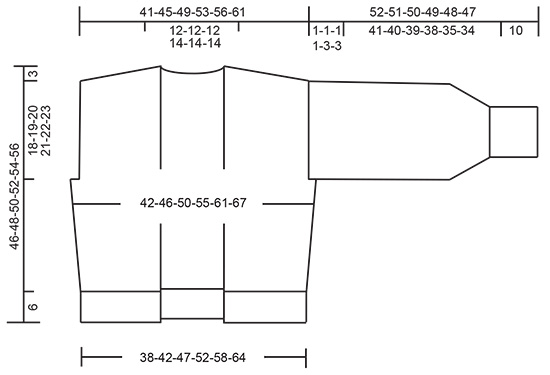
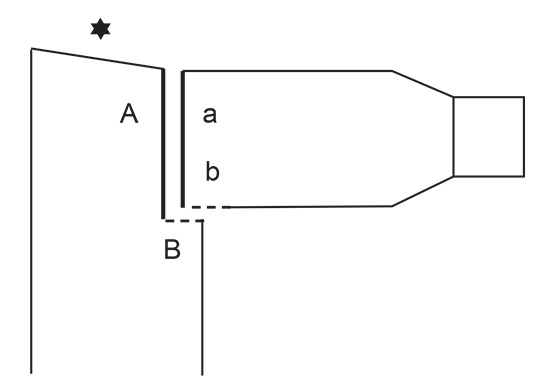
---------------------------------------------------------- EXPLANATION FOR THE PATTERN: ---------------------------------------------------------- GARTER STITCH (back and forth): Knit all rows. 1 ridge vertically = knit 2 rows. PATTERN: See diagrams A.1 and A.2. Diagrams show all rows in pattern seen from the right side. INCREASE TIP-1(applies to sides on back piece and front pieces): Increase 1 stitch inside the outermost 2 stitches from the edge by making 1 yarn over. On next row work yarn over twisted to avoid holes Then work the new stitches in stockinette stitch. INCREASE TIP-2 (applies to sleeves): INCREASE AS FOLLOWS AFTER MARKER THREAD: Work the first 4 stitches after marker thread as before, make 1 yarn over. INCREASE AS FOLLOWS BEFORE MARKER THREAD: Work until 4 stitches remain before marker thread, make 1 yarn over. On next round knit yarns over twisted to avoid holes. Then work the new stitches in stockinette stitch. ---------------------------------------------------------- START THE PIECE HERE: ---------------------------------------------------------- JACKET - SHORT OVERVIEW OF THE PIECE: Work back piece and front pieces back and forth on circular needle, bottom up, separately. Work sleeves in the round on double pointed needles/short circular needle, from the bottom and up to sleeve cap, then work back and forth on circular needle. Sew the piece together as explained in pattern. Finish by working a band in rib. BACK PIECE: Cast on 93-101-113-127-141-153 stitches on circular needle size 3.5 MM = US 4 with DROPS Cotton Light. Purl 1 row from wrong side. Work next row as follows from right side: 1 stitch in GARTER STITCH - read explanation above - * knit 1, purl 1 *, repeat from *-* until 2 stitches remain, knit 1, 1 stitch in garter stitch. Continue rib back and forth like this for 6 cm = 2⅜". When rib is finished, knit 1 row from right side while decreasing 11-11-13-15-17-17 stitches evenly = 82-90-100-112-124-136 stitches. Purl 1 row from wrong side with 1 stitch in garter stitch in each side. Switch to circular needle size 4 MM = US 6. Work in stockinette stitch with 1 stitch in garter stitch in each side. REMEMBER THE KNITTING GAUGE! When piece measures 8 cm = 3⅛", begin relief pattern. Work next row as follows from right side: 1 stitch in garter stitch, 3-2-2-3-4-5 stitches in stockinette stitch, work A.1 7-8-9-10-11-12 times, A.2, 3-2-2-3-4-5 stitches in stockinette stitch, 1 stitch in garter stitch. Continue this pattern. AT THE SAME TIME when piece measures 9 cm = 3½", increase 1 stitch in each side - READ INCREASE TIP-1! Increase like this every 4-4-4-6-6-6 cm = 1½"-1½"-1½"-2⅜"-2⅜"-2⅜" 4-4-4-3-3-3 times in total = 90-98-108-118-130-142 stitches. When piece measures 25-26-27-28-29-30 cm = 9¾"-10¼"-10⅝"-11"-11⅜"-11¾", bind off 2-2-3-3-6-7 stitches for armholes at the beginning of the next 2 rows = 86-94-102-112-118-128 stitches. Continue the pattern as before with 5-4-3-3-1-1 stitches in stockinette stitch and 1 stitch in garter stitch in each side. When piece measures 43-45-47-49-51-53 cm = 17"-17¾"-18½"-19¼"-20"-21", bind off for neck on mid back. AT THE SAME TIME slip stitches on a thread for diagonal shoulder in each side. Read NECK DECREASE and DIAGONAL SHOULDER before continuing. NECK DECREASE: Bind off the middle 20-20-20-24-24-24 stitches for neck and finish each shoulder separately. AT THE SAME TIME bind off for neck at the beginning of every row from neck as follows: Bind off 2 stitches 1 time and 1 stitch 1 time. DIAGONAL SHOULDER: Slip the outermost stitches towards armholes on a thread for diagonal shoulder but to avoid cutting the yarn work them before slipping them on the thread. Slip 8-9-10-10-11-12 stitches on a thread 3 times, and then the last 6-7-8-11-11-13 stitches on a thread. All stitches have now been bind off or slipped on a thread. Slip the 30-34-38-41-44-49 stitches from thread back on circular needle size 4 MM = US 6. Knit 1 row from wrong side but to avoid a hole where turning mid piece, pick up the yarn between 2 stitches and knit twisted together with first stitch on left needle. Then loosely bind off all stitches by knitting from right side. Piece measures approx. 46-48-50-52-54-56 cm = 18"-19"-19¾"-20½"-21¼"-22" from cast-on edge to the top of shoulder. Work the other shoulder the same way. RIGHT FRONT PIECE: Cast on 32-36-42-46-54-60 stitches on circular needle size 3.5 MM = US 4 with DROPS Cotton Light. Purl 1 row from wrong side. Work next row as follows from right side: 1 stitch in garter stitch, * knit 1, purl 1 *, work from*-* until 1 stitch remains on needle, work 1 stitch in garter stitch. Continue rib back and forth like this for 6 cm = 2⅜". When rib is finished, knit 1 row from right side while decreasing 4-4-5-5-7-7 stitches evenly = 28-32-37-41-47-53 stitches. Purl 1 row from wrong side with 1 stitch in garter stitch in each side. Switch to circular needle size 4 MM = US 6. Work in stockinette stitch with 1 stitch in garter stitch in each side. When piece measures 9 cm = 3½", increase 1 stitch in the side - remember INCREASE TIP-1! Increase like this every 4-4-4-6-6-6 cm = 1½"-1½"-1½"-2⅜"-2⅜"-2⅜" 4-4-4-3-3-3 times in total = 32-36-41-44-50-56 stitches. When piece measures 25-26-27-28-29-30 cm = 9¾"-10¼"-10⅝"-11"-11⅜"-11¾", bind off 2-2-3-3-6-7 stitches for armhole at the beginning of next row from wrong side = 30-34-38-41-44-49 stitches. When piece measures 43-45-47-49-51-53 cm = 17"-17¾"-18½"-19¼"-20"-21", slip stitches on a thread for diagonal shoulder the same way as on back piece, i.e. begin from wrong side and slip 8-9-10-10-11-12 stitches on a thread 3 times, then slip the last 6-7-8-11-11-13 stitches on a thread. All stitches have now been slipped on a thread (there is no neck decrease on front piece). Slip the 30-34-38-41-44-49 stitches from thread back on circular needle size 4 MM = US 6. Knit 1 row from wrong side but to avoid a hole where turning mid piece, pick up the yarn between 2 stitches and knit twisted together with first stitch on left needle. Then loosely bind off all stitches by knitting from right side. Piece measures approx. 46-48-50-52-54-56 cm = 18"-19"-19¾"-20½"-21¼"-22" from cast-on edge to the top of shoulder. LEFT FRONT PIECE: Cast on 32-36-42-46-54-60 stitches on circular needle size 3.5 MM = US 4 with DROPS Cotton Light. Purl 1 row from wrong side. Work next row as follows from right side: 1 stitch in garter stitch, * purl 1, knit 1 *, work from*-* until 1 stitch remains on needle, work 1 stitch in garter stitch. Continue rib back and forth like this for 6 cm = 2⅜". When rib is finished, knit 1 row from right side while decreasing 4-4-5-5-7-7 stitches evenly = 28-32-37-41-47-53 stitches. Purl 1 row from wrong side with 1 stitch in garter stitch in each side. Switch to circular needle size 4 MM = US 6. Work in stockinette stitch with 1 stitch in garter stitch in each side. When piece measures 9 cm = 3½", increase 1 stitch in the side - remember INCREASE TIP-1! Increase like this every 4-4-4-6-6-6 cm = 1½"-1½"-1½"-2⅜"-2⅜"-2⅜" 4-4-4-3-3-3 times in total = 32-36-41-44-50-56 stitches. When piece measures 25-26-27-28-29-30 cm = 9¾"-10¼"-10⅝"-11"-11⅜"-11¾", bind off 2-2-3-3-6-7 stitches for armhole at the beginning of next row from right side = 30-34-38-41-44-49 stitches. When piece measures 43-45-47-49-51-53 cm = 17"-17¾"-18½"-19¼"-20"-21", slip stitches on a thread for diagonal shoulder the same way as on right front piece, i.e. begin from right side and slip 8-9-10-10-11-12 stitches on a thread 3 times, then slip the last 6-7-8-11-11-13 stitches on a thread. All stitches have now been slipped on a thread (there is no neck decrease on front piece). Slip the 30-34-38-41-44-49 stitches from thread back on circular needle size 4 MM = US 6. Knit 1 row from wrong side the same way as on right front piece. Then loosely bind off all stitches by knitting from right side. SLEEVES: Cast on 54-56-58-60-62-64 stitches on double pointed needles size 3.5 MM = US 4 with DROPS Cotton Light. Knit 1 round. Then work rib (= knit 1/purl 1) for 10 cm = 4". Knit 1 round while increasing 2-0-2-0-2-0 stitches evenly = 56-56-60-60-64-64 stitches. Switch to double pointed needles size 4 MM = US 6. Insert 1 marker thread at beginning of round (mid under sleeve), and 1 marker thread after 28-28-30-30-32-32 stitches (mid on top of sleeve). Work in stockinette stitch in the round. When 5 rounds in stockinette stitch have been worked, increase 1 stitch on each side of both marker threads - read INCREASE TIP-2 (= 4 stitches increased). Increase like this every 6th round 5-6-6-7-7-8 times in total = 76-80-84-88-92-96 stitches. AT THE SAME TIME when sleeve measures 12 cm = 4¾", work A.2 mid on top of sleeve (marker thread is in the middle of A.2). Repeat A.2 vertically. Work until sleeve measures 51-50-49-48-45-44 cm = 20"-19¾"-19¼"-19"-17¾"-17¼" from cast-on edge. Now divide the piece mid under sleeve. Work in stockinette stitch back and forth until sleeve measures 52-51-50-49-48-47 cm = 20½"-20"-19¾"-19¼"-19"-18½", i.e. there is a vent of approx. 1-1-1-1-3-3 cm = ⅜"-⅜"-⅜"-⅜"-1⅛"-1⅛" at the top of sleeve. Bind off. Work the other sleeve the same way. ASSEMBLY: Sew shoulder seams inside bind-off edge. Sew side seams inside 1 edge stitch. Sew sleeve cap to armhole. Then sew vent at the top of sleeve to bottom of armhole - see chart. BAND: Insert 1 marker mid back of neck. Begin from right side at the bottom of right front piece, use circular needle size 3.5 MM = US 4 and Cotton Light, and knit up approx. 123-129-133-141-145-149 stitches along front piece and the neck at the back until marker in the neck (number of stitches must be divisible by 2 + 1), knit up 1 stitch mid back, then knit up the same number of stitches as along right front piece, inside 1 edge stitch along the neck at the back and down along left front piece = approx. 247-259-267-283-291-299 stitches. Begin from wrong side and work as follows: 1 stitch in garter stitch, * purl 1, knit 1 *, work from*-* until 2 stitches remain on needle, purl 1, 1 stitch in garter stitch. Continue rib back and forth like this. When band measures 3 cm = 1⅛", increase 1 stitch in every purl section (seen from right side) between shoulder seams at the back of neck. This is done to avoid a tight edge in the back of neck. Repeat increase when band measures approx. 6 cm = 2⅜". AT THE SAME TIME when band measures 5-5-5-6-6-6 cm = 2"-2"-2"-2⅜"-2⅜"-2⅜", decrease for 2 buttonholes on right band. 1 buttonhole = work 2 together, make 1 yarn over. Bottom buttonhole should be placed approx. 12 cm = 4¾" from bottom edge and top approx. 7-7-7-8-8-8 cm = 2¾"-2¾"-2¾"-3⅛"-3⅛"-3⅛" from bottom buttonhole. Continue to work until band measures approx. 8-8-8-9-9-9 cm = 3⅛"-3⅛"-3⅛"-3½"-3½"-3½". Loosely bind off. Sew the buttons on to the left band. |
|||||||||||||
Diagram explanations |
|||||||||||||
|
|||||||||||||
 |
|||||||||||||
 |
|||||||||||||
 |
|||||||||||||
Have you finished this pattern?Tag your pictures with #dropspattern #midsummersnightcardigan or submit them to the #dropsfan gallery. Do you need help with this pattern?You'll find 34 tutorial videos, a Comments/Questions area and more by visiting the pattern on garnstudio.com. © 1982-2026 DROPS Design A/S. We reserve all rights. This document, including all its sub-sections, has copyrights. Read more about what you can do with our patterns at the bottom of each pattern on our site. |
|||||||||||||


With over 40 years in knitting and crochet design, DROPS Design offers one of the most extensive collections of free patterns on the internet - translated to 17 languages. As of today we count 324 catalogs and 12290 patterns - 12280 of which are translated into English (US/in).
We work hard to bring you the best knitting and crochet have to offer, inspiration and advice as well as great quality yarns at incredible prices! Would you like to use our patterns for other than personal use? You can read what you are allowed to do in the Copyright text at the bottom of all our patterns. Happy crafting!
Post a comment to pattern DROPS 232-23
We would love to hear what you have to say about this pattern!
If you want to leave a question, please make sure you select the correct category in the form below, to speed up the answering process. Required fields are marked *.