
Popular categories
Looking for a yarn?







































Comments / Questions (99)
 Michelle wrote:
I am working on size 12/18 months. After the 101 stitches, we are to increase 8 per row until it gets to 202. This doesn't work, 8 per row should get us to 205. All stitch counts go with the 202. Is there an update?
20.10.2026 - 18:08DROPS Design answered:
Hi Michelle, You join the piece when it measures 6 cm, binding off 3 stitches on the last row before the join. This leaves you with 98 stitches. You increase 8 stitches for raglan x 13 in your size (after the first increase) = 104 increased stitches + 98 = 202 stitches. Regards, Drops Team.
21.10.2026 - 06:15
 Eva Ljung wrote:
Hej igen! När det gäller ökningen av raglan det ökade maskorna var och hur läggs de till? T.ex på bakstycket görs ökning efter 19 maskor varv 1 och innan framstyckets 3 maskor före mönstret på nästa räta varv lägger man till 2 maskor på bakstycket blir det 21 maskor sen raglan och på framstycket 5 maskor innan mönstret? Med vänlig hälsning, Eva Ljung
24.09.2026 - 09:53DROPS Design answered:
Hei Eva. Du skriver i et tidligere spørsmål at du legger opp 85 masker, regner med at det da gjelder str. 12/18 mnd. Fra midt bak: Ved først varv, øker du etter 3 kantmasker + 14 masker = 17 masker (ikke 19 masker). Se tidligere svar og video på hvordan det økes. Framstycke: Fra 2. raglanslinje (2 rett masker), gjørs det et omslag + 1 maske glattstrikk, før det strikkes etter A.1 (mønster). Se gjerne vårt svar til deg 21.09.2026 - 10:00 og bruk maskemarkører, så har du en mye bedre oversikt. mvh DROPS Design
28.09.2026 - 07:31
Eva Ljung wrote:
Hej igen! Ett litet tillägg till min tidigare fråga angående ökningen av 4 maskor på de 6 stickade maskorna i slätstickning så synd att det inte finns en video hur man stickar! Jag har kollat och letat bland videos men finns inte! Tyvärr. Med vänlig hälsning, Eva Ljung
17.09.2026 - 16:12DROPS Design answered:
Hei Eva. Ta en titt på denne videoen her og les teksten under videoen. I oppskriften skal du øke 4 ganger, mens video viser det samme omslaget 2 ganger. Når du skal øke 4 masker over 6 masker strikkes det således: 1 rett, 1omslag (se video), 1 rett, 1 omslag (se video), 2 rett, 1 omslag (se video), 1 rett, 1 omslag (se video), 1 rett - På næste omgang strikkes omslaget vridet så der ikke bliver hull. Se videoen på tidspunket :01:14. mvh DROPS Design
21.09.2026 - 10:11
Eva Ljung wrote:
Hej! Tyvärr blir det inte rätt när jag stickar ökningen på oket med svaret från er : 1 r,1omsl, 1r, 1 omsl,2r,1omsl,1r,1omsl efter 6m slätstickning blir det för många maskor och efter A 1 finns det inte 14 maskor samt 3 maskor till framkant kvar så ökningen av de 4 maskorna över 6 maskor fungerade inte tyvärr. Med vänlig hälsning, Eva Ljung
17.09.2026 - 15:22DROPS Design answered:
Hei Eva. Økningne skal strikkes samtidig med de 6 m i slätstickning, ikke etter. 1. omgang strikkes slik: Halva bakstycket: 3 framkantsmaskor, 14 m slätstickning. 1.raglanlinje: 1 omslag, 2 m slätstickning, 1 omslag. 1. Erme: 1r, 1omslag,1r,1omslag,2r,1omslag,1r,1omslag,1r. 2 .Raglanlinje: 1 omslag, 2 m slätstickning, 1 omslag. Framstycket: 1 m slätstickning, A.1 (= 29 m), 1 m slätstickning. 3. Raglanlinje: 1 omslag, 2 m slätstickning, 1 omslag. 2. Erme: 1r,1omslag,1r,1omslag,2r,1omslag,1r,1omslag,1r. 4 .Raglanlinje: 1 omslag, 2 m slätstickning, 1 omslag. Halva bakstycket: 14 m slätstickning och avsluta med 3 framkantsmaskor. 85 m er blitt til 101 m. mvh DROPS Design
21.09.2026 - 10:00
 Carin wrote:
I've just completed the first part of sweater until the end of my first A1 diagram pattern. Do I keep repeat A1 diagram from the beginning of the diagram when I continue?
16.09.2026 - 17:35DROPS Design answered:
Hi Carin, Yes, you continue A.1 from the beginning of the diagram as you repeat it vertically. The increased stitches are worked in stocking stitch. Regards, Drops Team.
17.09.2026 - 07:29
Eva Ljung wrote:
Hej! Hoppas ni har sett min fråga i mönstret angående ökningen hur det ska gå till. Jag skickade frågan igår till er. Jag väntar på att få börja sticka så snälla svara om möjligt så fort som möjligt tack på förhand! Med vänlig hälsning, Eva Ljung
15.09.2026 - 15:10DROPS Design answered:
Hej Eva, du har allerede fået svar :)
17.09.2026 - 08:44
Eva Ljung wrote:
Hej! När jag ska sticka oket förstår jag inte att efter raglan samt 6 maskor slätstickning samtidigt öka 4 maskor över dessa 6 maskor? = 10 maskor till ärm? Hur kan man göra det mitt i bland alla maskor? Jag har 85 maskor som jag lagt upp. Tacksam för en förklaring! Med vänlig hälsning, Eva Ljung
14.09.2026 - 16:09DROPS Design answered:
Hej Eva, over de 6 masker på ærmet øger du 4 m således, 1r,1omslag,1r,1omslag,2r,1omslag,1r,1omslag,1r - på næste omgang strikkes omslaget vridet så der ikke bliver hul :)
17.09.2026 - 07:53
 María wrote:
Hola! Me gustó mucho este patrón. Solo quisiera comentar que el diagrama A2, que a diferencia del A1 se teje siempre en redondo, muestra las filas consecutivas y en la descripción inicial indica que A1 y A2 muestran únicamente las filas de derecho. Sería bueno especificar que A1 muestra las filas de derecho y A2 se teje siempre de derecho en resorte.
16.08.2026 - 06:07
 Miriam wrote:
No me cierran los 29 puntos del diagrama A1 porque está corregido la descripción del 6to punto Pero ahí el 5to y 6to quedan iguales
17.07.2026 - 20:37DROPS Design answered:
Hola Miriam, el diagrama ya se encuentra corregido en la versión online; la nota de corrección es para los que hayan impreso el diagrama previamente. En el 5º símbolo tenemos una disminución simple: "deslizar 1 punto como de derecho, tejer 1 punto derecho y pasar el punto deslizado por encima del punto tejido". Sin embargo, en el 6º símbolo la disminución es diferente, ya que en vez de trabajar sobre 2 puntos trabajamos sobre 3: " deslizar 1 punto como de derecho, tejer 2 puntos derechos y pasar el punto deslizado por encima de los puntos tejidos". Deslizamos 1 pt como de derecho y trabajamos 2 derechos (en vez de 1 como en el 5º símbolo) y pasamos el deslizado sobre los puntos trabajados, quedándonos algo más similar a una trenza.
31.07.2026 - 23:50
 Monika wrote:
Hallo, wenn ich eine Masche rechts abhebe und zwei Maschenzusammenstrecke und die abgehobene darüber hebe wie bekomme ich in der rückreihe dann auf drei Maschen?
08.07.2026 - 18:25DROPS Design answered:
Liebe Monika, ja aber hier (bei dem 6. Symbol) wird man die 2 Maschen nicht zusammenstricken sondern diese beide Maschen werden separat rechts gestrickt, so sind es nur noch 2 Maschen wenn die abgehobene Masche über die 2 gestrickte Masche gezogen ist. In diesem Video zeigen wir, wie man so ein Zopf strickt. Viel Spaß beim Stricken!
09.07.2026 - 09:16
|
||||||||||||||||||||||
Sweet Ivy#sweetivysweater |
||||||||||||||||||||||
 |
 |
|||||||||||||||||||||
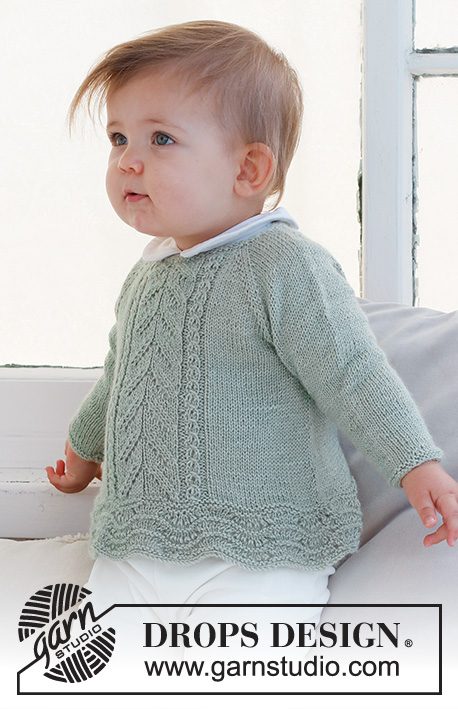
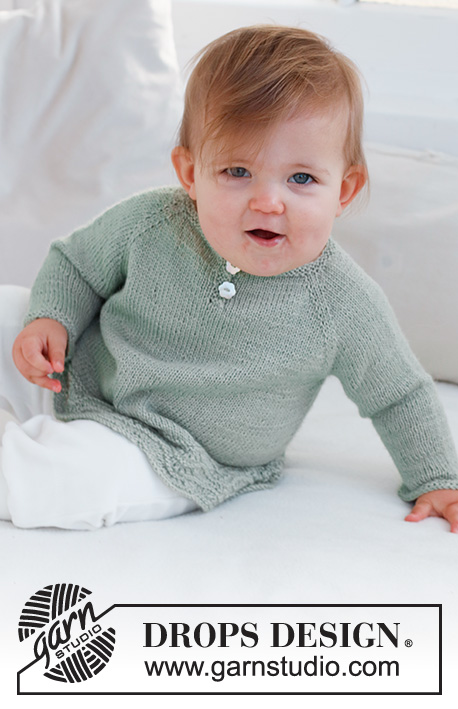
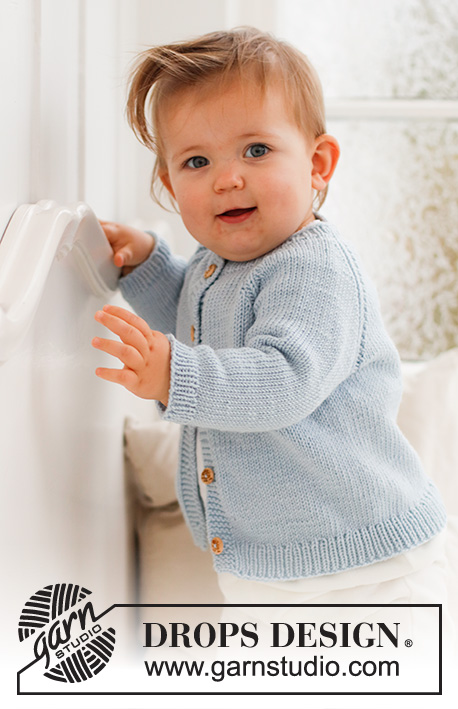
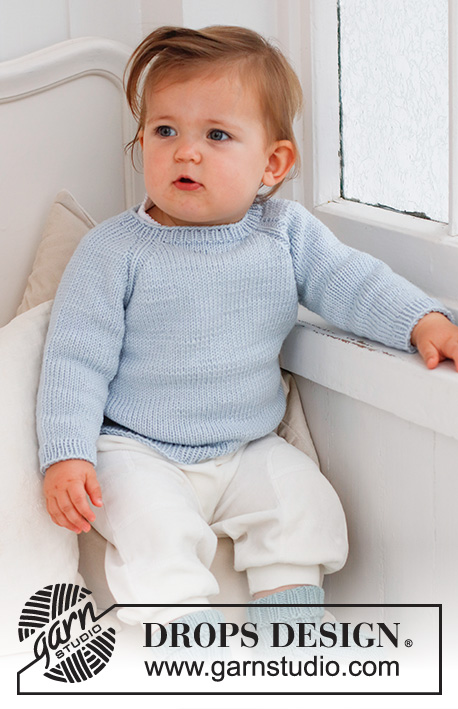
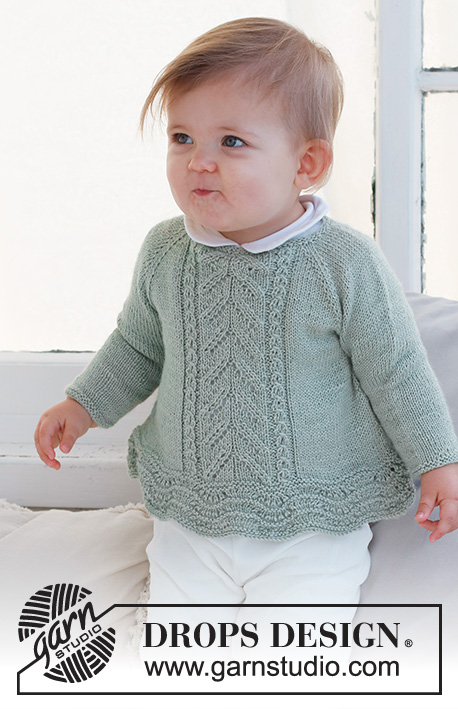
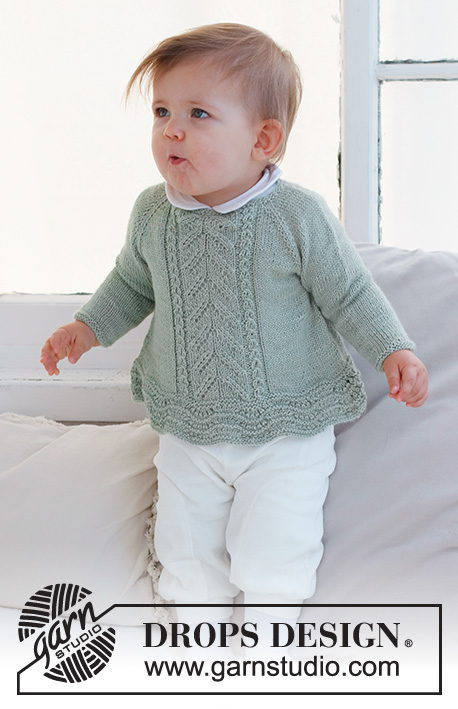
Knitted sweater for babies and children in DROPS Safran. The piece is worked top down with raglan, wave-pattern and lace-pattern. Sizes 0 - 6 years.
DROPS Baby 42-7 |
||||||||||||||||||||||
|
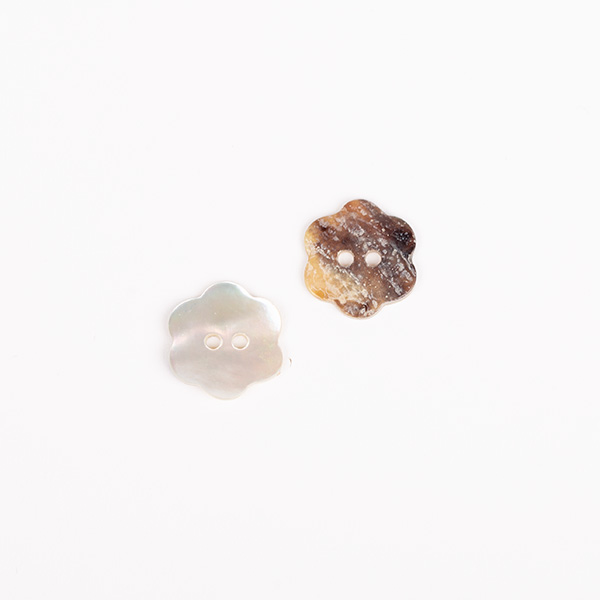
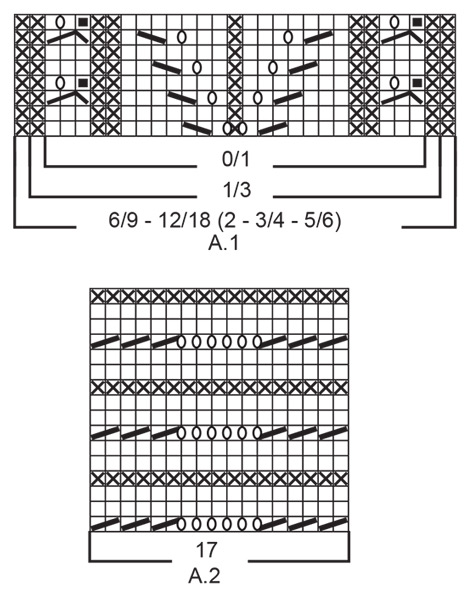
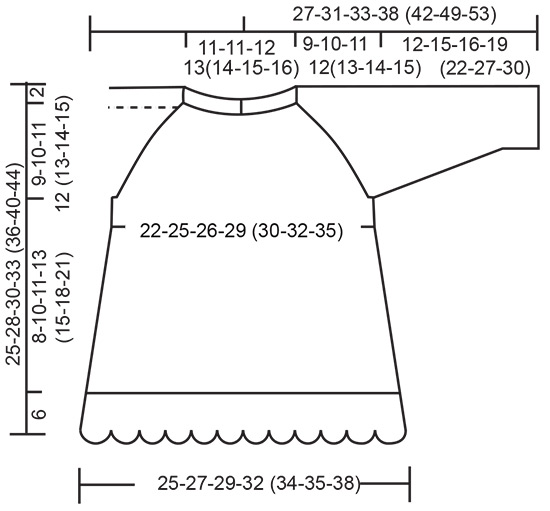
------------------------------------------------------- EXPLANATIONS FOR THE PATTERN: ------------------------------------------------------- RIDGE/GARTER STITCH (worked in the round): 1 ridge in height = 2 rounds; Knit 1 round and purl 1 round. RIDGE/GARTER STITCH (worked back and forth): Knit all rows. 1 ridge = knit 2 rows. PATTERN: See diagrams A.1 and A.2. The diagrams show all rows in the pattern from the right side. INCREASE TIP (for sides of body): Work until there are 2 stitches left before the marker, make 1 yarn over, knit 4 (marker thread sits between these 4 stitches), make 1 yarn over. On the next round work the yarn overs twisted to avoid holes. Then work the new stitches in stockinette stitch. RAGLAN: Increase 1 stitch on each side of the 2 stockinette stitches in each transition between body and sleeves (8 stitches increase on row/round). Increase 1 stitch by making 1 yarn over. On the next row (wrong side) purl the yarn overs twisted to avoid holes. On the next round (i.e. when working in the round) knit the yarn overs twisted to avoid holes. Then work the new stitches in stockinette stitch. DECREASE TIP (sleeves): Decrease 1 stitch on either side of the marker as follows: Work until there are 3 stitches left before the marker, knit 2 together, knit 2 (marker sits between these 2 stitches), slip 1 stitch as if to knit, knit 1 and pass the slipped stitch over the knitted stitch. BUTTONHOLES: 2 buttonholes are worked on the bands at the back of the neck. Work from the right side when there are 3 stitches left on the row as follows: Make 1 yarn over, knit 2 together and knit 1. On the next row, knit the yarn over to leave a hole. The first buttonhole is worked when the neck measures 1½ cm = ½". Then work the other buttonhole after 4 cm = 1½". ------------------------------------------------------- START THE PIECE HERE: ------------------------------------------------------- SWEATER – SHORT OVERVIEW OF THE PIECE: The piece is first worked back and forth from mid-back and top down. When the split is finished, it is continued in the round. The yoke is divided for the body and sleeves and the body continued in the round. The sleeves are worked in the round with double pointed needles. NECK: Cast on 73-77-81-85 (89-93-97) stitches with circular needle size 2.5 MM = US 1.5 and DROPS Safran. Work 2 RIDGES back and forth – read description above. Change to circular needle size 3 MM = US 2.5. YOKE: READ THE NEXT SECTION BEFORE CONTINUING! The first row is worked as follows from the right side: 3 band stitches in garter stitch, 11-12-13-14 (15-16-17) stitches in stockinette stitch (half back piece), 1 yarn over, 2 stitches in stockinette stitch (raglan-line), 1 yarn over, 6 stitches in stockinette stitch and increase 4 stitches evenly over these stitches (10 stitches on the sleeve), 1 yarn over, 2 stitches in stockinette stitch (raglan-line), 1 yarn over, 0-0-0-1 (2-3-4) stitches in stockinette stitch, A.1 (25-27-29-29 (29-29-29) stitches – see the start for your size in the smaller sizes, 0-0-0-1 (2-3-4) stitches in stockinette stitch (= front piece), 1 yarn over, 2 stitches in stockinette stitch (= raglan-line), 1 yarn over, 6 stitches in stockinette stitch and increase 4 stitches evenly over these stitches (10 stitches on the sleeve), 1 yarn over, 2 stitches in stockinette stitch (raglan-line), 1 yarn over, 11-12-13-14 (15-16-17) stitches in stockinette stitch and 3 band stitches in garter stitch (half back piece). The first increase to RAGLAN – read description above, is now finished and there are 89-93-97-101 (105-109-113) stitches on the row. Continue with stockinette stitch, A.1 and 3 band stitches in garter stitch on each side and continue to increase to raglan every 2nd row (each row from the right side) – REMEMBER THE KNITTING GAUGE and the BUTTONHOLES – read description above. Increase like this every 2nd row (each row from the right side). The increased stitches are worked in stockinette stitch. NOTE! In sizes 0/1 and 1/3 months first work the new stitches into A.1 then in stockinette stitch. AT THE SAME TIME when the piece measures 6 cm = 2⅜" join the piece on the next row from the right side as follows: Bind off the first 3 stitches and work to the end of the row. When the row is finished, continue in the round. You now are working stockinette stitch on the back piece, stockinette stitch and A.1 on the front piece. Move the beginning of the round to mid-back. Increase to raglan a total of 10-12-13-14 (15-16-18) times = 158-178-190-202 (214-226-246) stitches. Continue without further increases until the piece measures 9-10-11-12 (13-14-15) cm = 3½"-4"-4⅜"-4¾" (5⅛"-5½"-6"). Work the next round as follows: Work the first 24-27-29-31 (33-35-38) stitches, place the next 32-36-38-40 (42-44-48) stitches on a thread for the sleeve, cast on 6-6-6-8 (8-8-8) stitches (in side under sleeve), work 47-53-57-61 (65-69-75) stitches (front piece), place the next 32-36-38-40 (42-44-48) stitches on a thread for the sleeve, cast on 6-6-6-8 (8-8-8) stitches (in side under sleeve), work the last 23-26-28-30 (32-34-37) stitches. The body and sleeves are finished separately. BODY: = 106-118-126-138 (146-154-166) stitches. Insert 1 marker in each side, in the middle of the new stitches cast on under each sleeve. When the piece measures 3 cm = 1⅛" from the division, increase 1 stitch on each side of both markers - read INCREASE TIP. Increase like this every 2 cm = ¾" a total of 3-3-3-4 (4-4-4) times = 118-130-138-154 (162-170-182) stitches. When the piece measures 8-10-11-13 (15-18-21) cm = 3⅛"-4"-4⅜"-5⅛" (6"-7"-8¼") from the division, work 2 ridges over all stitches. Knit 1 round where you increase 18-23-32-33 (42-34-39) stitches evenly spaced = 136-153-170-187 (204-204-221) stitches. Knit 1 round; the yarn overs are knitted twisted to avoid holes. Now work A.2 over all stitches. When A.2 has been completed in height, loosely bind off. The sweater measures approx. 25-28-30-33 (36-40-44) cm = 9¾"-11"-11¾"-13" (14¼"-15¾"-17¼") from the shoulder down. SLEEVES: Place the 32-36-38-40 (42-44-48) stitches from the thread on the one side of the piece on double pointed needles size 3 MM = US 2.5 and knit up 1 stitch in each of the 6-6-6-8 (8-8-8) stitches cast on under the sleeve = 38-42-44-48 (50-52-56) stitches. Insert a marker in the middle of the new stitches under the sleeve. Work stockinette stitch in the round. When the sleeve measures 3 cm = 1⅛" from the division, decrease 1 stitch on each side of the marker - read DECREASE TIP! Decrease like this every 5-4-3-3 (4-5-3½) cm = 2"-1½"-1⅛"-1⅛" (1½"-2"-1¼") a total of 2-3-4-5 (5-5-7) times = 34-36-36-38 (40-42-42) stitches. When the sleeve measures 11-14-15-18 (21-26-29) cm = 4⅜"-5½"-6"-7" (8¼"-10¼"-11⅜"), change to double pointed needles size 2.5 MM = US 1.5. Work 2 ridges over all stitches. Bind off with knit. Work the other sleeve in the same way. ASSEMBLY: Sew the buttons onto the band without buttonholes. Lay the button-band under the buttonhole-band and sew together at the bottom. |
||||||||||||||||||||||
Diagram explanations |
||||||||||||||||||||||
|
||||||||||||||||||||||
 |
||||||||||||||||||||||
 |
||||||||||||||||||||||
Have you finished this pattern?Tag your pictures with #dropspattern #sweetivysweater or submit them to the #dropsfan gallery. Do you need help with this pattern?You'll find 21 tutorial videos, a Comments/Questions area and more by visiting the pattern on garnstudio.com. © 1982-2026 DROPS Design A/S. We reserve all rights. This document, including all its sub-sections, has copyrights. Read more about what you can do with our patterns at the bottom of each pattern on our site. |
||||||||||||||||||||||






With over 40 years in knitting and crochet design, DROPS Design offers one of the most extensive collections of free patterns on the internet - translated to 17 languages. As of today we count 333 catalogs and 12532 patterns - 12522 of which are translated into English (US/in).
We work hard to bring you the best knitting and crochet have to offer, inspiration and advice as well as great quality yarns at incredible prices! Would you like to use our patterns for other than personal use? You can read what you are allowed to do in the Copyright text at the bottom of all our patterns. Happy crafting!
Post a comment to pattern DROPS Baby 42-7
We would love to hear what you have to say about this pattern!
If you want to leave a question, please make sure you select the correct category in the form below, to speed up the answering process. Required fields are marked *.