
Popular categories
Looking for a yarn?


Megjegyzések / Kérdések (1)
![]() Sandra írta:
Sandra írta:
Bonjour, Combien faut-il de pelotes Sky pour réaliser ce modèle ? Merci d'avance, Sandra
10.11.2023 - 15:29A DROPS Design válasza:
Bonjour Sandra, vous trouverez la quantité nécessaire (pour chaque taille le cas échéant) dans l'en-tête, autrement dit, il faut ici 100 g DROPS Sky / 50 g la pelote = 2 pelotes. Bon tricot!
10.11.2023 - 16:03
|
|
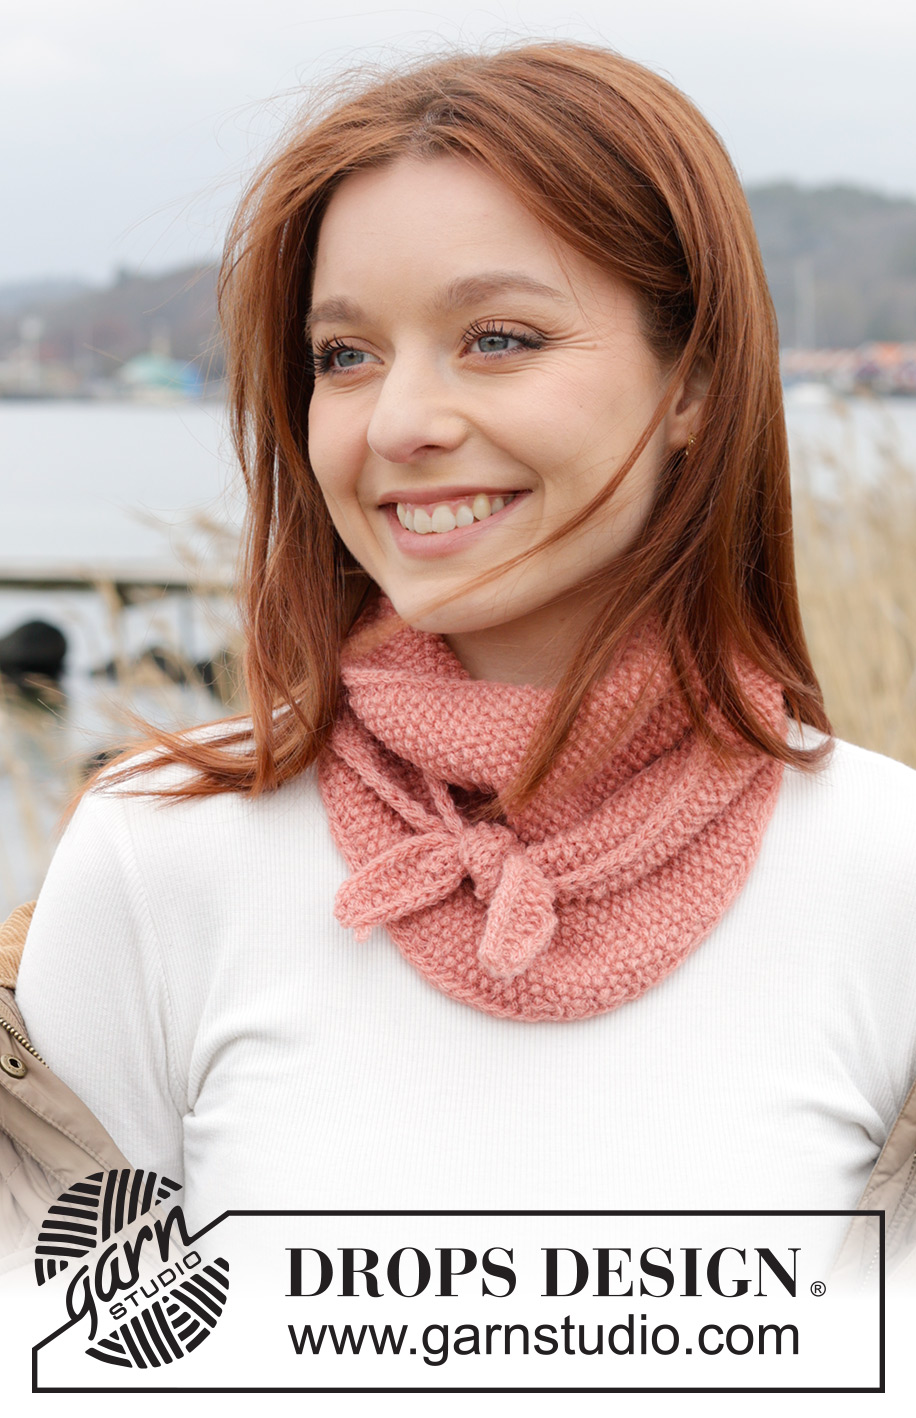
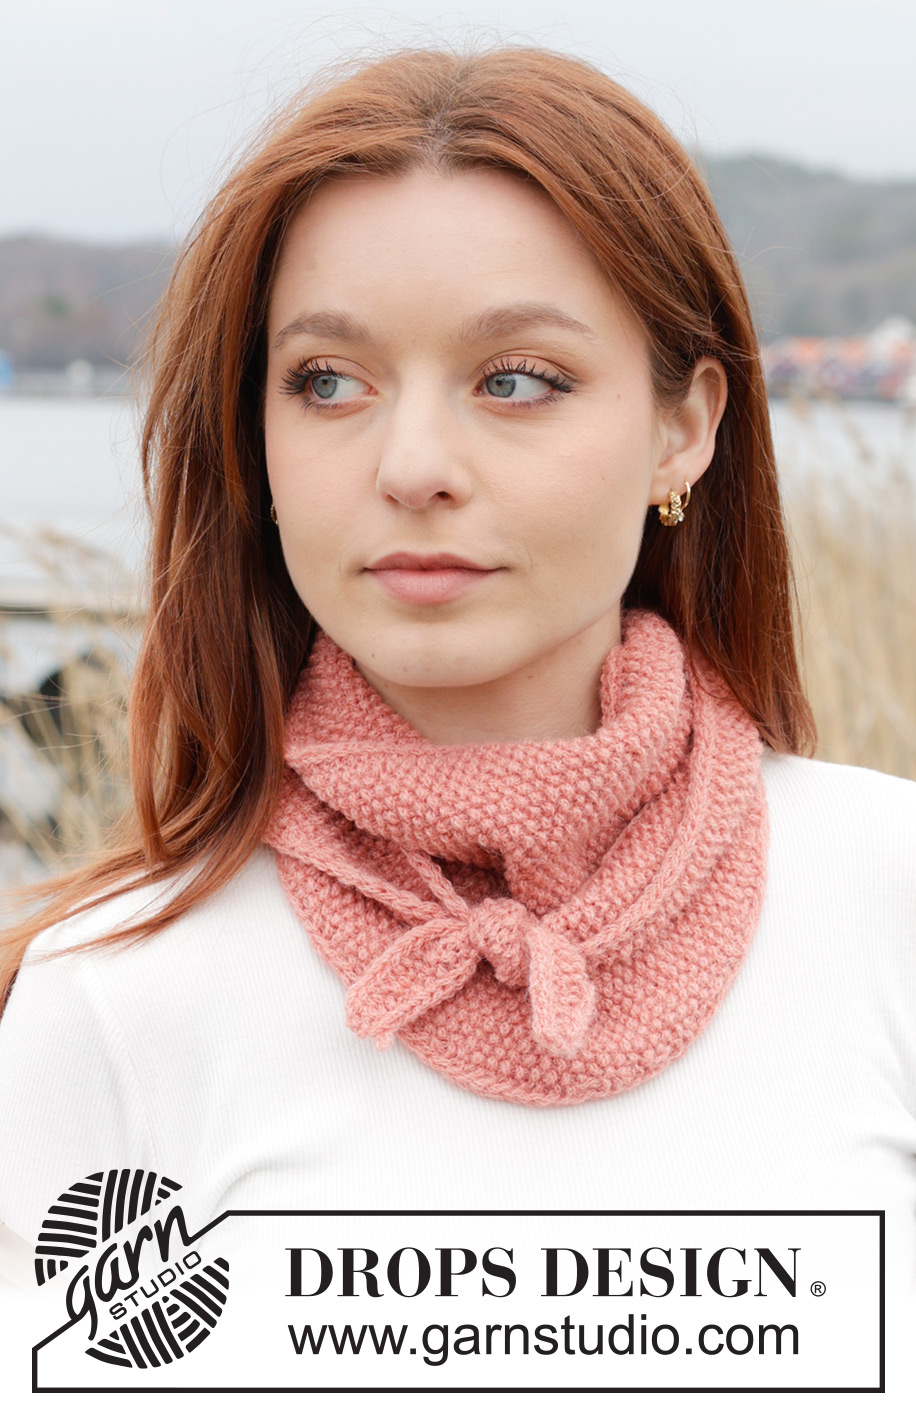
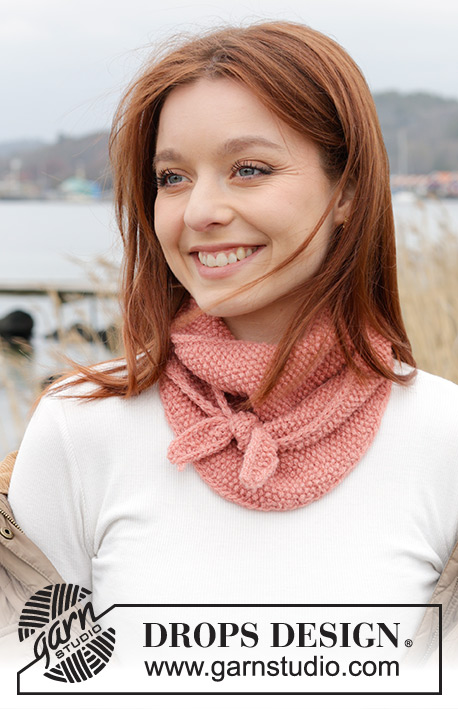
Pretty Peach Shawl#prettypeachshawl |
|
 |
 |
Kötött kendő DROPS Sky fonalból. A darabot oldalirányban készítjük, rizsmintával.
DROPS 242-21 |
|
|
---------------------------------------------------------- TANÁCSOK A MINTA ELKÉSZÍTÉSÉHEZ: ---------------------------------------------------------- SZÉLSZEMEK: A sorok elején a 2 szélszemet a köv módon kössük: 1 szemet F leemelünk, a szál a munka előtt, kössünk 1 S szemet. A sorok végén a 2 szélszemet a köv módon kössük: Kössünk, amíg a 2 szélszem marad a sorban, 1 szemet F leemelünk, a szál a munka előtt, kössünk 1 S szemet. Minden sor elején és végén így haladjunk. RIZSMINTA (oda-vissza haladva - síkban - kötve). 1.sor: * 1 sima, 1 fordított. * Ismételjük a *-* közötti részt 2.sor: A fordított szemeken sima szemekkel, a sima szemeken fordított szemekkel kötünk. Ismételjük a 2. sort ---------------------------------------------------------- A MINTALEÍRÁS ITT KEZDŐDIK: ---------------------------------------------------------- KENDŐ: RÖVID ÖSSZEFOGLALÓ A darabot körkötőtűn kötjük oda-vissza haladva, oldalirányban. KENDŐ: A kezdéshez szedjünk fel 5 szemet a 4 mm vastag körkötőtűre a DROPS Sky fonalból. Olvassuk el a fenti tanácsot a SZÉLSZEMEKről! 1. sor (= SZO) Kössünk 2 SZÉLSZEMET - olvassuk el a fenti magyarázatot, 1 sima, és a 2 szélszem. 2. sor (= FO): Kössünk 2 SZÉLSZEMET - olvassuk el a fenti magyarázatot, 1 sima, és a 2 szélszem. 3. sor (= SZO) Kössünk 2 SZÉLSZEMET, 1 rh, 1 sima, és a 2 szélszem. A következő sorban a ráhajtást csavartan kötjük, így a helyükön nem keletkezik lyuk. 4-7. sor: Kössük a 2 szélszemet. Kössünk a rizsmintával - olvassuk el a fenti magyarázatot, amíg 2 szem marad a sorban, és a 2 szélszemmel fejezzük be a sort. 8. sor (= FO): Kössük a 2 szélszemet, rizsminta, amíg 2 szem marad rh, és a 2 szélszem. A következő sorban a ráhajtást csavartan kötjük, így a helyén nem keletkezik lyuk. 9-12. sor: Kössük a 2 szélszemet, rizsminta, amíg 2 szem marad rh, és a 2 szélszem. 13. sor (= SZO) A2 szélszem, 1 rh, kössünk a rizsmintával amíg 2 szem marad a sorban, és a 2 szélszemmel fejezzük be a sort. A következő sorban a ráhajtást csavartan kötjük, így a helyükön nem keletkezik lyuk. Ismételjük az 4 - 13. sorokat. Szaporítsunk minden 5. sorban, felváltva szaporítunk a SZO és a FO felől. mindkét oldalon 2 szélszemmel, miközben, középen, a rizsmintával kötött szemek száma szaporodik. NE FELEDKEZZÜNK MEG A MEGFELELŐ KÖTÉSPRÓBA BETARTÁSÁRÓL! Amikor a darabunk kb 58 cm-es a kezdőszéltől, kb 21 cm-es lesz a közepén mérve (és kb 44 szemünk lesz a sorban a kötőtűnkön)., Folytassuk a rizsmintával és a 2-2 szélszemmel, mndkét oldalon, de további szaporítások nélkül, 3 cm-ig. Folytassuk a rizsmintával és a szélszemekkel, a korábbiak szerint, ugyanakkor, a 2 szélszem mellett, ugyanazon az oldalon, ahol korábban szaporítottunk, most fogyasszunk. Ezután fogyasszunk minden 5. sorban, felváltva a SZO és a FO felől, a köv módon: Kössünk 2 szélszemet lustakötéssel, 1 szemet S leemelünk, 1 sima, a leemelt szemet a lekötött szemet átemeljük szemet fogyasztottunk), kössünk a rizsmintával, amíg 2 szemünk marad, kössük a 2 szélszemet- Kössünk a korábbiak szerint, és fogyasszunk a fentieknek megfelelően, amíg 5 szemünk marad a sorban. Kössünk 2 sort sima szemekkel fogyasztás nélkül, és lazán láncoljuk le a szemeket. A darabunk körülbelül 119 cm-es lesz. |
|
Elkészítette ezt a mintát?Akkor adja a képeihez a #dropspattern #prettypeachshawl tageket, vagy küldje be a képet a #dropsfan galériába. Segítségre van szüksége a modell elkészítéséhez? 14 tutorial videót találhat, és egy kérdés/felelek részt, és még többet, ha a mintát megkeresi a garnstudio.com oldalán. © 1982-2025 DROPS Design A/S. Minden jog fenntartca. Ez a documentim, az összes részével védelem alatt áll. A weboldalunkon többet olvashat arról, hogy mit tehet és mit nem a mintáinkkal. |
|


Több mint 40 év tapasztalattal a kötés és horgolásminták tervezésében a DROPS Design az ingyenes minták egyik legszélesebb körű gyűjtemnyét kínálja az Interneten, 17 nyelvre fordítva. A mai nappal 314 katalógust 11822 mintát tudunk számon tartani a mintákból 11804 -t fordítottunk le magyarra (európai mértékegységekkel).
keményen dolgozunk azon, hogy a kötés és a horgolás világából a legjobbat hozzuk el, remek fonalakkal, hihetetlen árakon. Ha mintáinkat nemcsak személyes használatra szeretné használni, minden minta alján a Copyright szövegben olvashat arról, mit tehet s mit nem. Sikeres kézimunkázást!
Post a comment to pattern DROPS 242-21
Szívesen vesszük, ha megosztja velünk gondolatait erről a mintáról.
Ha kérdést szeretne feltenni, ügyeljen arra, hogy a megfelelő kategóriát válassza ki, így fegyorsíthatja a válaszadás folyamatát. Það verður að merkja við svæði merktri með *.