
Popular categories
Looking for a yarn?


Comments / Questions (166)
![]() Annemarie wrote:
Annemarie wrote:
Could I do this pattern in Drops Air?
10.11.2022 - 05:05DROPS Design answered:
Hi Annemarie, Drops Air is a yarn from group C, which means it is thicker than the recommended Drops Lace. You will therefore have to reduce the needle size you use or the number of stitches/rows on your swatch of 10 x 10 cm. Happy knitting!
10.11.2022 - 06:51
![]() Marjo Wallin wrote:
Marjo Wallin wrote:
Hei, suomenkielisestä ohjeesta puuttuu ’diagram’ kuva ja ruutupiirrokset, jotka löytyvät norjankielisestä versiosta.
24.10.2022 - 20:37
![]() Annette wrote:
Annette wrote:
Wat fijn dat deze patronen in hele zinnen en zonder afkortingen zijn uitgeschreven! Heel duidelijk allemaal.
15.10.2022 - 17:30
![]() Nicole wrote:
Nicole wrote:
Ich möchte jetzt gerne mit den Passe anfangen allerdings haben bei mir mein Vorderteil und mein Hinterteil nicht jeweils 82 Maschen sondern mein Hinterteil hat mehr Maschen. Ist das ein Problem ? wie kann ich das retten ?
03.09.2022 - 08:21DROPS Design answered:
Liebe Nicole, beachten Sie, daß Sie die richtigen Maschenanzahl für die Armausschnitte abgettet haben, bei der 1. Grösse stricken Sie die 184 Maschen wie folgt: 42 M (1/2 Rückenteil), die nächsten 8 M abketten, die nächsten 84 M stricken (die 1. davon ist schon auf der Nadel), die nächsten 8 M abketten , und die letzten 42 M (die 1. davon ist schon auf der Nadel) stricken. Viel Spaß beim stricken!
05.09.2022 - 08:48
![]() Nicole wrote:
Nicole wrote:
Beim rumpfteil hat vor dem anstricken der Ärmel nach dem abketten das Vorderteil 83 Maschen und das Rückenteil 103 Maschen stimmt es dass das Rückteil breiter ist als das Vorderteil ?
15.08.2022 - 17:10DROPS Design answered:
Liebe Nicole, beide Rückenteil und Vorderteil haben gleiche Maschenanzahl: 1. Hälfte Rückenteil = 42-46-50-54-59-64 + 2. Hälfte Rückenteil = 42-46-50-54-59-64 so haben Sie 84-92-100-108-118-128 Maschen für das Rückenteil und genausoviele für das Vorderteil (und dazwischen ketten Sie 8-8-10-10-12-16 Maschen für die Armlöcher ab). Viel Spaß beim stricken!
16.08.2022 - 08:22
![]() Nicole wrote:
Nicole wrote:
Hallo ich habe ein Problem nachdem ich die 8 Maschen beim Rumpfteil abgekettet habe hat eine Seite 107 Maschen und die andere Seite 83 Maschen. Ich habe eigentlich alles nach der Anleitung gemacht und weiß jetzt nicht ob das so sein soll :/ wenn nicht wir bekomme ich das wieder korrigiert Vielen Dank und liebe Grüße Ich hoffe es kann mir jemand helfen
12.08.2022 - 23:18DROPS Design answered:
Liebe Nicole, in S-M haben Sie 184-200 Maschen so stricken Sie 42-46 Maschen (1/2 Rückenteil), 8 Maschen abketten,84-92 M (Vorderteil - die 1. Masche ist schon auf der Nadel), 8 M abketten = es sind noch 42-46 M übrig (=in S: 42+8+84+8+42= 184 - in M: 46+8+92+8+46=200 M). Hoffentlich kann das Ihnen helfen. Viel Spaß beim stricken!
15.08.2022 - 07:59
![]() Jone wrote:
Jone wrote:
Hello I can't find a video on how to close the edge of the neckline. Thank you Hola, No encuentro video de como cerrar el borde del escote. Gracias
12.05.2022 - 14:24DROPS Design answered:
Hola Jone, no disponemos de un vídeo sobre cómo cerrar el borde del escote. Puedes pedir ayuda a tu tienda DROPS habitual. La técnica consiste en trabajar juntos 1 punto del borde y 1 punto recogido en el cuerpo, disminuyendo puntos de esta manera.
15.05.2022 - 22:51
![]() Siv Jonsson wrote:
Siv Jonsson wrote:
Hej! Ska precis påbörja denna tröja. Undrar nu om rullkanten (de 4 första varven) ska stickas fram o tillbaka så det blir rätstickning innan jag stickar varv 5 (1rät,1avig) ? Därefter står det ju att man stickar slätstickning runt.
10.05.2022 - 20:54DROPS Design answered:
Hej Siv, du strikker rundt, 1 omgang ret, byt ril rundpinne 4 og strik så 3 omgange ret (det bliver glatstrik) osv :)
11.05.2022 - 07:58
![]() Sharon Simpson Waller wrote:
Sharon Simpson Waller wrote:
Can I use Melody D yarn for this project? If so, what size needles should I use for size large sweater
02.02.2022 - 20:58DROPS Design answered:
Dear Mrs Simpson Waller, not really you can use a yarn group B such as Sky we suggest but not Melody . Find all jumpers worked with a yarn group D here. Happy knitting!
03.02.2022 - 08:44
![]() Janet Sandell Bengtsson wrote:
Janet Sandell Bengtsson wrote:
Tacksam om ni vill lägga upp en video på hur man stickar halskant på modell Drops 206-12. Har lyckats med hela mönstret fram till ” Sticka halskant ”. Tråkigt om tröjan inte kan bli klar.
01.12.2021 - 16:34
|
||||||||||
December Moon#decembermoonsweater |
||||||||||
 |
 |
|||||||||
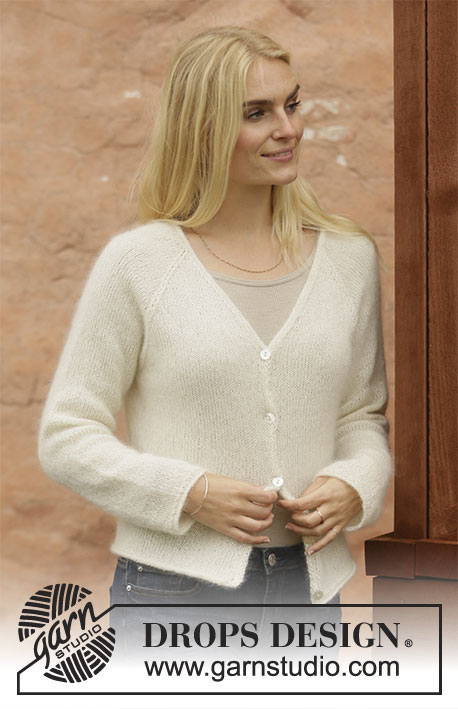
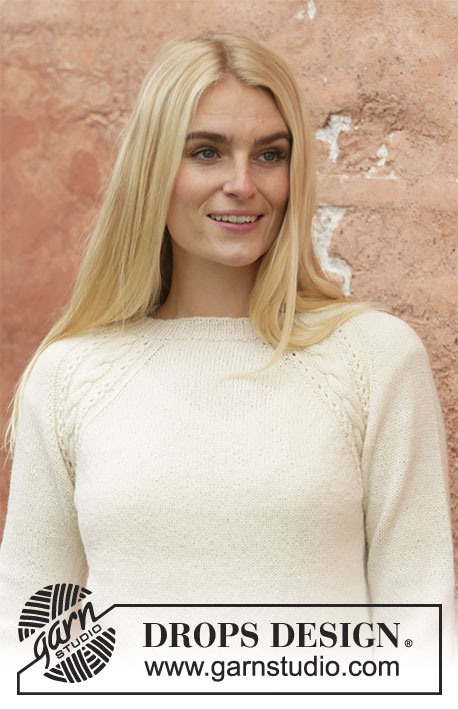
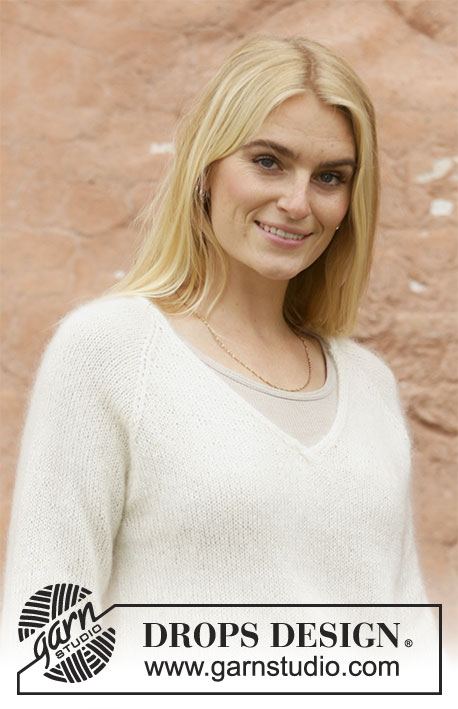
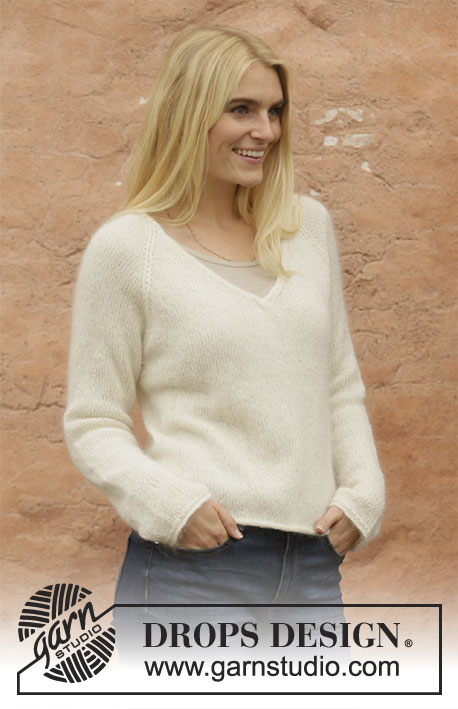
Knitted sweater with raglan and V-neck in DROPS Lace and DROPS Kid-Silk or DROPS Sky. Size: S - XXXL
DROPS 206-12 |
||||||||||
|
---------------------------------------------------------- EXPLANATION FOR THE PATTERN: ---------------------------------------------------------- PATTERN: See diagrams A.1 to A.3. Diagrams show all rows in pattern seen from the right side. INCREASE TIP (applies to sleeves): Work until 2 stitches remain before marker thread, 1 yarn over, knit 4 (marker thread is in the middle of these stitches), 1 yarn over. On next round knit yarn overs twisted to avoid holes. Then work the new stitches in stockinette stitch. RAGLAN: All decreases are done from the right side! Decrease 1 stitch on each side of marker thread as follows: Work until 2 stitches remain before marker thread, knit 2 together, marker thread is here, slip 1 stitch knitwise, knit 1, pass slipped stitch over stitch worked. Repeat at each of the remaining marker threads (= 8 stitches decreased). V-NECK: Decrease for V-neck on front piece. All decreases are done from the right side! Decrease as follows after A.2: Slip 1 stitch knitwise, knit 1, pass slipped stitch over (= 1 stitch decreased). Decrease as follows before A.3: Work until 2 stitches remain before A.3, knit the next 2 stitches together (= 1 stitch decreased). ---------------------------------------------------------- START THE PIECE HERE: ---------------------------------------------------------- SWEATER - SHORT OVERVIEW OF THE PIECE: Worked in the round on circular needle up to V-neck, then work back and forth until yoke is done. Finish by working the neck edges. Work sleeves in the round on double pointed needles/a short circular needle. BODY: Cast on 184-200-220-236-260-288 stitches on circular needle size 4.5 mm = US 7 with 1 strand Lace + 1 strand Kid-Silk (= 2 strands) or 1 strand Sky. Work rolling edge as follows: Knit 1 round. Switch to circular needle size 4 mm = US 6 and knit 3 rounds. Work next round as follows: * Knit 1, purl 1 *, repeat from *-* the entire round. Now work in stockinette stitch in the round. REMEMBER THE KNITTING GAUGE! When piece measures 31-31-31-31-30-30 cm = 12¼"-12¼"-12¼"-12¼"-11¾"-11¾", bind off stitches for armholes as in each side as follows: Work the first 42-46-50-54-59-64 stitches on round (= half back piece), bind off the next 8-8-10-10-12-16 stitches for sleeve, work the next 84-92-100-108-118-128 stitches (= front piece), bind off the next 8-8-10-10-12-16 stitches for armhole, work the remaining 42-46-50-54-59-64 stitches. Put piece aside and work the sleeves. SLEEVE: Cast on 50-52-54-56-56-60 stitches on circular needle size 4.5 mm = US 7 with 1 strand Lace + 1 strand Kid-Silk (= 2 strands) or 1 strand Sky. Work rolling edge as follows: Knit 1 round. Switch to double pointed needles size 4 mm = US 6 and knit 3 rounds. Work next round as follows: * Knit 1, purl 1 *, repeat from *-* the entire round. Work in stockinette stitch in the round. When piece measures 10-10-10-8-9-9 cm = 4"-4"-4"-3⅛"-3½"-3½", increase 2 stitches under sleeve - read INCREASE TIP! Increase like this every 3½-2½-2-2-1½-1½ cm = 1¼"-1"-¾"-¾"-½"-½" 10-13-16-17-18-18 times in total = 70-78-86-90-92-96 stitches. When sleeve measures 46-45-44-43-40-39 cm = 18"-17¾"-17¼"-17"-15¾"-15¼" (shorter measurements in the larger sizes because of longer yoke), bind off the middle 8-8-10-10-12-16 stitches under sleeve (= 4-4-5-5-6-8 stitches on each side of marker thread) = 62-70-76-80-80-80 stitches. Put piece aside and knit another sleeve the same way. YOKE: Slip sleeves on to same circular needle as body where armholes were bind off = 292-324-352-376-396-416 stitches. Now insert 4 marker threads in the piece between front piece, back piece and sleeves, but displace marker threads so that there are 1-1-1-2-4-6 stitches in each side of front piece and back piece on each side of sleeves. I.e. there are 82-90-98-104-110-116 stitches for front and back piece, and 64-72-78-84-88-92 stitches for each sleeve. Start round mid back and continue in the round with stockinette stitch. AT THE SAME TIME on first round begin decrease for raglan, and when piece measures 6-7-8-9-11-12 cm = 2⅜"-2¾"-3⅛"-3½"-4⅜"-4¾" from where sleeves were slipped onto same circular needle as body, work V-neck on front piece: RAGLAN: Decrease for RAGLAN - read explanation above. Decrease like this every 4th round 2-1-1-1-3-4 times and every other round/row 22-27-30-33-33-34 times (= 24-28-31-34-36-38 times). V-NECK: When yoke measures 6-7-8-9-11-12 cm = 2⅜"-2¾"-3⅛"-3½"-4⅜"-4¾", work A.1 over the middle 8 stitches on front piece – adjust so that first row in A.1 is worked on a round with decreases (for raglan). When A.1 has been worked vertically, work back to beginning of round mid back. Cut the yarn. Now divide front piece in the middle of A.1, and work back and forth, start from right side, at V-neck on front piece as follows: Work A.2 over the first 4 stitches from division in the middle of front piece, decrease 1 stitch for V-NECK – read explanation above, work stockinette stitch (continue decrease for raglan as before) until 6 stitches remain towards division in the middle of front piece in opposite side, decrease 1 stitch – remember V-NECK, work A.3 over the last 4 stitches. Continue back and forth like this, and decrease for V-neck every other row 7-6-7-5-6-6 times and every 4th row 5-6-6-8-8-9 times (= 12-12-13-13-14-15 stitches in total decreased for V-neck in each side). When all decreases for V-neck and raglan are done, there are 76-76-78-78-80-82 stitches on needle. Work next row from right side as follows: Knit the first 3 stitches, purl the next 2 stitches together (= 1 stitch decreased), knit until 5 stitches remain on needle, purl the next 2 stitches together (= 1 stitch decreased), knit the last 3 stitches = 74-74-76-76-78-80 stitches. Work 1 row from wrong side with knit over knit and purl over purl. Sweater measures approx. 54-56-58-60-62-64 cm = 21¼"-22"-22¾"-23⅝"-24⅜"-25¼" from shoulder and down. NECK EDGE: Insert a marker thread mid back. Slip the last 4 stitches on needle on a stitch holder, and work back and forth over the first 4 stitches for neck edge, at the same time work neck edge together with the remaining stitch on sleeve and neck line on back piece as follows: Work as follows from right side: ROW 1: Knit the first 3 stitches, knit the next 2 stitches together (= 1 stitch decreased). ROW 2: Turn and purl the 4 stitches. ROW 3: Knit the first 3 stitches, knit the next 3 stitches together (= 2 stitches decreased). ROW 4: Turn and purl the 4 stitches. ROWS 5-8: Work the same way as on 3rd and 4th row. Repeat rows 1-8 until you reach the marker thread mid back in the neck. Bind off the 4 stitches on neck edge. Slip the 4 stitches from stitch holder on 4 mm = US 6 needles and work from wrong side as follows: ROW 1: Purl the first 3 stitches, purl the next 2 stitches together (= 1 stitch decreased). ROW 2: Turn and knit the 4 stitches. ROW 3: Purl the first 3 stitches, purl the next 3 stitches together (= 2 stitches decreased). ROW 4: Turn and knit the 4 stitches. ROWS 5-8: Work the same way as on 3rd and 4th row. Repeat rows 1-8 until reach the marker thread mid back in the neck. Bind off the 4 stitches on neck edge. Sew bind-off edge together on the 2 neck edges mid back in the neck. Fasten off. |
||||||||||
Diagram explanations |
||||||||||
|
||||||||||
 |
||||||||||
Have you finished this pattern?Tag your pictures with #dropspattern #decembermoonsweater or submit them to the #dropsfan gallery. Do you need help with this pattern?You'll find 30 tutorial videos, a Comments/Questions area and more by visiting the pattern on garnstudio.com. © 1982-2026 DROPS Design A/S. We reserve all rights. This document, including all its sub-sections, has copyrights. Read more about what you can do with our patterns at the bottom of each pattern on our site. |
||||||||||


With over 40 years in knitting and crochet design, DROPS Design offers one of the most extensive collections of free patterns on the internet - translated to 17 languages. As of today we count 324 catalogs and 12290 patterns - 12280 of which are translated into English (US/in).
We work hard to bring you the best knitting and crochet have to offer, inspiration and advice as well as great quality yarns at incredible prices! Would you like to use our patterns for other than personal use? You can read what you are allowed to do in the Copyright text at the bottom of all our patterns. Happy crafting!
Post a comment to pattern DROPS 206-12
We would love to hear what you have to say about this pattern!
If you want to leave a question, please make sure you select the correct category in the form below, to speed up the answering process. Required fields are marked *.