
Popular categories
Looking for a yarn?


Comments / Questions (20)
![]() Carmen Giguère wrote:
Carmen Giguère wrote:
Merci de votre réponse. Je parlais de la hauteur des épaules du dos (4cm) et du devant (8cm). Aussi 14 cm pour commencer les augmentations n’arrivent pas aux mêmes rangs sur les grilles A1 et A2 pour le dos et le devant.
27.03.2023 - 15:03DROPS Design answered:
Bonjour Mme Giguère, comme indiqué auparavant, ajustez la dernier rang du devant sur le dernier rang du dos, tricotez quelques rangs supplémentaires pour le dos si besoin, ainsi, les diagrammes seront ajustés quand on les tricote en rond. Bon tricot!
27.03.2023 - 15:40
![]() Carmen Giguère wrote:
Carmen Giguère wrote:
Étant donné que les épaules n’ont pas la même longueur, je n’arrive pas aux mêmes rangs pour commencer les augmentations pour les emmanchures à 14 cm. Après ces augmentations je devrai joindre le dos et le devant pour continuer le tricot en rond. En raison de mon commentaire ci-dessus, est-ce que je dois continuer à suivre ma grille différemment pour le dos et le devant afin de ne pas briser la continuité ? Merci de me répondre et d’offrir un aussi bon service.
27.03.2023 - 13:19DROPS Design answered:
Bonjour Mme Giguère, je ne comprends pas bien votre question, les épaules droite et gauche doivent être de la même longueur à chaque fois avant de les joindre pour tricoter le dos/le devant. Ajustez pour terminer le devant au même rang que le dos pour pouvoir ensuite tricoter le dos et le devant ensemble. Bon tricot!
27.03.2023 - 13:38
![]() Carmen Giguère wrote:
Carmen Giguère wrote:
Puis-je avoir une photo du projet de dos, svp ?
16.03.2023 - 16:27DROPS Design answered:
Bonjour Mme Giguère, nous n'avons pas de photos du dos, il est exactement comme le devant, sauf que l'encolure est moins profonde: on réunit les 2 épaules du dos à 4 cm et celles du devant à 8 cm. Bon tricot!
16.03.2023 - 16:45
![]() Marianna wrote:
Marianna wrote:
Hi! I have the Drops Belle yarn and I'm ready to make the sweater, but I just do not like the knots. Can you suggest an alternative stitch in place of the knot stitch? Thanks 😊
26.02.2023 - 02:13DROPS Design answered:
Dear Marianna, you can just not work the knots, for example, by knitting the stitch that corresponds to the knot. Happy knitting!
26.02.2023 - 23:40
![]() Hanna Mourino wrote:
Hanna Mourino wrote:
Hej! Jag har stickat en del vågmönstrade halsdukar från er Garnstudio och tycker det är skoj. Min undran är varför man stickar denna tröja uppifrån och jobbar nedåt? Går det inte att sticka/börja detta mönster nedifrån istället?
29.06.2022 - 15:42DROPS Design answered:
Hei Hanna. Vi prøver å variere på oppskriftene, noen strikkes ovenfra og ned, andre nedenifra og opp. Slik prøver vi tilfredstiller alle som strikker. Noen liker at det strikkes ovenfra og ned, da man kan prøve plagget underveis. Men du kan fint strikke denne nedenifra og opp, bare husk å tenke motsatt, både selve oppskriften og diagrammet. mvh DROPS Design
04.07.2022 - 10:25
![]() Susanne Turn Pedersen wrote:
Susanne Turn Pedersen wrote:
Jeg kan ikke få opskriften til at passe, jeg skal til ærmekuplen. Jeg laver str small. Der står jeg skal lukke x antal masker af, og når jeg tæller de masker sammen, bliver det til 26, men der står 18 i opskriften. Derudover skal denne aflukning laves på ca 10 pinde og give 10 cm, det kan jo ikke lade sig gøre. Jeg håber I kan hjælpe med at forklare, hvordan det skal laves?!? Vh Sanne
03.05.2020 - 19:31DROPS Design answered:
Hej Susanne, du tager ind i hver side ifølge opskriften og har da 18 masker tilbage når ærmet måler 50 cm. Selve ærmekuplen er 8 cm i small. Det er hele omkredsen på ærmekuplen som passer ind i ærmegabet. God fornøjelse!
05.05.2020 - 09:03
![]() Josepha Korsten wrote:
Josepha Korsten wrote:
Heb ik alleen de rondbreinaald nodig of ook andere naalden?
08.06.2019 - 12:43DROPS Design answered:
Dag Josepha,
Je kunt deze trui inderdaad volledig met rondbreinaalden maken.
08.06.2019 - 15:32
![]() Josepha Korsten wrote:
Josepha Korsten wrote:
Hallo, ik zou graag willen weten of je de trui helemaal rond breit zonder zij naden. Groetjes Josepha
07.06.2019 - 15:56DROPS Design answered:
Dag Josepha,
Je hebt indedaad geen naden in dit patroon (behalve de schoudernaden). Het werk wordt van boven naar beneden gebreid. De voor- en achterpanden worden eerst los van elkaar gebreid en bij de armsgaten voeg je het voor en achterpand samen om verder in de rondte naar beneden te breien. De mouwen worden ook in de rondte gebreid.
13.06.2019 - 09:59
![]() Bettina wrote:
Bettina wrote:
Muster A1: über 7 M. Bei 2 Umschlägen in dem Muster wird nur eine Masche wieder ausgeglichen. oder muss ich die überzogene Masche zweimal stricken ? Dann sind es nämlich wieder sieben Maschen anstatt 8. Ich verstehe es einfach nicht.Bitte um Hilfe.
12.01.2019 - 13:13DROPS Design answered:
Liebe Bettina, bei der 1. Reihe in A.1 werden 2 Maschen abgenommen = 1 Masche wie zum Rechtsstricken abheben, 2 Maschen rechts zusammenstricken, die abgehobene Masche überziehen. Viel Spaß beim stricken!
14.01.2019 - 10:01
![]() Mira wrote:
Mira wrote:
Schöne Anleitung. Aber bei der linken Schulter des Vorderteils in der deutschen Anleitung ein Fehler: Dort steht "In der nächsten Reihe 1 Masche neben den 3 kraus rechten Maschen in Richtung Halsausschnitt ebenso wie beim Rückenteil abnehmen = 17-18-18-19-20-21 Maschen. " Statt abnehmen müsste hier zunehmen stehen.
18.12.2018 - 21:54
|
||||||||||||||||||||||
Key West Sweater#keywestsweater |
||||||||||||||||||||||
 |
 |
|||||||||||||||||||||
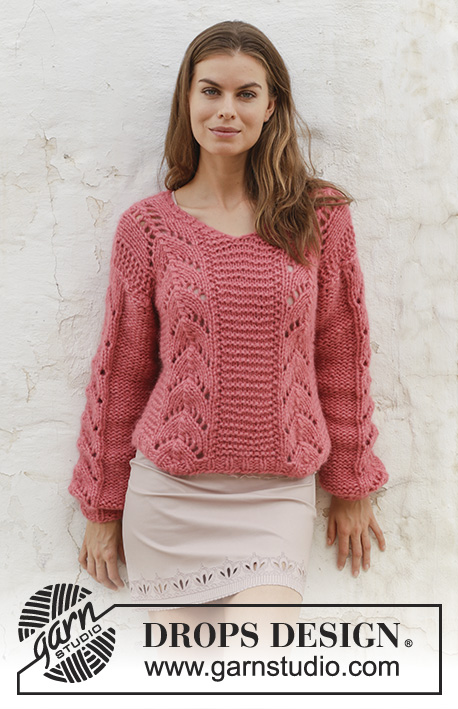
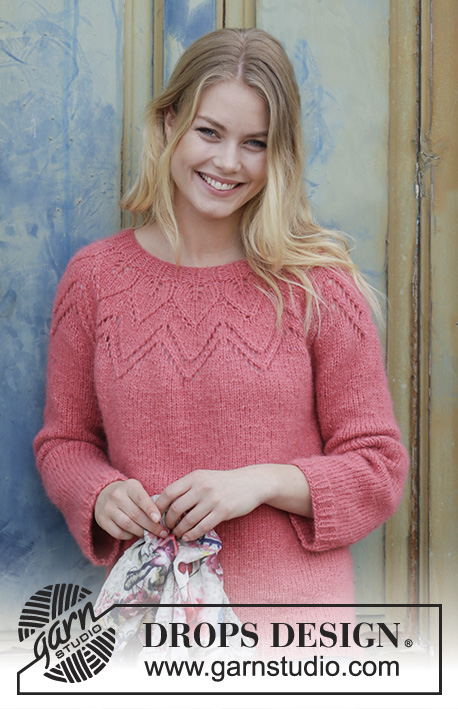
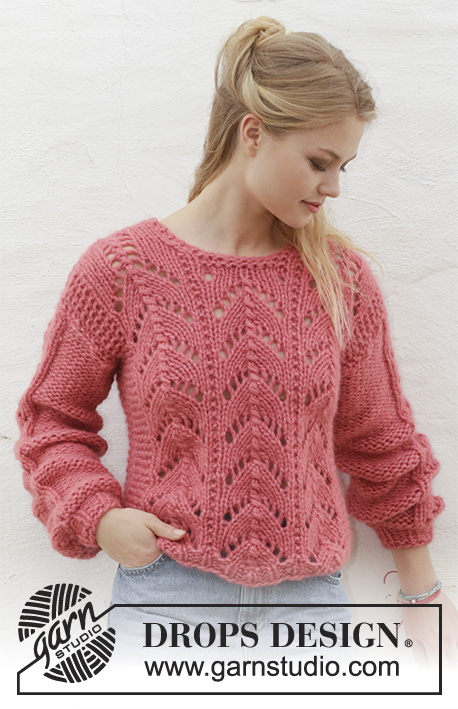
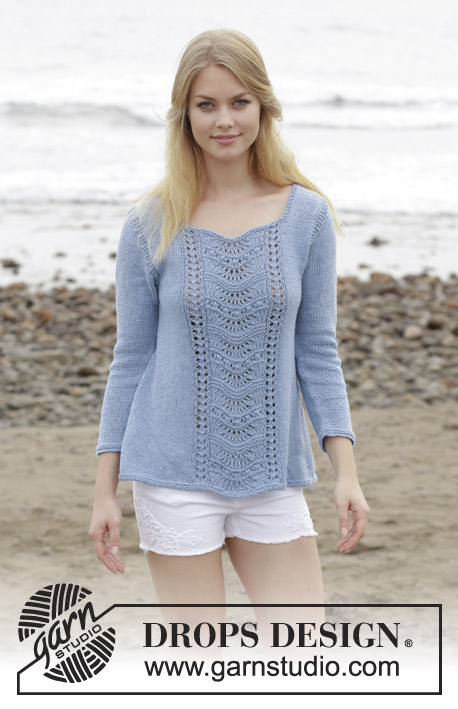
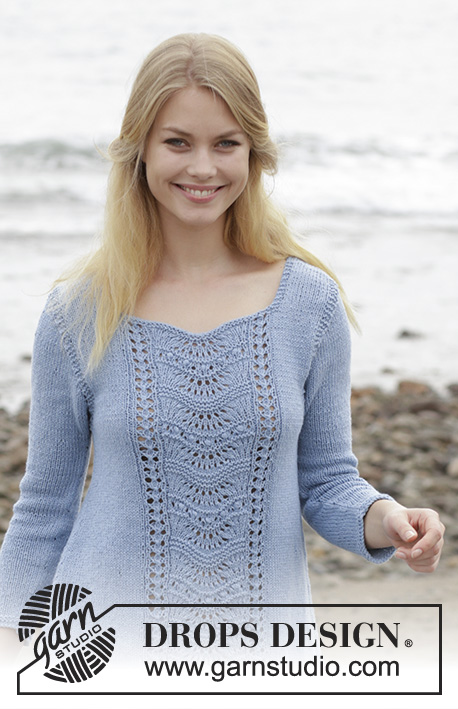
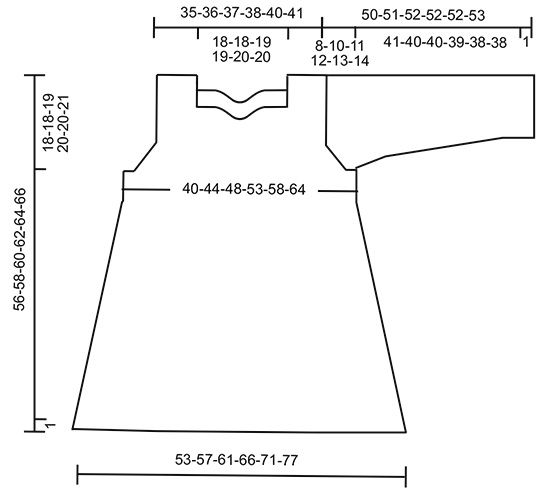
Sweater with lace pattern and A-shape, knitted top down. Size: S - XXXL Piece is knitted in DROPS Belle.
DROPS 186-14 |
||||||||||||||||||||||
|
INFORMATION FOR PATTERN: GARTER STITCH (worked in the round): 1 ridge = 2 rounds. Knit 1 round and purl 1 round. GARTER STITCH (back and forth): 1 ridge = knit 2 rows. PATTERN: See diagrams A.1 and A.2. Diagrams show all rows in pattern seen from the right side. INCREASE TIP-1: All increases are done from right side. Increase 1 stitch by making 1 yarn over. On next row purl yarn over twisted to avoid hole. Work the new stitches in stockinette stitch. INCREASE TIP-2: Work until 1 stitch remains before marker in the side, make 1 yarn over, knit 2, make 1 yarn over. Repeat in the other side. On next round knit yarns over twisted to avoid holes. Work the new stitches in stockinette stitch. ---------------------------------------------------------- SWEATER: Worked top down. Work first front and back piece separately, back and forth down to armholes, then work body in the round. Work sleeves back and forth on circular needle. BACK PIECE: Work right shoulder as follows: Cast on 16-17-17-18-19-20 stitches on circular needle size 4.5 mm / US 7 with Belle. ROW 1 (= right side): 3 stitches in GARTER STITCH - see explanation above (= towards the neck), knit 10-11-11-12-13-14, 3 stitches in garter stitch (= towards armhole). ROW 2: 3 edge stitches in garter stitch, purl until 3 stitches remain, 3 edge stitches in garter stitch. Repeat 1st and 2nd row 3 more times (= 4 times in total) = 8 rows. On next row increase 1 stitch inside the 3 stitches in garter stitch towards the neck - read INCREASE TIP-1 = 17-18-18-19-20-21 stitches. Work 1 row from wrong side and put piece aside. Piece measures approx. 4 cm / 1½" from cast-on edge and down. Work left shoulder as follows: Cast on and work as right shoulder but reversed. I.e. when increasing 1 stitch towards the neck increase 1 stitch before the 3 stitches in garter stitch towards the neck on 9th row. Work 1 row from wrong side. Now work left and right shoulder together as follows: Turn piece (= left shoulder) and work as before over all stitches and cast on 35-35-37-37-39-39 new stitches for neck at the end of row, then work the 17-18-18-19-20-21 stitches from right shoulder on to needle = 69-71-73-75-79-81 stitches. REMEMBER THE GAUGE! Work the new stitches cast on for neck mid front in garter stitch, work the other stitches on back piece in stockinette stitch and garter stitch as before. When 2 ridges have been worked over the new stitches for neck, work pattern while at the same time increasing for armhole as follows: READ ALL OF THE FOLLOWING SECTION BEFORE CONTINUING! Begin from right side and work pattern as follows: 3 stitches in garter stitch, 13-14-15-16-18-19 stitches in stockinette stitch, A.1 (= 7 stitches), work from row with star in A.2 (= 23 stitches), A.1, 13-14-15-16-18-19 stitches in stockinette stitch, 3 stitches in garter stitch. Continue pattern back and forth like this (when diagrams have been worked vertically, repeat them vertically until finished measurements). AT THE SAME TIME when piece measures 16-14-14-12-11-9 cm / 6¼"-5½"-5½"-4⅝"-4¼"-3½" from cast-on edge on shoulder, increase 1 stitch inside the 3 stitches in garter stitch in each side for armhole. Increase like this on every row from right side 3-5-7-10-12-16 times in total = 75-81-87-95-103-113 stitches. Work 1 row from wrong side after last increase and put piece aside. Piece measures 18-18-19-20-20-21 cm / 7"-7"-7⅜"-7⅞"-7⅞"-8 ¼" from shoulder and down. Put piece aside and work the front piece. FRONT PIECE: Work left shoulder as follows: Cast on 16-17-17-18-19-20 stitches on circular needle size 4.5 mm / US 7 with Belle. ROW 1 (= right side): 3 stitches in GARTER STITCH - see explanation above (= towards the neck), knit 10-11-11-12-13-14, 3 stitches in garter stitch (= towards armhole). ROW 2: 3 edge stitches in garter stitch, purl until 3 stitches remain, 3 edge stitches in garter stitch. Repeat 1st and 2nd row 8 more times (= 9 times in total) = 18 rows. On next row increase 1 stitch inside the 3 stitches in garter stitch towards the neck as on back piece = 17-18-18-19-20-21 stitches. Work 1 row from wrong side and put piece aside. Piece measures approx. 8 cm / 3⅛" from cast-on edge and down. Work right shoulder as follows: Cast on and work as left shoulder but reversed. I.e. when increasing 1 stitch towards the neck increase 1 stitch before the 3 stitches in garter stitch towards the neck on 19th row. Work 1 row from wrong side. Now work right and left shoulder together as follows: Turn piece (= right shoulder) and work as before over all stitches and cast on 35-35-37-37-39-39 new stitches for neck at the end of row, then work the 17-18-18-19-20-21 stitches from left shoulder on to needle = 69-71-73-75-79-81 stitches. Work the new stitches cast on for neck mid front in garter stitch, work the other stitches on front piece in stockinette stitch and garter stitch as before. When 2 ridges have been worked over the new stitches for neck, work pattern while at the same time increasing for armhole as follows: READ ALL OF THE FOLLOWING SECTION BEFORE CONTINUING! Begin from right side and work pattern as follows: 3 stitches in garter stitch, 13-14-15-16-18-19 stitches in stockinette stitch, A.1 (= 7 stitches), work from 1st row in A.2 (= 23 stitches), A.1, 13-14-15-16-18-19 stitches in stockinette stitch, 3 stitches in garter stitch. Continue pattern back and forth like this (when diagrams have been worked vertically, repeat them vertically until finished measurements). AT THE SAME TIME when piece measures 16-14-14-12-11-9 cm / 6¼"-5½"-5½"-4⅝"-4¼"-3½" from cast-on edge on shoulder, increase 1 stitch inside the 3 stitches in garter stitch in each side for armhole. Increase like this on every row from right side 3-5-7-10-12-16 times in total = 75-81-87-95-103-113 stitches. Work 1 row from wrong side after last increase and put piece aside. Piece measures 18-18-19-20-20-21 cm / 7"-7"-7⅜"-7⅞"-7⅞"-8 ¼" from shoulder and down. Now work as follows from right side: Turn and work over all stitches on front piece, cast on 4-6-8-10-12-14 new stitches for armhole, insert a marker thread in the middle of these new stitches (= 2-3-4-5-6-7 stitches on each side of marker thread), work the 75-81-87-95-103-113 stitches from back piece on to same circular needle, and cast on 4-6-8-10-12-14 new stitches for armhole, insert a marker thread in the middle of these new stitches (= 2-3-4-5-6-7 stitches on each side of marker thread). BODY: = 158-174-190-210-230-254 stitches. NOW MEASURE PIECE FROM HERE! Then work in the round on circular needle. Work pattern and stockinette stitch as before, but over the middle 10-12-14-16-18-20 stitches in each side (i.e. 5-6-7-8-9-10 stitches on each side of marker thread in each side) work in garter stitch. When 2 ridges have been worked over stitches in each side, continue in stockinette stitch, A.1 and A.2 as before. When piece measures 4 cm / 1½", increase 2 stitches in each side of piece - read INCREASE TIP-2! Increase like this every 7th-7th-7th-7th-8th-8th round 13 times in total = 210-226-242-262-282-306 stitches. Continue until piece measures 37-39-40-41-43-44 cm / 14½"-15¼"-15¾"-16⅛"-16⅞"-17¼" (56-58-60-62-64-66 cm / 22"-22¾"-23⅝"-24⅜"-25¼"-26" in total from shoulder). Work 2 ridges. Bind off by knitting. To avoid a tight bind-off edge make 1 yarn over after approx. every 6th stitch. Bind off yarn overs as stitches. SLEEVES: Cast on 48-50-52-54-56-60 stitches on circular needle size 4.5 mm / US 7. Work 2 ridges back and forth. Then work in stockinette stitch with 1 edge stitch in garter stitch in each side. When piece measures 6-9-9-7-11-9 cm / 2⅜"-3½"-3½"-2¾"-4¼"-3½", increase 1 stitch inside 1 edge stitch in garter stitch in each side - remember INCREASE TIP-1. Increase like this every 20th-14th-10th-8th-6th-6th row 5-6-8-10-11-12 times, then when piece measures 37-36-36-35-34-34 cm / 14½"-14⅛"-14⅛"-13¾"-13⅜"-13⅜" (= after last increase) increase every other row 6 times = 70-74-80-86-90-96 stitches. Sleeve measures approx. 42-41-41-40-39-39 cm / 16½"-16⅛"-16⅛"-15¾"-15¼"-15¼". Now bind off for sleeve cap at beginning of every row in each side as follows: bind off 4-4-4-5-5-6 stitches 1 time, 2 stitches 5 times, 1 stitch 0-1-2-3-5-6 times, 2 stitches 4-5-5-5-5-5 times and 4 stitches 1 time = 18-16-20-22-22-24 stitches. Bind off the remaining stitches. Sleeve measures approx. 50-51-52-52-52-53 cm / 19⅝"-20"-20⅜"-20⅜"-20⅜"-20⅞". Work another sleeve the same way. ASSEMBLY: Sew the shoulder seams with grafting stitches. Sew sleeve to body under edge in garter stitch. Sew the seam under the sleeves. Make sure to avoid a tight seam. |
||||||||||||||||||||||
Diagram explanations |
||||||||||||||||||||||
|
||||||||||||||||||||||
 |
||||||||||||||||||||||
 |
||||||||||||||||||||||
Have you finished this pattern?Tag your pictures with #dropspattern #keywestsweater or submit them to the #dropsfan gallery. Do you need help with this pattern?You'll find 27 tutorial videos, a Comments/Questions area and more by visiting the pattern on garnstudio.com. © 1982-2026 DROPS Design A/S. We reserve all rights. This document, including all its sub-sections, has copyrights. Read more about what you can do with our patterns at the bottom of each pattern on our site. |
||||||||||||||||||||||


With over 40 years in knitting and crochet design, DROPS Design offers one of the most extensive collections of free patterns on the internet - translated to 17 languages. As of today we count 324 catalogs and 12290 patterns - 12280 of which are translated into English (US/in).
We work hard to bring you the best knitting and crochet have to offer, inspiration and advice as well as great quality yarns at incredible prices! Would you like to use our patterns for other than personal use? You can read what you are allowed to do in the Copyright text at the bottom of all our patterns. Happy crafting!
Post a comment to pattern DROPS 186-14
We would love to hear what you have to say about this pattern!
If you want to leave a question, please make sure you select the correct category in the form below, to speed up the answering process. Required fields are marked *.