
Popular categories
Looking for a yarn?


Comments / Questions (25)
![]() Sonia wrote:
Sonia wrote:
Por favor ayúdeme a interpretar el esquema no entiendo cómo empezar luna talla M con cuantos puntos empiezo y el avance del modelo
17.04.2024 - 13:56DROPS Design answered:
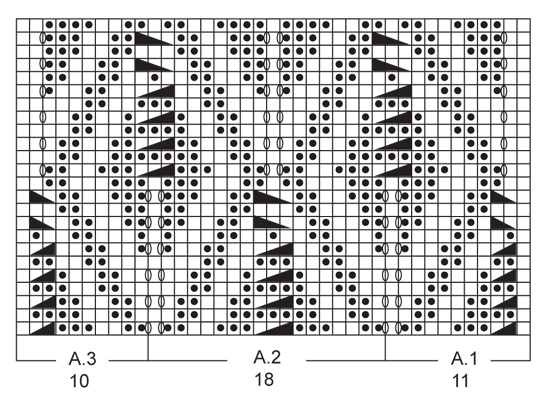
Hola Sonia, la labor comienza como se explica en el texto (montar 153 pts, trabajar 3 filas de derecho). Para trabajar el diagrama puedes leer la siguiente lección: https://www.garnstudio.com/lesson.php?id=68&cid=23. En la primera fila trabajas los 11 primeros puntos del esquema, en la esquina derecha (se corresponden a A.1), después trabajas los 18 puntos siguientes (A.2) 7 veces (cuando llegues al final del corchete vuelves al primer punto de A.2) y los 10 puntos de la esquina izquierda (A.3). No olvidar los 3 puntos en punto musgo al inicio y final de la fila. Ahora trabajas la fila 2 del diagrama, trabajando sobre los puntos de la fila anterior de acuerdo al diagrama.
21.04.2024 - 23:45
![]() Sandrine Tribuiani wrote:
Sandrine Tribuiani wrote:
Bonjour est il possible d’avoir les explications en français de ce modèle je vous remercie cordialement Sandrine
18.07.2021 - 07:13
![]() Ayat wrote:
Ayat wrote:
In this pattern you ask to pic up stiches for round high than cast on and cast of,sorry i do not understand or know what to do.
20.02.2020 - 21:14DROPS Design answered:
Dear Mrs Ayat, after you have sewn piece for sleeves, pick up stitches from the right side along the cast off edge + along the cast on edge so that you get a total of 304-340-392-436 stitches on needle and work now the edge in the round. Happy knitting!
21.02.2020 - 07:59
![]() Helle Andersen wrote:
Helle Andersen wrote:
Jeg fik ikke skrevet at den skal være ca 60 cm længere. Så st lave kanten bredere er desværre ikke en mulighed
03.07.2018 - 11:25
![]() Helle Andersen wrote:
Helle Andersen wrote:
Hej. Vil høre hvordan man kan gør den længere, men uden af lave større ærmegab
02.07.2018 - 21:00DROPS Design answered:
Hej Helle, du kan jo prøve at lave kanten længere :)
03.07.2018 - 10:36
![]() Marianna Capitani wrote:
Marianna Capitani wrote:
Grazie mille gentilissimi stasera provo
12.10.2015 - 16:00
![]() Marianna Capitani wrote:
Marianna Capitani wrote:
.si inizia lavorando tre ferri a drittto proseguire con il motivo come segue....ecc...ma avendo tutte le maglie a dritto quando mi dice 1m dir sul dritto,rov sul rovescio nel primo giro la devo fare dritta ,poi quando dice 1 m rov sul dritto dir sul rovescio la devo fare rovescio ,perchè in un altro vostro modello avevate scritto voi come mettere le maglie e il giro seguente iniziare con lo schema ora invece non capisco grazie
12.10.2015 - 13:59DROPS Design answered:
Buongiorno Marianna. Nei diagrammi le righe dispari (iniziando dal basso) sono ferri lavorati sul diritto del lavoro: i quadratini bianchi sono maglie lavorate a dir; quelli con il pallino nero, sono m lavorate a rov. Per gli altri quadratini rimandiamo alla legenda. Le righe pari, sono ferri lavorati sul rovescio del lavoro: i quadratini bianchi sono m lavorate a rov, quelli con il pallino nero sono m lavorate a dir. Le prime 3 e le ultime 3 m di ogni ferro (non indicati nel diagramma) vanno sempre lavorate a dir. Ci riscriva se non è ancora chiaro. Buon lavoro!
12.10.2015 - 15:10
![]() Marianna Capitani wrote:
Marianna Capitani wrote:
Buona sera io non riesco a capire perchè quando bisogna iniziare il diagramma si paret con tre maglie a punto legaccio ,e guardando lo schema non inizia con tre maglie a legaccio...grazie
11.10.2015 - 20:53DROPS Design answered:
Buongiorno Marianna. Generalmente nello schema vengono indicate quelle parti del motivo che cambiano nel corso della lavorazione. Non vengono riportate graficamente le prime 3 m e le ultime 3 m del ferro, in quanto lavorate sempre a legaccio, come specificato nel testo. Ci riscriva se incontra delle difficoltà. Buon lavoro!
12.10.2015 - 08:41
![]() Marianne S. Jepsen wrote:
Marianne S. Jepsen wrote:
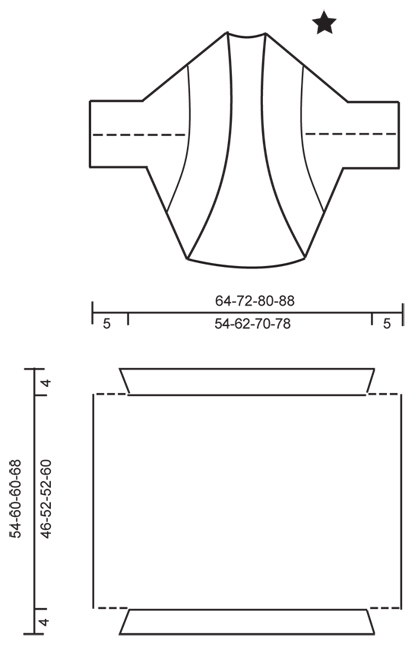
Jeg forstår ikke skitsen der viser sammensyning til ærmer. Er det i opslås og afluknings kanten- og hvor langt?
10.05.2015 - 17:48DROPS Design answered:
Hej Marianne. Du har strikket en firkant nu som er (eksempel str S) 46 cm höj og 64 cm bred. Du skal folde den over midten i höjden og lukke 5 cm söm i hver side (de stiplede linier) = underærmesømmene. Derefter tager du masker op rundt om hele aabningen til din kant som totalt bliver 4 cm bred.
11.05.2015 - 15:57Genevieve Foo wrote:
Hi. Just to check, the pattern printed is for RS reading from right to left and wrong side from left to right?
14.04.2015 - 04:41DROPS Design answered:
Dear Mrs Foo, that's correct, 1 square in diagram = 1 st x 1 row. Read more about diagrams here. Happy knitting!
14.04.2015 - 10:03
|
|||||||||||||||||||||||||
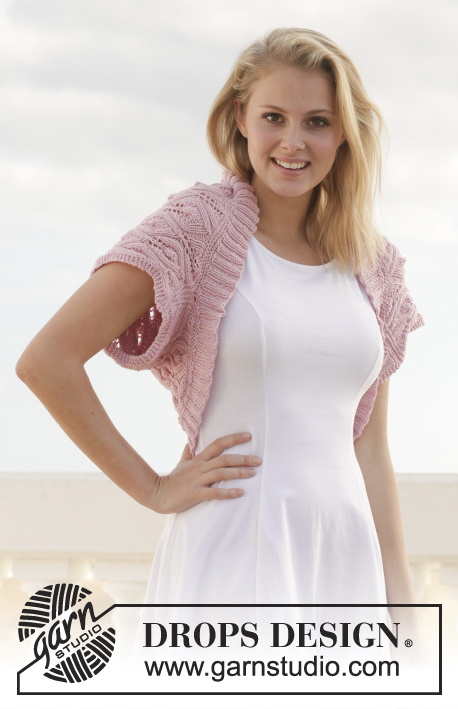
Bellevue#bellevuebolero |
|||||||||||||||||||||||||
 |
 |
||||||||||||||||||||||||
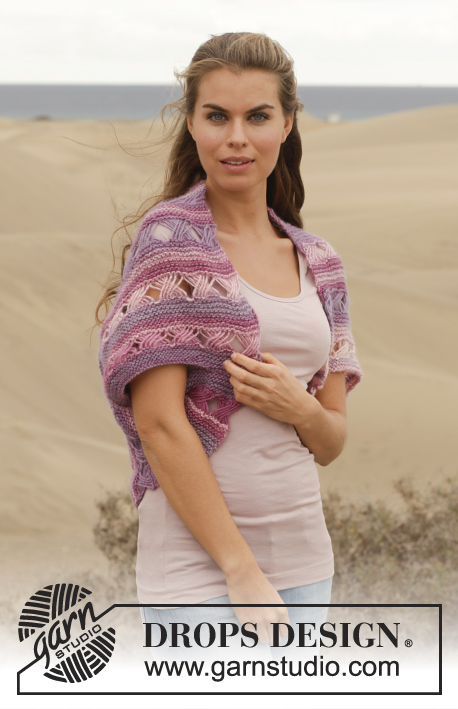
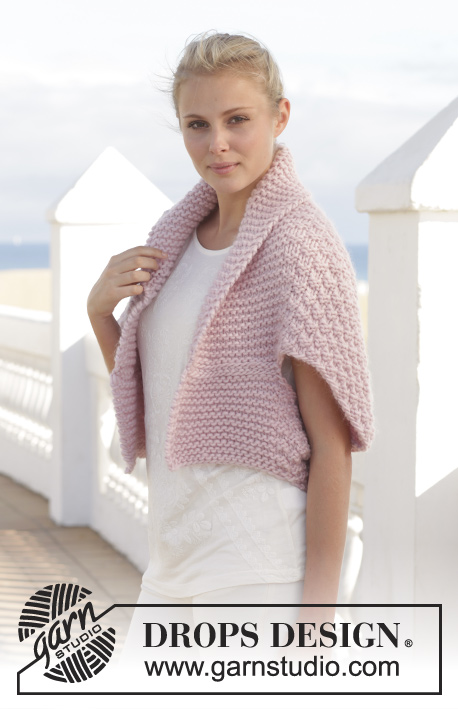
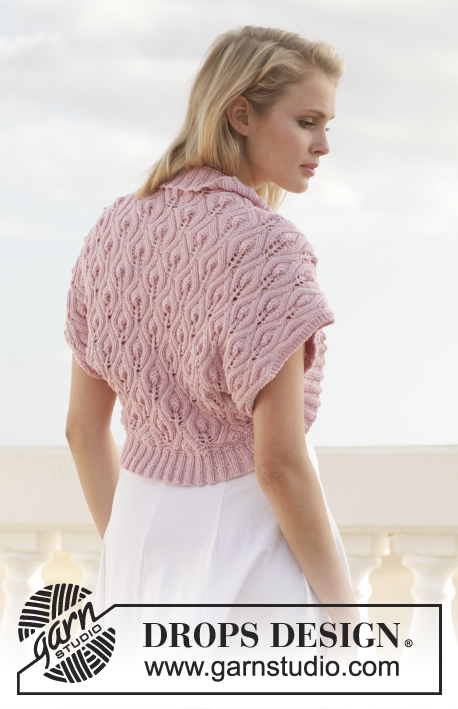
Knitted DROPS bolero with leaf pattern in ”Cotton Merino”. Size: S - XXXL
DROPS 155-36 |
|||||||||||||||||||||||||
|
GARTER ST (back and forth on needle): K all rows. 1 ridge = K2 rows. GARTER ST (in the round on circular needle): * K 1 round and P 1 round *, repeat from *-*. 1 ridge = 2 rounds. PATTERN: See diagrams A.1, A.2 and A.3. The diagrams show all rows in pattern seen from RS. ---------------------------------------------------------- BOLERO: Worked back and forth on needle. Loosely cast on 153-171-189-207 sts on circular needle size 4 mm / US 6 with Cotton Merino. NOTE! Make sure that the cast-on edge is not too tight. K 3 rows. Then work pattern as follows, beg from RS: 3 sts in GARTER ST – see explanation above, A.1 (= 11 sts), A.2 (= 18 sts) 7-8-9-10 times in total, A.3 (= 10 sts), 3 sts in garter st. Continue the pattern like this. REMEMBER THE GAUGE! When piece measures approx. 23-26-26-30 cm / 9"-10¼"-10¼"-11¾" - stop after 1 whole or 1 half repetition vertically, insert a marker in the side to indicate half the piece. Continue as before until same no of repetitions vertically has been worked as before marker. Now piece measures approx. 46-52-52-60 cm / 18"-20½"-20½"-23½". Work 2 ridges in garter st over all sts. Loosely bind off. ASSEMBLY: Place cast-on edge towards bind-off edge, WS against WS. Sew underarm seams in one in outer loops of edge sts - see dotted line in chart. EDGE: Worked in the round on circular needle size 3.5 mm / US 4. Pick up from RS approx. 304-340-392-436 sts along the entire opening between sleeves. Work 2 ridges in GARTER ST - see explanation above - in the round over all sts. Then work rib K 2/P 2 until piece measures approx. 2½ cm / ⅞". On next round inc 1 st by making a YO before first P st in every section with P sts in rib = 380-425-490-545 sts on needle. On next round P YOs twisted to avoid holes, continue rib but with K 2/P 3. Loosely bind off when rib measures approx. 4 cm / 1½". |
|||||||||||||||||||||||||
Diagram explanations |
|||||||||||||||||||||||||
|
|||||||||||||||||||||||||
 |
|||||||||||||||||||||||||
 |
|||||||||||||||||||||||||
Have you finished this pattern?Tag your pictures with #dropspattern #bellevuebolero or submit them to the #dropsfan gallery. Do you need help with this pattern?You'll find 20 tutorial videos, a Comments/Questions area and more by visiting the pattern on garnstudio.com. © 1982-2026 DROPS Design A/S. We reserve all rights. This document, including all its sub-sections, has copyrights. Read more about what you can do with our patterns at the bottom of each pattern on our site. |
|||||||||||||||||||||||||


With over 40 years in knitting and crochet design, DROPS Design offers one of the most extensive collections of free patterns on the internet - translated to 17 languages. As of today we count 324 catalogs and 12290 patterns - 12280 of which are translated into English (US/in).
We work hard to bring you the best knitting and crochet have to offer, inspiration and advice as well as great quality yarns at incredible prices! Would you like to use our patterns for other than personal use? You can read what you are allowed to do in the Copyright text at the bottom of all our patterns. Happy crafting!
Post a comment to pattern DROPS 155-36
We would love to hear what you have to say about this pattern!
If you want to leave a question, please make sure you select the correct category in the form below, to speed up the answering process. Required fields are marked *.