
Popular categories
Looking for a yarn?


Comments / Questions (146)
Heather wrote:
After heel decreases, I ve picked up 9 sts each side, Ive gone in pattern across upper foot to get to other side to pu other 9 sts, Im backwards (working on wrong side, after heel decreases should i do another row to make sure in on right side?? also once that is done and I proceed where it says continue in stockinette and M! and decrease at same time (again right now I'm one wrong side)
25.01.2017 - 15:16DROPS Design answered:
See answer above.
25.01.2017 - 15:54
![]() Terhi wrote:
Terhi wrote:
En ihan ymmärrä tuota mallineuletta.. Ensin pitää kutoa 6 oikein, sitten 3 nurin, nostaa 3 apupuikolle ja kutoa 1 oikein, jonka jälkeen apupuikolta ne 3. Siinähän tulee 13 silmukkaa? Jos per puikko on 12 silmukkaa? Mitä kohtaa en ymmärrä? Help! :-)
16.01.2017 - 07:55DROPS Design answered:
Hei! Palmikkoneuleen mallikertaa toistetaan vain kerran kerroksella, eli palmikkokuvio tulee ainoastaan sukan etuosaan.
13.02.2017 - 17:16
![]() Debbie wrote:
Debbie wrote:
After knitting 18 cm from marker on heel the comment " adjust to after a full repeat of M1 (= approx 4 cm remain). What does that mean?
08.11.2016 - 22:05DROPS Design answered:
Dear Debbie, make sure you have worked a full repeat of M.1 (work to the last row in M.1) when your piece measures 18 cm from marker on heel, work more/less row if necessary so that the last row is last row in M.1. Happy knitting!
09.11.2016 - 09:49
![]() Debbie A Davis wrote:
Debbie A Davis wrote:
2nd last paragraph - adjust to after a full repeat of m1
08.11.2016 - 22:03
![]() Vennie wrote:
Vennie wrote:
Where do I get the 27 stitches to put on stitch holder? I only havee 11 that are on the flap, I just knit
01.11.2016 - 19:35DROPS Design answered:
Dear Vennie, after ribbing you are working as follows over the 48 sts: K3/P3 over the first 24 sts, K6, M.1 (= 15 sts), K3 = 24+6+15+3= 48 sts. When piece measures 4 cm / 1½'' from cast on row, keep the first 27 sts on needle (= the first 24 sts worked in rib + next 3 sts) and slip the last 21 sts on a st holder (= K3, M.1, K3). Happy knitting!
02.11.2016 - 09:16
![]() Vennie wrote:
Vennie wrote:
I am thoroughly confused.... I cast on 48 stitches, worked the 5 rounds in k3/p3. I then I ribbed for 24 stitches, K 6 then did pattern with 15 sts worked on that until there was 11 stitches remaining, and piece measured 1 1/2 " so now I have a flap of 11 sts on 1 needle measuring 1 1/2 " long and 29 stitches left over at original length. Am I doing something wrong? I don't understand how i have 27 to work heel and 21 for st holder. Please help me Thank you
30.10.2016 - 01:48DROPS Design answered:
Dear Vennie, after ribbing, you work K3/P3 over the 24 sts as before, then K6, M1 and K3 over the remaining sts on round = 48 sts until piece measures 1½''. Then keep the first 27 sts on needle (for heel) and slip the last 21 sts on a st holder (mid upper foot, sts will be worked again later). Work heel back and forth over the 27 sts dec sts as explained for your size. Happy knitting!
31.10.2016 - 10:37Valda Stryde wrote:
Had a little trouble doing first sock. but was watching TV at the same time. So I started to pay attention to what I was doing .When I got the first sock completed I had no trouble. I have completed four pairs now and I can watch TV while doing them now. Beautiful pattern and quite easy to follow. Just have to pay attention doing the first one then everything is quite easy after that. thank you for this pattern.
12.10.2016 - 17:04
![]() Shirley Myles wrote:
Shirley Myles wrote:
I wish someone would rewrite this pattern .... I needed help every step of the way !
10.10.2016 - 03:34DROPS Design answered:
Dear Mrs Myles, you are welcome to ask you question here, for any individual assistance, remember you will get help from your DROPS store, even per mail or telefon. Happy knnitting!
10.10.2016 - 10:20
![]() Joanne wrote:
Joanne wrote:
I understand reading the pattern but don't know where the 23 stitches are coming from ?? is it the stitches that came off of stitch holder because I only have 21 ???? totally confused along with several people I have asked for assistance.
03.10.2016 - 20:42DROPS Design answered:
Dear Joanne, when you've finished with heel decreases and pick up sts, you'll end up with 52 sts. Now you've to put a marker as follows: keep M.1 (= 15 sts) as central, leave 4 sts each side of M.1 and place 1 marker each side of the 4 sts, so you'll have: marker, 4 sts, M.1, 4 sts, marker. Happy knitting!
04.10.2016 - 08:46
![]() Joanne wrote:
Joanne wrote:
I am very confused .. I'm working on middle size .. I have one needle with 21 stitches from stitch holder, one needle with 10 stitches picked up side of heel, other needle with 11 from heel decrease, and 4th needle with 10 stitches for heel pickup .. total of 52 as pattern says .. I'm not sure where it says insert markers each side of 23 stitches .. which 23 stitches ..pls help trying to make these as a gift..
02.10.2016 - 03:58DROPS Design answered:
Dear Joanne, markers should be inserted as follows: 1st marker, 4 sts, M.1 (= 15 sts), 4 sts, 2nd marker (= 23 sts between markers = top of foot). Happy knitting!
03.10.2016 - 09:28
|
|||||||||||||||||||||||||
Alaskan Cables |
|||||||||||||||||||||||||
 |
 |
||||||||||||||||||||||||
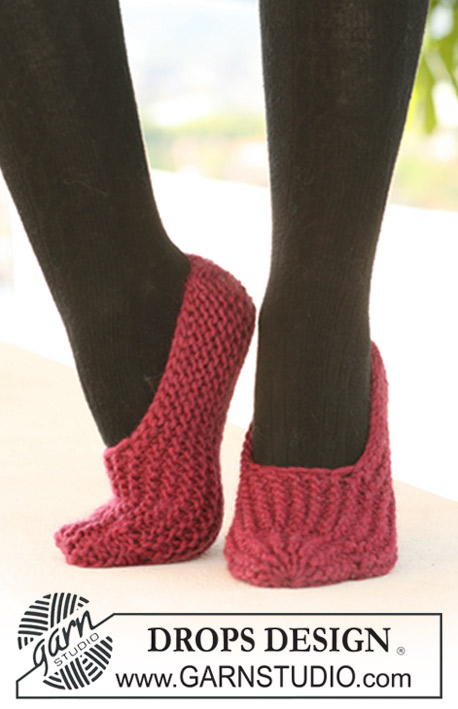
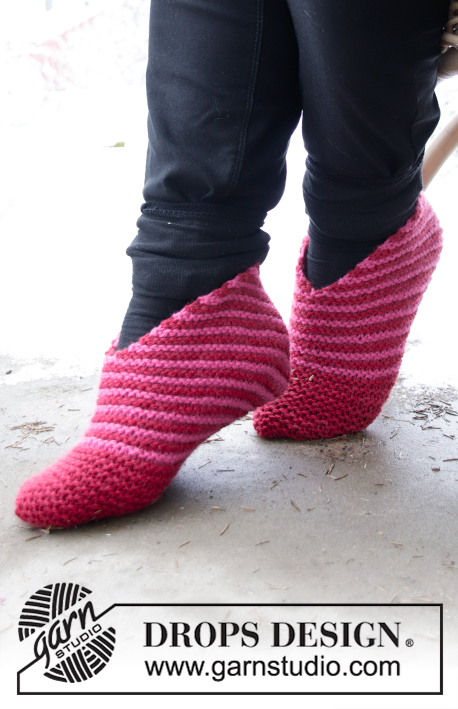
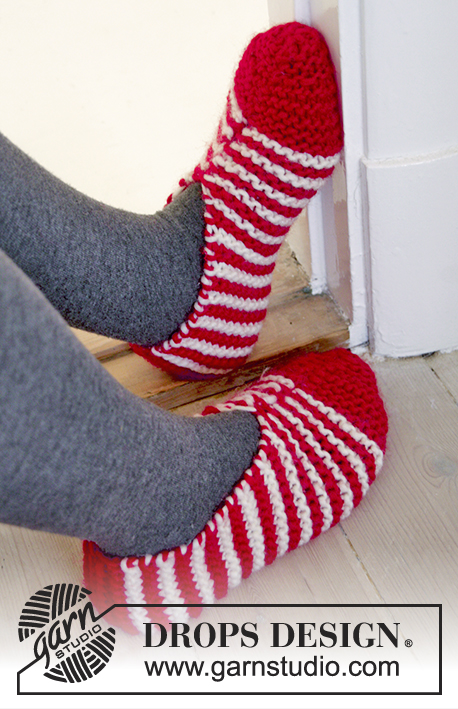
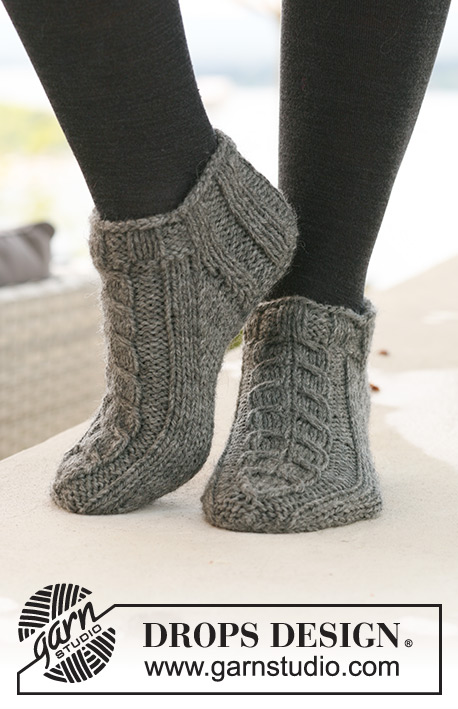
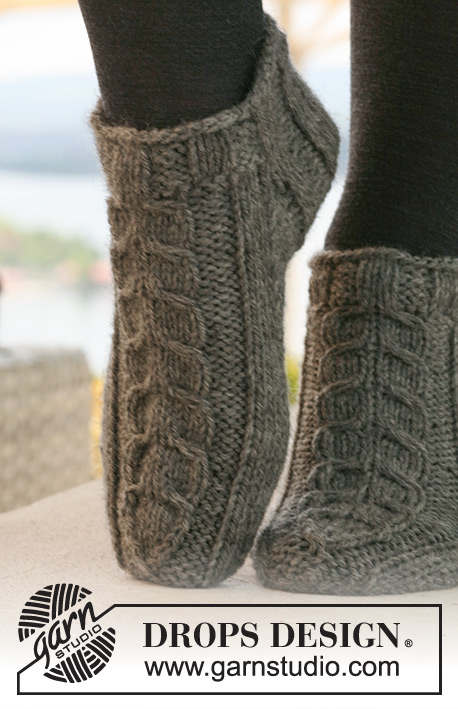
DROPS short Socks with cables in ”Alaska”.
DROPS 125-15 |
|||||||||||||||||||||||||
|
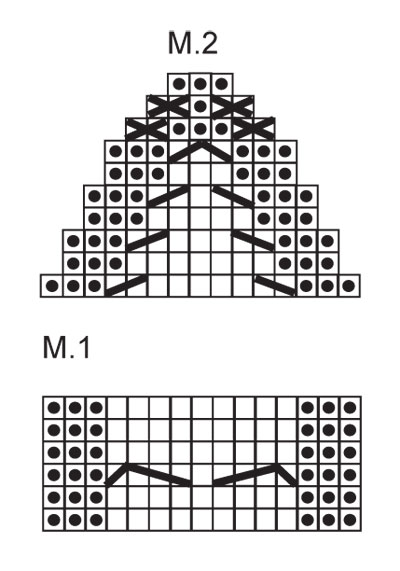
PATTERN: See diagram M.1 (= 15 sts) and M.2 (= 15 sts). Diagram shows the pattern from RS. HEEL DECREASES (worked in stockinette st): Row 1 (= RS): Work row until 6-7-7 sts remain, slip next st as it to K, K1, psso, turn piece. Row 2 (= WS): Work row until 6-7-7 sts remain, slip next st as it to P, P1, psso, turn piece. Row 3 (= RS): Work row until 5-6-6 sts remain, slip next st as it to K, K1, psso, turn piece. Row 4 (= WS): Work row until 5-6-6 sts remain, slip next st as it to P, P1, psso, turn piece. Continue dec like this with 1 less st before each dec until there are 9-11-11 sts on needle. -------------------------------------------------------- SOCK: Worked in the round. Cast on 42-48-48 sts on double pointed needles size 4.5 mm / US 7 with Alaska. K 2 rounds and work 5 rounds rib, K3/P3. On next round work PATTERN - see above - as follows: Continue in rib K3/P3 on the first 18-24-24 sts, K 6-6-6 sts, M.1 (= 15 sts), K 3-3-3 sts. REMEMBER THE GAUGE! Continue like this until piece measures 4 cm / 1½" for all sizes. Now keep the first 21-27-27 sts on needle for heel and slip the last 21-21-21 sts on a stitch holder (= mid upper foot). Work rib back and forth on heel sts for 5-5.5-6 cm / 2"-2¼"-2⅜". NOTE! On last row from WS dec as follows: Size 5/6½ / 35/37: 1 st in the first and last K-section by K2 tog. Size 7½/9 and 9½/10½ / 38/40 and 41/43: 1 st in each of the K4-section by K2 tog. All Sizes: = 19-23-23 sts. Insert a marker in piece. Now work HEEL DECREASES – see above! After heel dec pick up 9-10-12 sts each side of heel and slip the 21-21-21 sts from stitch holder back on needle = 48-52-56 sts. Insert a marker each side of the middle 21-23-25 sts on upper foot (= 3-4-5 sts each side of M.1). Continue in stockinette st and M.1 - AT THE SAME TIME dec each side as follows: K tog into back of loop the 2 last sts before first marker on upper foot and K tog the first 2 sts after second marker on upper foot. Repeat the dec on every other round a total of 6-7-7 times = 36-38-42 sts. Continue until piece measures 18-20-22 cm / 7"-8"-8¾" from marker on heel – adjust to after a full repeat of M.1 (= approx 4-4-5 cm / 1½"-1½"-2" remain). Insert a marker each side with 19-19-21 sts under foot and 17-19-21 sts on upper foot (= 1-2-3 sts each side of M.1). Now dec for toes. READ ALL OF THE FOLLOWING SECTION BEFORE CONTINUING: (NOTE! dec differently under foot and upper foot but make the dec on the same rounds). Dec under foot as follows: K tog into back of loop the 2 sts after marker and K tog the 2 sts before marker. Repeat the dec on every other round a total of 4-4-4 times, then on every round a total of 3-3-4 times. AT THE SAME TIME dec on upper foot as follows: Work M.2 over M.1 (1-2-3 sts each side of M.1 worked in stockinette st as before). Finish with P the 3 last sts on last round for Size 9½/10½ / 41/43 = 10-12-14 sts left on needle. Cut the thread, pull it through remaining sts and fasten. |
|||||||||||||||||||||||||
Diagram explanations |
|||||||||||||||||||||||||
|
|||||||||||||||||||||||||
 |
|||||||||||||||||||||||||
Have you finished this pattern?Tag your pictures with #dropspattern or submit them to the #dropsfan gallery. Do you need help with this pattern?You'll find 16 tutorial videos, a Comments/Questions area and more by visiting the pattern on garnstudio.com. © 1982-2026 DROPS Design A/S. We reserve all rights. This document, including all its sub-sections, has copyrights. Read more about what you can do with our patterns at the bottom of each pattern on our site. |
|||||||||||||||||||||||||


With over 40 years in knitting and crochet design, DROPS Design offers one of the most extensive collections of free patterns on the internet - translated to 17 languages. As of today we count 324 catalogs and 12290 patterns - 12280 of which are translated into English (US/in).
We work hard to bring you the best knitting and crochet have to offer, inspiration and advice as well as great quality yarns at incredible prices! Would you like to use our patterns for other than personal use? You can read what you are allowed to do in the Copyright text at the bottom of all our patterns. Happy crafting!
Post a comment to pattern DROPS 125-15
We would love to hear what you have to say about this pattern!
If you want to leave a question, please make sure you select the correct category in the form below, to speed up the answering process. Required fields are marked *.