
Popular categories
Looking for a yarn?




































Comments / Questions (25)
 Joanna wrote:
Zamiast zszywać dekolt na końcu, można od razu połączyć oczka drutami przerabiając razem jedno oczko z początku i jedno z końca robótki, wygląda to zdecydowanie lepiej.
01.09.2026 - 06:05DROPS Design answered:
Świetny pomysł :) Zachęcamy do modyfikowania wzorów, sama często to robię. Pozdrawiamy!
02.09.2026 - 08:58
 Lisa wrote:
OK, I'll try again. When I'm dividing for body/sleeves and needing to CO 11 ST, what color yarn are they supposed to be? Under "BODY" in the pattern it also says that "The pattern will not fit in the sides...." I'm not sure what to make of that, either. Thank you.
05.08.2026 - 18:20DROPS Design answered:
Hi Lisa, You continue the colour pattern A.2 from the yoke and across the first half of the back piece, then continue the pattern as far as it will go across half the cast-on stitches under the sleeve. When you reach the middle cast-on stitch, this is worked in Dream Blue. Then you need to work out where to start the colour pattern in A.2 again so it is correct after the cast-on stitches on the front piece. Regards, Drops Team
06.08.2026 - 06:19
 Lisa wrote:
Hello DROPS- I'm still looking for help with this pattern. Since you're usually so excellent about replying, I'm wondering if maybe you're on holiday? Thanks for any help....
29.07.2026 - 17:02DROPS Design answered:
Hi Lisa, We have all been on holiday for the summer month of July, so yes som answers have been a bit delayed. I had a look at your question but it is a bit hard to understand. Could you rewrite it a little more clearly? Regards, Drops Team.
30.07.2026 - 07:11
Lisa wrote:
I'm dividing for sleeves on R27 (sz L). When I stop at 55 ST of Chart A.2, I am ending w/ ST #7 (=24 St repeat x 2=48 + 7=55 ST) before placing 70 St on hold. When I CO 11 St ("=in the side under sleeve"), do I continue w/St 8 in the colorway w/these stitches in the chart? That seems like it would be the correct thing to do, but the math on the chart doesn't add up after that. Thanks for any help.
21.07.2026 - 22:35DROPS Design answered:
Dear Lisa, when dividing you can cast on the new stitches under sleeve with both colours as the same row worked on front/back piece but just note that the diagram will not fit on the sides, so you can just cast on the stitches with 2 colours together (so that you don't have to carry one of the colours), then work as many stitches as possible to the sides. Happy knitting!
11.08.2026 - 11:34
 BAB wrote:
Bonjour, Pouvez-vous me dire quel motif je dois réaliser avec les mailles (9 pour la taille S) montées entre dos et devant après séparation des manches ? Merci beaucoup.
20.02.2026 - 13:57DROPS Design answered:
Bonjour Bab, en commençant au milieu des mailles montées sous la manche, tricotez le jacquard comme avant en l'étendant sur ces mailles, avant celles du dos/du devant et jusqu'au milieu sous l'autre manche. Bon tricot!
23.02.2026 - 07:23
Jennifer Carvalho wrote:
If I only want to work A1, would I just go ahead and do the increases as indicated in A2 in the blue without working the pattern? Would that work?
28.04.2025 - 17:37DROPS Design answered:
Dear Mrs Carvalho, yes that should work, this means just work A.2 with blue only but as explained in the written pattern and increase in each A.2 as shown in the diagram. Happy knitting!
29.04.2025 - 09:26
Jennifer Carvalho wrote:
If I only want to work A1, would I just go ahead and do the increases as indicated in A2 in the blue without working the pattern? Would that work?
28.04.2025 - 17:36
Emily Daub wrote:
Is there a size chart? I only see a tool to highlight the size, but not a size chart, finished measurements and expected ease! I could be missing it too, I just spent a while reading and didn’t see it
17.03.2025 - 10:16DROPS Design answered:
Dear Mrs Daub, you will find a chart with all finished measurements in each size at the very bottom of the pattern; read more here. Happy knitting!
17.03.2025 - 15:27
Fiona wrote:
You say to do increases in A.2 but there are no increase arrows on pattern, so where do I increase
10.02.2025 - 08:39DROPS Design answered:
Hi Fiona, The arrows for increasing evenly (when the yoke measures 5 cm) are in A.1. When you have completed A.1, you continue with A.2. There are increases in A.2 but these are yarn overs which are drawn into the diagram as small black circles, i.e., in rows 2, 4, 6, 8 and 10. Happy knitting!
11.02.2025 - 06:58
 Manuela Dietrich wrote:
In der Strickschrift A2 ist ein Fehler. 13 Reihe von oben, das 4. Feld von links muss in Natur ( schwarzes Quadrat) gestrickt werden
11.11.2024 - 13:30
|
||||||||||
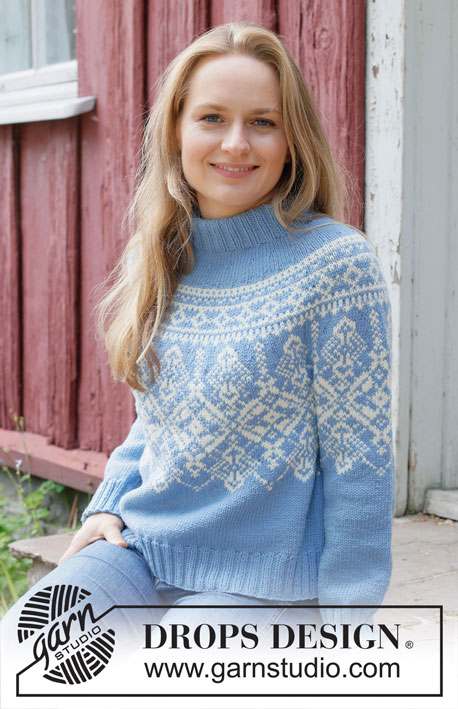
Snow Maiden#snowmaidensweater |
||||||||||
 |
 |
|||||||||
Knitted sweater in DROPS Merino Extra Fine. Piece is knitted top down with round yoke, Nordic pattern and double neck edge. Size: S - XXXL
DROPS 254-16 |
||||||||||
|
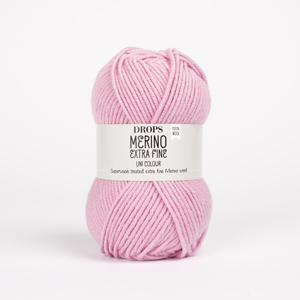
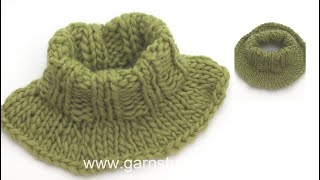
---------------------------------------------------------- EXPLANATION FOR THE PATTERN: ---------------------------------------------------------- PATTERN: See diagrams A.1 and A.2. To avoid the knitting gauge to tighten when working pattern, it is important not to tighten the strands on back side of piece. Switch to a higher needle number when working pattern if the pattern is somewhat tight. INCREASE TIP (evenly): To calculate how to increase evenly, use the total number of stitches on row (e.g. 128 stitches) and divide stitches by number of increases to be done (e.g. 16) = 8. In this example increase by making 1 yarn over after every 8th stitch. On next round work yarn overs twisted to avoid holes. DECREASE TIP: Decrease 1 stitch on each side of marker thread as follows: Work until 3 stitches remain before marker thread and knit 2 together, knit 2 (marker thread is in the middle of these 2 stitches), slip 1 stitch knitwise, knit 1, pass slipped stitch over stitch worked (= 2 stitches decreased). ---------------------------------------------------------- START THE PIECE HERE: ---------------------------------------------------------- SWEATER - SHORT OVERVIEW OF THE PIECE: In this pattern needles of different length have been used, begin with fitting length for number of stitches and switch as needed. Work neck edge and yoke in the round on circular needle from mid back, work top down. When yoke is done, divide piece for body and sleeves. Work body down wards in the round on circular needle while putting the sleeves aside. Then work sleeves downwards in the round on needle. Fold the neck edge double against the wrong side and fasten. DOUBLE NECK EDGE: Cast on 112-116-120-124-128-132 stitches on a circular needle size 4 MM = US 6 with color dream blue in DROPS Merino Extra Fine. Switch to circular needle size 3 MM = US 2.5 (cast on on a larger needle to get an elastic cast-on edge). Work rib in the round (= knit 2/purl 2) for 9 cm = 3½". The neck edge is later folded in towards wrong side and assembled to form a neck edge of approx. 4 cm = 1½". Insert 1 marker after the first 56-58-60-62-64-66 stitches on round (= approx. mid front), measures piece from this marker. YOKE: Switch to circular needle size 4 MM = US 6, work 1 round in stockinette stitch while increasing 16-19-20-25-27-28 stitches evenly - read INCREASE TIP = 128-135-140-149-155-160 stitches. Then work in stockinette stitch in color dream blue. Remember to follow the knitting gauge! When yoke measures 2.5 cm = 1" from marker, increase 16-19-20-25-27-28 stitches evenly – remember INCREASE TIP = 144-154-160-174-182-188 stitches. When yoke measures 5 cm = 2" from marker, increase 36-38-40-50-54-56 stitches evenly – remember INCREASE TIP = 180-192-200-224-236-244 stitches. Now work PATTERN – see explanation above, work first round as follows: Work A.1 in the round on yoke - AT THE SAME TIME on every round marked with arrow in A.1 increase stitches evenly as explained below - remember INCREASE TIP: Arrow-1: Increase 36-40-40-48-52-60 stitches evenly = 216-232-240-272-288-304 stitches. Arrow-2: Increase 32-32-44-52-56-56 stitches evenly = 248-264-284-324-344-360 stitches. Arrow-3: Adjust number of stitches to 247-266-285-323-342-361. When A.1 has been worked, yoke measures approx. 14 cm = 5½" from marker. Then work and increase as shown in A.2 (work 13-14-15-17-18-19 repetitions of A.2 on round). When increases in A.2 are done, there are 312-336-360-408-432-456 stitches on round. Work until piece measures 21-23-25-27-29-31 cm = 8¼"-9"-9¾"-10⅝"-11⅜"-12¼" from marker, now divide piece for body and sleeves. NOTE! A.2 is not done. DIVIDING FOR BODY AND SLEEVES: AT THE SAME TIME as next round is worked divide yoke for body and sleeves as follows: Continue with A.2 over the first 48-52-55-62-67-73 stitches ( = half back piece), slip the next 60-64-70-80-82-82 stitches on a thread for sleeve, cast on 9-9-11-11-11-15 new stitches on needle (= in the side under sleeve), continue with A.2 over the next 96-104-110-124-134-146 stitches (= front piece), slip the next 60-64-70-80-82-82 stitches on a thread for sleeve, cast on 9-9-11-11-11-15 new stitches on needle (= in the side under sleeve), and continue A.2 over the last 48-52-55-62-67-73 stitches. Finish body and sleeves separately. BODY: = 210-226-242-270-290-322 stitches. Continue A.2, make sure that the pattern fits over A.2 from yoke. NOTE! The pattern will not fit in the sides, work pattern as far as possible towards the side on body, and always work middle stitch in each side in color dream blue. When A.2 has been worked, continue with color dream blue. Work until piece measures 42-44-46-45-47-49 cm = 16½"-17¼"-18"-17¾"-18½"-19¼" from marker mid front. Switch to circular needles size 3 MM = US 2.5, work rib (= knit 2/purl 2) while AT THE SAME TIME increasing 22-22-26-26-26-30 stitches evenly on 1st round = 232-248-268-296-316-352 stitches. When rib measures 6-6-6-7-7-7 cm = 2⅜"-2⅜"-2⅜"-2¾"-2¾"-2¾" bind off. Sweater measures 48-50-52-54-56-58 cm = 19"-19¾"-20½"-21¼"-22"-22¾" from marker mid front and approx. 54-56-58-60-62-64 cm = 21¼"-22"-22¾"-23⅝"-24⅜"-25¼" from the top of shoulder. SLEEVES: Slip 60-64-70-80-82-82 sleeve stitches from one thread on to circular needle size 4 MM = US 6 and pick in addition up 1 stitch in each of the 9-9-11-11-11-15 stitches cast on under sleeve = 69-73-81-91-93-97 stitches. Insert 1 marker in the middle of the 9-9-11-11-11-15 new stitches under sleeve. Continue A.2 in the round on needle (the pattern will not fit under sleeve when decreasing) - AT THE SAME TIME when sleeve measures 3 cm = 1⅛" from division, decrease mid under sleeve – read DECREASE TIP and decrease as follows: Decrease 2 stitches every 5½-5½-4-2½-2½-2 cm = 2⅛"-2⅛"-1½"-1"-1"-¾" 6-6-8-12-12-13 times in total = 57-61-65-67-69-71 stitches. When A.2 has been worked, continue in stockinette stitch with color dream blue. Work until sleeve measures 38-36-36-33-32-31 cm = 15"-14¼"-14¼"-13"-12½"-12¼" from division. Switch to double pointed needles size 3 MM = US 2.5 and work rib (= knit 2/purl 2) while AT THE SAME TIME increasing 7-7-7-5-7-5 stitches evenly on 1st round = 64-68-72-72-76-76 stitches. When rib measures 6-6-6-7-7-7 cm = 2⅜"-2⅜"-2⅜"-2¾"-2¾"-2¾" bind off. Sleeve measures approx. 44-42-42-40-39-38 cm = 17¼"-16½"-16½"-15¾"-15¼"-15" from division. ASSEMBLY: Fold the neck edge down on the inside of garment. Fasten neck edge to get a double neck edge. To avoid a tight neck edge that sticks out it is important to keep the seam elastic. |
||||||||||
Diagram explanations |
||||||||||
|
||||||||||
 |
||||||||||
 |
||||||||||
Have you finished this pattern?Tag your pictures with #dropspattern #snowmaidensweater or submit them to the #dropsfan gallery. Do you need help with this pattern?You'll find 20 tutorial videos, a Comments/Questions area and more by visiting the pattern on garnstudio.com. © 1982-2026 DROPS Design A/S. We reserve all rights. This document, including all its sub-sections, has copyrights. Read more about what you can do with our patterns at the bottom of each pattern on our site. |
||||||||||






With over 40 years in knitting and crochet design, DROPS Design offers one of the most extensive collections of free patterns on the internet - translated to 17 languages. As of today we count 333 catalogs and 12525 patterns - 12515 of which are translated into English (US/in).
We work hard to bring you the best knitting and crochet have to offer, inspiration and advice as well as great quality yarns at incredible prices! Would you like to use our patterns for other than personal use? You can read what you are allowed to do in the Copyright text at the bottom of all our patterns. Happy crafting!
Post a comment to pattern DROPS 254-16
We would love to hear what you have to say about this pattern!
If you want to leave a question, please make sure you select the correct category in the form below, to speed up the answering process. Required fields are marked *.