
Popular categories
Looking for a yarn?


Comments / Questions (40)
![]() Veronique wrote:
Veronique wrote:
Bonjour, je ne comprends pas à partir de où placer les marqueurs, chapitre empiècement, taille S. Pourquoi la manche 1 est elle après 21 mailles et l autre manche après 26 mailles ? Ensuite Tour 1, où augmente t on la 1ere maille ?
01.12.2025 - 22:10DROPS Design answered:
Bonjour Véronique, la maille avec le marqueur est celle au milieu de chaque raglan, d'abord de A.1 puis de A.2, le début du tour commence par les mailles de la manche = 16 m + les 5 premières mailles de A.1 = 21, la 2ème manche aura également 16 m: 26 m entre les marqueurs moins les 5 dernières mailles de A.1 après le devant moins les 5 premières mailles de A.1 du dos = `16 m. Au 1er tour, vous augmentez pour le raglan dès le début du tour (car le tour se termine par A.1 et que l'on doit augmenter après/avant chaque A.1). Bon tricot!
02.12.2025 - 09:45
![]() Saskia wrote:
Saskia wrote:
Ik begrijp het begin na de boord niet… Het begin van de naald is op de rechter schouder achter. Voeg 1 markeerdraad in na de eerste 32-32-33-38-40-42 steken op de naald (= ongeveer midden voor), meet het werk vanaf deze markeerdraad. Brei ik de 1e 32 steken wel of niet en begint het patroon dan na deze 32 steken of bij het begin van de naald?
10.11.2025 - 15:56DROPS Design answered:
Dag Saskia,
Bij het invoegen van deze markeerdraad brei je de steken niet. Het begin van de naald is nog steeds dezelfde plek als waar je was.
10.11.2025 - 20:44
![]() Jozefien wrote:
Jozefien wrote:
Het verdelen van de steken snap ik niet: 38 steken vanaf de rechterschouder (??????) is ongeveer middenvoor. Maar vanaf waar begin ik dan te tellen voor het 'in de draad' invoegen van vier markeerdraden ? Vanaf de rechterschouder ? Vanaf middenachter ? Vanaf middenvoor waar die eerste markeerdraad al zit ? Na tien keer lezen is het mij nog steeds niet duidelijk, maar u kunt me vast vertellen hoe het moet.
15.10.2025 - 17:55DROPS Design answered:
Dag Jozefien,
De markeerdraad die je ongeveer midden voor invoegt is enkel voor het opmeten van de lengte van het kledingstuk, het komt dus niet zo precies waar deze zit. Het is misschien ook handig om hiervoor een andere kleur te geven dan de markeerdraden die je in gaat voegen voor de raglan. Dus ongeveer 38 steken vanaf het begin van de toer voeg je deze markeerdraad voor het opmeten in. Dan ga je verder met het stuk voor de pas. De markeerdraden die je dan voor de raglan voeg je in een steek (niet tussen 2 steken).
21.10.2025 - 21:26
![]() Mistere wrote:
Mistere wrote:
Ces marqueurs doivent être la maille centrale de A.1 Compter 21mailles (= manche), placer 1 marqueur dans la maille suivante, compter 20mailles (= devant), placer 1 marqueur dans la maille suivante, compter 26 mailles (= manche), placer 1 marqueur dans la maille suivante, compter 25 mailles (= dos), placer 1 marqueur dans la dernière maille. je ne comprends pas la place du dernier marqueur. Pourquoi n'est ce pas sur la 21e maille ? Il ya bien des torsades dans le dos ?
04.10.2025 - 23:16DROPS Design answered:
Bonjour Mme Mistere, les torsades se tricotent sur le devant et le dos de la même façon; vous avez ensuite 16 mailles jersey pour chaque manche, 5 mailles jersey pour le devant et pour le dos et les 11 m de A.1 (augmentées à 17 mailles) entre les manches et le devant le dos. Bon tricot!
06.10.2025 - 07:41
![]() Lena wrote:
Lena wrote:
Hej, jag skulle föredra att sticka 17 slätstickade maskor istället för flätor, kan det fungera eller blir det fel antal maskor allt som allt?
03.10.2025 - 14:02DROPS Design answered:
Hej Lena. Eftersom flätorna gör att arbetet drar ihop sig så kommer arbetet att bli bredare om du väljer att sticka slätstickning istället för flätor. Vill du inte ha flätor så hade jag rekommenderat att välja ett liknande mönster utan flätor istället. Mvh DROPS Design
07.10.2025 - 08:07
![]() Birgitte Pedersen wrote:
Birgitte Pedersen wrote:
Hej. Efter hvad jeg kan se, er der en fejl. Når jeg i str l har jeg 116 masker, men når jeg starter på mønster A1, skal der ved sammentællingen være 135 masker, for at få det til at gå op, Der mangler 19 masker, for at få mønsteret til at gå op. Hvad gør jeg.
01.10.2025 - 13:37DROPS Design answered:
Hei Birgitte. I str. L skal du ha 100 masker etter halskanten / når du starter på diagram A.1, og kan ikke se noen steder der maskeantallet skal være 135. Er det riktig oppskrift du har lagt dit spørsmål til (DROPS 254-5)? mvh DROPS Design
06.10.2025 - 14:37
![]() Maria wrote:
Maria wrote:
Buonasera. Mi pare ci sia un errore nella spiegazione del Giro 3 (dopo che si è arrivsti ad avere 168 maglie per la taglia S). C'è scritto: "lavorare a maglia rasata e motivo come prima e aumentare 1 maglia PRIMA della prima ripetizione di A2", ma credo che l'aumento vada fatto DOPO la prima ripetizione di A2. Potete per favore confermarmi che è così? Grazie Maria
12.09.2025 - 22:29DROPS Design answered:
Buonasera Maria, grazie per la segnalazione: abbiamo corretto il testo. Buon lavoro!
13.09.2025 - 22:09
![]() Maibritt wrote:
Maibritt wrote:
Jeg strikkede str L og jeg har løst problemet, men det kan måske hjælpe de næste, der vil strikke den. Markeringerne efter halskanten er ikke rigtige. Den sidste markering kommer til at sidde efter mønsteret er færdig og ikke midt i mønsteret (vrangmasken), så vidt jeg kunne regne ud. Jeg har strikket blusen færdig og den er meget flot.
27.08.2025 - 10:52
![]() Maibritt wrote:
Maibritt wrote:
Hej. Jeg håber på, at i kan hjælpe mig med opskriften på denne skønne trøje. Jeg er kommet til 1. omg i bærestykket og har nu forsøgt i flere timer, at tælle og trævle op. 😢 Jeg er en habil strikker, men kan simpelthen ikke få det til at passe. Er der en fejl i opskriften eller er det bare mig, der skal finde en anden opskrift? På forhånd tak for hjælpen.
07.08.2025 - 10:22DROPS Design answered:
Hej Maibritt. Vad är det som inte passar och vilken storlek stickar du? Mvh DROPS Design
27.08.2025 - 09:30
![]() Maria wrote:
Maria wrote:
Czy karczek w sumie ma mieć 15 łańcuchów. Robiąc próbkę żeby otrzymać te wymiary musiałam użyć druty 3.5cm. Pomimo to karczek wychodzi mi dłuższy niż 22 cm. Co z tym zrobić. Czy dłuższy będzie ok?
16.02.2025 - 23:14DROPS Design answered:
Witaj Mario, zawsze dostosowuj wymiary do siebie. Jak widzisz że karczek będzie za długi, to zakończ go wcześniej. Zwróć tylko uwagę na ogólną liczbę oczek, być może trzeba będzie dodać więcej oczek pod rękawami. Pozdrawiamy!
17.02.2025 - 12:52
|
|||||||||||||||||||||||||||||||
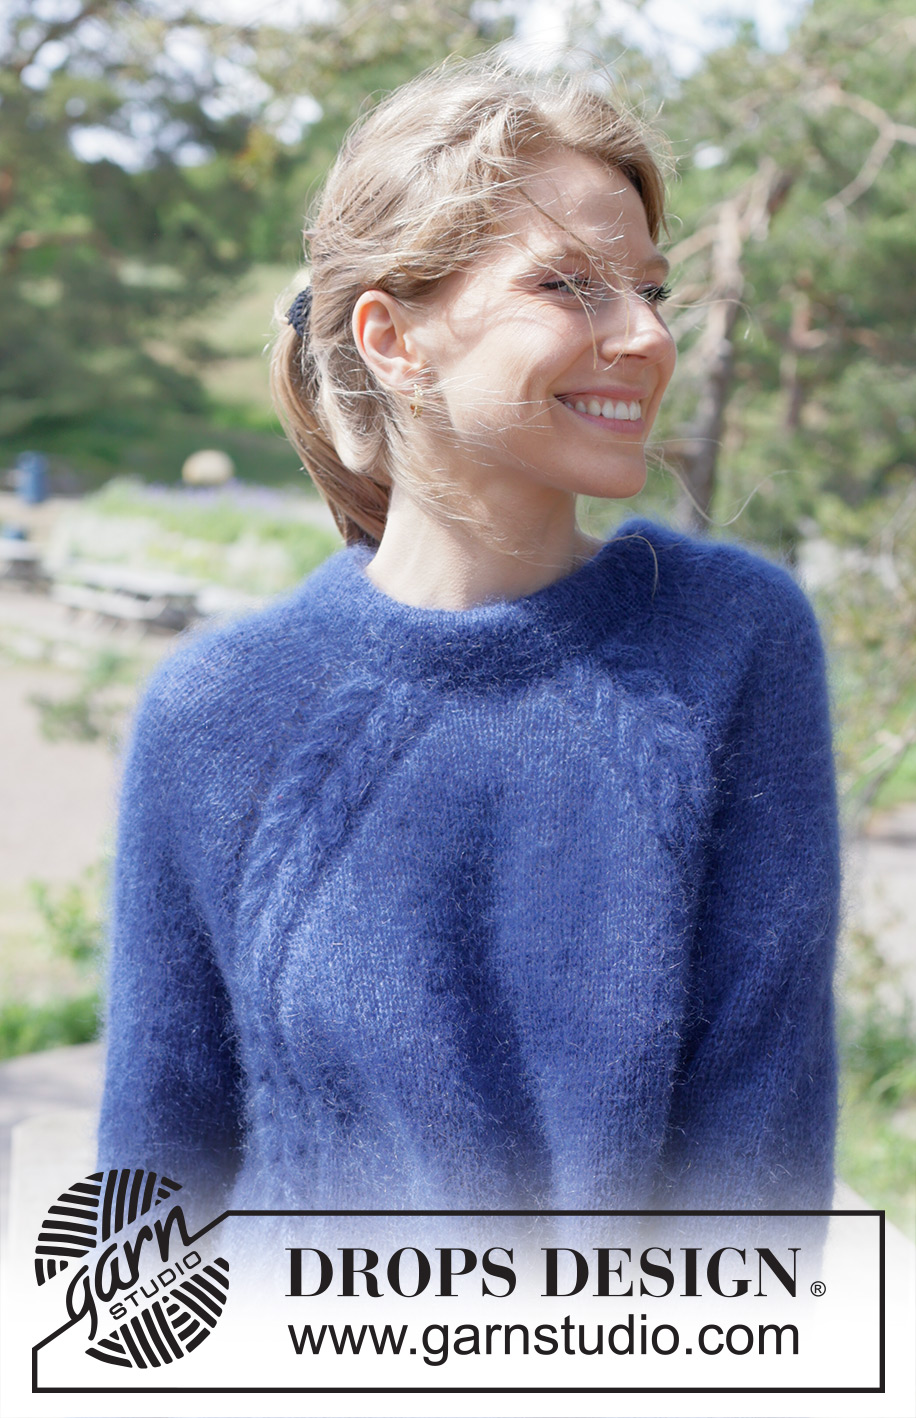
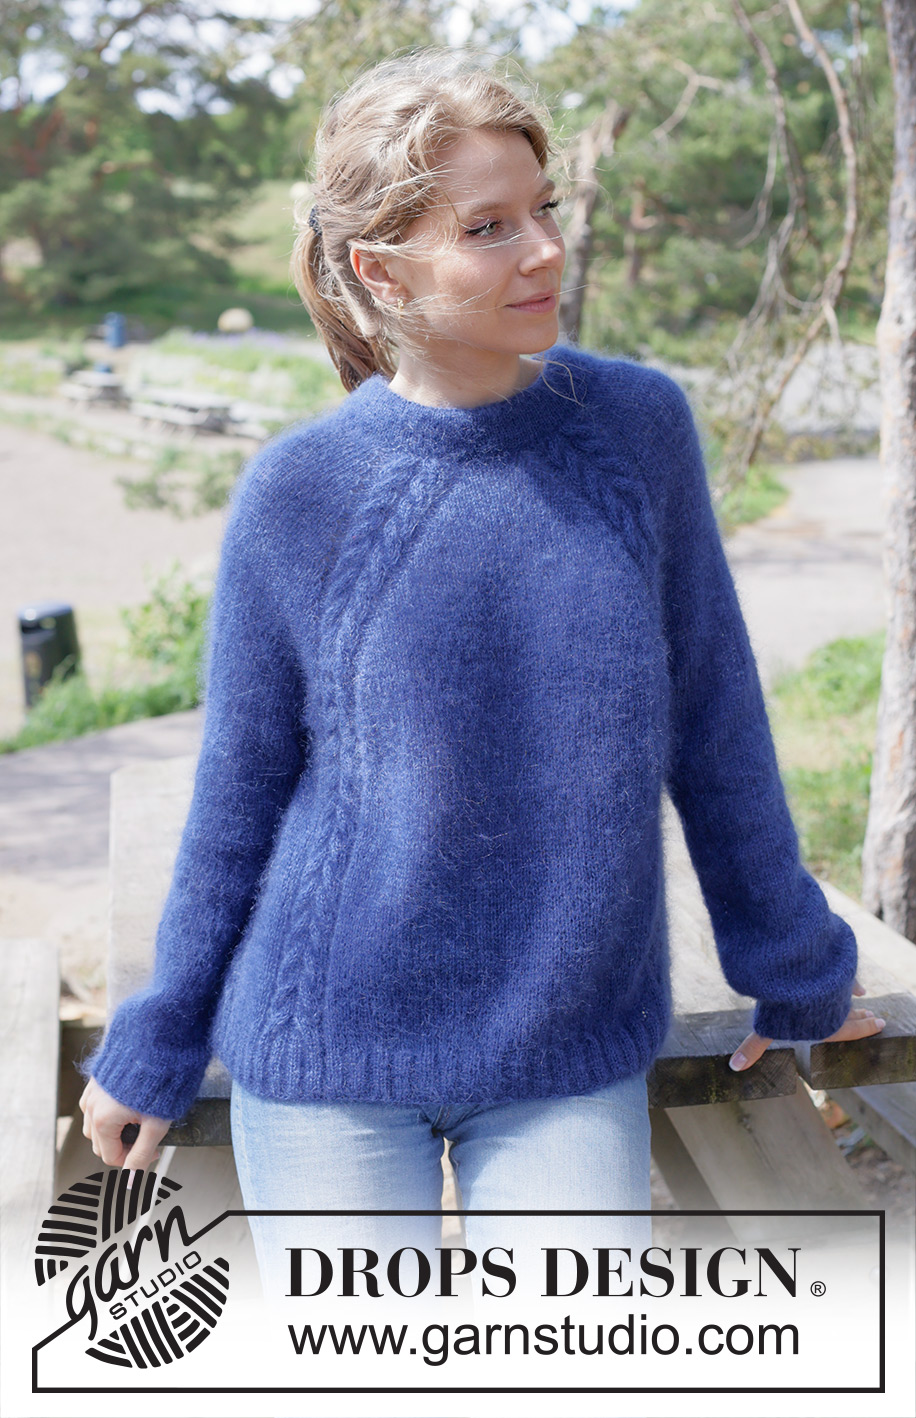
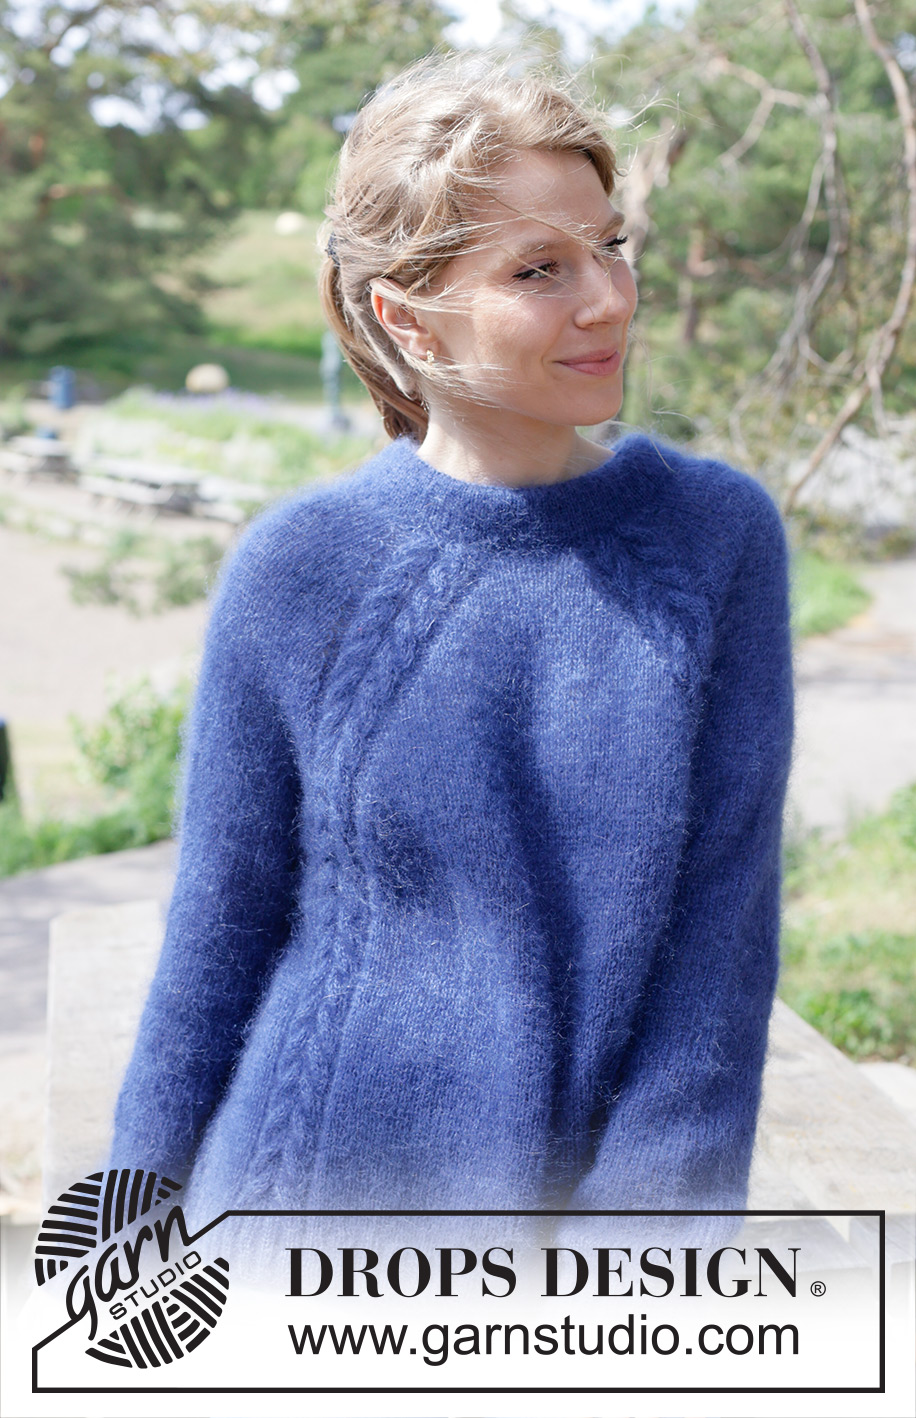
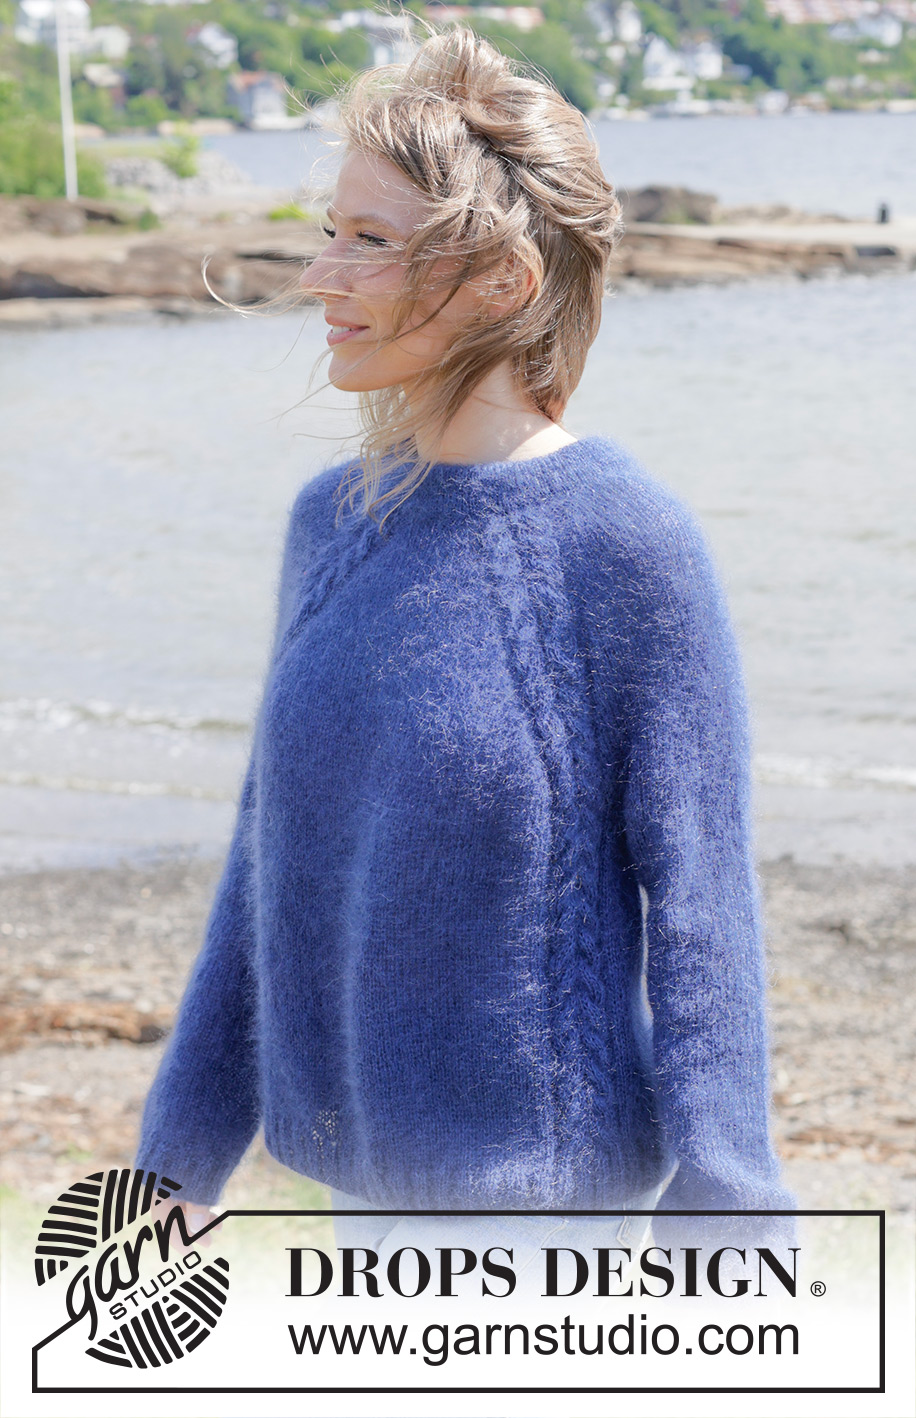
Sea Feather#seafeathersweater |
|||||||||||||||||||||||||||||||
 |
 |
||||||||||||||||||||||||||||||
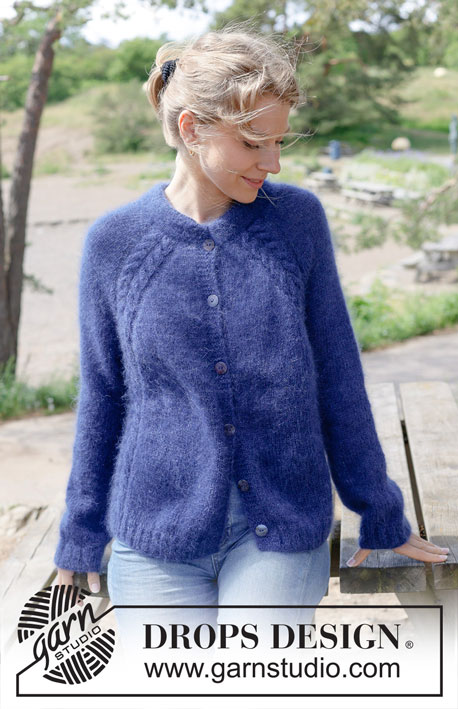
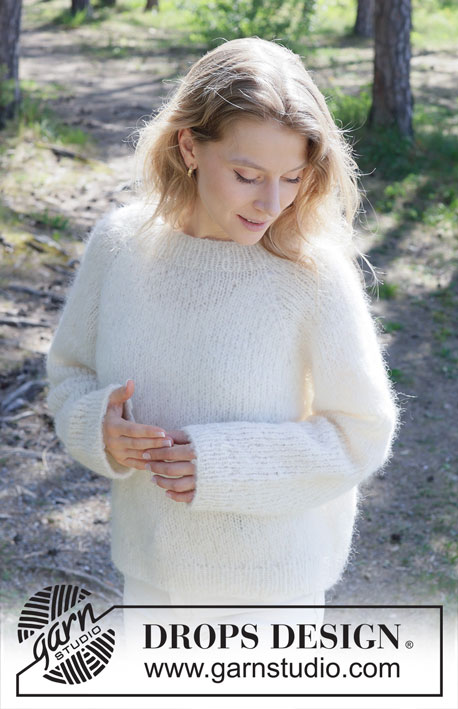
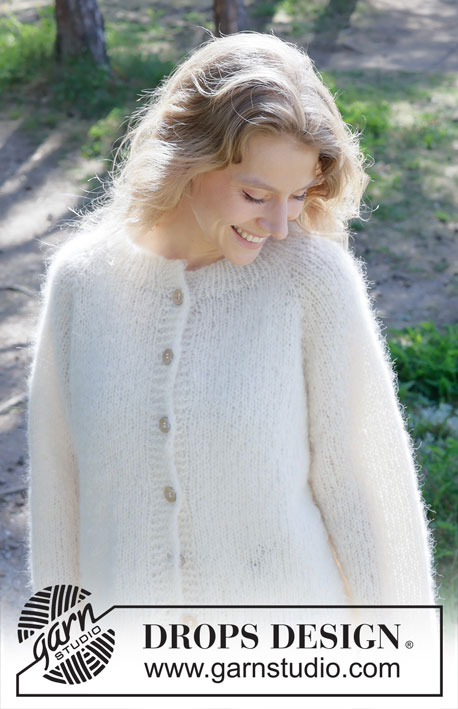
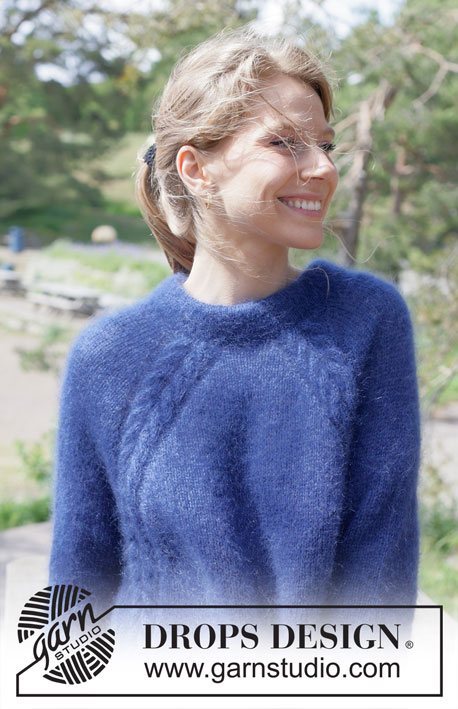
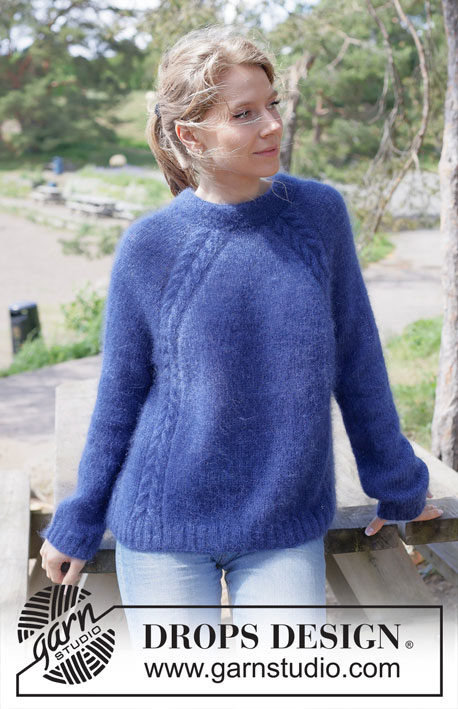
Knitted sweater in 2 strands DROPS Kid-Silk. Piece is knitted top down with raglan, cables and double neck edge. Size: S - XXXL
DROPS 254-5 |
|||||||||||||||||||||||||||||||
|
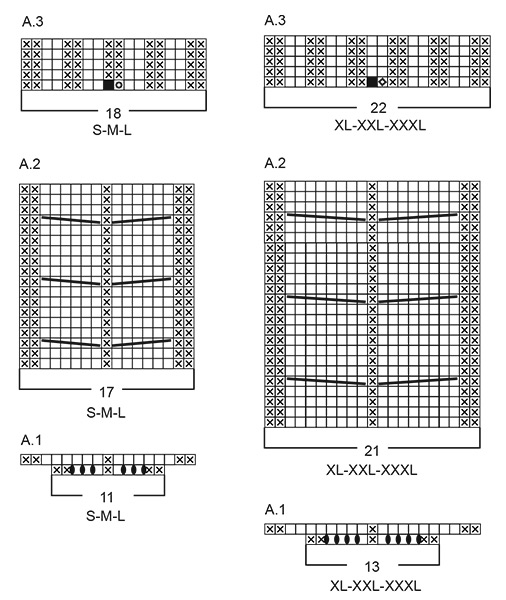
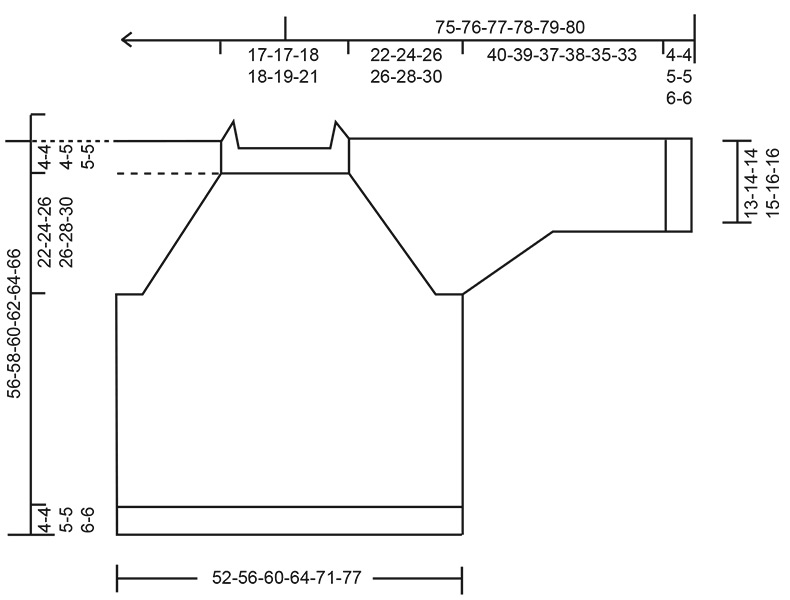
---------------------------------------------------------- EXPLANATION FOR THE PATTERN: ---------------------------------------------------------- PATTERN: See diagrams A.1 to A.3. Choose diagram for correct size. RAGLAN: Increase 1 stitch by making 1 yarn over, on next round knit yarns over as explained below: BEFORE A.1/A.2: Slip stitch off left needle and put it back on left needle but the opposite way (insert left needle in from behind when slipping it back on needle). Knit yarn overs in front loop of stitches to avoid holes. Then work the new stitches in stockinette stitch. AFTER A.1/A.2: Knit yarn overs in back loop of stitches to avoid holes. Then work the new stitches in stockinette stitch. INCREASE TIP: Increase 1 stitch by making 1 yarn over, on next round work yarn over twisted to avoid holes. DECREASE TIP: Decrease 1 stitch on each side of marker thread as follows: Work until 3 stitches remain before marker thread and knit 2 together, knit 2 (marker thread is in the middle of these 2 stitches), slip 1 stitch knitwise, knit 1, pass slipped stitch over stitch worked (= 2 stitches decreased). ---------------------------------------------------------- START THE PIECE HERE: ---------------------------------------------------------- SWEATER - SHORT OVERVIEW OF THE PIECE: In this pattern needles of different length have been used, begin with fitting length for number of stitches and switch as needed. Work neck edge and yoke in the round on circular needle from right shoulder back, and work top down. When yoke is done, divide piece for body and sleeves. Work body down wards in the round on circular needle while putting the sleeves aside. Then work sleeves downwards in the round on needle. Fold the neck edge double against the wrong side and fasten. If 0 is given for the chosen size, it means that you skip the information until next information. NECK EDGE: Cast on 96-96-100-108-112-116 stitches on circular needle size 4.5 MM = US 7 with 2 strands DROPS Kid-Silk. Switch to circular needle size 3 MM = US 2.5 (cast on on a larger needle to get an elastic cast-on edge). Work in stockinette stitch for 4-4-4-5-5-5 cm = 1½"-1½"-1½"-2"-2"-2". Then purl 1 round (= folding edge). Then work in stockinette stitch until neck edge measures 8-8-8-10-10-10 cm = 3⅛"-3⅛"-3⅛"-4"-4"-4" from cast on edge AT THE SAME TIME increase 0-0-0-8-12-16 stitches evenly of last row= 96-96-100-116-124-132 stitches. Later the neck edge is folded in towards wrong side and assembled to form a neck edge of approx. 4-4-4-5-5-5 cm = 1½"-1½"-1½"-2"-2"-2". Beginning of round is at right shoulder at the back. Insert 1 marker after the first 32-32-33-38-40-42 stitches on round (= approx. mid front), measures piece from this marker. YOKE: Switch to circular needle size 4.5 MM = US 7 and insert 4 markers in piece without working the stitches, insert markers in a stitch, and markers should later fit middle stitch in A.1 and A.2. Count 21-21-21-24-24-24 stitches (= sleeve), insert 1 marker in next stitch, count 20-20-22-26-30-34 stitches (= front piece), insert 1 marker in next stitch, count 26-26-26-30-30-30 stitches (= sleeve), insert 1 marker in next stitch, count 25-25-27-32-36-40 stitches (= back piece), insert 1 marker in last stitch. Now work PATTERN and increase for RAGLAN - read explanation above and work as follows: ROUND 1: Increase 1 stitch for raglan, work 16-16-16-18-18-18 stitches in stockinette stitch, increase 1 stitch for raglan, work A.1, increase 1 stitch for raglan, work 10-10-12-14-18-22 stitches in stockinette stitch, increase 1 stitch for raglan, work A.1, increase 1 stitch for raglan, work 16-16-16-18-18-18 stitch in stockinette stitch, increase 1 stitch for raglan, work A.1, increase 1 stitch for raglan, work 10-10-12-14-18-22 stitches in stockinette stitch, increase 1 stitch for raglan, work A.1 (= 8 stitches increased for raglan and 24-24-24-32-32-32 stitches increased in A.1) = 128-128-132-156-164-172 stitches. ROUND 2: Work in stockinette stitch and A.1 as before, work the new stitches in stockinette stitch (remember to twist yarn overs as explained above). ROUND 3: Work in stockinette stitch as before, work A.2 over stitches in A.1 and increase for raglan as follows: Increase 1 stitch after/before every A.2 (= 8 stitches increased). ROUND 4: Work in stockinette stitch and A.2 as before, work the new stitches in stockinette stitch (remember to twist yarn overs). Continue A.2 and work 3rd and 4th ROUND 5-6-8-12-11-9 times (= 10-12-16-24-22-18 rounds worked) = 168-176-196-252-252-244 stitches on needle. Remember to follow the knitting gauge! Then work and increase as follows: ROUND 1: Work in stockinette stitch and pattern as before and increase 1 stitch after and before every A.2 (= 8 stitches increased). ROUND 2: Work in stockinette stitch and pattern as before, work the new stitches in stockinette stitch. ROUND 3: Work in stockinette stitch and pattern as before and increase 1 stitch over after 1st repetition of A.2, before 2nd repetition of A.2, after 3rd repetition of A.2 and before 4th repetition of A.2, i.e. increase only on front piece and back piece, do not increase on sleeves (= 4 stitches increased). ROUND 4: Work in stockinette stitch and pattern as before, work the new stitches in stockinette stitch. Work 1st to 4th ROUND 10-11-11-9-11-13 times (= 40-44-44-36-44-52 rounds worked). All increases for raglan are now done, you have increased 26-29-31-31-34-36 times in total have been done on front piece and back piece and 16-18-20-22-23-23 times on sleeve = 288-308-328-360-384-400 stitches on needle and piece measures approx. 22-24-26-26-28-30 cm = 8¾"-9½"-10¼"-10¼"-11"-11¾" from marker mid front. Now divide yoke for body and sleeves. DIVIDING FOR BODY AND SLEEVES: AT THE SAME TIME as next round is worked divide yoke for body and sleeves as follows: Slip the first 48-52-56-62-64-64 stitches on a thread for sleeve, cast on 10-10-12-14-16-18 new stitches on needle (= in the side mid under sleeve), work 96-102-108-118-128-136 stitches as before (= front piece), slip the next 48-52-56-62-64-64 stitches on a thread for sleeve, cast on 10-10-12-14-16-18 new stitches on needle (= in the side mid under sleeve) and work the last 96-102-108-118-128-136 stitches as before (= back piece). Work body and sleeves separately and beginning of round is in the transition between body and sleeve. BODY: = 212-224-240-264-288-308 stitches. Work in stockinette stitch and A.2 as before (work the new stitches mid under sleeves in stockinette stitch) until piece measures 48-50-51-52-53-55 cm = 19"-19¾"-20"-20½"-21"-21⅝" from marker mid front. Work 1 round as before while increasing stitches evenly – read INCREASE TIP and increase as follows: Increase 0-0-2-0-2-0 stitches evenly in each side (between every A.2 in each side) and increase 12-10-12-14-16-16 stitches evenly on front piece and back piece (increase between every A.2 on front piece and back piece) = 236-244-268-292-324-340 stitches. Switch to circular needle size 3 MM = US 2.5 and work rib as follows: * knit 2, purl 2 *, work from *-* over the first 8-8-12-12-16-16 stitches, knit 2, work A.3 over stitches in A.2, * knit 2, purl 2 *, work from *-* until 2 stitches remain before A.2, knit 2, work A.3 over stitches in A.2, * knit 2, purl 2 *, work from *-* over the next 8-8-12-12-16-16 stitches, knit 2, work A.3 over stitches in A.2, * knit 2, purl 2 *, work from *-* until 2 stitches remain before A.2, knit 2, work A.3 over stitches in A.2 = 240-248-272-296-328-344 stitches. Work rib like this for 4-4-5-5-6-6 cm = 1½"-1½"-2"-2"-2⅜"-2⅜". Loosely bind off. Sweater measures 52-54-56-57-59-61 cm = 20½"-21¼"-22"-22½"-23¼"-24" from marker mid front and approx. 56-58-60-62-64-66 cm = 22"-22¾"-23⅝"-24⅜"-25¼"-26" from the top of shoulder. SLEEVES: Slip 48-52-56-62-64-64 sleeve stitches from one thread on to circular needle size 4.5 MM = US 7 and pick in addition up 1 stitch in each of the 10-10-12-14-16-18 stitches cast on under sleeve = 58-62-68-76-80-82 stitches. Insert 1 marker thread in the middle of the 10-10-12-14-16-18 new stitches under sleeve - round begins at the marker thread. Work in stockinette stitch in the round on needle - AT THE SAME TIME when sleeve measures 1 cm = ⅜" from division, decrease mid under sleeve – read DECREASE TIP and decrease as follows: Decrease 2 stitches total 1-1-2-4-6-6 times on every other round, then decrease 2 stitches every 2½-2½-2-1½-1-1 cm = 1"-1"-¾"-½"-⅜"-⅜" 4-5-6-7-6-6 times in total = 48-50-52-54-56-58 stitches. Work until sleeve measures 40-39-37-38-35-33 cm = 15¾"-15¼"-14½"-15"-13¾"-13" from division. Switch to double pointed needles size 3 MM = US 2.5 and work rib (= knit 2/purl 2) while AT THE SAME TIME increasing 8-10-8-10-8-10 stitches evenly on 1st round = 56-60-60-64-64-68 stitches. When rib measures 4-4-5-5-6-6 cm = 1½"-1½"-2"-2"-2⅜"-2⅜" bind off somewhat loosely. Sleeve measures approx. 44-43-42-43-41-39 cm = 17¼"-17"-16½"-17"-16⅛"-15¼" from division. ASSEMBLY: Fold edge at the top of neck down on the inside of garment. Fasten edge to get a double neck edge. To avoid a tight neck edge that sticks out it is important to keep the seam elastic. |
|||||||||||||||||||||||||||||||
Diagram explanations |
|||||||||||||||||||||||||||||||
|
|||||||||||||||||||||||||||||||
 |
|||||||||||||||||||||||||||||||
 |
|||||||||||||||||||||||||||||||
Have you finished this pattern?Tag your pictures with #dropspattern #seafeathersweater or submit them to the #dropsfan gallery. Do you need help with this pattern?You'll find 31 tutorial videos, a Comments/Questions area and more by visiting the pattern on garnstudio.com. © 1982-2026 DROPS Design A/S. We reserve all rights. This document, including all its sub-sections, has copyrights. Read more about what you can do with our patterns at the bottom of each pattern on our site. |
|||||||||||||||||||||||||||||||


With over 40 years in knitting and crochet design, DROPS Design offers one of the most extensive collections of free patterns on the internet - translated to 17 languages. As of today we count 324 catalogs and 12290 patterns - 12280 of which are translated into English (US/in).
We work hard to bring you the best knitting and crochet have to offer, inspiration and advice as well as great quality yarns at incredible prices! Would you like to use our patterns for other than personal use? You can read what you are allowed to do in the Copyright text at the bottom of all our patterns. Happy crafting!
Post a comment to pattern DROPS 254-5
We would love to hear what you have to say about this pattern!
If you want to leave a question, please make sure you select the correct category in the form below, to speed up the answering process. Required fields are marked *.