
Popular categories
Looking for a yarn?


Comments / Questions (29)
![]() Kit wrote:
Kit wrote:
Till Storlek M, är det när man får ihop 47 maskor i ärm då man behöver inte öka mera? Stort tack !
22.04.2026 - 14:28DROPS Design answered:
Hej Kit, ja i størrelse M skal du have 47 masker til hvert ærme, da er du færdig med udtagningerne :)
23.04.2026 - 14:12
![]() Kit wrote:
Kit wrote:
Man får ihop 76 maskor(9+9 +58maskor) Sedan sätter 4 markörer (10 +15 +22 +15 +10m) 72 maskor, 4 maskor kvar??? Missade jag något?
16.03.2026 - 22:34DROPS Design answered:
Hej Kit, du sætter markøren i de 4 masker du har kvar :)
08.04.2026 - 12:25
![]() Venetia wrote:
Venetia wrote:
First of all does the pattern recommend using two yarns throughout the pattern? Then I have a problem because I want to knit in Raspberry Rose Alpaca but can only find kid-silk in Raspberry which looks like a slightly different colour on screen.
21.02.2026 - 19:58DROPS Design answered:
Hi Venetia, If you work with Alpaca, then you just need 1 strand of this yarn. It is the combination of Nord and Kid Silk which uses 2 strands as these yarns are thinner than Drops Alpaca. Regards, Drops Team.
23.02.2026 - 07:18
![]() Frauke wrote:
Frauke wrote:
Model: DROPS 250-6: Det står at man trenger Drops Alpaca og Drops Kid-silk. Men i oppskriften står ikke nærmere forklart hvordan man skal bruke dem? Skal man strikke med begge garn samtidig? Eller hvilke deler skal strikkes med hvilket garn? Takk for oppklaringen :)
06.09.2025 - 22:12DROPS Design answered:
Hei Frauke, Hele plagg er strikket med 2 tråder holdt sammen (1 tråd av hvert garn). Hilsen Drops team.
08.09.2025 - 07:00
![]() Katleen wrote:
Katleen wrote:
Thanks, So I have to do 2 increases after de 10 first st, one for de v neck and one for the raglan … ?
04.08.2025 - 02:17DROPS Design answered:
Dear Katleen, for the V-neck increases you work 1 increase after/before 9 band stitches on each side (you increase 1 time on each side of the piece). At the same time you increase on each side of each marker for the raglan (so in the first row the V-neck and raglan increases will be very closely located, but they will spread apart as you increase the number of stitches at the side of the marker). The increases for the V-neck are repeated every 4th row, while the increases for the raglan are worked on every row from the right side (every 2nd row). Happy knitting!
05.08.2025 - 12:15
![]() Katleen wrote:
Katleen wrote:
I don’t understand when I have to start with the V neck. Can anebody help me please … thanks ! Katleen
01.08.2025 - 02:23DROPS Design answered:
Dear Katleen, you start with the V-neck at exactly the same row as you start with the RAGLAN increases. So you will be working the RAGLAN increases as you increase for the V-neck as well. For example, you start increasing every other row for the RAGLAN while you increase every 4th row for the V-neck. So you work: 1 RAGLAN + V-NECK increase row, 1 normal row from the wrong side , 1 RAGLAN increase only row, 1 normal row from the wrong side. And you repeat these 4 rows, (unless the RAGLAN increases change for your size). Happy knitting!
04.08.2025 - 00:27
![]() Inès wrote:
Inès wrote:
Bonjour Lorsque l\'on augmente le raglan, faut-il ajouter en plus une maille d\'augmentation pour le point fantaisie ? Le schéma ci dessous est il correct : Point fantaisie/ Augmentation / augmentation / raglan/ augmentation Merci d\'avance
19.05.2025 - 22:39DROPS Design answered:
Bonjour Inès, lorsque vous devez augmenter pour le raglan des manches, vous tricotez ainsi: mailles des raglans, augmentation manche, point fantaisie, augmentation manche, mailles des raglans. En fonction de la taille et des rangs, vous devrez augmenter pour les manches soit tous les 2 rangs soit tous les 4 rangs. (Les augmentations des devants et du dos se font tous les 2 rangs: devant gauche / augmentation/ mailles du raglan. Pour le dos: mailles du raglan / augmentation / dos/augmentation / mailles du raglan. Et pour le devant droit: mailles du raglan / augmentation / devant droit. Bon tricot!
20.05.2025 - 10:35
![]() Réjane wrote:
Réjane wrote:
Bonjour, j’ai du mal a commencer le gilet car je ne comprends pas les explications pour réaliser les bordures devant droit et gauche. Serait-il possible de m’expliquer cette étape de manière compréhensible ou de me rediriger vers un tuto vidéo de cette dernière?
16.03.2025 - 10:20DROPS Design answered:
Bonjour Réjane, la bordure des devants se tricote en côtes 1/1 avec 1 m point mousse sur le côté ainsi: Bordure devant droit (vu sur l'endroit): (1 m env, 1 m end)x4 + 1 m point mousse (= 9 m) et Bordure devant gauche: 1 m point mousse+ (1 m end, 1 m env)x4. Tricotez les bordures séparément puis, vous monterez les mailles de l'encolure (et des épaules) entre les mailles de bordure. Dans cette vidéo, nous montrons une technique similaire (sauf qu'il y a des rangs raccourcis pour les bordures de la vidéo et que vous n'en faites pas ici). Bon tricot!
17.03.2025 - 09:30
![]() Grosjean B wrote:
Grosjean B wrote:
Explications pour les manches raglan :quand on a terminé le diagramme A1 et qu'on a 47 m. , comment continuer la suite surtout qu'on n'a pas encore le nombre de mailles pour le dos et le devant ???
01.03.2025 - 11:32DROPS Design answered:
Bonjour Mme Grosjean, continuez le point ajouré exactement comme avant: 5 rangs jersey entre chaque nouveau motif ajouré, puis alignez les points ajourés sur l'avant-dernier motif ajouré pour qu'ils soient en quinconce comme avant. Bon tricot!
03.03.2025 - 08:49
![]() Eva wrote:
Eva wrote:
Hallo, die Zunahmen und die Teilung sind mir nicht klar. Ich stricke S. Es sind 76 Maschen am Anfang: 10,15,22,15,10 plus 4 markierte Maschen (mM). Dann V und Raglan: 34,43,50,43,34 +4mM. Dann 8/4=44,53,70,53,44 +4mM. Warum dann Aufteilung in 47,49,76,49,46? Sind das dann die zu erreichenden Maschen in jedem Abschnitt? Wie kommt man da hin? Und was bedeutet bei den Ärmeln „Muster in der Höhe richtig fortsetzen? Gleicher Abstand?
15.01.2025 - 22:21DROPS Design answered:
Liebe Eva, die 2 ersten + die 2 letzten Maschen von beiden Ärmel werden jetzt zum Vorder- /Rückenteil gehören, um die richtigen Breiten zu behalten. So stricken Sie die genaue Anzahl wie beschrieben, so haben Sie die Aufteilung symmetrisch. Viel Spaß beim Stricken!
16.01.2025 - 16:28
|
|||||||||||||
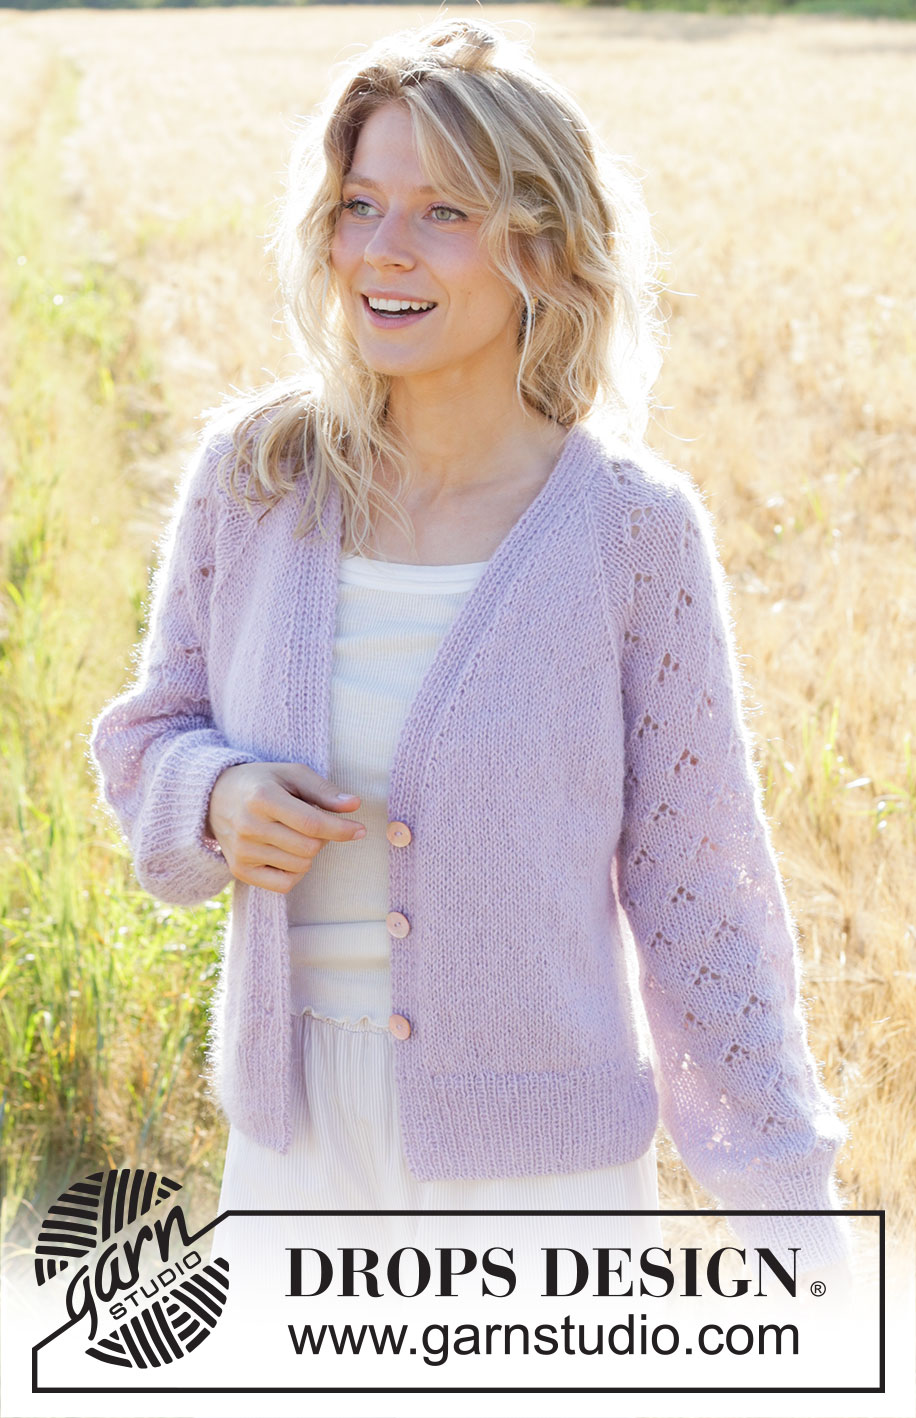
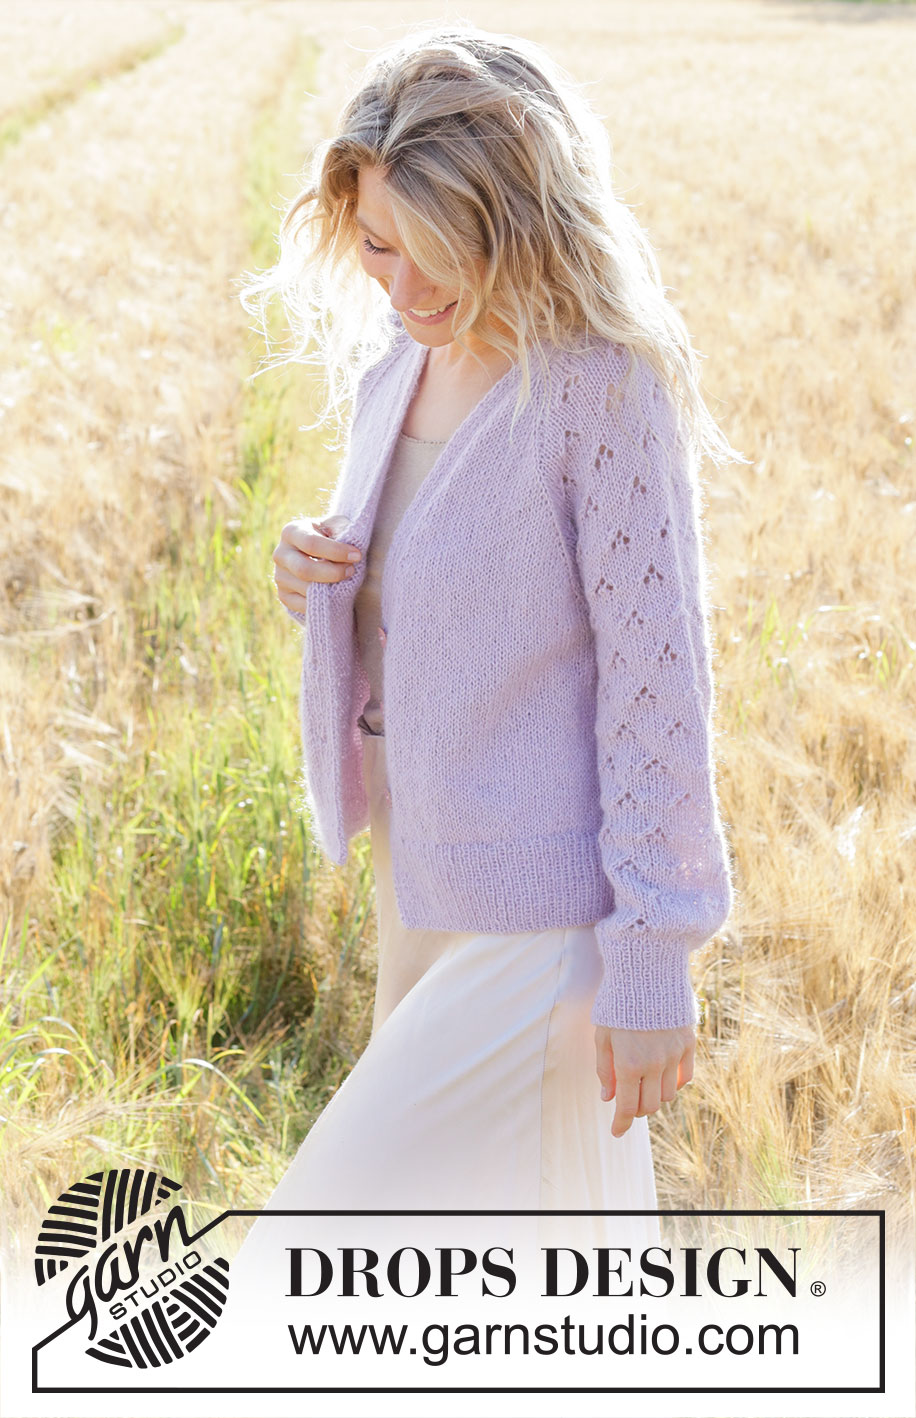
Afternoon in Provence Cardigan#afternooninprovencecardigan |
|||||||||||||
 |
 |
||||||||||||
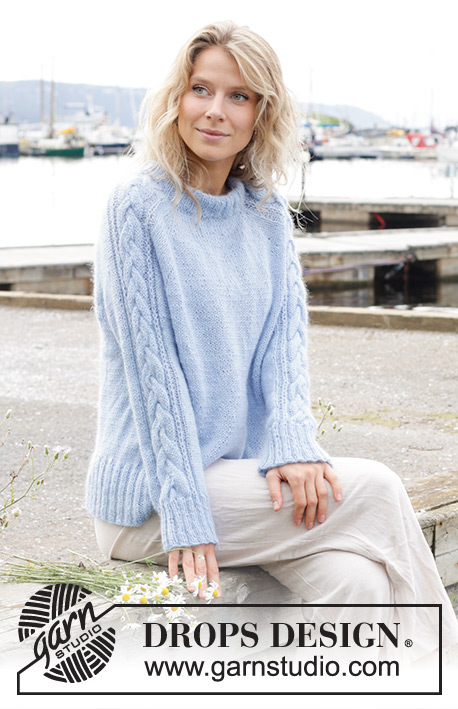
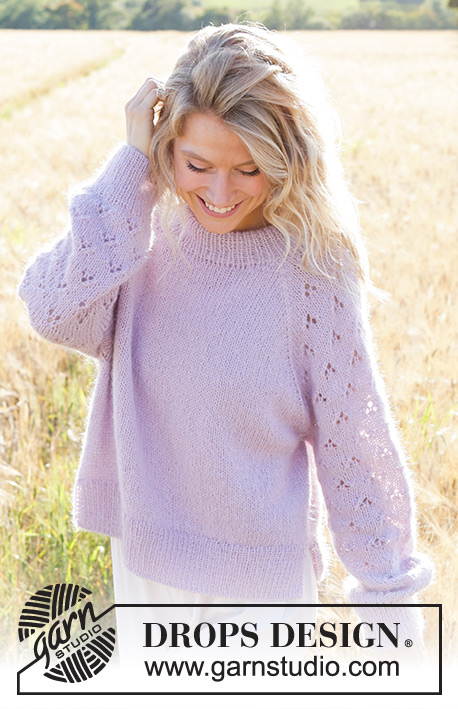
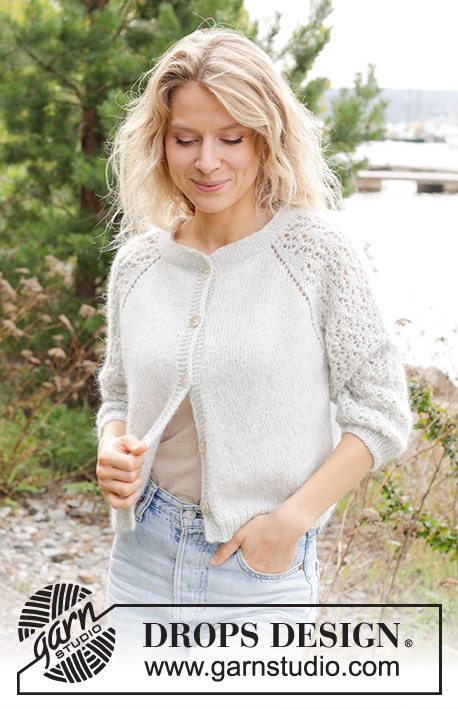
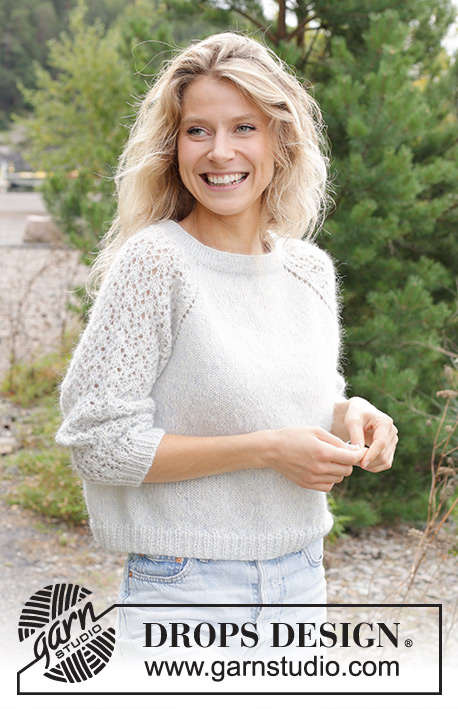
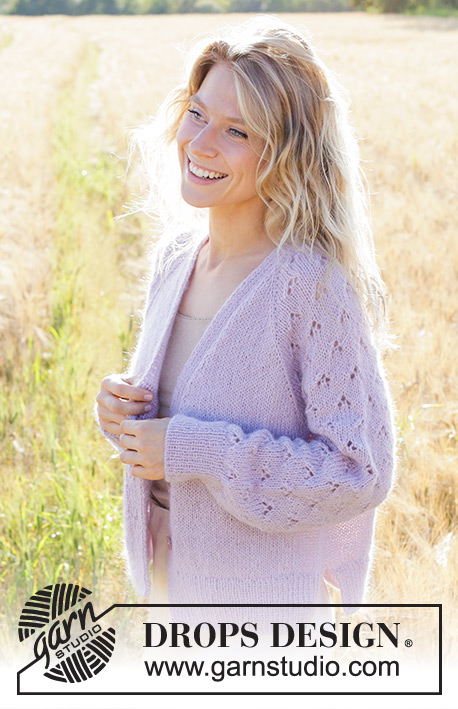
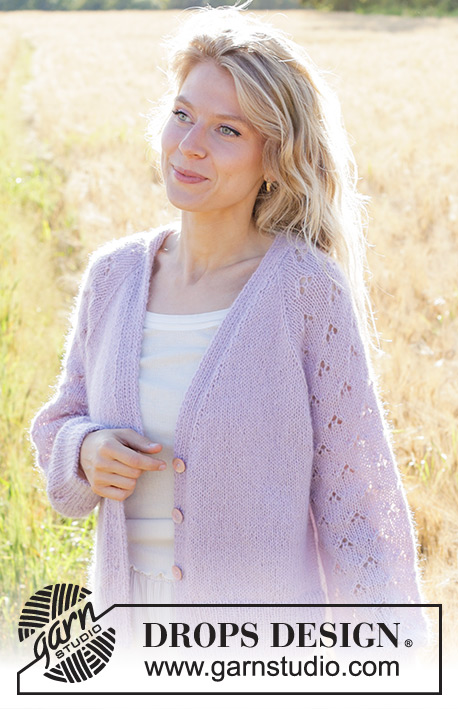
Knitted jacket in DROPS Alpaca or DROPS Nord and DROPS Kid-Silk. Piece is knitted top down with V-neck, raglan, lace pattern, balloon sleeves and vents in the sides. Size: S - XXXL
DROPS 250-6 |
|||||||||||||
|
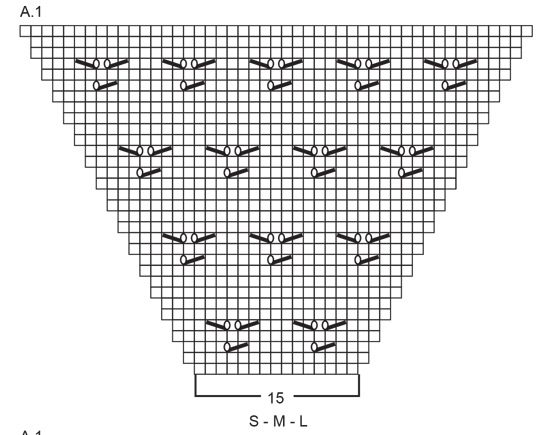
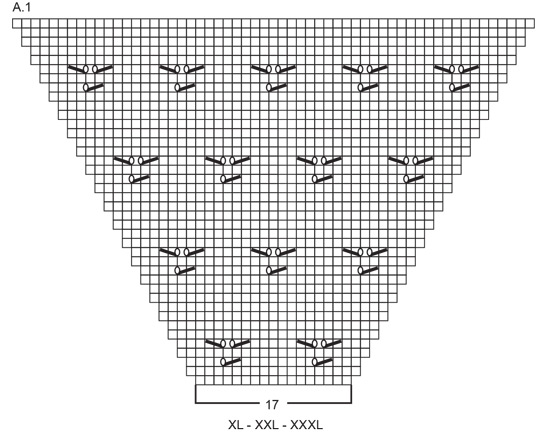
---------------------------------------------------------- EXPLANATION FOR THE PATTERN: ---------------------------------------------------------- GARTER STITCH (when working back and forth): Knit on all rows, i.e. knit from right side and knit from wrong side. 1 ridge vertically = knit 2 rows. PATTERN: See diagram A.1. Choose diagram for your size. Diagrams show all rows in pattern seen from the right side. When increasing stitches for raglan, increase the new stitches on sleeve in pattern as shown in A.1, i.e. work stitches in stockinette stitch until there is room for a whole lace pattern. Work stitches that do not fit the pattern in stockinette stitch when increasing. NOTE! When increases on sleeves goes from every other to every 4th row, the pattern will no longer follow the diagram. Make sure that the lace pattern continue correctly vertically. RAGLAN: All increases are done from the right side. Increase 1 stitch before/after the 4 stitches with marker in every transition between front pieces/back piece and sleeves (in pattern these stitches are called raglan stitches, and raglan stitches are worked in stockinette stitch). Increase 1 stitch by making 1 yarn over. Work yarn overs as follows from wrong side: BEFORE RAGLAN STITCH: Purl yarn over in back loop of stitch. It should not make a hole. AFTER RAGLAN STITCH: Slip stitch off left needle and put it back on left needle but the opposite way (insert left needle in from behind when slipping it back on needle). Purl yarn over in front loop of stitch. It should not make a hole. V-NECK: All increases are done from the right side. Increase 1 stitch after the first 10 stitches at the beginning of row (band + 1 stitch in stockinette stitch) / before the last 10 stitches at the end of row (1 stitch in stockinette stitch + band). Increase 1 stitch by making 1 yarn over. Work yarn overs as follows from wrong side: BEFORE 10 STITCHES: Purl yarn over in back loop of stitch. It should not make a hole. AFTER 10 STITCHES: Slip stitch off left needle and put it back on left needle but the opposite way (insert left needle in from behind when slipping it back on needle). Purl yarn over in front loop of stitch. It should not make a hole. INCREASE TIP: Increase 1 stitch by making 1 yarn over. On next row work yarn overs twisted to avoid holes. Then work the new stitches in stockinette stitch. DECREASE TIP (applies to mid under sleeves): Decrease 1 stitch on each side of marker thread as follows: Work until 3 stitches remain before marker thread and knit 2 together, knit 2 (marker thread is between these 2 stitches), slip 1 stitch knitwise, knit 1, pass slipped stitch over stitch worked (= 2 stitches decreased). BUTTONHOLES: Decrease for buttonholes on right band (when garment is worn). Decrease from right side when 7 stitches remain on row as follows: Knit 2 together, make 1 yarn over, purl 1, knit 1, purl 1, knit 1, 1 stitch in garter stitch. On next row (= wrong side) purl the yarn over to make a hole. Decrease for first buttonhole when 1 cm = ⅜" has been worked after last increase for V-neck. Then decrease the next 2 buttonholes, approx. 10-10½-10½-10-10½-10 cm = 4"-4⅛"-4⅛"-4"-4⅛"-4" apart. ---------------------------------------------------------- START THE PIECE HERE: ---------------------------------------------------------- JACKET - SHORT OVERVIEW OF THE PIECE: In this pattern long and short needles have been used, begin with fitting length and switch as needed. Begin by working 2 loose bands in rib. Then cast on stitches between these bands for shoulders and neck line at the back of neck. Then work yoke back and forth on circular needle, top down. When yoke is done, divide stitches for body and sleeves. Work body downwards back and forth on circular needle while putting the sleeves aside. Divide the piece for vents in each side, then finish front piece and back piece back and forth on circular needle separately. Then work sleeves downwards in the round on needle. Sew bands together mid back before sewing them on to neckline at the back of neck. RIGHT BAND (when garment is worn): Cast on 9 stitches on double pointed needle size 3.5 MM = US 4 with 1 strand in each quality (= 2 strands). Work rib as follows from right side: * Purl 1, knit 1 *, work from *-* until 1 stitch remains, finish with 1 stitch in GARTER STITCH – read explanation above. Continue rib back and forth like this until band measures 14-14-14-17-17-18 cm = 5½"-5½"-5½"-6¾"-6¾"-7", finish after 1 row from wrong side. Put piece aside. LEFT BAND (when garment is worn): Cast on 9 stitches on double pointed needle size 3.5 MM = US 4 with 1 strand in each quality (= 2 strands). Work rib as follows from right side: 1 stitch in garter stitch, * knit 1, purl 1 *, work from *-* the entire row Continue rib back and forth like this until band measures 14-14-14-17-17-18 cm = 5½"-5½"-5½"-6¾"-6¾"-7", finish after 1 row from right side, but do not cut the yarn. SHOULDERS AND NECKLINE AT THE BACK OF NECK: Now cast on 58-58-60-66-66-70 new stitches at the end of row, then slip the 9 stitches from right band back on needle and work rib as before over these 9 stitches = 76-76-78-84-84-88 stitches. Switch to circular needle size 5 MM = US 8. Purl 1 row from wrong side while working the 9 stitches in each side in rib as before. YOKE: Insert 4 markers in piece as explained below (without working the stitches). Use markers when increasing for raglan. Count 10 stitches (= left front piece), insert 1st marker in next stitch, count 15-15-15-17-17-17 stitches (= sleeve), insert 2nd marker in next stitch, count 22-22-24-26-26-30 stitches (= back piece), insert 3rd marker in next stitch, count 15-15-15-17-17-17 stitches (= sleeve), insert 4th marker in next stitch. 10 stitches remain on row after last marker (= right front piece). Work back and forth with stockinette stitch on front pieces and back piece, PATTERN A.1 on sleeves - read explanation above (work A.1 between 1st and 2nd marker and between 3rd and 4th marker) and 9 band stitches in each side as before. REMEMBER THE KNITTING GAUGE, AT THE SAME TIME increase for RAGLAN and V-NECK - read explanation above, this is done at the same time, therefore read both sections before continuing. Begin mid front and from right side. RAGLAN: Increase on each side of the 4 raglan stitches every other row (every row from right side) 14-12-14-28-26-30 times in total. Increases for raglan are now done in size XL. Work as explained below in the other sizes. SIZE S, M, L, XXL and XXXL: Continue increase for raglan on every other row but on every other increase, increase only on front pieces/back piece. I.e. increase on front pieces/back piece on every other row and on sleeves every 4th row (increase alternately 4 and 8 stitches). NOTE! When increasing on every 4th row on sleeves, make sure that lace pattern fits vertically. Increase like this 10-14-14-4-2 times on front pieces / back piece (5-7-7-2-1 times on sleeves). V-NECK: Increase for V-neck inside the outermost 10 stitches in each side every 4th row 10-10-11-12-12-14 times in total. Remember BUTTONHOLES on right band when increases for V-neck are done - read explanation above. ALL SIZES: When all increases for raglan and V-neck are done, there are 268-276-296-332-340-368 stitches on needle and piece measures approx. 22-24-25-25-27-29 cm = 8¾"-9½"-9¾"-9¾"-10⅝"-11⅜" measured from cast-on edge mid back. Now divide the yoke for body and sleeves. DIVIDING FOR BODY AND SLEEVES: Work the first 47-50-52-57-60-64 stitches as before (= front piece), slip the next 49-47-53-61-59-65 stitches on a thread for sleeve, cast on 8-10-12-12-14-16 new stitches on needle (= in the side under sleeve), work 76-82-86-96-102-110 stitches in stockinette stitch (= back piece), slip the next 49-47-53-61-59-65 stitches on a thread for sleeve, cast on 8-10-12-12-14-16 new stitches on needle (= in the side under sleeve), and work the last 47-50-52-57-60-64 stitches as before (= front piece). Finish body and sleeves separately. Now measure piece from here! BODY: = 186-202-214-234-250-270 stitches. Insert 1 marker thread in each side on body, in the middle of the 8-10-12-12-14-16 stitches that were cast on under each sleeve. Move the marker threads upwards when working; they should be used for dividing for vents in each side. Work in stockinette stitch back and forth with 9 band stitches in each side as before - remember BUTTONHOLES. Work until piece measures 20-20-21-22-22-22 cm = 8"-8"-8¼"-8¾"-8¾"-8¾". Now divide the piece at both marker threads to make a vent in each side and finish each part separately. LEFT FRONT PIECE: = 51-55-58-63-67-72 stitches. On next row (= right side) begin rib while AT THE SAME TIME increasing 15-17-18-19-21-22 stitches evenly on row (do not increase over band) = 66-72-76-82-88-94 stitches, work as follows: Switch to circular needle size 3.5 MM = US 4, work 1 stitch in garter stitch, work rib (= knit 1/purl 1 - remember increase) until 3 stitches remain, knit 1 and 2 stitches in garter stitch. When rib measures 8 cm = 3⅛", bind off all stitches with Italian bind off or bind off somewhat loosely with knit over knit and purl over purl. Jacket measures approx. 54-56-58-60-62-64 cm = 21¼"-22"-22¾"-23⅝"-24⅜"-25¼" from shoulder. RIGHT FRONT PIECE: = 51-55-58-63-67-72 stitches. On next row (= right side) begin rib while AT THE SAME TIME increasing 15-17-18-19-21-22 stitches evenly on row (do not increase over band) = 66-72-76-82-88-94 stitches, work as follows: Switch to circular needle size 3.5 MM = US 4, work 2 stitches in garter stitch, work rib (= knit 1/purl 1 - remember increase) until 2 stitches remain, knit 1 and 1 stitch in garter stitch. When rib measures 8 cm = 3⅛", bind off all stitches with Italian bind off or bind off somewhat loosely with knit over knit and purl over purl. BACK PIECE: = 84-92-98-108-116-126 stitches. On next row (= right side) begin rib while AT THE SAME TIME increasing 29-33-35-39-41-45 stitches evenly = 113-125-133-147-157-171 stitches, work as follows: Switch to circular needle size 3.5 MM = US 4, work 2 stitches in garter stitch, work rib (= knit 1/purl 1 - remember increase) until 3 stitches remain, knit 1 and 2 stitches in garter stitch. When rib measures 8 cm = 3⅛", bind off the same way as on front pieces. SLEEVES: Slip the 49-47-53-61-59-65 stitches from thread in one side of piece on double pointed needles/a circular needle size 5 MM = US 8 and pick in addition up 1 stitch in each of the 8-10-12-12-14-16 new stitches cast on under sleeve = 57-57-65-73-73-81 stitches. Insert 1 marker thread in the middle of the 8-10-12-12-14-16 stitches under sleeve. Begin round at the marker thread and continue with A.1 in the round. NOTE! Make sure to continue correctly over stitches from yoke, work the stitches that do not fit the pattern under sleeve in stockinette stitch. When sleeve measures 2 cm = ¾" from division, decrease 2 stitches mid under sleeve - read DECREASE TIP. Decrease like this every 2-2-2-1½-1½-1½ cm = ¾"-¾"-¾"-½"-½"-½" 4-3-5-8-6-8 times in total = 49-51-55-57-61-65 stitches. Work until sleeve measures 36-35-34-34-33-31 cm = 14¼"-13¾"-13⅜"-13⅜"-13"-12¼" from division. 8 cm = 3⅛" remain until finished measurements. Try the sweater and work to desired length before rib. Switch to double pointed needles size 3.5 MM = US 4 and work rib (= knit 1/purl 1) while AT THE SAME TIME increasing 9-9-7-7-5-3 stitches evenly on 1st round = 58-60-62-64-66-68 stitches. When rib measures 8 cm = 3⅛", bind off all stitches with Italian bind off or bind off somewhat loosely with knit over knit and purl over purl. Sleeve measures approx. 44-43-42-42-41-39 cm = 17¼"-17"-16½"-16½"-16⅛"-15¼" from division. ASSEMBLY: Sew bands together mid back, and sew bands to neckline at the back of neck. Sew the buttons on to the left band. |
|||||||||||||
Diagram explanations |
|||||||||||||
|
|||||||||||||
 |
|||||||||||||
 |
|||||||||||||
 |
|||||||||||||
Have you finished this pattern?Tag your pictures with #dropspattern #afternooninprovencecardigan or submit them to the #dropsfan gallery. Do you need help with this pattern?You'll find 33 tutorial videos, a Comments/Questions area and more by visiting the pattern on garnstudio.com. © 1982-2026 DROPS Design A/S. We reserve all rights. This document, including all its sub-sections, has copyrights. Read more about what you can do with our patterns at the bottom of each pattern on our site. |
|||||||||||||


With over 40 years in knitting and crochet design, DROPS Design offers one of the most extensive collections of free patterns on the internet - translated to 17 languages. As of today we count 324 catalogs and 12290 patterns - 12280 of which are translated into English (US/in).
We work hard to bring you the best knitting and crochet have to offer, inspiration and advice as well as great quality yarns at incredible prices! Would you like to use our patterns for other than personal use? You can read what you are allowed to do in the Copyright text at the bottom of all our patterns. Happy crafting!
Post a comment to pattern DROPS 250-6
We would love to hear what you have to say about this pattern!
If you want to leave a question, please make sure you select the correct category in the form below, to speed up the answering process. Required fields are marked *.